# OVERVIEW

Thinger.io is an Open-Source Platform for the Internet of Things. This documentation guides users on how to use each component, enabling the creation of projects within minutes.

## What is Thinger.io?

Thinger.io is a cloud IoT Platform that provides every needed tool to prototype, scale and manage connected products in a very simple way. Our goal is to democratize the use of IoT, making it accessible to the entire world and streamlining the development of large-scale IoT projects.&#x20;

* **Free IoT platform**: Thinger.io offers a lifetime freemium account with a few limitations for learning and prototyping. When a product is ready to scale, a Premium Server with full capacity can be deployed within minutes.
* **Simple but Powerful**: Just a couple of code lines to connect a device and start retrieving data or controlling its functionalities with our web-based Console, able to connect and manage thousands of devices in a simple way.
* **Hardware agnostic:** Any device from any manufacturer can be easily integrated with Thinger.io's infrastructure.
* **Extremely scalable & efficient infrastructure:** thanks to our unique communication paradigm, in which the IoT **server subscribes device resources** to retrieve data only when it is necessary, a single Thinger.io instance is able to manage thousands of IoT devices with low computational load, bandwidth and latencies.&#x20;
* **Open-Source**: most of the platform modules, libraries and app source code are available in our Github repository to be downloaded and modified with the MIT license.&#x20;

{% hint style="success" %}
Sign-up [**HERE** ](https://console.thinger.io/#/signup)to obtain a **free account** and start creating IoT projects within minutes!
{% endhint %}

### Thinger.io Main Features

Thinger.io platform is formed by two main products: a Backend (which is the actual IoT server) and a web-based Frontend that simplifies working with all the features using any computer or smartphone. The main features provided by this platform to create IoT projects are:

<br>

<figure><img src="/files/kWlDyTetgOVv6BKhceO3" alt="" width="563"><figcaption></figcaption></figure>

* **Connect devices:** Fully compatible with every kind of device, no matter the processor, the network or the manufacturer. Thinger.io allows creating **bidirectional communications** with Linux, Arduino, Raspberry Pi, or MQTT devices and even with edge technologies like Sigfox or LoRaWAN or other internet API data resources.&#x20;
* **Store Device Data:** Just a couple of clicks to create a Data Bucket a store IoT data in a scalable, efficient and affordable way, that also allows real-time data aggregation.&#x20;
* **Display Real-time** or **Stored Data** in multiple widgets such as time series, donut charts, gauges, or even custom-made representations to create awesome dashboards within minutes.&#x20;
* **Trigger events and data values** using an embedded Node-RED rule engine.
* **Extend with custom features** with multiple plugins to integrate IoT projects into the company's software or any other third-party Internet service. &#x20;
* **Customize the appearance** thanks to our fully rebrandable frontend, which allows introducing the company´s branding colors, logotypes and web domain.

Ready to start creating IoT projects? [**Create a free account**](https://console.thinger.io/signup) and learn below how to use all this technology.


# QUICK START

Connecting IoT devices in minutes

Quick Start Guide

To start working with Thinger.io just [**create a free account in our cloud platform**](https://console.thinger.io/#!/signup) and follow the next steps to configure and connect the first IoT device.

### 1. Create Device <a href="#id-1-create-device" id="id-1-create-device"></a>

Using `Devices` menu tab, just click in `Add Device`button. We recommend starting with a compatible Arduino Framework device (ESP2666, ESP32, MKR1010, etc), so choose Generic Device in `Device Type`and fill the form with the `Device Id`, `Name`, `Description` and `Credentials` prefered.  Thus, this is explained in further detail in the section on [Devices Administration](/features/devices-administration). Make sure to click on Add Device to finish the process.

<figure><img src="/files/yTCtwmsxEdIDs16rJy4V" alt=""><figcaption></figcaption></figure>

### 2. Connect Device <a href="#id-2-connect-device" id="id-2-connect-device"></a>

After provisioning the device at Thinger.io cloud, it is time to configure it in the Hardware device. There are many different hardware supports and communication technologies, but Thinger.io allows using all of them:

{% tabs %}
{% tab title="Arduino Compatible Devices" %}
The most suitable devices to start working with Thinger.io are the ESP8266 or ESP32. Our [Thinger.io library](https://github.com/thinger-io/Arduino-Library) for the Arduino framework allows programming the first device in two minutes, just following the next steps:

1. [Install Thinger.io libraries into the Arduino IDE](/arduino#installation)
2. Going to "File>Examples>Thinger.io", open the example code that fits better with the board, i.e., ESP8266
3. Edit the example code to include the `USERNAME`, `DEVICE_ID` and `DEVICE_CREDENTIALS`established in the previous step.

<figure><img src="/files/DlJy9ZJbMU4YWLBZmDlg" alt=""><figcaption></figcaption></figure>

<figure><img src="/files/zV8wALTDTth3ieSHx5uJ" alt="" width="470"><figcaption></figcaption></figure>

The basic example contains two simple resources to send and retrieve to the device, i.e., controlling a digital pin or reading a value from the device.  It can be modified with many different functionalities that we have explained in the [**Coding**](/coding-guide) **Guide** section.  After modifying the source code, just flash the device again and wait for the device to connect.

{% hint style="success" %}
Find additional information about Thinger.io devices in the next sections:&#x20;

1. [**Compatible Arduino and Linux devices**](/devices)
2. [**Zero to Hero Thinger.io Firmware Coding Guide** ](/coding-guide#sketch-overview)
3. [**Connection Troubleshooting Guide**](https://docs.thinger.io/coding/good-practices-and-troubleshooting)
   {% endhint %}
   {% endtab %}

{% tab title="HTTP Devices" %}
1\) Create an HTTP device profile by selecting it in the "Device Type" when creating the device \
2\) Going to the device dashboard, create an HTTP device Callback \
3\) Create a device Access Token to authorize the device sending data to the platform \
4\) Introduce the HTTP request (API+TOKEN) into your device code or third party platform and start sending data to Thinger.io

{% content-ref url="/pages/-LqlH6XDMyPs-u\_8LklD" %}
[HTTP DEVICES](/http-devices)
{% endcontent-ref %}
{% endtab %}

{% tab title="LPWAN Devices" %}
Any individual Sigfox or LoraWAN device can be integrated using our API as HTTP devices, just setting an HTTP device callback into their callback managers, but if a big network is going to be created using these technologies, it is better to use our integration plugins:

{% content-ref url="/pages/-LpYhfDDV\_ePM5qDqnmI" %}
[SIGFOX](/lpwan/sigfox)
{% endcontent-ref %}

{% content-ref url="/pages/-Lq7I9DKCCfk50wpGUfo" %}
[Broken mention](broken://pages/-Lq7I9DKCCfk50wpGUfo)
{% endcontent-ref %}
{% endtab %}

{% tab title="MQTT Devices" %}
1\) Create a new device profile and select "MQTT" device type\
2\) Configure device credentials a secret password\
3\) Configure the MQTT client to send data to the embedded broker

{% content-ref url="/pages/-LucnVZkYlgS1rnynD9B" %}
[MQTT CLIENTS](/mqtt)
{% endcontent-ref %}
{% endtab %}
{% endtabs %}

### 3. Devices & Data management <a href="#id-3-devices-and-data-management" id="id-3-devices-and-data-management"></a>

Thinger.io enables users to organize, monitor, and interact with connected devices through a unified interface. It allows real-time visibility into device status, access to and control over device resources (such as sensors or actuators), and the ability to store historical data in *Data Buckets* for later analysis. Additionally, it supports tagging and grouping devices, making it easier to manage large-scale deployments. Overall, this feature is essential for maintaining a structured, scalable, and easily manageable IoT system.

<img src="/files/CcxR56BgM4Ebaz9LAvBJ" alt="" width="563">

T4. Store, Show & Share Data

Thinger.io provides three essential tools to work with device data that are the basis for creating any IoT project. The next tabs show each tool introduction:

{% tabs %}
{% tab title="Data Buckets" %}
To **store** **device data** in a scalable way, program different sampling intervals or record events raised by devices.

{% content-ref url="/pages/-Lv5RqfIOMbcL7T6BuVy" %}
[DATA BUCKETS](/features/buckets)
{% endcontent-ref %}
{% endtab %}

{% tab title="Dashboards" %}
Panels with **customizable widgets** that can be created within minutes using drag'n drop technology, to show real-time and stored data.

{% content-ref url="/pages/-Lv5S7vglV\_YyIai8161" %}
[DASHBOARDS](/features/dashboards)
{% endcontent-ref %}
{% endtab %}

{% tab title="Endpoints" %}
Extend the device's interoperability by using endpoints to interact with other services like IFTTT, custom Web Services, emails, or call other devices.

{% content-ref url="/pages/-Lv5S4L\_LLbLqICsY2RW" %}
[ENDPOINTS](/features/endpoints-1)
{% endcontent-ref %}
{% endtab %}

{% tab title="Access Tokens" %}
Dashboards, Data buckets or Device resources can be easily shared with third parties using **Access Tokens** and our **API.**

{% content-ref url="/pages/-Lv5SO4nSVm6-PSUol6f" %}
[ACCESS TOKENS](/features/access-tokens)
{% endcontent-ref %}
{% endtab %}
{% endtabs %}

### 5. Extend Thinger.io <a href="#id-5-extend-thinger-io" id="id-5-extend-thinger-io"></a>

Thinger.io platform can be complemented with many different Internet services using **Plugins** that can be found and deployed within seconds just by going to our marketplace and selecting them.

<details>

<summary><a href="/pages/DIAdFQcil7BInBRzCBVr">Plugins</a></summary>

</details>


# CONNECT A DEVICE

Thinger.io provides comprehensive support for a variety of devices and protocols, enabling seamless integration from simple IoT applications to complex industrial systems.

<table data-view="cards"><thead><tr><th></th><th></th><th></th><th data-hidden data-card-cover data-type="files"></th><th data-hidden data-card-target data-type="content-ref"></th></tr></thead><tbody><tr><td><strong>Arduino Compatible Devices</strong></td><td></td><td></td><td><a href="/files/kUEYijmUPqldY2bhFwdM">/files/kUEYijmUPqldY2bhFwdM</a></td><td><a href="/pages/-MjTFfmlmwVVkKDxlPw4">/pages/-MjTFfmlmwVVkKDxlPw4</a></td></tr><tr><td><strong>Linux and Raspberry Pi Devices</strong></td><td></td><td></td><td><a href="/files/rfhlQFLrb3t1PshGSyKd">/files/rfhlQFLrb3t1PshGSyKd</a></td><td><a href="/pages/-LpXslzKjYiSNWUOdM6N">/pages/-LpXslzKjYiSNWUOdM6N</a></td></tr><tr><td><strong>MQTT Devices</strong></td><td></td><td></td><td><a href="/files/9afs8zVUtzof9CpWKY66">/files/9afs8zVUtzof9CpWKY66</a></td><td><a href="/pages/-LucnVZkYlgS1rnynD9B">/pages/-LucnVZkYlgS1rnynD9B</a></td></tr><tr><td><strong>Sigfox Devices</strong></td><td></td><td></td><td><a href="/files/ASCqQR36qkK50hEVJynr">/files/ASCqQR36qkK50hEVJynr</a></td><td><a href="/pages/-LpYhfDDV_ePM5qDqnmI">/pages/-LpYhfDDV_ePM5qDqnmI</a></td></tr><tr><td><strong>LoraWan Devices</strong></td><td></td><td></td><td><a href="/files/7lkwgZ4IGFrd9ekcy5Yi">/files/7lkwgZ4IGFrd9ekcy5Yi</a></td><td><a href="/pages/-MiuHpWeO3Cq_TbYS2uV">/pages/-MiuHpWeO3Cq_TbYS2uV</a></td></tr><tr><td><strong>Generic HTTP Devices</strong></td><td></td><td></td><td><a href="/files/EoB1NbYh2BmXoACjyu42">/files/EoB1NbYh2BmXoACjyu42</a></td><td><a href="/pages/-LqlH6XDMyPs-u_8LklD">/pages/-LqlH6XDMyPs-u_8LklD</a></td></tr></tbody></table>

To connect a device, choose the appropriate technology that matches the device's capabilities and communication protocol.

* **Arduino Compatible Devices**: Any Arduino with Internet connectivity, including the Espressif [ESP8266](/arduino/espressif-esp8266) and [ESP32](/arduino/espressif-esp32) devices. Connect them with the IOTMP protocol, which enables a Device API, includes[ Remote OTA](/ota), and [Remote Console](/remote-console).
* **Linux/Raspberry Pi Devices**: Any device running Linux, using IOTMP protocol, including Device API, Remote SSH, Sockets Proxy, and Remote Web Services.
* **MQTT Devices**: Connect any device over the MQTT protocol. MQTT (Message Queuing Telemetry Transport) is a messaging protocol for small sensors and mobile devices.
* **Sigfox Devices**: Connect any device over the Sigfox 0G network. Sigfox is a global IoT network operator that provides low-power, wide-area network (LPWAN) services, ideal for applications requiring long battery life and low data transmission rates.
* **LoraWAN Devices**: Connect any device using the LoraWAN protocol. LoraWAN (Long Range Wide Area Network) is a protocol for low-power, wide-area networks designed to wirelessly connect battery-operated things to the internet in regional, national, or global networks.
* **HTTP Devices**: Connect any device using HTTP requests to communicate with Thinger.io. HTTP (Hypertext Transfer Protocol) is the foundation of data communication for the World Wide Web, allowing devices to send and receive data over the Internet.


# OVERVIEW

This documentation is related to connecting Arduino-compatible devices to Thinger.io. In Thinger.io, it is possible to connect almost any Arduino board using Ethernet, WiFi, GSM, or even hardware from different vendors that are compatible with the Arduino ecosystem, like ESP8266, ESP32, and TI CC3200.

Thinger.io provides a library for such devices, simplifying the cloud connectivity, i.e., handling the network connection, managing reconnection to the cloud, and exposing resources from a device, like a sensor or actuator. This library is specifically designed for the Arduino IDE ecosystem, but it is also possible to use Visual Studio Code with PlatformIO. With this library, devices can be easily programmed and connected within minutes. Once the device is connected, it is possible to create dashboards, store device information in data buckets, or send its data to external services.

<figure><img src="/files/X8V70gMgVOVWv7F5Qqzs" alt="" width="563"><figcaption></figcaption></figure>

This library supports multiple network interfaces and boards:

* Espressif ESP8266 (OTA Support)
* Espressif ESP32 (OTA Support)
* Arduino Nano RP2040 Connect (OTA Support)
* Arduino Nano 33 IoT (OTA Support)
* Arduino Portenta H7 (OTA Support)
* Arduino MKR 1010 (OTA Support)
* Arduino MKR NB 1500 (OTA Support)
* Arduino MKR 1000
* Arduino GSM1400 (MKRGSM)
* Arduino + Ethernet
* Arduino + Wifi
* Arduino + Adafruit CC3000
* Arduino + ENC28J60
* Arduino Yun
* Arduino + GPRS Shield
* Arduino + TinyGSM library for GSM modems using GPRS (SIM800, SIM900, AI-THINKER A6, A6C, A7, Neoway M590)
* Arduino + ESP8266 as WiFi Modem via AT commands (using TinyGSM library)
* Texas Instruments CC3200
* SeeedStudio LinkIt ONE (Both GPRS and WiFi)


# SDK SETUP

To develop with Arduino-compatible devices in Thinger.io, you have two main options:

1. [**Arduino IDE**](/sdk-setup/arduino-ide)
2. [**Visual Studio Code with PlatformIO**](/sdk-setup/visual-studio-code)

At Thinger.io, we recommend using Visual Studio Code with PlatformIO. This setup offers a superior editing experience, enhanced code completion, support for multiple hardware platforms, and access to extended Thinger.io features such as OTA (Over-The-Air) updates.

**Choose your preferred option to start coding:**

<table data-view="cards"><thead><tr><th></th><th></th><th></th><th data-hidden data-card-cover data-type="files"></th><th data-hidden data-card-target data-type="content-ref"></th></tr></thead><tbody><tr><td><strong>Arduino IDE</strong></td><td></td><td></td><td><a href="/files/kUEYijmUPqldY2bhFwdM">/files/kUEYijmUPqldY2bhFwdM</a></td><td><a href="/pages/-Mj61qNfUAC3HssW-d1G">/pages/-Mj61qNfUAC3HssW-d1G</a></td></tr><tr><td><strong>Visual Studio Code</strong></td><td></td><td></td><td><a href="/files/-MjOLi_Zejnk3NaILKr6">/files/-MjOLi_Zejnk3NaILKr6</a></td><td><a href="/pages/-Mj61mtALz8IHrLgk8I-">/pages/-Mj61mtALz8IHrLgk8I-</a></td></tr></tbody></table>


# Arduino IDE

Arduino is widely recognized as the best framework for learning, prototyping, and even product development. Its simplicity and the robust community of developers continuously enhancing its capabilities make it an excellent choice.

At Thinger.io, we have developed a Software Client to easily connect Arduino-based devices. This client is compatible with a wide variety of hardware and is available for Windows, macOS, and Linux distributions. It is possible to download it for free from the official [Arduino website](https://arduino.cc).

The following sections will provide guidance on the installation and preparation of the Arduino IDE to work with Thinger.io client libraries.

<figure><img src="/files/QzMWc8KlWpJZNSHDvB6I" alt=""><figcaption><p>Arduino IDE</p></figcaption></figure>

## Installing the Arduino IDE

To use Thinger.io with Arduino, a modern version of the Arduino IDE that supports the Library Manager and other advanced features is needed. Version 1.6.3 or later should be installed. If a compatible version is already installed, this step can be skipped.

1. **Download the Arduino IDE**: Visit the official [Arduino download page](https://www.arduino.cc/en/software) to download the latest version suitable for any operating system (Windows, macOS, or Linux).

Follow the instructions on the website to complete the installation process.

## Install Thinger.io from the Library Manager

Thinger.io Client libraries contain the software needed to connect Arduino-compatible devices with the Thinger.io platform. Using these libraries is the preferred method for connecting devices, as it allows leveraging all of Thinger.io's features.

To install the Thinger.io library from the Arduino Library Manager:

1. **Open the Library Manager**:
   * In the Arduino IDE, go to **Sketch > Include Library > Manage Libraries**.
2. **Search for Thinger.io**:
   * Use the search bar in the Library Manager to find "Thinger.io".
3. **Install the Library**:
   * Select the Thinger.io Client library from the search results and click **Install**.

<figure><img src="/files/PWyhPZNM6TEzH3XspFJV" alt=""><figcaption><p>Thinger.io Arduino Library</p></figcaption></figure>

## Install Thinger.io from ZIP

If there is a preference to manage the libraries manually or if the Library Manager is not working, the Thinger.io library can be installed by following these steps:

1. **Download the ZIP Library**:
   * Obtain the .zip library file from the official [Thinger.io project GitHub repository](https://github.com/thinger-io/Arduino-Library).
   * Click on CODE and download the ZIP named [`Arduino-Library-master.zip`](https://github.com/thinger-io/Arduino-Library/archive/refs/heads/master.zip).
2. **Rename the ZIP File**:
   * Rename `Arduino-Library-master.zip` to something more relevant, such as `thinger.zip`.
3. **Import the ZIP Library in Arduino IDE**:

   * Open the Arduino IDE.
   * Go to **Sketch > Include Library > Add .ZIP Library...**.
   * Navigate to and select the `thinger.zip` file.
   * The Arduino IDE will uncompress and copy the zip library into the Arduino libraries folder, typically located under the Documents folder.

   <figure><img src="/files/UZWuV5QJ3Q1IsguR8LxK" alt=""><figcaption></figcaption></figure>

## Starting a Project

Once the Thinger.io Library has been installed, start a new project using one of the default examples provided. There are examples tailored for different boards, so choose the one that matches the device.

1. **Open Example Project**:
   * In the Arduino IDE, go to **File > Examples > thinger.io**.
   * Select an example that corresponds to the device.

This will load the example code, which can then be modified to suit specific needs.

<figure><img src="/files/SCYUFJotGSw3nguvnt1D" alt=""><figcaption><p>Thinger.io Arduino Examples </p></figcaption></figure>

&#x20;A basic example for an ESP32 device:

{% tabs %}
{% tab title="ESP32.ino" %}

```cpp
#define THINGER_SERIAL_DEBUG

#include <ThingerESP32.h>
#include "arduino_secrets.h"

ThingerESP32 thing(USERNAME, DEVICE_ID, DEVICE_CREDENTIAL);

void setup() {
  // open serial for debugging
  Serial.begin(115200);

  pinMode(16, OUTPUT);

  thing.add_wifi(SSID, SSID_PASSWORD);

  // digital pin control example (i.e. turning on/off a light, a relay, configuring a parameter, etc)
  thing["GPIO_16"] << digitalPin(16);

  // resource output example (i.e. reading a sensor value)
  thing["millis"] >> outputValue(millis());

  // more details at http://docs.thinger.io/arduino/
}

void loop() {
  thing.handle();
}
```

{% endtab %}

{% tab title="arduino\_secrets.h" %}

```cpp
#define USERNAME "your_user_name"
#define DEVICE_ID "your_device_id"
#define DEVICE_CREDENTIAL "your_device_credential"

#define SSID "your_wifi_ssid"
#define SSID_PASSWORD "your_wifi_ssid_password"
```

{% endtab %}
{% endtabs %}


# Visual Studio Code

For advanced developers and more complex projects, an advanced IDE can be beneficial. Visual Studio Code (VS Code) offers features like GIT control, code completion, and a variety of useful extensions to streamline the development process. By combining VS Code with PlatformIO, a powerful setup for Thinger.io projects is obtained.

**Benefits of Using Visual Studio Code with PlatformIO:**

* **GIT Control**: Version control can be easily managed with integrated GIT support.
* **Code Completion**: Enjoy enhanced code completion for faster and more accurate coding.
* **Extensions**: Access a wide range of extensions to add functionality and improve productivity.

To get started, download and install Visual Studio Code and the PlatformIO extension.

## Install Visual Studio Code

**Visual Studio Code** is a free source-code editor developed by Microsoft for Windows, Linux and macOS. It can be extended via [extensions](https://en.wikipedia.org/wiki/Plug-in_\(computing\)), available through a central repository to add language support, new programming languages, [themes](https://en.wikipedia.org/wiki/Theme_\(computing\)), and [debuggers](https://en.wikipedia.org/wiki/Debugger), or perform [static code analysis](https://en.wikipedia.org/wiki/Static_code_analysis). It can be downloaded for free from the official website.

&#x20;[**Download Visual Studio Code**](https://code.visualstudio.com/download)

![Visual Studio Code](/files/-M8A0fPMgP3DvdsrYMo9)

## **Install PlatformIO**

PlatformIO is a cross-platform, cross-architecture, multi-framework professional tool for embedded systems engineers and software developers working on embedded products. It can be installed as an extension in Visual Studio Code.

**Steps to Install PlatformIO:**

1. **Open Extensions in Visual Studio Code**:
   * Press `Ctrl + Shift + X` on Windows or `Command + Shift + X` on Mac to open the Extensions view.
2. **Search for PlatformIO**:
   * In the Extensions view, type "PlatformIO" in the search bar.
3. **Install PlatformIO**:
   * Click on the **PlatformIO IDE** result.
   * Click the **Install** button.

Once installed, PlatformIO provides powerful features to enhance the development process for Thinger.io projects.

![](/files/-M8A0qZzA1HSL-WwMJFE)

## Starting a Project

Once Visual Studio Code with PlatformIO is installed, it is possible to create a new project for our specific board. For this purpose, we can access the PIO Home and click on the `New Project` button:

![Create a new Project from PIO Home.](/files/-MjVGv3WM7vDHwmVhzNq)

For this example, we will be using the ESP32 board, so in the `Project Wizard` pop-up, we enter a `Project Name`, select the `Espressif ESP32 Dev Module`, as a generic ESP32 board, and the `Arduino` Framework. Once done, click on `Finish` and wait for PlatformIO to download the required toolchains for the device.

![PlatformIO project Wizard](/files/-MjVH99PHfyC7w8xrXcC)

After the project initialization is done, PlatformIO generates a file structure:

![PlatformIO default project structure](/files/-MjVKnzeuV3nQS-rWWdn)

As shown in the above picture, each PlatformIO project has a configuration file named `platformio.ini` in the root directory of the project. This is an INI-style file.

`platformio.ini` has sections (each denoted by a `[header]`) and key/value pairs within the sections. Lines beginning with `;`are ignored and may be used to provide comments.

In our default `ESP32` project:

```bash
[env:esp32dev]
platform = espressif32
board = esp32dev
framework = arduino
```

Now, to start working with Thinger.io, it is required to add the Thinger.io client library using the `lib_deps` property:

```bash
[env:esp32dev]
platform = espressif32
board = esp32dev
framework = arduino
lib_deps = thinger.io
```

After this configuration is done, it is possible to start compiling for our device. A basic example for our ESP32 device:

{% tabs %}
{% tab title="main.cpp" %}

```cpp
#define THINGER_SERIAL_DEBUG

#include <ThingerESP32.h>
#include "arduino_secrets.h"

ThingerESP32 thing(USERNAME, DEVICE_ID, DEVICE_CREDENTIAL);

void setup() {
  // open serial for debugging
  Serial.begin(115200);

  pinMode(16, OUTPUT);

  thing.add_wifi(SSID, SSID_PASSWORD);

  // digital pin control example (i.e. turning on/off a light, a relay, configuring a parameter, etc)
  thing["GPIO_16"] << digitalPin(16);

  // resource output example (i.e. reading a sensor value)
  thing["millis"] >> outputValue(millis());

  // more details at http://docs.thinger.io/arduino/
}

void loop() {
  thing.handle();
}
```

{% endtab %}

{% tab title="arduino\_secrets.h" %}

```cpp
#define USERNAME "your_user_name"
#define DEVICE_ID "your_device_id"
#define DEVICE_CREDENTIAL "your_device_credential"

#define SSID "your_wifi_ssid"
#define SSID_PASSWORD "your_wifi_ssid_password"
```

{% endtab %}
{% endtabs %}


# DEVICES

Connecting Arduino Compatible devices to IoT

The Thinger.io platform is designed to support almost any microcontroller or device with communication capabilities, whether it uses Ethernet, WiFi, or GSM. This flexibility allows you to choose the hardware that best suits your needs without being forced to purchase specific vendor-compatible hardware. This is crucial when designing your IoT projects.

**Steps to Connect Your Device:**

1. **Configure Your SDK**:
   * Ensure your SDK is configured according to the previous [SDK Setup instructions](/sdk-setup).
2. **Start with Default Examples**:
   * Open the Arduino IDE or Visual Studio Code with PlatformIO.
   * Navigate to the default examples provided by Thinger.io.
   * In the Arduino IDE, go to **File > Examples > thinger.io** and choose an example for your device.
   * In Visual Studio Code, open the PlatformIO Home and select an example project compatible with your hardware.
3. **Upload the Example Code**:
   * Modify the example code if necessary to fit your specific hardware setup.
   * Upload the code to your device following the instructions for your development environment.

By following these steps, you can start connecting your device to the Thinger.io platform and leverage its full range of features.

{% hint style="info" %}
The best way to start connecting your device is by using the Arduino IDE and loading an example for your device from the Thinger.io client library in File > Examples > thinger.io.
{% endhint %}

Please select the device typology you want to connect to get detailed instructions for each specific device.

{% content-ref url="/pages/-Mj8Sd2KlZKo8VqQ1hRc" %}
[ESPRESSIF ESP32](/arduino/espressif-esp32)
{% endcontent-ref %}

{% content-ref url="/pages/-Mj8SZoUb2cvaSBw\_XvA" %}
[ESPRESSIF ESP8266](/arduino/espressif-esp8266)
{% endcontent-ref %}

{% content-ref url="/pages/-Mj8Skc5ofdBSkBvvzzD" %}
[ARDUINO ETHERNET](/arduino/arduino-ethernet)
{% endcontent-ref %}

{% content-ref url="/pages/-Mj8SiQ856hVoDzZmBIo" %}
[ARDUINO WIFI](/arduino/arduino-wifi)
{% endcontent-ref %}

{% content-ref url="/pages/-Mj8StCSrI88IZbcOmLW" %}
[ARDUINO GSM](/arduino/arduino-gsm)
{% endcontent-ref %}

{% content-ref url="/pages/-Mj8VbuGU6au7jZ3NBIv" %}
[OTHER DEVICES](/arduino/other-devices)
{% endcontent-ref %}


# ESPRESSIF ESP32

## Introduction

ESP32 is a series of low-cost, low-power system-on-chip microcontrollers with integrated Wi-Fi and dual-mode Bluetooth. There are multiple modules based on this microcontroller that include different kinds of antennas, pinouts and memory extensions. It is the successor to the ESP8266 microcontroller and is designed to be one of the most relevant IoT impulsors during the next years and there is a great diversity of variants that exploit its capacities together with other peripherals, integrating LoRa communication, audio amplifiers, LCD screens, etc.

![ESP32 WROOM DEV MODULE](/files/-Lpm7yTNAe6-2ceHDxH0)

## Install On Arduino IDE

This device can be programmed directly from the Arduino IDE by including the ESP32 core libraries with the Arduino Boards Manager. For this step, include this first: <https://dl.espressif.com/dl/package_esp32_index.json> into `Additional Board Manager URLs` field in the Arduino preferences.

![](/files/-Lpm87Y4oxzG5znAgGxB)

Next, go to the Boards manager to install the ESP32 package. Search for the `esp32` and install the package **esp32 by Espressif Systems**

![](/files/-Lpm8BI-yVMKP14HtHQ0)

After this process, this board should be selectable on the Arduino IDE, allowing for the creation of IoT projects with Thinger.io.

## ESP32 WiFi

This example will allow connecting a device to the cloud platform in a few lines via the WiFi interface. The `arduino_secrets.h` file just needs to be modified with the relevant information.

{% tabs %}
{% tab title="ESP32.ino" %}

```cpp
#define THINGER_SERIAL_DEBUG

#include <ThingerESP32.h>
#include "arduino_secrets.h"

ThingerESP32 thing(USERNAME, DEVICE_ID, DEVICE_CREDENTIAL);

void setup() {
  // open serial for debugging
  Serial.begin(115200);

  pinMode(16, OUTPUT);

  thing.add_wifi(SSID, SSID_PASSWORD);

  // digital pin control example (i.e. turning on/off a light, a relay, configuring a parameter, etc)
  thing["GPIO_16"] << digitalPin(16);

  // resource output example (i.e. reading a sensor value)
  thing["millis"] >> outputValue(millis());

  // more details at http://docs.thinger.io/arduino/
}

void loop() {
  thing.handle();
}
```

{% endtab %}

{% tab title="arduino\_secrets.h" %}

```cpp
#define USERNAME "your_user_name"
#define DEVICE_ID "your_device_id"
#define DEVICE_CREDENTIAL "your_device_credential"

#define SSID "your_wifi_ssid"
#define SSID_PASSWORD "your_wifi_ssid_password"
```

{% endtab %}
{% endtabs %}

## ESP32 Ethernet

{% tabs %}
{% tab title="ESP32Eth.ino" %}

```cpp
// It may be required to define this according to a specific board
// Example RMII LAN8720 (Olimex, etc.)
#ifndef ETH_PHY_TYPE
#define ETH_PHY_TYPE  ETH_PHY_LAN8720
#define ETH_PHY_ADDR  0
#define ETH_PHY_MDC   23
#define ETH_PHY_MDIO  18
#define ETH_PHY_POWER -1
#define ETH_CLK_MODE  ETH_CLOCK_GPIO0_IN
#endif

// enable debug output over serial
#define THINGER_SERIAL_DEBUG

// disable certificate validation
// #define THINGER_INSECURE_SSL

// define private server instance
// #define THINGER_SERVER "acme.aws.thinger.io"

#include <ThingerESP32Eth.h>
#include <ThingerESP32OTA.h>
#include "arduino_secrets.h"

// initialize thinger instance
ThingerESP32Eth thing(USERNAME, DEVICE_ID, DEVICE_CREDENTIAL);

// Initialize ESP32OTA OTA
// use Thinger.io VSCode Studio extension + Platformio to upgrade the device remotely
ThingerESP32OTA ota(thing);

void setup() {

    // enable serial for debugging
    Serial.begin(115200);

    // example of fixed IP address (DHCP is used by default)
    //thing.set_address("192.168.1.55", "192.168.1.1", "255.255.255.0", "8.8.8.8", "8.8.4.4");

    // set desired hostname
    thing.set_hostname("ESP32Eth");

    // resource output example (i.e. reading a sensor value)
    thing["eth"] >> [](pson& out){
        out["hostname"] = ETH.getHostname();
        out["mac"] = ETH.macAddress();
        out["ip"] = ETH.localIP().toString();
        out["link"] = ETH.linkSpeed();
    };

    // more details at http://docs.thinger.io/arduino/
}

void loop() {
    thing.handle();
}
```

{% endtab %}

{% tab title="arduino\_secrets.h" %}

```cpp
#define USERNAME "your_user_name"
#define DEVICE_ID "your_device_id"
#define DEVICE_CREDENTIAL "your_device_credential"
```

{% endtab %}
{% endtabs %}

## ESP32 WiFi WebConfig

It is possible to configure all parameters required for connection via a web Interface (captive portal). The device will create an access point where the user can connect to establish required information, like username, device identifier, credentials, and access point to connect.

{% tabs %}
{% tab title="ESP32WebConfig.ino" %}

```cpp
#define THINGER_SERIAL_DEBUG

// Requires WifiManager from Library Manager or https://github.com/tzapu/WiFiManager
#include <ThingerESP32WebConfig.h>

ThingerESP32WebConfig thing;

void setup() {
  // open serial for debugging
  Serial.begin(115200);

  pinMode(27, OUTPUT);

  // digital pin control example (i.e. turning on/off a light, a relay, configuring a parameter, etc)
  thing["relay"] << digitalPin(27);

  // resource output example (i.e. reading a sensor value)
  thing["millis"] >> outputValue(millis());
}

void loop() {
  thing.handle();
}
```

{% endtab %}
{% endtabs %}

Once this sketch is loaded on the device, it is possible to follow the next steps to connect it to the platform:

1. Connect to the "Thinger-Device" WiFi with a computer or phone, using "thinger.io" as the WiFi password.
2. Wait for the configuration window, or navigate to <http://192.168.4.1> if it does not appear.
3. Configure the WiFi network to which the ESP32 will connect, and input the Thinger.io device credentials.
4. The device should now be connected to the platform.

The WebConfig interface includes different methods to control the captive portal:

* **clean\_credentials**: It cleans all credentials from the device (WiFi/user parameters). This way, the next time the device is booted will create the captive portal again to request the WiFi configuration. It can be executed after a long press on a button.&#x20;
* **set\_user**: Initializes the default user for connecting the device to the platform (if set, this parameter is not requested from the user in the captive portal).
* **set\_device**: Initializes the default device for connecting the device to the platform (if set, this parameter is not requested from the user in the captive portal).
* **set\_password**: Initializes the default device password for connecting the device to the platform (if set, this parameter is not requested from the user in the captive portal).
* **add\_setup\_parameter**: Add additional parameters to be requested in the captive portal, for example, any other configuration required for the execution: sampling intervals, meta-data, thresholds, etc.
* **set\_on\_config\_callback**: Set a callback to receive configuration provided by the user in the captive portal, i.e., user, device, password, or any additional parameter configured.
* **set\_on\_wifi\_config**: Set a callback to receive the result of the WiFi configuration. If the connection did not succeed, it can be used to clean credentials, so, the captive portal runs again.
* **set\_on\_captive\_portal\_run**: Set a callback to receive the WiFiManager instance before the captive portal is shown. It can be used to add any other customization over the WebConfig interface.

## ESP32 WiFi SmartConfig

Coming soon


# ESPRESSIF ESP8266

## Introduction

The ESP8266 chip from Espressif is the new generation of low-cost WiFi chips after the TI CC3000/CC3200. This small chip not only integrates the whole WiFi features, but also a powerful programmable MCU. Depending on the board layout (ESP-01, ESP-03, ESP-07, ESP12, etc) it is attached to a programmable flash, ranging from 512K to 4 M. This increases the available user code space, and makes possible other cool features like a small file system, or OTA updates.

![ESP8266 Dev Module. Also known as NodeMCU.](/files/-LpXt-jt9761qMH3KcKY)

## Install On Arduino IDE

This device can be directly programmed from the Arduino IDE. These steps can be followed if these boards were not programmed with the Arduino IDE. The only requirement is to install the board via the Arduino Boards Manager.

> In the Arduino preferences, enter <http://arduino.esp8266.com/stable/package_esp8266com_index.json> in **Additional Boards Manager URLs**

![Arduino Preferences - Additional Boards Manager](https://discoursefiles.s3-eu-west-1.amazonaws.com/original/1X/b9ef9df0c95c1bff0e9d7db258a355bb44374b06.png)

> Next, go to the Boards manager to install the ESP8266 package. **Tools** > **Boards** > **Board manager...** Then search and install the esp8266 package.

![](https://discoursefiles.s3-eu-west-1.amazonaws.com/original/1X/efdec170e35cb296b895dd92b9868f8e0a9d3cd9.png)

> Almost any ESP8266 can now be programmed directly from the Arduino IDE. From the **Tools > Boards** menu, the newly installed ESP8266 boards should be visible. The relevant board should be selected to compile code for the ESP8266.

Additional information for the ESP8266 package can be found in the [ESP8266 GitHub Repository](https://github.com/esp8266/Arduino). The NodeMCU is the easiest board to program, as it does not require pressing the Flash + Reset buttons for uploading the sketch. For other boards, a USB to Serial converter (3v3!) will be needed, and the sketch will need to be flashed by setting some GPIOs to GND. It is advisable to search online for this step if unfamiliar with the process for a particular board.

## ESP8266 WiFi

This example will allow connecting an ESP8266 device to the cloud platform in a few lines using the WiFi interface. The `arduino_secrets.h` file just needs to be modified with the relevant information.

{% tabs %}
{% tab title="ESP8266.ino" %}

```cpp
#define THINGER_SERIAL_DEBUG

#include <ThingerESP8266.h>
#include "arduino_secrets.h"

ThingerESP8266 thing(USERNAME, DEVICE_ID, DEVICE_CREDENTIAL);

void setup() {
  // open serial for monitoring
  Serial.begin(115200);

  // set builtin led as output
  pinMode(LED_BUILTIN, OUTPUT);

  // add WiFi credentials
  thing.add_wifi(SSID, SSID_PASSWORD);

  // digital pin control example (i.e. turning on/off a light, a relay, configuring a parameter, etc)
  thing["led"] << digitalPin(LED_BUILTIN);

  // resource output example (i.e. reading a sensor value)
  thing["millis"] >> outputValue(millis());

  // more details at http://docs.thinger.io/arduino/
}

void loop() {
  thing.handle();
}
```

{% endtab %}

{% tab title="arduino\_secrets.h" %}

```cpp
#define USERNAME "your_user_name"
#define DEVICE_ID "your_device_id"
#define DEVICE_CREDENTIAL "your_device_credential"

#define SSID "your_wifi_ssid"
#define SSID_PASSWORD "your_wifi_ssid_password"
```

{% endtab %}
{% endtabs %}

## ESP8266 WiFi WebConfig

It is possible to configure all parameters required for connection via a web Interface (captive portal). The device will create an access point where the user can connect to establish required information, like username, device identifier, credentials, and access point to connect.

{% tabs %}
{% tab title="ESP8266WebConfig.ino" %}

```cpp
#define THINGER_SERIAL_DEBUG

// Requires WifiManager from Library Manager or https://github.com/tzapu/WiFiManager
#include <ThingerESP8266WebConfig.h>

ThingerESP8266WebConfig thing;

void setup() {
  // open serial for debugging
  Serial.begin(115200);

  pinMode(LED_BUILTIN, OUTPUT);

  // digital pin control example (i.e. turning on/off a light, a relay, configuring a parameter, etc)
  thing["led"] << digitalPin(LED_BUILTIN);

  // resource output example (i.e. reading a sensor value)
  thing["millis"] >> outputValue(millis());
}

void loop() {
  thing.handle();
}
```

{% endtab %}
{% endtabs %}

Once this sketch is loaded on the device, it is possible to follow the next steps to connect it to the platform:

1. Connect to Thinger-Device WiFi with a computer or phone, using `thinger.io` as the WiFi password
2. Wait for the configuration window, or navigate to <http://192.168.4.1> if it does not appear
3. Configure the wifi where the ESP8266 will be connected,  and input the Thinger.io device credentials.
4. The device should now be connected to the platform.
5. Connect to the "Thinger-Device" WiFi with a computer or phone, using "thinger.io" as the WiFi password.

   Configure the WiFi network to which the ESP32 will connect, and input the Thinger.io device credentials.

   The device should now be connected to the platform.

The WebConfig interface includes different methods to control the captive portal:

* **clean\_credentials**: It cleans all credentials from the device (WiFi/user parameters). This way, the next time the device is booted will create the captive portal again to request the WiFi configuration. It can be executed after a long press on a button.&#x20;
* **set\_user**: Initializes the default user for connecting the device to the platform (if set, this parameter is not requested from the user in the captive portal).
* **set\_device**: Initializes the default device for connecting the device to the platform (if set, this parameter is not requested from the user in the captive portal).
* **set\_password**: Initializes the default device password for connecting the device to the platform (if set, this parameter is not requested from the user in the captive portal).
* **add\_setup\_parameter**: Add additional parameters to be requested in the captive portal, for example, any other configuration required for the execution: sampling intervals, meta-data, thresholds, etc.
* **set\_on\_config\_callback**: Set a callback to receive configuration provided by the user in the captive portal, i.e., user, device, password, or any additional parameter configured.
* **set\_on\_wifi\_config**: Set a callback to receive the result of the WiFi configuration. If the connection did not succeed, it can be used to clean credentials, so, the captive portal runs again.
* **set\_on\_captive\_portal\_run**: Set a callback to receive the WiFiManager instance before the captive portal is shown. It can be used to add any other customization over the WebConfig interface.

## ESP8266 WiFi SmartConfig

The SmartConfig (or recently named [ESP-Touch](https://www.espressif.com/en/products/software/esp-touch/overview)) is a provisioning technology developed by TI to connect a new Wi-Fi device to a Wi-Fi network. It uses a mobile app to broadcast the network credentials from a smartphone or a tablet to an un-provisioned Wi-Fi device.

The advantage of this technology is that the device does not need to directly know the SSID or password of an Access Point (AP). This information is provided using a smartphone. This is particularly important for headless devices and systems, due to their lack of a user interface.

To use this Wi-Fi provisioning technology, this example is valid:

{% tabs %}
{% tab title="ESP8266SmartConfig.ino" %}

```cpp
#define THINGER_SERIAL_DEBUG

#include <ThingerSmartConfig.h>
#include "arduino_secrets.h"

ThingerSmartConfig thing(USERNAME, DEVICE_ID, DEVICE_CREDENTIAL);

void setup() {
  // open serial for debugging
  Serial.begin(115200);

  pinMode(LED_BUILTIN, OUTPUT);

  // digital pin control example (i.e. turning on/off a light, a relay, configuring a parameter, etc)
  thing["led"] << digitalPin(LED_BUILTIN);

  // resource output example (i.e. reading a sensor value)
  thing["millis"] >> outputValue(millis());

  // more details at http://docs.thinger.io/arduino/
}

void loop() {
  thing.handle();
}
```

{% endtab %}

{% tab title="arduino\_secrets.h" %}

```cpp
#define USERNAME "your_user_name"
#define DEVICE_ID "your_device_id"
#define DEVICE_CREDENTIAL "your_device_credential"
```

{% endtab %}
{% endtabs %}

Once this sketch is loaded on the device, it is possible to set up WiFi credentials using example applications from Espressif. Just download and install the ESP Touch application from Espressif for a mobile phone and follow the onscreen instructions. Reference applications can be downloaded from here: <https://www.espressif.com/en/products/software/esp-touch/resources>


# ARDUINO ETHERNET

## Introduction

Using Arduino with Ethernet is a great option for connecting the Arduino board to the Internet in a few minutes. It provides the fastest and reliable connectivity to the IoT devices. There are Ethernet shields that can extend Arduino features, like the Arduino Ethernet Shield for standard Arduinos, or the Arduino MKR ETH Shield for MKR devices. There are also external modules that can be plugged into any microcontroller, like the ENC28J60 module.&#x20;

In this documentation, we cover how to connect devices over Ethernet by using both approaches, the default Arduino Ethernet Shields, and the external ENC28J60 module.

## Arduino Portenta H7 Ethernet

Portenta H7 simultaneously runs high-level code along with real-time tasks. The design includes two processors that can run tasks in parallel. For example, it is possible to execute Arduino compiled code along with MicroPython code, and have both cores communicate with one another. The Portenta functionality is two-fold, it can either be running like any other embedded microcontroller board or as the main processor of an embedded computer.&#x20;

H7's main processor is the dual-core STM32H747, including a Cortex® M7 running at 480 MHz and a Cortex® M4 running at 240 MHz. The two cores communicate via a *Remote Procedure Call* mechanism that allows calling functions on the other processor seamlessly.

![Arduino Portenta H7](/files/-MjZ7epW7smJuoNnq-zr)

{% tabs %}
{% tab title="ArduinoPortentaH7Eth.ino" %}

```cpp
#define THINGER_SERIAL_DEBUG

#include <ThingerMbedEth.h>
#include <ThingerPortentaOTA.h>
#include "arduino_secrets.h"

ThingerMbedEth thing(USERNAME, DEVICE_ID, DEVICE_CREDENTIAL);
ThingerPortentaOTA ota(thing);

void setup() {
    // configure LED_BUILTIN for output
    pinMode(LED_BUILTIN, OUTPUT);

    // open serial for debugging
    Serial.begin(115200);

    // pin control example (i.e. turning on/off a light, a relay, etc)
    thing["led"] << digitalPin(LED_BUILTIN);

    // resource output example (i.e. reading a sensor value, a variable, etc)
    thing["millis"] >> outputValue(millis());

    // start thinger on its own task
    thing.start();

    // more details at http://docs.thinger.io/arduino/
}

void loop() {
    // use loop as in normal Arduino Sketch
    // use thing.lock() thing.unlock() when using/modifying variables exposed on thinger resources
    delay(1000);
}
```

{% endtab %}

{% tab title="arduino\_secrets.h" %}

```cpp
#define USERNAME "your_user_name"
#define DEVICE_ID "your_device_id"
#define DEVICE_CREDENTIAL "your_device_credential"
```

{% endtab %}
{% endtabs %}

{% hint style="success" %}
In case of problems when connecting over secure TLS connections, try updating the WiFi firmware by flashing the WiFiFirmwareUpdater example sketch.

<img src="/files/NAAcaz7Bdlzx726LclgY" alt="" data-size="original">
{% endhint %}

## Arduino Opta Ethernet

The Arduino Opta is designed for industrial automation, offering robust performance and reliability. It features a dual-core STM32H747 microcontroller, which includes a Cortex® M7 running at 480 MHz and a Cortex® M4 running at 240 MHz. This configuration enables Opta to handle complex real-time tasks and high-level code execution concurrently.

With its versatile architecture, the Opta supports running Arduino sketches alongside MicroPython, allowing developers to leverage the strengths of both programming environments. The dual-core setup facilitates inter-core communication via Remote Procedure Call, ensuring smooth and efficient coordination between the two processors. This capability makes the Arduino Opta ideal for advanced automation systems, where precise control and rapid response are crucial.

Additionally, the Arduino Opta is equipped with industrial-grade features, such as enhanced I/O capabilities and robust connectivity options. It can be seamlessly integrated into existing industrial networks, providing a reliable solution for monitoring and control applications. Whether used as a standalone microcontroller or as part of a larger embedded system, the Opta's performance and versatility make it a valuable asset in any industrial setting.

<figure><img src="/files/cz2CvVoWNvwfL6uErQXr" alt=""><figcaption><p>Arduino Opta Wifi</p></figcaption></figure>

{% tabs %}
{% tab title="ArduinoOptaEth.ino" %}

```cpp
// enable debug output over serial
#define THINGER_SERIAL_DEBUG

// define private server instance
#define THINGER_SERVER "acme.aws.thinger.io"

#include <ThingerMbedEth.h>
#include <ThingerPortentaOTA.h>
#include "arduino_secrets.h"

ThingerMbedEth thing(USERNAME, DEVICE_ID, DEVICE_CREDENTIAL);
ThingerPortentaOTA ota(thing);

void setup() {
    // open serial for debugging
    Serial.begin(115200);

    // configure leds for output
    pinMode(LED_D0, OUTPUT);
    pinMode(LED_D1, OUTPUT);
    pinMode(LED_D2, OUTPUT);
    pinMode(LED_D3, OUTPUT);
    pinMode(LEDR, OUTPUT);
    pinMode(LED_BUILTIN, OUTPUT);

    // configure relays for output
    pinMode(D0, OUTPUT);
    pinMode(D1, OUTPUT);
    pinMode(D2, OUTPUT);
    pinMode(D3, OUTPUT);

    // example for controlling relays and status LED
    thing["relay_d0"] << [](pson& in){
        if(in.is_empty()){
            in = (bool) digitalRead(D0);
        }else{
            digitalWrite(D0, in ? HIGH : LOW);
            digitalWrite(LED_D0, in ? HIGH : LOW);
        }
    };

    thing["relay_d1"] << [](pson& in){
        if(in.is_empty()){
            in = (bool) digitalRead(D1);
        }else{
            digitalWrite(D1, in ? HIGH : LOW);
            digitalWrite(LED_D1, in ? HIGH : LOW);
        }
    };

    thing["relay_d2"] << [](pson& in){
        if(in.is_empty()){
            in = (bool) digitalRead(D2);
        }else{
            digitalWrite(D2, in ? HIGH : LOW);
            digitalWrite(LED_D2, in ? HIGH : LOW);
        }
    };

    thing["relay_d3"] << [](pson& in){
        if(in.is_empty()){
            in = (bool) digitalRead(D3);
        }else{
            digitalWrite(D3, in ? HIGH : LOW);
            digitalWrite(LED_D3, in ? HIGH : LOW);
        }
    };

    // example for controlling the LED
    thing["led"] << digitalPin(LED_BUILTIN);
    thing["led_r"] << digitalPin(LEDR);

    // resource output example (i.e. reading a sensor value, a variable, etc)
    thing["millis"] >> outputValue(millis());

    // start thinger on its own task
    thing.start();

    // more details at http://docs.thinger.io/arduino/
}

void loop() {
    // use loop as in normal Arduino Sketch
    // use thing.lock() thing.unlock() when using/modifying variables exposed on thinger resources
    delay(1000);
}
```

{% endtab %}

{% tab title="arduino\_secrets.h" %}

```cpp
#define USERNAME "your_user_name"
#define DEVICE_ID "your_device_id"
#define DEVICE_CREDENTIAL "your_device_credential"
```

{% endtab %}
{% endtabs %}

{% hint style="success" %}
In case of problems when connecting over secure TLS connections, try updating the WiFi firmware by flashing the WiFiFirmwareUpdater example sketch.

<img src="/files/NAAcaz7Bdlzx726LclgY" alt="" data-size="original">
{% endhint %}

## Arduino with Ethernet Shield

![Arduino Ethernet Shield](/files/-LpXt-jddcoTdwusJUMc)

This example will allow connecting the Arduino device with the Ethernet Shield to the cloud platform in a few lines. The `arduino_secrets.h` file just needs to be modified with the relevant information.

{% tabs %}
{% tab title="ArduinoEthernet.ino" %}

```cpp
#define THINGER_SERIAL_DEBUG

#include <ThingerEthernet.h>
#include "arduino_secrets.h"

ThingerEthernet thing(USERNAME, DEVICE_ID, DEVICE_CREDENTIAL);

void setup() {
  // open serial for debugging
  Serial.begin(115200);

  pinMode(2, OUTPUT);

  // pin control example (i.e. turning on/off a light, a relay, etc)
  thing["led"] << digitalPin(2);

  // resource output example (i.e. reading a sensor value, a variable, etc)
  thing["millis"] >> outputValue(millis());

  // more details at http://docs.thinger.io/arduino/
}

void loop() {
  thing.handle();
}
```

{% endtab %}

{% tab title="arduino\_secrets.h" %}

```cpp
#define USERNAME "your_user_name"
#define DEVICE_ID "your_device_id"
#define DEVICE_CREDENTIAL "your_device_credential"
```

{% endtab %}
{% endtabs %}

## Arduino with ENC28J60

The ENC28J60 is a very cheap Ethernet controller that can be used with our Arduinos to extend their connectivity. The main advantage of this controller is that it is inexpensive, as this module costs a few dollars. The bad news is that all the TCP/IP stack, DNS features, and so on, must run in the microcontroller itself, so there is not enough space in stock Arduinos for building our program. This way, for integrating the thinger.io libraries in the sketch, it would be necessary to disable the DHCP protocol (which uses UDP under the hood) and assign a manual IP address. If this is suitable for a project, or if a compatible microcontroller with more resources (such as ESP8266, Teensy, STM32F, etc.) is available, then this module can be a great option.

![ENC28J60 Ethernet Module](/files/-LpXt-jxrVmtNnOXWh29)

There are some libraries for managing these boards, but we will use [UIPEthernet](https://github.com/ntruchsess/arduino_uip), as it provides a standard interface that is compatible with the stock Thinger libraries.

This example will allow connecting a device using the ENC28J60 interface to the cloud platform in a few lines using the WiFi interface. The `arduino_secrets.h` file just needs to be modified with the relevant information.

{% tabs %}
{% tab title="ArduinoENC28J60.ino" %}

```cpp
// Install UIPEthernet for ENC28J60
// https://github.com/UIPEthernet/UIPEthernet
#define THINGER_SERIAL_DEBUG
  
#include <ThingerENC28J60.h>
#include "arduino_secrets.h"

ThingerENC28J60 thing(USERNAME, DEVICE_ID, DEVICE_CREDENTIAL);

void setup() {
  // open serial for debugging
  Serial.begin(115200);

  // ENC28J60 using fixed IP Address. DHCP is too big for the sketch.
  uint8_t mac[6] = {0x00, 0x01, 0x02, 0x03, 0x04, 0x05};
  Ethernet.begin(mac, IPAddress(192, 168, 1, 125));

  pinMode(LED_BUILTIN, OUTPUT);

  // pin control example (i.e. turning on/off a light, a relay, etc)
  thing["led"] << digitalPin(LED_BUILTIN);

  // resource output example (i.e. reading a sensor value)
  thing["millis"] >> outputValue(millis());

  // more details at http://docs.thinger.io/arduino/
}

void loop() {
  thing.handle();
}
```

{% endtab %}

{% tab title="arduino\_secrets.h" %}

```cpp
#define USERNAME "your_user_name"
#define DEVICE_ID "your_device_id"
#define DEVICE_CREDENTIAL "your_device_credential"
```

{% endtab %}
{% endtabs %}


# ARDUINO WIFI

## Introduction

Using Arduino with WiFi is a great option for connecting the Arduino board wirelessly to the Internet in a few minutes. Connecting a device to a WiFi network is straightforward; no configuration beyond the SSID and password is needed. There are many boards with WiFi connectivity, as it provides an easy setup, without any cable requirement. There are plenty of alternatives for WiFi connectivity, including shields, devices with on-board WiFi, or external modules that can be connected to the microcontroller.

In this documentation, we cover how to connect devices over WiFi by using different approaches, like Arduino Shields, external modules, and devices with embedded WiFi like Arduino Nano 33 IoT, or Arduino MKR WIFI 1010.

## Arduino with WiFi Shield

![Arduino WiFi shield](/files/-LpXt-jfp-4LQ0JwyEwJ)

This example will allow connecting the Arduino device with the WiFi Shield to the cloud platform in a few lines. The `arduino_secrets.h` file just needs to be modified with the relevant information.

{% tabs %}
{% tab title="ArduinoWifi.ino" %}

```cpp
#define THINGER_SERIAL_DEBUG
#define THINGER_USE_STATIC_MEMORY
#define THINGER_STATIC_MEMORY_SIZE 512

#include <WiFi.h>
#include <ThingerWifi.h>
#include "arduino_secrets.h"

ThingerWifi thing(USERNAME, DEVICE_ID, DEVICE_CREDENTIAL);

void setup() {
  // open serial for debugging
  Serial.begin(115200);
  
  // configure wifi network
  thing.add_wifi(SSID, SSID_PASSWORD);

  pinMode(2, OUTPUT);

  // pin control example (i.e. turning on/off a light, a relay, etc)
  thing["led"] << digitalPin(2);

  // resource output example (i.e. reading a sensor value, a variable, etc)
  thing["millis"] >> outputValue(millis());

  // more details at http://docs.thinger.io/arduino/
}

void loop() {
  thing.handle();
}
```

{% endtab %}

{% tab title="arduino\_secrets.h" %}

```cpp
#define USERNAME "your_user_name"
#define DEVICE_ID "your_device_id"
#define DEVICE_CREDENTIAL "your_device_credential"

#define SSID "your_wifi_ssid"
#define SSID_PASSWORD "your_wifi_ssid_password"
```

{% endtab %}
{% endtabs %}

## Arduino with CC3000

The CC3000 chip from Texas Instruments was one of the first low-cost WiFi chips that revolutionized the IoT maker ecosystem. In contrast to the other available WiFi alternatives, like the WiFi shield, the CC3000 appeared at a low cost (about 10$) for its time. It is a powerful chip as it integrates the whole TCP/IP stack and many other protocols. Some vendors, like Adadruit, started to build modules and libraries for integrating this chip with the Arduino ecosystem. Thanks to the libraries provided by Adafruit is then possible to build a connected device with a few lines of code.

![Texas Instruments CC3000 WiFi module](/files/-LpXt-jhBt4jMkJiYoma)

For this module is required to have installed the **Adafruit CC3000 Libraries**, as they are directly used by the Thinger client. Install it directly from the Arduino Library Manager by searching `cc3000`.

![Install CC3000 Arduino Libraries](/files/-MjVv5hVO6cCu2T1Txwk)

This example will allow connecting the Arduino device with the CC3000 module to the cloud platform in a few lines. The `arduino_secrets.h` file just needs to be modified with the relevant information.

{% tabs %}
{% tab title="ArduinoCC3000.ino" %}

```cpp
#define THINGER_SERIAL_DEBUG

#include <ThingerCC3000.h>
#include "arduino_secrets.h"

ThingerCC3000 thing(USERNAME, DEVICE_ID, DEVICE_CREDENTIAL);

void setup() {
  // open serial for debugging
  Serial.begin(115200);

  // configure wifi network
  thing.add_wifi(SSID, SSID_PASSWORD);

  pinMode(2, OUTPUT);

  // pin control example (i.e. turning on/off a light, a relay, etc)
  thing["led"] << digitalPin(2);

  // resource output example (i.e. reading a sensor value, a variable, etc)
  thing["millis"] >> outputValue(millis());

  // more details at http://docs.thinger.io/arduino/
}

void loop() {
  thing.handle();
}
```

{% endtab %}

{% tab title="arduino\_secrets.h" %}

```cpp
#define USERNAME "your_user_name"
#define DEVICE_ID "your_device_id"
#define DEVICE_CREDENTIAL "your_device_credential"

#define SSID "your_wifi_ssid"
#define SSID_PASSWORD "your_wifi_ssid_password"
```

{% endtab %}
{% endtabs %}

## Arduino Yun

The Arduino Yún is a microcontroller board based on the ATmega32u4 and the Atheros AR9331. The Atheros processor supports a Linux distribution based on OpenWrt named OpenWrt-Yun. The board has built-in Ethernet and WiFi support, a USB-A port, micro-SD card slot, 20 digital input/output pins (of which 7 can be used as PWM outputs and 12 as analog inputs), a 16 MHz crystal oscillator, a micro USB connection, an ICSP header, and 3 reset buttons. This board lets the programmable ATmega32u4 communicate with the Internet by using the Bridge Library that exposes some functions running in the Linux distribution.

<img src="/files/-LpXt-jjTDMFqYh5Oc7R" alt="Arduino Yun Board" width="563">

This example will allow connecting an Arduino Yun to the cloud platform in a few lines using the WiFi interface. The `arduino_secrets.h` file just needs to be modified with the relevant information. Notice that it is not required to configure any network parameters in the code, as this is managed by the running Linux distribution. However, it may be necessary to connect with the Arduino Yun via WiFi to connect it to a local network.

{% tabs %}
{% tab title="ArduinoYun.ino" %}

```cpp
#include <ThingerYun.h>
#include "arduino_secrets.h"

ThingerYun thing(USERNAME, DEVICE_ID, DEVICE_CREDENTIAL);

void setup() {
  pinMode(LED_BUILTIN, OUTPUT);

  // initialize bridge
  Bridge.begin();

  // pin control example (i.e. turning on/off a light, a relay, etc)
  thing["led"] << digitalPin(LED_BUILTIN);

  // resource output example (i.e. reading a sensor value, a variable, etc)

  // more details at http://docs.thinger.io/arduino/
}

void loop() {
  thing.handle();
}
```

{% endtab %}

{% tab title="arduino\_secrets.h" %}

```cpp
#define USERNAME "your_user_name"
#define DEVICE_ID "your_device_id"
#define DEVICE_CREDENTIAL "your_device_credential"
```

{% endtab %}
{% endtabs %}

{% hint style="info" %}
For using Arduino Yun, the device must be connected to a network with Internet, just via Ethernet or a Wifi connection. It can be configured in the Arduino Yun web configuration.
{% endhint %}

![Arduino Yun network configuration](/files/-LpXt-jlvMDDnLI5eONI)

## Arduino MKR1000

The Arduino MKR1000 is a microcontroller based on the Atmel ATSAMW25 SoC (System on Chip), which is part of the SmartConnect family of Atmel Wireless devices, specifically designed for IoT projects and devices. A good 32-bit computational power similar to the Zero board, the usual rich set of I/O interfaces, low-power WiFi with a Cryptochip for secure communication, and the ease of use of the Arduino Software (IDE) for code development and programming. All these features make this board the preferred choice for the emerging IoT battery-powered projects in a compact form factor.

![](/files/-LpXt-jnH_7YIg19ROQi)

This example will allow connecting the MKR1000 device to the cloud platform in a few lines using the WiFi interface. The `arduino_secrets.h` file just needs to be modified with the relevant information.

{% tabs %}
{% tab title="C++" %}

```cpp
#define THINGER_SERIAL_DEBUG

#include <ThingerWifi101.h>
#include "arduino_secrets.h"

// cannot connect? Update WiFi101 firmware and add iot.thinger.io SSL Certificate
// https://support.arduino.cc/hc/en-us/articles/360016119219

ThingerWifi101 thing(USERNAME, DEVICE_ID, DEVICE_CREDENTIAL);

void setup() {
  // open serial for debugging
  Serial.begin(115200);

  // configure wifi network
  thing.add_wifi(SSID, SSID_PASSWORD);

  pinMode(LED_BUILTIN, OUTPUT);

  // pin control example (i.e. turning on/off a light, a relay, etc)
  thing["led"] << digitalPin(LED_BUILTIN);

  // resource output example (i.e. reading a sensor value, a variable, etc)
  thing["millis"] >> outputValue(millis());

  // more details at http://docs.thinger.io/arduino/
}

void loop() {
  thing.handle();
}
```

{% endtab %}

{% tab title="arduino\_secrets.h" %}

```
#define USERNAME "your_user_name"
#define DEVICE_ID "your_device_id"
#define DEVICE_CREDENTIAL "your_device_credential"

#define SSID "your_wifi_ssid"
#define SSID_PASSWORD "your_wifi_ssid_password"
```

{% endtab %}
{% endtabs %}

{% hint style="info" %}
For using MKR1000 over the default TLS/SSL connection, it is required to install the Thinger.io server certificate on the board with the Wifi101 Firmware Updater located in the Tools menu.
{% endhint %}

<img src="/files/-LpXt-jpKSPVacSMJvcF" alt="WiFi 101 Certificates Updater" width="563">

## Arduino MKR1010

The Arduino MKR WiFi 1010 serves as an accessible entry point for basic IoT and pico-network application design. It is a comprehensive solution for many fundamental IoT application scenarios, whether building a sensor network connected to an office or home router, or creating a BLE device that sends data to a cellphone. The board's primary processor is a low-power Arm® Cortex®-M0 32-bit SAMD21, consistent with other boards in the Arduino MKR family. WiFi and Bluetooth® connectivity are handled by the u-blox NINA-W10 module, a low-power chipset operating in the 2.4GHz range. Additionally, the Microchip® ECC508 crypto chip ensures secure communication. The board also features a battery charger and a directional RGB LED.

<img src="/files/-MjZ3OzerAIABGy3HoVL" alt="Arduino MKR1010" width="563">

This example will allow connecting the MKR1010 device to the cloud platform in a few lines using the WiFi interface. The `arduino_secrets.h` file just needs to be modified with the relevant information.

{% hint style="warning" %}
The integration with Thinger.io requires downloading an additional library called "Arduino WiFiNINA" that allows communicating with the U-BLOX WiFi module.
{% endhint %}

{% tabs %}
{% tab title="ArduinoMKR1010.ino" %}

```cpp
#define THINGER_SERIAL_DEBUG

#include <ThingerWiFiNINA.h>
#include "arduino_secrets.h"

// cannot connect? Update WiFiNiNA and add iot.thinger.io SSL Certificate
// https://support.arduino.cc/hc/en-us/articles/360016119219

ThingerWiFiNINA thing(USERNAME, DEVICE_ID, DEVICE_CREDENTIAL);

void setup() {
  // configure LED_BUILTIN for output
  pinMode(LED_BUILTIN, OUTPUT);

   // open serial for debugging
  Serial.begin(115200);

  // configure wifi network
  thing.add_wifi(SSID, SSID_PASSWORD);

  // pin control example (i.e. turning on/off a light, a relay, etc)
  thing["led"] << digitalPin(LED_BUILTIN);

  // resource output example (i.e. reading a sensor value, a variable, etc)
  thing["millis"] >> outputValue(millis());

  // more details at http://docs.thinger.io/arduino/
}

void loop() {
  thing.handle();
}
```

{% endtab %}

{% tab title="arduino\_secrets.h" %}

```cpp
#define USERNAME "your_user_name"
#define DEVICE_ID "your_device_id"
#define DEVICE_CREDENTIAL "your_device_credential"

#define SSID "your_wifi_ssid"
#define SSID_PASSWORD "your_wifi_ssid_password"
```

{% endtab %}
{% endtabs %}

{% hint style="info" %}
For using MKR1010 over the default TLS/SSL connection, it is required to install the Thinger.io server certificate in the board with the Wifi101 Firmware Updater located in the Tools menu.
{% endhint %}

![WiFiNINA Certificates Updater](/files/-LpXt-jpKSPVacSMJvcF)

## Arduino Nano 33 IoT

In the same iconic size as the Arduino Nano, the Arduino Nano 33 IoT hosts an Arm Cortex-M0+ SAMD21 processor, a WiFi and Bluetooth module based on ESP32, a 6-axis Inertial Measurement Unit (IMU) and a crypto chip which can securely store certificates and pre-shared keys.

![](/files/-LphrVtRD8Jb5TuNQk8s)

{% hint style="warning" %}
The integration with Thinger.io requires downloading an additional library called "Arduino WiFiNINA" that allows communicating with the U-BLOX WiFi module.
{% endhint %}

This example will allow connecting the Arduino Nano 33 IoT device to the cloud platform in a few lines using the WiFi interface. The `arduino_secrets.h` file just needs to be modified with the relevant information.

{% tabs %}
{% tab title="ArduinoNano33IoT.ino" %}

```cpp
#define THINGER_SERIAL_DEBUG

#include <ThingerWiFiNINA.h>
#include "arduino_secrets.h"

// requires library Arduino_LSM6DS3 for the imu readings
#include <Arduino_LSM6DS3.h>

// cannot connect? Update WiFiNiNA and add iot.thinger.io SSL Certificate
// https://support.arduino.cc/hc/en-us/articles/360016119219

ThingerWiFiNINA thing(USERNAME, DEVICE_ID, DEVICE_CREDENTIAL);

void setup() {
  // configure LED_BUILTIN for output
  pinMode(LED_BUILTIN, OUTPUT);

  // open serial for debugging
  Serial.begin(115200);

  // initialize IMU
  if (!IMU.begin()) {
    Serial.println("Failed to initialize IMU!");
    while (1);
  }

  // configure wifi network
  thing.add_wifi(SSID, SSID_PASSWORD);

  // pin control example (i.e. turning on/off a light, a relay, etc)
  thing["led"] << digitalPin(LED_BUILTIN);

  // resource output example (i.e. reading a sensor value, a variable, etc)
  thing["millis"] >> outputValue(millis());

  // example for the built-in gyroscope
  thing["imu"] >> [](pson& out){
    float x, y, z;
    IMU.readGyroscope(x, y, z);
    out["x"] = x;
    out["y"] = y;
    out["z"] = z;
  };

  // more details at http://docs.thinger.io/arduino/
}

void loop() {
  thing.handle();
}
```

{% endtab %}

{% tab title="arduino\_secrets.h" %}

```cpp
#define USERNAME "your_user_name"
#define DEVICE_ID "your_device_id"
#define DEVICE_CREDENTIAL "your_device_credential"

#define SSID "your_wifi_ssid"
#define SSID_PASSWORD "your_wifi_ssid_password"
```

{% endtab %}
{% endtabs %}

{% hint style="info" %}
For using Arduino 33 IoT over the default TLS/SSL connection, it is required to install the Thinger.io server certificate in the board with the Wifi101 Firmware Updater located in the Tools menu.
{% endhint %}

![WiFiNINA Certificates Updater](/files/-LpXt-jpKSPVacSMJvcF)

## Arduino Nano RP2040

The brain of the board is the Raspberry Pi RP2040 silicon, a dual-core Arm Cortex M0+ running at 133MHz. It has 264KB of SRAM, and the 16MB of flash memory is off-chip to give extra storage. But what’s really exciting is the onboard connectivity options. The hugely popular and highly adaptable u-blox NINA-W102 radio module is on there to make this a true IoT champion. It has on-board, built-in sensors to turn builds into powerhouse projects as well. Microphone and motion sensing add a depth of possibilities that’s almost impossible to find in a board of this size. The Arduino Nano RP2040 Connect is the premium choice for RP2040 devices and the perfect option for upgrading projects and unlocking the potential of new ones.

![Arduino Nano RP2040](/files/-MjZ6DJMu9fKCIi-A5Rs)

{% hint style="warning" %}
The integration with Thinger.io requires downloading an additional library called "Arduino WiFiNINA" that allows communicating with the U-BLOX WiFi module.
{% endhint %}

This example will allow connecting the Arduino Nano RP2040 device to the cloud platform in a few lines using the WiFi interface. The `arduino_secrets.h` file just needs to be modified with the relevant information.

{% tabs %}
{% tab title="ArduinoNanoRP2040.ino" %}

```cpp
#define THINGER_SERIAL_DEBUG

#include <ThingerMbed.h>
#include "arduino_secrets.h"

ThingerMbed thing(USERNAME, DEVICE_ID, DEVICE_CREDENTIAL);

// cannot connect? Update WiFiNiNA and add iot.thinger.io SSL Certificate
// https://support.arduino.cc/hc/en-us/articles/360016119219

void setup() {
  // configure LED_BUILTIN for output
  pinMode(LED_BUILTIN, OUTPUT);

  // open serial for debugging
  Serial.begin(115200);

  // configure wifi network
  thing.add_wifi(SSID, SSID_PASSWORD);

  // pin control example (i.e. turning on/off a light, a relay, etc)
  thing["led"] << digitalPin(LED_BUILTIN);

  // resource output example (i.e. reading a sensor value, a variable, etc)
  thing["millis"] >> outputValue(millis());

  // start thinger task
  thing.start();

  // more details at http://docs.thinger.io/arduino/
}

void loop() {
  // use loop as in normal Arduino Sketch
  // use thing.lock() thing.unlock() if using variables exposed on Thinger resources
}
```

{% endtab %}

{% tab title="arduino\_secrets.h" %}

```cpp
#define USERNAME "your_user_name"
#define DEVICE_ID "your_device_id"
#define DEVICE_CREDENTIAL "your_device_credential"

#define SSID "your_wifi_ssid"
#define SSID_PASSWORD "your_wifi_ssid_password"
```

{% endtab %}
{% endtabs %}

{% hint style="info" %}
For using Arduino Nano RP2040 over the default TLS/SSL connection, it is required to install the Thinger.io server certificate in the board with the Wifi101 Firmware Updater located in the Tools menu.
{% endhint %}

![WiFiNINA Certificates Updater](/files/-LpXt-jpKSPVacSMJvcF)

## Arduino Portenta H7

Portenta H7 simultaneously runs high-level code along with real-time tasks. The design includes two processors that can run tasks in parallel. For example, it is possible to execute Arduino compiled code along with MicroPython code, and have both cores communicate with one another. The Portenta functionality is two-fold, it can either be running like any other embedded microcontroller board or as the main processor of an embedded computer.&#x20;

H7's main processor is the dual-core STM32H747, including a Cortex® M7 running at 480 MHz and a Cortex® M4 running at 240 MHz. The two cores communicate via a *Remote Procedure Call* mechanism that allows calling functions on the other processor seamlessly.

![Arduino Portenta H7](/files/-MjZ7epW7smJuoNnq-zr)

{% tabs %}
{% tab title="ArduinoPortentaH7.ino" %}

```cpp
#define THINGER_SERIAL_DEBUG

#include <ThingerMbed.h>
#include "arduino_secrets.h"

ThingerMbed thing(USERNAME, DEVICE_ID, DEVICE_CREDENTIAL);

void setup() {
  // configure LED_BUILTIN for output
  pinMode(LED_BUILTIN, OUTPUT);

  // open serial for debugging
  Serial.begin(115200);

  // configure wifi network
  thing.add_wifi(SSID, SSID_PASSWORD);

  // pin control example (i.e. turning on/off a light, a relay, etc)
  thing["led"] << digitalPin(LED_BUILTIN);

  // resource output example (i.e. reading a sensor value, a variable, etc)
  thing["millis"] >> outputValue(millis());

  // more details at http://docs.thinger.io/arduino/
}

void loop() {
  thing.handle();
}
```

{% endtab %}

{% tab title="arduino\_secrets.h" %}

```cpp
#define USERNAME "your_user_name"
#define DEVICE_ID "your_device_id"
#define DEVICE_CREDENTIAL "your_device_credential"

#define SSID "your_wifi_ssid"
#define SSID_PASSWORD "your_wifi_ssid_password"
```

{% endtab %}
{% endtabs %}

{% hint style="success" %}
In case of problems when connecting over secure TLS connections, try updating the WiFi firmware by flashing the WiFiFirmwareUpdater example sketch.

<img src="/files/NAAcaz7Bdlzx726LclgY" alt="" data-size="original">
{% endhint %}

## Arduino Opta Wifi

The Arduino Opta is designed for industrial automation, offering robust performance and reliability. It features a dual-core STM32H747 microcontroller, which includes a Cortex® M7 running at 480 MHz and a Cortex® M4 running at 240 MHz. This configuration enables Opta to handle complex real-time tasks and high-level code execution concurrently.

With its versatile architecture, the Opta supports running Arduino sketches alongside MicroPython, allowing developers to leverage the strengths of both programming environments. The dual-core setup facilitates inter-core communication via Remote Procedure Call, ensuring smooth and efficient coordination between the two processors. This capability makes the Arduino Opta ideal for advanced automation systems, where precise control and rapid response are crucial.

Additionally, the Arduino Opta is equipped with industrial-grade features, such as enhanced I/O capabilities and robust connectivity options. It can be seamlessly integrated into existing industrial networks, providing a reliable solution for monitoring and control applications. Whether used as a standalone microcontroller or as part of a larger embedded system, the Opta's performance and versatility make it a valuable asset in any industrial setting.

<figure><img src="/files/cz2CvVoWNvwfL6uErQXr" alt=""><figcaption><p>Arduino Opta Wifi</p></figcaption></figure>

{% tabs %}
{% tab title="ArduinoOptaWifi.ino" %}

```cpp
#define THINGER_SERIAL_DEBUG

#include <ThingerMbed.h>
#include <ThingerPortentaOTA.h>
#include "arduino_secrets.h"

ThingerMbed thing(USERNAME, DEVICE_ID, DEVICE_CREDENTIAL);
ThingerPortentaOTA ota(thing);

void setup() {
    // open serial for debugging
    Serial.begin(115200);

    // configure leds for output
    pinMode(LED_D0, OUTPUT);
    pinMode(LED_D1, OUTPUT);
    pinMode(LED_D2, OUTPUT);
    pinMode(LED_D3, OUTPUT);
    pinMode(LEDR, OUTPUT);
    pinMode(LED_BUILTIN, OUTPUT);

    // configure relays for output
    pinMode(D0, OUTPUT);
    pinMode(D1, OUTPUT);
    pinMode(D2, OUTPUT);
    pinMode(D3, OUTPUT);

    // example for controlling relays and status LED
    thing["relay_d0"] << [](pson& in){
        if(in.is_empty()){
            in = (bool) digitalRead(D0);
        }else{
            digitalWrite(D0, in ? HIGH : LOW);
            digitalWrite(LED_D0, in ? HIGH : LOW);
        }
    };

    thing["relay_d1"] << [](pson& in){
        if(in.is_empty()){
            in = (bool) digitalRead(D1);
        }else{
            digitalWrite(D1, in ? HIGH : LOW);
            digitalWrite(LED_D1, in ? HIGH : LOW);
        }
    };

    thing["relay_d2"] << [](pson& in){
        if(in.is_empty()){
            in = (bool) digitalRead(D2);
        }else{
            digitalWrite(D2, in ? HIGH : LOW);
            digitalWrite(LED_D2, in ? HIGH : LOW);
        }
    };

    thing["relay_d3"] << [](pson& in){
        if(in.is_empty()){
            in = (bool) digitalRead(D3);
        }else{
            digitalWrite(D3, in ? HIGH : LOW);
            digitalWrite(LED_D3, in ? HIGH : LOW);
        }
    };

    // example for controlling the LED
    thing["led"] << digitalPin(LED_BUILTIN);
    thing["led_r"] << digitalPin(LEDR);

    // resource output example (i.e. reading a sensor value, a variable, etc)
    thing["millis"] >> outputValue(millis());

    // start thinger on its own task
    thing.start();

    // more details at http://docs.thinger.io/arduino/
}

void loop() {
    // use loop as in normal Arduino Sketch
    // use thing.lock() thing.unlock() when using/modifying variables exposed on thinger resources
    delay(1000);
}
```

{% endtab %}

{% tab title="arduino\_secrets.h" %}

```cpp
#define USERNAME "your_user_name"
#define DEVICE_ID "your_device_id"
#define DEVICE_CREDENTIAL "your_device_credential"

#define SSID "your_wifi_ssid"
#define SSID_PASSWORD "your_wifi_ssid_password"
```

{% endtab %}
{% endtabs %}

{% hint style="success" %}
In case of problems when connecting over secure TLS connections, try updating the WiFi firmware by flashing the WiFiFirmwareUpdater example sketch.

<img src="/files/NAAcaz7Bdlzx726LclgY" alt="" data-size="original">
{% endhint %}

## Arduino Uno WiFi Rev2

The Arduino Uno WiFi is functionally the same as the Arduino Uno Rev3, but with the addition of WiFi and some other enhancements. It incorporates a brand new 8-bit microprocessor from Microchip and has an onboard IMU (Inertial Measurement Unit). The WiFi Module is a self-contained SoC with an integrated TCP/IP protocol stack that can provide access to a WiFi network or act as an access point.

{% hint style="warning" %}
The integration with Thinger.io requires downloading an additional library called "Arduino WiFiNINA" that allows communicating with the U-BLOX WiFi module.
{% endhint %}

This example will allow connecting the Arduino Uno WiFi Rev2 device to the cloud platform in a few lines using the WiFi interface. The `arduino_secrets.h` file just needs to be modified with the relevant information.

{% tabs %}
{% tab title="ArduinoUnoWiFiRev2.ino" %}

```cpp
#define THINGER_SERIAL_DEBUG

#include <ThingerWiFiNINA.h>
#include "arduino_secrets.h"

// cannot connect? Update WiFiNiNA and add iot.thinger.io SSL Certificate
// https://support.arduino.cc/hc/en-us/articles/360016119219

ThingerWiFiNINA thing(USERNAME, DEVICE_ID, DEVICE_CREDENTIAL);

void setup() {
  // configure LED_BUILTIN for output
  pinMode(LED_BUILTIN, OUTPUT);

   // open serial for debugging
  Serial.begin(115200);

  // configure wifi network
  thing.add_wifi(SSID, SSID_PASSWORD);

  // pin control example (i.e. turning on/off a light, a relay, etc)
  thing["led"] << digitalPin(LED_BUILTIN);

  // resource output example (i.e. reading a sensor value, a variable, etc)
  thing["millis"] >> outputValue(millis());

  // more details at http://docs.thinger.io/arduino/
}

void loop() {
  thing.handle();
}
```

{% endtab %}

{% tab title="arduino\_secrets.h" %}

```cpp
#define USERNAME "your_user_name"
#define DEVICE_ID "your_device_id"
#define DEVICE_CREDENTIAL "your_device_credential"

#define SSID "your_wifi_ssid"
#define SSID_PASSWORD "your_wifi_ssid_password"
```

{% endtab %}
{% endtabs %}

{% hint style="info" %}
For using this board with he default TLS/SSL connection, it is required to install the Thinger.io server certificate in the board with the Wifi101 Firmware Updater located in the Tools menu.
{% endhint %}

![](/files/-LpXt-jpKSPVacSMJvcF)


# ARDUINO GSM

Thinger.io documentation for Arduino based on GSM connectivity

## Introduction

Using Arduino with GSM connectivity is a great option for connecting the Arduino board wirelessly to the Internet in a few minutes. Connecting a device to a GSM network is simple, and it only requires a module with GSM connectivity and a SIM card. There are some boards with GSM connectivity on the Arduino ecosystem, like the MKR GSM 1400 that uses the 3G network for Internet connectivity, and the MKR NB 1500, using a narrowband solution, allowing the use of LTE Cat M1 or NB LTE-M.

In this documentation, we cover how to connect devices over GSM by using different approaches, like using Arduino MKR GSM 1400 or Arduino MKR NB 1500.

## Arduino MKR GSM 1400

The Arduino MKR GSM 1400 takes advantage of the cellular network as a means to communicate. The GSM / 3G network is the one that covers the highest percentage of the world's surface, making this connectivity option very attractive when no other connectivity options exist. Whether for building a gateway to a remote sensor network or for a single device sending a text message when an event occurs across the country, the MKR GSM 1400 assists in quickly implementing a solution to accommodate such needs.

The board's main processor is a low-power Arm® Cortex®-M0 32-bit SAMD21, like in the other boards within the Arduino MKR family. The GSM / 3G connectivity is performed with a module from u-blox, the SARA-U201, a low power chipset operating in the de different bands of the cellular range (GSM 850 MHz, E-GSM 1900 MHz, DCS 1800 MHz, PCS 1900 MHz). On top of those, secure communication is ensured through the Microchip® ECC508 crypto chip. Besides that, a battery charger and a connector for an external antenna can be found.

![Arduino MKR GSM 1400](/files/-MjZ8GqADmbo7reDeuGd)

This example will allow connecting the Arduino GSM 1400 to the cloud platform in a few lines. The `arduino_secrets.h` file just needs to be modified with the relevant information.

{% tabs %}
{% tab title="ArduinoGSM1400.ino" %}

```cpp
#define THINGER_SERIAL_DEBUG

#include <ThingerMKRGSM.h>
#include "arduino_secrets.h"

ThingerMKRGSM thing(USERNAME, DEVICE_ID, DEVICE_CREDENTIAL);

void setup() {
  // open serial for debugging
  Serial.begin(115200);

  // optional set pin number
  thing.set_pin(PIN_NUMBER);

  // set APN
  thing.set_apn(GPRS_APN, GPRS_LOGIN, GPRS_PASSWORD);

  // set builtin led to output
  pinMode(LED_BUILTIN, OUTPUT);

  // pin control example over the Internet (i.e. turning on/off a light, a relay, etc)
  thing["led"] << digitalPin(LED_BUILTIN);

  // resource output example (i.e. reading a sensor value, a variable, etc)
  thing["millis"] >> outputValue(millis());

  // more details at http://docs.thinger.io/arduino/
}

void loop() {
  thing.handle();
}
```

{% endtab %}

{% tab title="arduino\_secrets.h" %}

```cpp
#define USERNAME "your_user_name"
#define DEVICE_ID "your_device_id"
#define DEVICE_CREDENTIAL "your_device_credential"

#define PIN_NUMBER "your_pin"

#define GPRS_APN "your_apn_name"
#define GPRS_LOGIN "your_gprs_login"
#define GPRS_PASSWORD "your_gprs_password"
```

{% endtab %}
{% endtabs %}

## Arduino MKR NB 1500

Add Narrowband communication to the project with the MKR NB 1500. It's the perfect choice for devices in remote locations without an Internet connection, or in situations in which power isn't available, like on-field deployments, remote metering systems, solar-powered devices, or other extreme scenarios.

The board's main processor is a low-power Arm® Cortex®-M0 32-bit SAMD21, like in the other boards within the Arduino MKR family. The Narrowband connectivity is performed with a module from u-blox, the SARA-R410M-02B, a low power chipset operating in the de different bands of the IoT LTE cellular range. On top of those, secure communication is ensured through the Microchip® ECC508 crypto chip. Besides that, the PCB includes a battery charger and a connector for an external antenna.

This board is designed for global use, providing connectivity on LTE's Cat M1/NB1 bands 1, 2, 3, 4, 5, 8, 12, 13, 18, 19, 20, 25, 26, 28. Operators offering service in that part of the spectrum include: Vodafone, AT\&T, T-Mobile USA, Telstra, and Verizon, among others.

![Arduino MRK NB 1500](/files/-MjZ8x6VM83X3OE7Vx4j)

This example will allow connecting the Arduino MKR NB 1500 to the cloud platform in a few lines. The `arduino_secrets.h` file just needs to be modified with the relevant information.

{% tabs %}
{% tab title="ArduinoMKRNB1500.ino" %}

```cpp
#define THINGER_SERIAL_DEBUG

#include <ThingerMKRNB.h>
#include "arduino_secrets.h"

ThingerMKRNB thing(USERNAME, DEVICE_ID, DEVICE_CREDENTIAL);

void setup() {
  // enable serial for debugging
  Serial.begin(115200);

  // optional set pin number
  thing.set_pin(PIN_NUMBER);

  // set APN
  thing.set_apn(GPRS_APN, GPRS_LOGIN, GPRS_PASSWORD);

  // set builtin led to output
  pinMode(LED_BUILTIN, OUTPUT);

  // pin control example over the Iinternet (i.e. turning on/off a light, a relay, etc)
  thing["led"] << digitalPin(LED_BUILTIN);

  // resource output example (i.e. reading a sensor value, a variable, etc)
  thing["time"] >> [&](pson& out){
      out = thing.getNB().getTime();
  };

  // more details at http://docs.thinger.io/arduino/
}

void loop() {
  thing.handle();
}
```

{% endtab %}

{% tab title="arduino\_secrets.h" %}

```cpp
#define USERNAME "your_user_name"
#define DEVICE_ID "your_device_id"
#define DEVICE_CREDENTIAL "your_device_credential"

#define PIN_NUMBER ""

#define GPRS_APN "your_apn_name"
#define GPRS_LOGIN "your_gprs_login"
#define GPRS_PASSWORD "your_gprs_password"
```

{% endtab %}
{% endtabs %}


# OTHER DEVICES

## TI Launchpad CC3200

The TI CC3200 was the natural evolution of the CC3000/CC3100 chip. Instead of providing a single chip for managing the WiFi communications, it also integrates a powerful programmable MCU, in the same way the ESP8266 does. So you can program your code and have WiFi capabilities right out of the box. The easiest way to start with this chip is by using the TI CC3200 Launchpad, which integrates the chip, as well as some sensors, LEDs, and the USB-to-serial so you can program the board right from the USB.

![](/files/-LpXt-jvI5q1YvfW9ohg)

To program this board, it is possible to use an Arduino-based IDE that is called [Energia](http://energia.nu/download/). So, download and install it before continuing. Check out also the required instructions for programming the CC3200, as you need to make a short between two pins.

Once the environment is available and you can program the board examples, then you should install the Thinger Arduino Client Libraries also in the Energia IDE. Check the [Manual Import](/arduino#installation-manual-import) for reference.

This example will allow connecting your device to the cloud platform in a few lines. Just replace the sketch **username**, **deviceId**, and **deviceCredential** with your own credentials, and the **wifi\_ssid**, **wifi\_password** with the WiFi credentials.

```cpp
#include <WiFi.h>
#include <ThingerWifi.h>

ThingerWifi thing("username", "deviceId", "deviceCredential");

void setup() {
    thing.add_wifi("wifi_ssid", "wifi_password");
}

void loop() {
  thing.handle();
}
```

Want to add some device resources (LED, sensors, etc.) to interact with them from the Internet? Check the [Add Resources](/arduino#coding-adding-resources) section.

## SeeedStudio LinkIT ONE

The LinkIt ONE development board is an open-source, high-performance, Arduino footprint board for prototyping Internet of Things (IoT) devices. The list of capabilities is truly staggering. The board is based around a powerful ARM7 EJ-S™ processor, but has onboard GSM, GPRS, Wi-Fi, Bluetooth BR/EDR/BLE, GPS, Audio codec, and SD card connector (and more!).

The board is programmed through the Arduino IDE with a plugin from MediaTek. Check the [MediaTek LinkIt™ ONE SDK for Arduino](http://labs.mediatek.com/site/global/developer_tools/mediatek_linkit/sdk_intro/index.gsp)

![](/files/-LpXt-jzAyGY6gRmVd3I)

> Pin-out similar to Arduino boards, including Digital I/O, Analog I/O, PWM, I2C, SPI, UART and power supply, compatible with Grove 4-pin interface. Although the board is made by Seeed, the chipset is made by MediaTek, a large Chinese company who are already offering significant SDK / support resources.

### WIFI Connection

This example will allow connecting your device to the cloud platform in a few lines. Just replace the sketch **username**, **deviceId**, and **deviceCredential** with your own credentials, and the **wifi\_ssid**, **wifi\_password** with the WiFi credentials.

{% tabs %}
{% tab title="" %}

```cpp
#include <ThingerLinkItOneWifi.h>

ThingerLinkItOneWifi thing("user_id", "device_id", "device_credential");

void setup() {
  thing.add_wifi("SSID", "SSID_Password");

  pinMode(2, OUTPUT);

  // pin control example (i.e. turning on/off a light, a relay, etc)
  thing["led"] << digitalPin(2);

  // resource output example (i.e. reading a sensor value, a variable, etc)
  thing["millis"] >> outputValue(millis());

  // more details at http://docs.thinger.io/arduino/
}

void loop() {
  thing.handle();
}
```

{% endtab %}
{% endtabs %}

### GPRS Connection

It is also possible to connect the board by using the GPRS connection, so it does not require a WiFi connection for communication, improving the board's mobility. Note that the current version of the LinkIt ONE does not support a SIM with PIN, so remove the PIN before its use. In this case, it is only necessary to provide the **APN**, **username**, and **password** provided by your network operator. But you can skip this process if your SIM already integrates this information.

{% tabs %}
{% tab title="LinkItOneGRPS.ino" %}

```cpp
#include <ThingerLinkItOneGPRS.h>

#define USERNAME "your_user_name"
#define DEVICE_ID "your_device_id"
#define DEVICE_CREDENTIAL "your_device_credential"

ThingerLinkItOneGPRS thing(USERNAME, DEVICE_ID, DEVICE_CREDENTIAL);

void setup() {
  // SIM unlock using a PIN is not supported by LinkItOne. Remove PIN from SIM before use.

  // Set your GPRS APN if it is not provided automatically by your SIM
  //thing.set_apn("orangeworld", "orange", "orange");

  pinMode(2, OUTPUT);

  // pin control example (i.e. turning on/off a light, a relay, etc)
  thing["led"] << digitalPin(2);

  // resource output example (i.e. reading a sensor value, a variable, etc)
  thing["millis"] >> outputValue(millis());

  // more details at http://docs.thinger.io/arduino/
}

void loop() {
  thing.handle();
}
```

{% endtab %}
{% endtabs %}


# CODING GUIDE

## Sketch Overview

Almost all Arduino Sketches share a common structure, consisting of a `setup` method and a `loop` method. This structure remains unchanged when integrating with Thinger.io. However, it is important to understand where device resources should be defined and where interaction with external services is possible. In general terms, any device resource (such as an LED, relay, sensor, or servo) must be defined inside the `setup()` method. Similar to initializing devices, setting the input/output direction of a digital pin, or initializing the Serial port speed, resources also need to be initialized here. This essentially involves configuring which values or resources are to be exposed over the Internet.

The `loop()` is the designated place to consistently call the `thing.handle()` method, allowing the Thinger libraries to manage the platform connection. This method also serves as the location for calling endpoints or streaming real-time data to a dashboard. It is important to avoid adding any delays within the `loop()` unless specific actions, such as working with deep sleep modes on a device, are being implemented. Any other delay will negatively impact Thinger's proper functioning on the device. Additionally, reading a sensor value in every loop iteration can be detrimental if the sensor requires significant time to complete a read, as this will lead to a device with noticeable lag when responding to commands.

```cpp
// add required headers according to the device
#include <ThingerESP32.h>

// initialize Thinger instance (type can change depending on the device)
ThingerESP32 thing("username", "deviceId", "deviceCredential");

void setup() {
    // initialize sensors and pins

    // initialize wifi (see examples for the device)

    // add resources here, like sensors, lights, etc.
}

void loop() {
  // call always the thing handled in the loop and avoid any delay here
  thing.handle(); 
  // here it is possible to call endpoints
  // and also it is possible to stream resources
}
```

## Setting Credentials

All devices connected to the platform require authentication against the server. When a device is created [in the console](https://link_to_console/), a new device identifier is generated and device credentials are set. Therefore, these credentials must also be configured in the Arduino code to allow the device to be recognized and associated with the account. This is typically done during the initialization of the Thinger instance in the code, specifically when the `thing` instance is defined. The `username`, `deviceId`, and `deviceCredential` should be replaced with the values registered in the cloud. It is worth noting that credentials used to be defined inside `arduino_secrets.h`.

```cpp
 ThingerESP32 thing("username", "deviceId", "deviceCredential");
```

## Adding Resources

In the Thinger.io platform, each device can define several resources. A resource can be considered anything that can be sensed or activated. For example, typical resources include a sensor value like temperature or humidity, or a relay that controls a light. Therefore, the resources that need to be exposed over the Internet should be defined.

All resources must be defined inside the `setup()` method of the Arduino sketch. This way, the resources are configured at the beginning, but can be accessed later as necessary.

There are three different types of resources, which are explained in the following sections.

### Input Resources

If control or actuation of an IoT device is required, an input resource must be defined. An input resource serves as a source of information for the device. Examples include resources for controlling a light or relay, adjusting a servo position, or modifying a device parameter.

To control or actuate an IoT device, it is necessary to define an input resource. An input resource is anything that can provide information to a device. Examples include a resource for turning a light or a relay on and off, changing a servo position, or adjusting a device parameter.

To define an input resource it the operator is used `<<` , pointing to the resource name, and it uses a C++11 Lambda function to define the function.

The input resource function takes one parameter of type `pson` that is a variable type that can contain booleans, numbers, floats, strings, or even structured information like in a JSON document.

The following subsections will show how to define different input resources for typical use cases.

#### ***Turn on/off a LED, a relay, etc***

This kind of resource only requires an on/off state, so it can be enabled or disabled as required. As the `pson` type can hold multiple data types, we can think that the `pson` parameter of the input function is like a boolean.

So, inside the `setup` function, place a resource called `led` (but use any other name), of input type (using the operator `<<`), that takes a reference to a `pson` parameter. This example will turn on/off the digital pin 10 using a ternary operator over the `in` parameter.

```cpp
thing["led"] << [](pson& in){
  digitalWrite(10, in ? HIGH : LOW);
};
```

#### ***Modify a servo position***

Modifying a servo position is quite similar to turning on/off a LED. In this case, however, it is necessary to use an integer value. As the `pson` type can hold multiple data types, we can still use the `pson` type as an integer value.

```cpp
thing["servo"] << [](pson& in){
    myServo.write(in);
};
```

#### ***Update sketch variables***

Input resources can also be used to update sketch variables, allowing for dynamic changes in device behavior. This is quite useful in situations where it is desirable to temporarily disable an alarm, change reporting intervals, update a hysteresis value, and so on. In this way, additional resources can be defined to change variables.

```cpp
float hysteresis = 0; // defined as a global variable
thing["hysteresis"] << [](pson& in){
    hysteresis = in;
};
```

#### ***Pass multiple data***

The `pson` data type can hold not only different data types, but also is fully compatible with JSON documents. The PSON data type can be utilized to receive multiple values simultaneously. This example will receive two different floats that are stored with the `lat` and `lon` keys.

```cpp
thing["location"] << [](pson& in){
    float lat = in["lat"];
    float lon = in["lon"];
};
```

#### ***Show Input Resources State in Dashboards and API***

The Dashboards or API work in a way that when opening them, they query the associated resources to correctly print their current state, i.e., the switch is on or off. In this way, when the API or a Dashboard is open, each associated input resource is called, receiving empty data in the call, as there is no intention to control the resource (the pson input will be empty).

So, how do the Dashboards or the API know what is the current state of an input resource? The resource must set its current state in the input parameter, if it is empty, or use the input value if there is one. This way, we can obtain three different things: query the current resource state (without modifying it), modify the current resource state, and obtain the expected input on the resource (this is how the API explorer on the device works).

Therefore, a correct input resource definition that actually allows to display of the current state of the resource in a Dashboard or in the API, will be like this example code.

```cpp
thing["resource"] << [](pson& in){
    if(in.is_empty()){
        in = currentState;
    }
    else{
        currentState = in;
    }
};
```

This sample code basically returns the current state (like a boolean, a number, etc) if there is no input control, or uses the incoming data to update the current state. This can be easily adapted for controlling a LED, while showing its current state in the dashboard once opened or updated.

```cpp
thing["led"] << [](pson& in){
    if(in.is_empty()){
        in = (bool) digitalRead(pin);
    }
    else{
        digitalWrite(pin, in ? HIGH : LOW);
    }
};
```

Note: For controlling a digital pin, just use the method explained in the Easier Resources Section.

### Output Resources

Output resources should be used in general when needed to sense or read a sensor value, like temperature, humidity, etc. So the output resources are quite useful for extracting information from the device.

To define an output resource it is used the operator `>>` to point to the resource name, and it uses a C++11 Lambda function to define the output function.

The output resource function takes one parameter of `pson` type that is a variable type that can contain booleans, numbers, floats, strings, or even structured information like in a JSON document.

The following subsections will show how to define different output resources for typical use cases.

#### ***Read a sensor value***

Defining an output resource is quite similar to defining an input resource, but in this case it is used the operator `>>`. In the callback function, we can fill the output value with any value we want, like in this case, the output from a sensor reading.

```cpp
thing["temperature"] >> [](pson& out){
      out = dht.readTemperature();
};
```

#### ***Read multiple datasets***

In the same way, the input resources can receive multiple values at the same time, the output resources can also provide multiple data. This is an example of providing both latitude and longitude from a GPS.

```cpp
thing["location"] >> [](pson& out){
      out["lat"] = gps.getLatitude();
      out["lon"] = gps.getLongitude();
};
```

#### ***Read sketch variables***

If the sketch cannot provide a single sensor reading, as it is doing some kind of data integration, an output resource can also be used for reading the sketch variables, where the computed result is updated frequently.

```cpp
float yaw = 0; // defined as a global variable
thing["yaw"] >> [](pson& out){
      out = yaw;
};
```

### Input/Output Resources

The last resource type is a resource that not only takes an input or an output, but takes both parameters. This is particularly useful when an output is dependent on an input, such as when a changing reference value needs to be provided to a sensor.&#x20;

These kinds of resources are defined with the operator `=`. In this case, the function takes two different `pson` parameters. One for input data and another for output data. This example provides an altitude reading using the BMP180 Sensor. It takes the reference altitude as input and provides the current altitude as output.

```cpp
thing["altitude"] = [](pson& in, pson& out){
    out = bmp.readAltitude(in);
};
```

Also, define more complex input/output resources that take several input values, to provide multiple output values, like in this example that takes `value1` and `value2` to provide the `sum` and `mult` values.

```cpp
thing["in_out"] = [](pson& in, pson& out){
    out["sum"] = (long)in["value1"] + (long)in["value2"];
    out["mult"] = (long)in["value1"] * (long)in["value2"];
};
```

### Resources without parameters

It is also possible to define resources that do not require any input or generate any output. These are like callbacks that can be executed as needed, for example, to reboot the device or perform a required action.

In this case, the resource is defined as a function without any input or output parameters.

```cpp
thing["resource"] = [](){
    // write here the execution code
};
```

## Easier Resources

The client library also includes some useful syntactic sugar definitions for declaring resources more easily without having to think about input or output resources. These syntactic sugar features are macros that are expanded automatically to define the resources in the standard way.

The advantage of using this kind of definition is that resources will be able to handle the state when queried from the API. For example, if a digital pin is enabled or disabled, its current state will be visible in both the API explorer and a dashboard.

### Control a digital pin

This kind of resource will allow defining a resource for declaring control over a digital pin, so it is possible to alternate over on/off states, which can be used for controlling a LED, a relay, a light, etc.

It is required to define the digital pin as OUTPUT in the setup code, or the resource will not work properly.

```cpp
thing["relay"] << digitalPin(PIN_NUMBER);
thing["relay"] << invertedDigitalPin(PIN_NUMBER);
```

### Define Output Resources

This kind of resource will allow defining a resource for declaring a read-only resource, like a value obtained from a sensor, or a given variable in our sketch.

In this example, we are defining a resource that exposes a sensor reading, like the DHT11 sensor temperature.

```cpp
thing["temperature"] >> outputValue(dht.readTemperature());
```

But it is also possible to define an output resource for any global variable in our sketch.

```cpp
thing["variable"] >> outputValue(myVar);
```

### Modify Sketch Variables

Our sketch usually defines some parameters or variables that are used inside the loop code. These kinds of resources are normally used to handle or control the execution behaviour. With these kinds of resources, we can modify any parameter we want to expose, like a float, an integer, a boolean, etc.

In this example, it is possible to remotely modify the boolean `sdLogging` variable defined as a global variable.

```cpp
thing["logging"] << inputValue(sdLogging);
```

It is also possible to define a callback function to know when the variable has changed, so we can perform any other action. For this use case, define the resource to have some code executed when the `hysteresisVar` changes.

```cpp
thing["hysteresis"] << inputValue(hysteresisVar, {
    // execute some code when the value changes
    Serial.println("Hystereis changed to: ");
    Serial.print(hysteresisVar);
});
```

### Servo control

It is also possible to define a resource for controlling a servo instance. This way, the defined resource will automatically handle the servo instance, reading its current position, or changing to a new one according to the API interactions.

To define a servo resource, just define and initialize the servo as usual, and then use the declared instance in the resource definition.

```cpp
thing["servo"] << servo(myServoInstance);
```

## Communication between devices

In Thinger.io, it is possible that devices can communicate between them. There are two possibilities here. One is the communication between devices from the same account, and the other is the communication between devices from different accounts. Here we describe the two different approaches:

### Same account communication

For this use case, in which both devices belong to the same user account, there is a specific method that allows devices to communicate with other devices with low latency and simple codification. This communication can contain data or not (it is possible to make an empty call). Let's suppose that we have two devices: `deviceA` and `deviceB`, and we want to communicate both calls from `deviceB`to a specific `deviceA` input resource. We can use "thing.call\_device(,);":

The `deviceA` defines a resource:

```cpp
setup(){
    thing[“resource_On_A”] = [](){
        Serial.println("Someone is calling me!");
    };
}
```

`deviceB` can easily call this resource and send data to it:

```cpp
loop(){
    thing.handle();
    // be sure to call it at an appropriate rate
    thing.call_device("deviceA", "resource_On_A");
}
```

On the other hand, if we want to send the message with a `pson` payload in order to share data between devices. In this case, the `deviceA` will need to define a resource with some expected input

```cpp
setup(){
    thing[“resourceOnA”] << [](pson& in){
        int val1 = in["anyValue1"];
        float val2 = in["anyValue2"];
        // Work with the updated parameters here
    };
}
```

Then `deviceB` can call this method, providing the appropriate input by defining a `pson` type that is filled with the same keys used on `resourceOnA`:

```cpp
loop(){
    thing.handle();
    // be sure to call it at an appropriate rate
    pson data;
    data["anyValue1"] = 3;
    data["anyValue2"] = 43.1;
    thing.call_device("deviceA", "resourceOnA", data);
}
```

`deviceB` can also call this method by providing the information from a defined resource that generates the information. In this case, the call is similar to the previous example, but using the resource as the data source.

```cpp
setup(){
    thing["resourceName"] >> [](pson& out){
        out["anyValue1"] = 3;
        out["anyValue2"] = 43.1;
    };
}

loop(){
    thing.handle();
    // be sure to call it at an appropriate rate
    thing.call_device("deviceA", "resourceOnA", thing["resourceName"]);
}
```

### Communication between different accounts

If we want to communicate devices from different accounts, we can do that by calling an endpoint of type `Thinger.io Device Call`. Just register an endpoint of this type in the console:

<figure><img src="/files/rmtgt1oZhTwxRi67EnHu" alt=""><figcaption></figcaption></figure>

In this case, it is required to define different parameters in the endpoint:

* Endpoint Identifier: The endpoint ID that the device will use for calling the device.
* Endpoint Name: The name of the endpoint, which does not need to equal the "Endpoint Identifier". The endpoint will show in the list of endpoints with this name.
* Endpoint Description: This is an optional field. It is useful to remember what the endpoint consists of.
* Device Owner: The device owner's username.
* Device Identifier: The device ID of the other account.
* Resource Name: The resource on the device to be called.
* Device Access Token: A device token generated in the other account for granting external access to the device.

Once defined, the device will be able to call the endpoint, as explained in the following section. It basically consists of calling the `call_endpoint`method.

```cpp
thing.call_endpoint("DeviceACall");
```

## Using Endpoints

In Thinger.io, an endpoint is defined as some kind of external resource that can be accessed by the device. With the endpoints feature, devices can easily send emails, SMS, push data to external Web Services, interact with IFTTT, and perform any general action that can be made by using WebHooks (Calling HTTP/HTTPS URLs).

Calling an endpoint is so easy from the Arduino sketch, as it only requires calling the `call_endpoint` method over the `thing` variable.

```cpp
thing.call_endpoint("endpoint_id");
```

Endpoints can be called from the device code in order to execute any action, like sending a predefined email. The call can also include some reading values, which is especially useful to send the device's data to third-party services.

{% hint style="warning" %}
**Extra attention must be taken while calling resources, in order to avoid uncontrolled recurrency. If the interval is too short, the server will lock the device connection**
{% endhint %}

### Calling Endpoints

In this case, we will see a simple example to send an email alert based on a temperature value. For this example, we have configured an email endpoint  `high_temp_email` that contains some warning text about the temperature. For this case, we do not want to check the temperature every millisecond, so we are introducing some variables to control the sensing and warning frequency. In this example, the temperature is checked every hour, and if it is above 30ºC, it will call the endpoint called `high_temp_email` which will send us an email with the predefined text. It is important here **not to add delays** inside the loop method, as it will prevent the required execution of the `thing.handle()` method, so we are using a non-blocking delay based on the `millis()` function.

```cpp
unsigned long lastCheck = 0;

loop(){
    thing.handle(); // required thing handle
   
    unsigned long currentTs = millis();
    
    if(currentTs-lastCheck>=60*60*1000){
        lastCheck = currentTs;
        if(dht.readTemperature()>30){
            thing.call_endpoint("high_temp_email");
        }
    }
}
```

Endpoints offer significant creative flexibility, allowing for automation based on various events. For example, endpoints can be triggered by a presence sensor detection, a humidity sensor reporting no water in plants, or a device's unexpected location. Furthermore, endpoints can be integrated with services like IFTTT (If This Then That) to interact with multiple third-party platforms.

### Sending Data to Endpoints

Sending data to an endpoint (in JSON format) is also quite easy. We also need to call the `call_endpoint` method, but in this case, adding some information based on the `pson` data format, which will be automatically converted to JSON. For example, if we want to report data to a third-party service like Keen.io, we can create such kind of endpoint in the console. Once configured, we can call the endpoint with our readings, for example, with humidity and temperature values from a DHT sensor.

```cpp
// be careful of sending data at an appropriate rate!
pson data;
data["temperature"] = dht.readTemperature();
data["humidity"] = dht.readHumidity();
thing.call_endpoint("keen_endpoint", data);
```

Data can also be sent based on a defined resource; for instance, if a resource already provides temperature and humidity. It is possible to reuse this definition for sending the same data to the endpoint, without having to redefine the sensor reading:

```cpp
setup(){
    // defined resource in the setup for reading a sensor value
    thing["data"] >> (pson& out){
        out["temperature"] = dht.readTemperature();
        out["humidity"] = dht.readHumidity();
    }
}

loop(){
    // be careful of sending data at an appropriate rate!
    thing.call_endpoint("endpoint", thing["data"]);
}
```

### Email Type Endpoint Example

This is a simple example, applied to an email-type endpoint, with a custom body

```cpp
setup()
{
 thing["temperature"] >> outputValue(analogRead(0));
}
loop()
{
 if(actualLevel>UpperLevel && endpointUpperFlag)
   {
    thing.call_endpoint("endpoint_id",thing["temperature"]);
    endpointUpperFlag=0;
   }
}
```

Notice that there are a variable that limitates the run of this "if" just once, its important to define any condition or method to warrantee that this kind of enpoint call is executed just once (or at appropiate rate), because it can get a lot of emails generated by the microcontroller across thinger.io platform.

At endpoint configuration, in the custom body email, we must add double brackets "{{\<variable\_key>}}" to invoke the variable sent by the microcontroller.

`"The room temperature is {{temperature}}%"`

And receiving an email with the text:

`The the room temperature is 80.34%`

## Using Data Buckets

Thinger.io provides an easy-to-use and extremely scalable virtual storage system that allows for storing long-term device data from device output resources. This information can be used to be plotted in dashboards, or can be exported in different formats for offline processing or a third-party Data Analysis process.

### From Device Resource

It is not necessary to implement specific codification in device firmware to start storing data in a data bucket. Data buckets will retrieve information from output resources; simply configure the Data Bucket to set the source and sampling interval as explained in the [Console documentation.](http://docs.thinger.io/console/#data-buckets)&#x20;

### Streaming Resource Data

To enable the device to stream information only when required, such as upon event detection, the "Update by Device" option can be used during bucket configuration. This utilizes streaming resource instructions. For instance, using a previously defined Output Resource named "location," this could be achieved with this code snippet:

```cpp
 void loop() {
  thing.handle();
  // use the logic here to determine when to stream/record the resource.
  if(requires_recording){
      thing.stream("location");
  }
}
```

### From Write Call

This option will allow setting the bucket in a state that it will not register any information by default, but it will just wait for writing calls, both from the Arduino library using the write\_bucket method, as shown here, or calling the REST API directly, as done with Sigfox. This feature opens the option to register information in the same bucket from different devices, or store information from devices that are not connected permanently with the server, that are in sleep mode, or use a different technology like Sigfox.

Here is an example of an ESP8266 device writing information to a bucket using the write\_bucket function:

```cpp
void setup() {
  // define the resource with temperature and humidity
  thing["door_status"] >> [](pson &out){ 
    out["OPEN"] = (bool)digitalRead(SENSOR_PIN);
  };
}

void loop() { 
  // handle connection
  thing.handle();

  if(digitalRead(SENSOR_PIN)!=previous_status){
    // write to bucket BucketId when the door changes its status
    thing.write_bucket("BucketId", "door_status");
  }
  previous_status=digitalRead(SENSOR_PIN);
}
```

Note that this instruction will retrieve the \["door\_status"] resource PSON, so it is also possible to call this function by attaching a custom PSON:

```cpp
void loop(){
  // handle connection
  thing.handle();

  if(digitalRead(SENSOR_PIN)!=previous_status){
    // write to bucket BucketId when the door changes its status
    thing.write_bucket("BucketId", "door_status");
  }
  previous_status=digitalRead(SENSOR_PIN);
}
```

## Streaming Resources

In Thinger.io, WebSocket connections can be opened against devices to receive real-time sensor values, events, or other information. WebSockets are primarily utilized in the Console's Dashboard feature for streaming resources at a fixed, configurable interval. This functionality is available by default when an output resource is defined. However, to transmit information precisely when required, such as upon detection of movement or presence, a specific code, similar to calling an endpoint, must be programmed.

In such cases, it is necessary to detect when to stream the event, for example, when an accelerometer value exceeds a threshold, a presence sensor makes a detection, or the compass heading changes. The determination of when to stream new data is left to the implementer. Streaming resources also require that another endpoint is connected, listening for them (i.e., from a WebSocket connection), so if there is no one listening for this data, the data is not sent. This is handled automatically by the client library and the server, therefore, it is safe to stream data always, as the device will transmit the information only when there is a destination.

This example will report the compass heading in real-time if the heading value changes by more than 1 degree.

![](/files/ILegv6gzi18FLWWL9NLW)

```cpp
void setup(){
  thing["heading"] >> [](pson& out){     
    out = getHeading();
  };
}

float previousHeading = 0;
void loop() {
  thing.handle();
  float currentHeading = getHeading();
  if(abs(currentHeading-previousHeading)>=1.0f){
    thing.stream(thing["heading"]);
    previousHeading=currentHeading;
  }
}
```

## Enabling Debug Output

Thinger.io library provides extensive logging of its activities, which is especially useful when one needs to troubleshoot authentication and Wi-Fi connectivity issues. Include this definition in the sketch, but *make sure it comes first, before any other includes* (it was reported to cause crashes on some boards otherwise):

```
#define THINGER_SERIAL_DEBUG

// the rest of the sketch goes here
```

It is also necessary to enable `Serial` communication, as all the debugging information is displayed over the Serial. So, enable it in the sketch in the setup method.

```
void setup() {
  Serial.begin(115200);
}
```

## Listen for Connection State

Sometimes it can be useful for an application to know the current connection status with Thinger.io, i.e., to notify disconnected status with a LED, request device configuration after authentication, or any other internal control flow according to connection state.

In order to create a listener for such connection states, it can be done with the `set_state_listener` function in the `setup()` method. For example, it is possible to define a listener that will receive the different connection states for the network, server, or authentication:&#x20;

```cpp
void setup(){
    
    // the setup code here..
    
    thing.set_state_listener([&](ThingerClient::THINGER_STATE state){
        switch(state){
            case ThingerClient::NETWORK_CONNECTING:
                break;
            case ThingerClient::NETWORK_CONNECTED:
                break;
            case ThingerClient::NETWORK_CONNECT_ERROR:
                break;
            case ThingerClient::SOCKET_CONNECTING:
                break;
            case ThingerClient::SOCKET_CONNECTED:
                break;
            case ThingerClient::SOCKET_CONNECTION_ERROR:
                break;
            case ThingerClient::SOCKET_DISCONNECTED:
                break;
            case ThingerClient::SOCKET_ERROR:
                break;
            case ThingerClient::SOCKET_TIMEOUT:
                break;
            case ThingerClient::THINGER_AUTHENTICATING:
                break;
            case ThingerClient::THINGER_AUTHENTICATED:
                break;
            case ThingerClient::THINGER_AUTH_FAILED:
                break;
            case ThingerClient::THINGER_STOP_REQUEST:
                break;
        }
      });
  }
```

In this table it is detailed the different values and their descriptions.

| State                     | Description                                                                                                               |
| ------------------------- | ------------------------------------------------------------------------------------------------------------------------- |
| NETWORK\_CONNECTING       | The underlying network is being connected, i.e., initializing ethernet, wifi, gsm, etc.                                   |
| NETWORK\_CONNECTED        | The network is connected and ready to be used.                                                                            |
| NETWORK\_CONNECT\_ERROR   | The network cannot be initialized, i.e., bad WiFi credentials, cannot reach GSM, etc.                                     |
| SOCKET\_CONNECTING        | After the network is connected, it means that the client is connecting to Thinger.io servers.                             |
| SOCKET\_CONNECTED         | The socket has been connected to the server.                                                                              |
| SOCKET\_CONNECTION\_ERROR | The socket cannot be connected to Thinger.io. If often means a bad Internet connection.                                   |
| SOCKET\_DISCONNECTED      | The connection with Thinger.io has been closed.                                                                           |
| SOCKET\_ERROR             | An error happened with the socket, i.e, bad read or write, which will cause a disconnect.                                 |
| SOCKET\_TIMEOUT           | The socket timed out while reading or writing, so the connection will be closed.                                          |
| THINGER\_AUTHENTICATING   | Thinger.io client is connected and it is being authenticated.                                                             |
| THINGER\_AUTHENTICATED    | Thinger.io client is connected and authenticated, so it can use Thinger.io, i.e., call an endpoint, read a property, etc. |
| THINGER\_AUTH\_FAILED     | Thinger.io client authentication failed. Please, review the server, username, device id, and password.                    |
| THINGER\_STOP\_REQUEST    | Thinger.io client was requested to stop, i.e., from the source code, or by the server.                                    |


# TROUBLESHOOTING

This section explains how to identify and solve connection issues

## Connection Troubleshooting

Several scenarios may lead to the malfunctioning of the software client, thereby impeding or destabilizing its connection with the IoT platform. However, Thinger.io's software client is equipped with various tools to identify and prevent such issues.

### Enabling DEBUG

If a newly programmed device is showing problems to be "online" on Thinger.io Server or is even being locked, the debug function will help to identify the issue. Include the following definition in the sketch, but make sure it comes first, **before any other includes**. When using the Arduino framework, it is necessary to enable `Serial` communication, as all the debugging information is displayed over Serial.

```cpp
#define THINGER_SERIAL_DEBUG

#include "Thinger.h" //use the proper thinger.io library for each processor

void setup() {
  Serial.begin(115200);
}
```

When this command is incorporated, the program will display all communication traces on the device's Serial port. The following section demonstrates a successful connection for an ESP8266 device.

```
[NETWORK] Connecting to network my_wifi_SSID
[NETWORK] Connected to WiFi!
[NETWORK] Getting IP Address...
[NETWORK] Got IP Address: 192.168.1.61
[NETWORK] Connected!
[_SOCKET] Connecting to iot.thinger.io:25202...
[_SOCKET] Using secure TLS/SSL connection: yes
[SSL/TLS] Warning: use #define _VALIDATE_SSL_CERTIFICATE_ if certificate validation is required
[_SOCKET] Connected!
[THINGER] Authenticating. User: my_user_name Device: my_device_ID
[THINGER] Writing bytes: 29 [OK]
[THINGER] Authenticated
```

With the debug traces, is it possible to determine what is happening inside the sketch.

{% hint style="info" %}
Enable DEBUG traces for better troubleshooting. Don't forget to open the Serial port.
{% endhint %}

### Possible Errors

#### Can't connect to the network

* On WiFi, check the network credentials as WiFi SSID, PASSWORD.
* On Ethernet, ensure the cable is properly plugged into a network.
* For GSM, ensure the correct APN is set and the module is correctly powered. Check the network signal and antennas.

#### Can't connect to Thinger.io Server

* The device is trying to connect to the standard Thinger.io server. On private server instances, set the server address by using the definition `#define THINGER_SERVER "acme.thinger.io"` at the top of the code. [More details](/server/deployment/thinger.io-cloud-server#device-connection).

#### Error while connecting Thinger.io Server

* Disable the secure TLS/SSL connection by placing`#define _DISABLE_TLS_` at the top of the code. If it works, please review how to include proper TLS/SSL certificates on the device for a secure connection.
* Using MQTT, try to test a non-SSL connection through the 1883 port.

#### Authentication Error

* For private server instances, it is essential to ensure the device is pointing to the correct server by including the definition `#define THINGER_SERVER "acme.thinger.io"` at the top of the code. [More details.](/server/deployment/thinger.io-cloud-server#device-connection)
* Check that the username, Device ID and Device Credentials are the same as the platform configuration.

#### No Debug Traces

* Delete any delay() instructions.
* Verify sensors' connection and other libraries' behavior. Ensure the setup function is able to end.
* Identify and delete `while(1)` loops.

## Support / Find help

If a solution remains elusive even after following these instructions, additional resources have been established for assistance. Searching for "Thinger.io" in a browser:

<figure><img src="/files/44aHUBLdfKUpSd3Z4PWD" alt=""><figcaption></figcaption></figure>

### **Community Discussion Forum**

[Community Discussion Forum](https://community.thinger.io) is a forum designed to provide developers a platform to exchange ideas, share their projects, and seek advice among fellow Thinger.io users. It is currently the best avenue for quick and free assistance with development issues, as many queries have likely been previously asked and resolved by other developers. So, the first step should be to use the search bar to locate a similar post:

<figure><img src="/files/oC0FNL1ltrgQovZGNUXK" alt=""><figcaption></figcaption></figure>

Optimizing the use of this resource involves browsing for existing topics related to a query before starting a new one. However, if creating a new topic is necessary, please consider:

* It is preferable to write in **English**, as it broadens the pool of people who can understand and potentially provide diverse opinions or solutions to the problem.&#x20;
* Choose an engaging and descriptive title and select the most suitable category.&#x20;
* Compose a comprehensive description of the issue, which includes context, use case, or project objectives. This will help others grasp this situation.&#x20;
* Don't forget to supply all the necessary information to recreate the problem, such as: Source code, Libraries and PCB specifications, Compiler output and Debug connection trace, as well as Thinger.io configuration.&#x20;
* Remember to always be polite; other developers are under no obligation to assist, and any help received is a gesture of goodwill.
* If sharing source code, please use the **Preformatted text** option for optimal display.&#x20;

<figure><img src="/files/WnTLc75LMKXi1mc4Gbj9" alt=""><figcaption><p>Use preformatted text when sharing source code</p></figcaption></figure>

### **Extended Support**

For professional developers who require swift assistance with development or maintenance procedures, Thinger.io private instance licenses can be supplemented with an extended support service. Additionally, an SLA service is available for large infrastructure customers, which can be contracted separately. If interested, please contact us via [this webpage](https://thinger.io/contact-us/).


# REMOTE OTA

Over The Air Device Updates

Over-the-Air (OTA) Programming is a method that allows the remote sending of new firmware to IoT devices over the Internet, regardless of their location. This process works with the Thinger.io Cloud to deliver the new firmware binaries.

This feature enables us to keep devices updated with new security patches and code improvements quickly and on a large scale. It is an essential tool for the maintenance of IoT products, preventing the need to travel to the devices' locations.

The update process is performed using a **Visual Studio Code** extension that integrates with the Thinger.io cloud to upload new firmware binaries to the target device. This integration with the IDE streamlines the development process, allowing developers to compile and upload firmware as if the device were connected to the computer.

{% embed url="<https://youtu.be/AHqfI7yP1-o>" fullWidth="false" %}

## IDE Configuration

Before working with this tool, it is necessary to install and configure Visual Studio Code and the PlatformIO extension as explained in the [SDK SETUP](/sdk-setup#visual-studio-code) section of the documentation. Then, **install the Thinger.io VSCode extension** directly from the Extension Manager. Search for "Thinger.io" or [Checkout on Microsoft Marketplace](https://marketplace.visualstudio.com/items?itemName=thinger-io.thinger-io).&#x20;

<figure><img src="/files/952zxMnChcq9tVvnraaR" alt=""><figcaption><p>Visual Studio Code Thinger.io Extension for MCU OTA </p></figcaption></figure>

This extension will manage the OTA processes with several interesting features such as:

* OTA updates directly from the Internet over Thinger.io
* Device and Product switcher to search and select the target device(s) for the update
* Real-time device connection status and input/output indicators
* Compatibility with multiple PlatformIO configuration environments within a project
* Automatic build and upload over the Internet with a single click
* OTA with compression support for ESP8266, ESP32, and Arduino Portenta devices
* MD5 checksum verification for firmware binaries, both compressed and uncompressed

### Extension Configuration

Before running the OTA, it is necessary to configure the extension by accessing the VS Code Extensions Manager and selecting the Extensions Settings option.

<figure><img src="/files/nWZhoKio7BObW9cE29Dr" alt=""><figcaption><p>Thinger.io Visual Studio Code Extension for OTA updates</p></figcaption></figure>

* **Thinger.io Host:** The URL of the Thinger.io instance being used should be placed here (if using a private instance, otherwise by default it will be `backend.thinger.io`).
* **Thinger.io Port:** Specifies the connection port (443 by default).
* **Thinger.io Secure:** Verify SSL/TLS connection (enabled by default).
* **Thinger.io SSL:** Use SSL/TLS encryption (enabled by default).
* **Thinger.io Token:** Place here a Thinger.io Access Token with these permissions:
  * ListDevices
  * AccessDeviceResources
  * ReadDeviceStatistics
  * ListProducts

<figure><img src="/files/mXCoyvpMeVj3Ykon2nGU" alt=""><figcaption><p>Example Thinger.io Token Configuration for Visual Studio Code Extension</p></figcaption></figure>

## Firmware Upload via OTA

The OTA feature is implemented on the default [Thinger.io Arduino IOTMP client libraries](https://github.com/thinger-io/Arduino-Library) required for connectivity with the Thinger.io cloud.

The boards that support OTA updates over the Visual Studio Code extension are:

* Espressif ESP8266
* Espressif ESP32
* Arduino Nano 33 IOT
* Arduino MKR WiFi 1010
* Arduino RPI2040 Connect
* Arduino MKR NB 1500
* Arduino Portenta
* Arduino Opta

The general requirements to start working with OTA updates for a specific device are:

1. Have a PlatformIO project on Visual Studio Code for the target device. More details [here](https://docs.thinger.io/sdk-setup/visual-studio-code#starting-a-project).
2. A basic Thinger.io firmware should be prepared for the device, ensuring its ability to connect to the cloud.
3. Modify the sketch to include the OTA functionality. More details in each specific device section.
4. Flash the initial firmware over a serial communication port on the computer.
5. The initial firmware can then be flashed over a serial communication port on the computer.

Subsequently, the Thinger.io Visual Studio Code toolbar buttons can be used to select the device and flash new firmware. If the configuration is correct, it will be possible to begin working with the Thinger.io extension through the new elements added to the bottom toolbar. Two buttons are available to select the target device for flashing, and then to compile and upload new firmware binaries.

![Thinger.io Buttons on Visual Studio Code Toolbar](/files/-MkpvU1trqHmASbcya8Q)

**Select Target Device** 🚀

This button is a device selector. Upon activation, a prompt will appear for the selection of a target device from the user's Thinger.io account.

![Device Selector for OTA Updates over Visual Studio Code](/files/-Mkpz3b7yBHnlK1waXUO)

{% hint style="info" %}
When the target device is disconnected, the target device button background color will be red.
{% endhint %}

**Compile and Update ▶️**

This button compiles and uploads the code to the selected device. In the process, it will show a window with the OTA progress.&#x20;

![Compile and upload example for ESP8266](/files/-Mkq-ayxXfXpEHGiJxgS)

{% hint style="info" %}
To update the device over OTA, the first time, it must be flashed from a serial COM port.
{% endhint %}

**Clean Target Device** 🗑️

It is possible to clean the selected target device by accessing the Visual Studio command Palette with `Ctrl` + `Shift` + `P`, and searching for `Thinger.io` :

![Clean Target Device](/files/-MkqAmdlFmxRCWny9DI_)

### ESP32 OTA

To add OTA functionality for **ESP32,** it is only required to include the `ThingerESP32OTA.h` header and create an instance of it. A complete example for a basic firmware with OTA support:

{% tabs %}
{% tab title="main.cpp" %}

```cpp
#define THINGER_SERIAL_DEBUG

#include <ThingerESP32.h>
#include <ThingerESP32OTA.h>
#include "arduino_secrets.h"

ThingerESP32 thing(USERNAME, DEVICE_ID, DEVICE_CREDENTIAL);
ThingerESP32OTA ota(thing);

void setup() {
  // open serial for monitoring
  Serial.begin(115200);
  
  pinMode(16, OUTPUT);

  thing.add_wifi(SSID, SSID_PASSWORD);

  // digital pin control example (i.e. turning on/off a light, a relay, configuring a parameter, etc)
  thing["GPIO_16"] << digitalPin(16);

  // resource output example (i.e. reading a sensor value)
  thing["millis"] >> outputValue(millis());

  // more details at http://docs.thinger.io/arduino/
}

void loop() {
  thing.handle();
}
```

{% endtab %}

{% tab title="ardunio\_secrets.h" %}

```cpp
#define USERNAME "your_user_name"
#define DEVICE_ID "your_device_id"
#define DEVICE_CREDENTIAL "your_device_credential"

#define SSID "your_wifi_ssid"
#define SSID_PASSWORD "your_wifi_ssid_password"
```

{% endtab %}
{% endtabs %}

### ESP8266 OTA

To add OTA functionality for **ESP8266,** it is only required to include the `ThingerESP8266OTA.h` header and create an instance of it. A complete example for a basic firmware with OTA support:

{% tabs %}
{% tab title="main.cpp" %}

```cpp
#define THINGER_SERIAL_DEBUG

#include <ThingerESP8266.h>
#include <ThingerESP8266OTA.h>
#include "arduino_secrets.h"

ThingerESP8266 thing(USERNAME, DEVICE_ID, DEVICE_CREDENTIAL);
ThingerESP8266OTA ota(thing);

void setup() {
  // open serial for monitoring
  Serial.begin(115200);

  // set builtin led as output
  pinMode(LED_BUILTIN, OUTPUT);

  // add WiFi credentials
  thing.add_wifi(SSID, SSID_PASSWORD);

  // digital pin control example (i.e. turning on/off a light, a relay, configuring a parameter, etc)
  thing["led"] << digitalPin(LED_BUILTIN);

  // resource output example (i.e. reading a sensor value)
  thing["millis"] >> outputValue(millis());

  // more details at http://docs.thinger.io/arduino/
}

void loop() {
  thing.handle();
}
```

{% endtab %}

{% tab title="arduino\_secrets.h" %}

```cpp
#define USERNAME "your_user_name"
#define DEVICE_ID "your_device_id"
#define DEVICE_CREDENTIAL "your_device_credential"

#define SSID "your_wifi_ssid"
#define SSID_PASSWORD "your_wifi_ssid_password"
```

{% endtab %}
{% endtabs %}

### Arduino Portenta/Opta

To add OTA functionality for **Arduino Portenta and Opta devices,** it is required to include the `ThingerPortentaOTA.h` header and create an instance of it. A complete example for a basic firmware with OTA support:

{% tabs %}
{% tab title="main.cpp" %}

```cpp
#define THINGER_SERIAL_DEBUG

#include <ThingerMbed.h>
#include <ThingerPortentaOTA.h>
#include "arduino_secrets.h"

ThingerMbed thing(USERNAME, DEVICE_ID, DEVICE_CREDENTIAL);
ThingerPortentaOTA ota(thing);

void setup() {
    // configure LED_BUILTIN for output
    pinMode(LED_BUILTIN, OUTPUT);

    // open serial for debugging
    Serial.begin(115200);

    // configure wifi network
    thing.add_wifi(SSID, SSID_PASSWORD);

    // pin control example (i.e. turning on/off a light, a relay, etc)
    thing["led"] << digitalPin(LED_BUILTIN);

    // resource output example (i.e. reading a sensor value, a variable, etc)
    thing["millis"] >> outputValue(millis());

    // start thinger on its own task
    thing.start();

    // more details at http://docs.thinger.io/arduino/
}

void loop() {
    // use loop as in normal Arduino Sketch
    // use thing.lock() thing.unlock() when using/modifying variables exposed on thinger resources
    delay(1000);
}
```

{% endtab %}

{% tab title="arduino\_secrets.h" %}

```cpp
#define USERNAME "your_user_name"
#define DEVICE_ID "your_device_id"
#define DEVICE_CREDENTIAL "your_device_credential"

#define SSID "your_wifi_ssid"
#define SSID_PASSWORD "your_wifi_ssid_password"
```

{% endtab %}
{% endtabs %}

{% hint style="warning" %}
It may be required to update the bootloader of the Portenta/Opta device to enable OTA updates.&#x20;

* Update the Bootloader of the Arduino Portenta/Opta: Run the sketch 'STM32H747\_System\_manage\_Bootloader'
* Format the QSPI flash memory: Run the sketch 'QSPIFormat'.
* Run WiFiFirmwareUpdater&#x20;

![](/files/CIiXAs1xJnHFQY63HO6A)
{% endhint %}

### Arduino Nano 33 IOT OTA

To add OTA functionality for **Arduino Nano 33 IOT,** it is required to include the `ThingerWiFiNINAOTA.h` header and create an instance of it. A complete example for a basic firmware with OTA support:

{% tabs %}
{% tab title="main.cpp" %}

```cpp
#define THINGER_SERIAL_DEBUG

#include <ThingerWiFiNINA.h>
#include <ThingerWiFiNINAOTA.h>
#include "arduino_secrets.h"

ThingerWiFiNINA thing(USERNAME, DEVICE_ID, DEVICE_CREDENTIAL);
ThingerWiFiNINAOTA ota(thing);

void setup() {
  // configure LED_BUILTIN for output
  pinMode(LED_BUILTIN, OUTPUT);

  // open serial for debugging
  Serial.begin(115200);

  // configure wifi network
  thing.add_wifi(SSID, SSID_PASSWORD);

  // pin control example (i.e. turning on/off a light, a relay, etc)
  thing["led"] << digitalPin(LED_BUILTIN);

  // resource output example (i.e. reading a sensor value, a variable, etc)
  thing["millis"] >> outputValue(millis());
  
  // more details at http://docs.thinger.io/arduino/
}

void loop() {
  thing.handle();
}
```

{% endtab %}

{% tab title="arduino\_secrets.h" %}

```cpp
#define USERNAME "your_user_name"
#define DEVICE_ID "your_device_id"
#define DEVICE_CREDENTIAL "your_device_credential"

#define SSID "your_wifi_ssid"
#define SSID_PASSWORD "your_wifi_ssid_password"
```

{% endtab %}
{% endtabs %}

{% hint style="success" %}
Note: it is required to include `lib_archive = no` to `platformio.ini` configuration file.
{% endhint %}

{% code title="platformio.ini" %}

```bash
[env:nano_33_iot]
platform = atmelsam
board = nano_33_iot
framework = arduino
lib_archive = no
lib_deps = thinger.io
```

{% endcode %}

### Arduino MKR WiFi 1010 OTA

To add OTA functionality for Arduino **MKR WiFi 1010,** it is required to include the `ThingerWiFiNINAOTA.h` header and create an instance of it. A complete example for a basic firmware with OTA support:

{% tabs %}
{% tab title="main.cpp" %}

```cpp

#include <ThingerWiFiNINA.h>
#include <ThingerWiFiNINAOTA.h>
#include "arduino_secrets.h"

ThingerWiFiNINA thing(USERNAME, DEVICE_ID, DEVICE_CREDENTIAL);
ThingerWiFiNINAOTA ota(thing);

void setup() {
  // configure LED_BUILTIN for output
  pinMode(LED_BUILTIN, OUTPUT);

  // open serial for debugging
  Serial.begin(115200);

  // configure wifi network
  thing.add_wifi(SSID, SSID_PASSWORD);

  // pin control example (i.e. turning on/off a light, a relay, etc)
  thing["led"] << digitalPin(LED_BUILTIN);

  // resource output example (i.e. reading a sensor value, a variable, etc)
  thing["millis"] >> outputValue(millis());
  
  // more details at http://docs.thinger.io/arduino/
}

void loop() {
  thing.handle();
}
```

{% endtab %}

{% tab title="arduino\_secrets.h" %}

```cpp
#define DEVICE_ID "your_device_id"
#define DEVICE_CREDENTIAL "your_device_credential"

#define SSID "your_wifi_ssid"
#define SSID_PASSWORD "your_wifi_ssid_password"
```

{% endtab %}
{% endtabs %}

{% hint style="success" %}
Note: it is required to include `lib_archive = no` to `platformio.ini` configuration file.
{% endhint %}

{% code title="platformio.ini" %}

```bash
[env:mkrwifi1010]
platform = atmelsam
board = mkrwifi1010
framework = arduino
lib_archive = no
lib_deps = thinger.io
```

{% endcode %}

### Arduino RPI2040 Connect OTA

To add OTA functionality for **Arduino RPI2040 Connect,** it is only required to include the `ThingerMbedOTA.h` header and create an instance of it. A complete example for a basic firmware with OTA support:

{% tabs %}
{% tab title="main.cpp" %}

```cpp

#define THINGER_SERIAL_DEBUG

#include <ThingerMbed.h>
#include <ThingerMbedOTA.h>
#include "arduino_secrets.h"

ThingerMbed thing(USERNAME, DEVICE_ID, DEVICE_CREDENTIAL);
ThingerMbedOTA ota(thing);

void setup() {
  // open serial for debugging
  Serial.begin(115200);

  // configure LED_BUILTIN for output
  pinMode(LED_BUILTIN, OUTPUT);

  // configure wifi network
  thing.add_wifi(SSID, SSID_PASSWORD);

  // pin control example (i.e. turning on/off a light, a relay, etc)
  thing["led"] << digitalPin(LED_BUILTIN);

  // resource output example (i.e. reading a sensor value, a variable, etc)
  thing["millis"] >> outputValue(millis());

  // start thinger task
  thing.start();

  // more details at http://docs.thinger.io/arduino/
}

void loop() {
  // your code here
}
```

{% endtab %}

{% tab title="arduino\_secrets.h" %}

```cpp
#define DEVICE_ID "your_device_id"
#define DEVICE_CREDENTIAL "your_device_credential"

#define SSID "your_wifi_ssid"
#define SSID_PASSWORD "your_wifi_ssid_password"
```

{% endtab %}
{% endtabs %}

### Arduino MKR NB 1500 OTA

To add OTA functionality for **MKR NB 1500,** it is only required to include the `ThingerMKRNBOTA.h` header and create an instance of it. A complete example for a basic firmware with OTA support:

{% tabs %}
{% tab title="main.cpp" %}

```cpp
#define THINGER_SERIAL_DEBUG

#include <ThingerMKRNB.h>
#include <ThingerMKRNBOTA.h>
#include "arduino_secrets.h"

ThingerMKRNB thing(USERNAME, DEVICE_ID, DEVICE_CREDENTIAL);
// OTA seems not to work if no reset button is pressed
ThingerMKRNBOTA ota(thing);

void setup() {
  // enable serial for debugging
  Serial.begin(115200);

  // optional set pin number
  thing.set_pin(PIN_NUMBER);

  // set APN
  thing.set_apn(GPRS_APN, GPRS_LOGIN, GPRS_PASSWORD);

  // set builtin led to output
  pinMode(LED_BUILTIN, OUTPUT);

  // pin control example over the Internet (i.e. turning on/off a light, a relay, etc)
  thing["led"] << digitalPin(LED_BUILTIN);

  // resource output example (i.e. reading a sensor value, a variable, etc)
  thing["time"] >> [&](pson& out){
      out = thing.getNB().getTime();
  };

  // more details at http://docs.thinger.io/arduino/
}

void loop() {
  thing.handle();
}

```

{% endtab %}

{% tab title="arduino\_secrets.h" %}

```cpp
#define USERNAME "your_user_name"
#define DEVICE_ID "your_device_id"
#define DEVICE_CREDENTIAL "your_device_credential"

#define PIN_NUMBER ""

#define GPRS_APN "your_apn_name"
#define GPRS_LOGIN "your_gprs_login"
#define GPRS_PASSWORD "your_gprs_password"
```

{% endtab %}
{% endtabs %}

{% hint style="success" %}
Note: it is required to include `lib_archive = no` to `platformio.ini` configuration file.
{% endhint %}

{% code title="platformio.ini" %}

```bash
[env:mkrnb1500]
platform = atmelsam
board = mkrnb1500
framework = arduino
lib_archive = no
lib_deps = thinger.io
```

{% endcode %}

{% hint style="warning" %}
At this moment, it seems that MKR NB 1500 requires pressing the reset button to apply the OTA update.
{% endhint %}

## Firmware Versioning

Firmware versioning is essential for managing updates and maintaining the security of IoT devices. As IoT deployments grow in complexity and scale, proper versioning ensures that devices operate reliably and securely.

Our recommended versioning system follows the Semantic Versioning ([SemVer](https://semver.org/)) approach, which uses a Major.Minor.Patch format:

* **Major**: Incremented for incompatible API changes.
* **Minor**: Incremented for added functionality in a backwards-compatible manner.
* **Patch**: Incremented for backwards-compatible bug fixes.

To define the firmware version, it is required to define a preprocessor definition called `THINGER_OTA_VERSION`. This is used inside the firmware and VS Code to decide when a device requires an update.

Each time an OTA update process is started, the system will display a confirmation dialog showing the details of the firmware to be uploaded. This dialog includes the device name, firmware version, and the environment. It ensures that the user is informed about the firmware update specifics before proceeding, providing an additional layer of verification.

<figure><img src="/files/zfi9BnVHP4fC2ocvE8vO" alt=""><figcaption><p>OTA Update Confirmation Dialog with Firmware Version</p></figcaption></figure>

Devices that are already running the current firmware version will not be updated, ensuring that only devices with outdated firmware receive the new update. This helps to optimize the update process, reducing unnecessary data transfer and minimizing downtime for devices that are already up-to-date.

{% hint style="info" %}
For development purposes, it is possible to remove the **`THINGER_OTA_VERSION`** definition, which will prevent version checking on the update process.
{% endhint %}

It is possible to define the firmware version in different places, such as:

* In the source code
* Through external build flags
* Based on version control, like git tags

Different alternatives are described in detail below.

### Fixed on Code

Define `THINGER_OTA_VERSION` in the code before Thinger.io includes. This method requires hardcoding the firmware version directly in the source files. Each firmware version update necessitates a manual change of the version number in the code and subsequent redeployment of the firmware.

{% code title="main.cpp" %}

```cpp
#define THINGER_OTA_VERSION "1.0.0"

// Thinger.io includes
#include <ThingerMbed.h>
#include <ThingerPortentaOTA.h>
```

{% endcode %}

### Fixed Build Flag

Create a build flag in `platformio.ini` with a static version definition. This approach sets the firmware version through build configuration. To update the firmware version, modify the version number in the `platformio.ini` file and rebuild the firmware.

{% code title="platformio.ini" %}

```ini
build_flags = 
    -D THINGER_OTA_VERSION=1.0.0
```

{% endcode %}

### Dynamic Build Flag

This is the recommended approach and consists of dynamically setting the firmware version based on version control information, such as git tags. This method ensures the firmware version is automatically updated based on the latest git tag, reducing manual intervention. Each time a new version in git is tagged, the build process will automatically use this tag as the firmware version.

To achieve this configuration, it is required to modify the `platformio.ini` file and include a build flag that will be dynamically composed using the `git describe` command. This command retrieves the latest git tag and uses it to set the `THINGER_OTA_VERSION` preprocessor definition.

{% code title="platformio.ini" %}

```ini
build_flags = 
    !echo '-D THINGER_OTA_VERSION='$(git describe --tags)''
```

{% endcode %}


# REMOTE CONSOLE

Remote console for IoT devices

Remote console is a unique Thinger.io feature to allow remote access to the devices. It allows the creation of web terminals to interact with the device like in a serial interface. It also provides features to create interactive terminals on any Arduino-compatible device.&#x20;

This feature is especially useful for remote diagnosis, showing logs on devices, managing device configuration, or any other functionality, as the console can be easily extended to include new commands.

![Remote console for IoT devices](/files/-Mka8FVxpr6RUZkeed2G)

## Web Serial Interface

By default, the Thinger.io Console can work as a web serial interface, similar to the Arduino Serial Monitor, where the device writes logs to the serial interface.&#x20;

To use Thinger.io Console, it is required to include the `ThingerConsole.h` file and create an instance by `thing` reference.

```
#include <ThingerConsole.h>

ThingerConsole console(thing);
```

### Writing to Console

Then it is possible to use the `console` instance for logging to the remote terminal by using the same interface available in the Arduino `Serial` class, i.e, using `println`, `printf`, etc. This code shows a log every second:

```cpp
unsigned long last_log = 0;
void loop() {
  thing.handle();
  auto current = millis();
  
  if(current-last_log>=1000){
    last_log = current;
    console.printf("printing on serial interface: %lu\r\n", current);
  }
}
```

When the terminal is connected in the Thinger.io console, the device will start to send the configured log. If there is no terminal connected to the device, the device will skip sending any data over the wire.

![Writing to Thinger.io web console](/files/-Mkb-389-7ZWKg21l0ee)

It is possible to check if the console is connected, so the associated logging code can be omitted, which can be useful if the log involves doing some calculation, reading a sensor, etc. The above example can be improved by adding an extra check&#x20;

```cpp
unsigned long last_log = 0;
void loop() {
  thing.handle();
  
  // check if console is connected
  if(console){
    auto current = millis();
    if(current-last_log>=1000){
      last_log = current;
      console.printf("printing on serial interface: %lu\r\n", current);
    }
  }
}
```

{% hint style="info" %}
If the web console is not connected, the device will not send any data over the wire.
{% endhint %}

### Reading from Console

Reading from the serial can be done in the same way it is done over Arduino `Serial` interface. This code sample checks if there is any data available using the `available` method on the console (in the same way it is used on Arduino `Serial`), and will print back to the console:

```cpp
void loop() {
  thing.handle();
  if(console.available()){
    console.setTimeout(100);
    String input = console.readStringUntil('\n');
    console.print("> I received: ");
    console.println(input);
  }
}
```

![Reading from Thinger.io remote console](/files/-Mkb7Vs7FcGHrQdioF6f)

## Interactive terminals

It is possible to create interactive terminals easily for handling custom commands with arguments. For working with the interactive terminal mode, it is required to create and register commands on the console instance.

### Create Commands

Creating a new command in the console can be done with the `setup` function. It is required to call the function `command` over the `console` instance. This function requires two arguments: the `command name` first and the second `command function`. There is an optional parameters that is the `command description`, that can be useful to specify command arguments or any other help about the command.

In the following sections, some command examples are presented covering different requirements, like writing to the console, reading arguments, or reading from the console.

#### Millis Command Example

The simplest example of a command registers a command named `millis`, and a function that just prints the result of the `millis()` function over the console terminal. It also includes a description in the third argument with this content.

```cpp
void setup() {
  // any other code
  
  // console commands
  console.command("millis", [&](int argc, char* argv[]){
    console.println(millis());
  }, "get current time millis");
}

void loop() {
  thing.handle();
}
```

This will result in a prompt with an interactive terminal in the console, with the ability to execute the `millis` function defined above.

![Millis Command Example](/files/-MkbMt7bmyXulJtVUIAi)

{% hint style="info" %}
The function definition with the syntax `[&](int argc, char* argv[]{}`is a C++ lambda function, but it is possible to use any other`void function(int argc, char* argv[]){}`
{% endhint %}

#### Log Command Example&#x20;

There are some cases where commands need to be running during long periods, i.e., to print an ongoing log. The command will print a sample log until the command is canceled or the console is closed.

```cpp
void setup() {
  console.command("log", [&](int argc, char* argv[]){
      while(console.command_running()){
        console.printf("Running log at %lu\r\n", millis());
        delay(1000);
      }
  }, "show logs");
}
```

To work with long-running commands, it is required to frequently check the `command_running` method, which will return false if the console has been closed or the command was cancelled.

{% hint style="info" %}
To cancel a running command on the terminal, just press Ctrl+C
{% endhint %}

![Log Command Example](/files/-MkbQuTpD8l7HQKN_Q4N)

#### GPIO Command Example&#x20;

Some commands may need to accept arguments, i.e., turn on/off a given GPIO, print a given string to a display, modify a threshold, etc. For this reason, all commands receive `argc` and `argv` parameters, like in any standard C/C++ main function. `argc` determines the number of arguments, and `argv` is an array of `char*` which holds all parsed parameters. Any command will receive at least one argument, which is the command name.

A command is created to modify the digital state of a given GPIO. This function accepts two parameters, which are the GPIO pin number and the desired state.&#x20;

```cpp
void setup() {
  console.command("gpio", [&](int argc, char* argv[]){
      if(argc<3){
        console.error("missing parameters");
      }else{
        int pin = atoi(argv[1]);
        pinMode(pin, OUTPUT);
        digitalWrite(pin, strcmp(argv[2],"on")==0);
        console.printf("%d turned %sn", pin, argv[2]);
      }
  }, "<pin> <on|off> turn on/off a given gpio");
}
```

![GPIO Command Example](/files/-MkbkaHphrEoOEfg6in9)

#### Hello Command Example

Commands may also require reading console inputs interactively while they are running. A simple command is outlined that asks for a name to say hello.

```cpp
void setup() {
  console.command("hello", [&](int argc, char* argv[]){
    console.print("please, enter your name: ");
    console.flush();
    while(console.command_running() && !console.available());
    String name = console.readStringUntil('\n');
    console.printf("hello %s\r\n", name.c_str());
  }, "hello command");
}
```

Once the command is executed, it will prompt the user for its name, waiting until it is ready. After typing the name and pressing Enter,, it will display the name with a hello.

![Interactive Command Example](/files/-Mkc72J-auL-GbX83AOf)

### Terminal Prompt

By default, when the interactive terminal is enabled, it will show a prompt with the device identifier. The `esp32` name acts as the device's identifier:

![Default Console Prompt based on the device ID (esp32)](/files/-MkbBV4Cutm6cYpEoX_m)

The prompt name can be modified by using the `set_prompt("my prompt")` method on the console instance. For example:

```cpp
void setup(){
    console.set_prompt("Arduino");
}
```

Will result in a modified prompt with the `Arduino` name.

![Custom Prompt](/files/-Mkby3DXKCcqLPWVKh5D)

### Default Commands

By default, Thinger.io adds some general utility commands.

#### Help command

The help command will display all registered commands with an associated description.

![Help command to see the registered commands](/files/-Mkc7wseDK4NHDXTsHa9)

#### Reboot command

Thinger.io client implements a command that will reboot the device, as in a normal computer.&#x20;

![Reboot command](/files/-MkbJZ9LCd3ZEq0C6cua)

#### Clear command

It can be useful to clear the console sometimes, so it is a clear console command to clear all screen content.

![Clear Command](/files/-Mkc8aydjcVbHRSdVQh8)

## SSH Connection

The console can be accessed over the Thinger.io web console, but there is also a possibility for connecting devices over standard SSH connections from the Internet (no local network required). This feature is a work in progress and will be released soon as a plugin!

![](/files/-MkcCmA05ZZhlfzhZSP3)


# SIGFOX

0G Technology. LPWAN dedicated to Massive IoT.

## ![](/files/WZ1FuTeNc6VjIJizODrD)

## Introduction

Sigfox is a company founded in 2009 that builds wireless networks to connect low-energy objects such as electricity meters, smartwatches, and washing machines, which need to be continuously on and emitting small amounts of data. Sigfox employs a proprietary technology that enables communication using the Industrial, Scientific and Medical ISM radio band, which uses 868 MHz in Europe and 902 MHz in the US. It utilizes a wide-reaching signal that passes freely through solid objects, called "ultra-narrowband" and requires little energy, being termed "Low-power Wide-area network (LPWAN)". The network is based on a one-hop star topology and requires a mobile operator to carry the generated traffic. The signal can also be used to easily cover large areas and to reach underground objects.

Sigfox has partnered with a number of firms in the LPWAN industry, such as Texas Instruments and Silicon Labs. The ISM radio band supports bidirectional communication. The existing standard for Sigfox communications supports up to **140 uplink messages a day**, each of which can carry a payload of **12 Bytes** (Excluding message header and transmission information), and up to 4 downlink messages per day, each of which can carry a payload of 8 Bytes. For more details about Sigfox, please visit the [Sigfox Developer Portal](https://www.sigfox.com/developers/).

This documentation will describe how to integrate SigFox devices and their data into the Thinger.io Platform. In the first steps, we will review how to configure Thinger.io resources, and then, on the Sigfox side, we will configure the communication with the platform for pushing our sensor's data.

## Integrating a Sigfox Device with Thinger.io

This process is carried out in two parts: on the one hand, the preparation of Thinger.io to receive data from Sigfox and, on the other hand, the configuration of the Sigfox cloud callback that will send the information to Thinger.io. During the next sections, we will explain both parts, starting with Thinger.io side steps:&#x20;

There are two ways to configure Thinger.io to work with Sigfox devices. The best option is by deploying the "Sigfox Plugin", which will manage the integration, providing advanced features such as device auto-provisioning (good to integrate large networks), Uplink/Downlink payload processing and device management, but this option is only available for subscribed developers. Freemium accounts can also make individual Sigfox device integration using the "HTTP device". Both ways are explained below:

### **Advanced Integration (with Sigfox plugin)**

<details>

<summary><a href="#sigfox-plugin"><strong>SigFox Plugin</strong></a></summary>

</details>

### Single Device Integration (without plugins)

When implementing little prototypes or maker projects using the free account, it is possible to integrate an individual device using the "HTTP device" that allows using almost every Thinger.io platform feature, including:&#x20;

* Store data in buckets
* Show data in customizable dashboards
* Send endpoints to post data on emails, social networks or third parties
* Sigfox downlink processes to send configuration data to the device

{% hint style="info" %}
Payload data processing is only available using plugin integration
{% endhint %}

To perform this integration, it is required to create a new HTTP device and configure its callback flows as it is explained in the HTTP devices section of this documentation:&#x20;

{% content-ref url="/pages/-LqlH6XDMyPs-u\_8LklD" %}
[HTTP DEVICES](/http-devices)
{% endcontent-ref %}

Once the new device has been created, Thinger.io will provide a REST API callback that can be used to configure the Sigfox cloud, as it is explained in the section below:

## Sigfox Cloud Configuration

After making all the configurations that are required to get Thinger.io ready for receiving data, the next step is to configure the Sigfox Backend for pushing data to it, using our token identifier and the token we have generated.

### Creating Sigfox Callback

In this step, we will create a Sigfox callback that will push the information from our Sigfox device to our Thinger.io data bucket. In our example, a callback is just an endpoint that is called when the Sigfox device sends data over the network, so we will configure the callback to point to our data bucket.

To create a callback in Sigfox:

1. Go to <https://backend.sigfox.com> and log in to the account. It is assumed that the device has already been registered with the platform.
2. Click on `Device Type` tab on the top, and then click on the desired device type name to configure. Alternatively, navigate to the `Device` tab and click on the `Device type` column of the device.
3. Click on `Callbacks` on left menu, and then create a new one.&#x20;

In this step, select the option to create a `Custom Callback`, as there is a need to call an endpoint not directly supported by the Sigfox back-end.

![](/files/-LpXt-fuqNkIzEnKa0kq)

Then, we need to configure the callback to write to our data bucket. Here is the configuration. Details for each field are provided after this:

![](/files/-LpXt-fwgo-ylvaubOZ5)

The configuration in our example is:

1. `Type` is `DATA` with `UPLINK`, as we want to send our device data.
2. `Channel` is of type `URL`, as we will be calling an HTTP endpoint.
3. `Send duplicate` as disabled to avoid writing duplicate messages received by different base stations.
4. `Custom payload config` will completely depend on the payload sent by the device. In our case, our device will be sending the temperature and humidity as 32-bit floats, so we have configured the payload as `temp::float:32:little-endian hum::float:32:little-endian`, where we define the `temp` and `hum` parameters as 32-bit floats in little-endian. Notice that Sigfox only supports 12 bytes of payload per message, so it is a must to optimize this space, like sending temperature and humidity as integers if it is not required decimal accuracy. For example, this will work.
5. `Url pattern` must be configured according to the Thinger.io user ID and our bucket name.
   * The pattern should be like `https://api.thinger.io/v1/users/{user_id}/buckets/{bucket_id}/data`.&#x20;
   * The `{user_id}` and `{bucket_id}` must be changed to match the account. For example, the final URL pattern will be `https://api.thinger.io/v1/users/alvarolb/buckets/SmartEverything/data`.

     Note that Sigfox variables can also be used to compose the URL; for instance, to store data from each device in a different bucket, a URL could be created: `https://api.thinger.io/v1/users/alvarolb/buckets/{device}/data`.&#x20;
6. `HTTP Method` should be set to POST.
7. In `Headers` we must include an `Authorization` header with our device token in order to authenticate the bucket write request.
   * Header name should be `Authorization`
   * Header value should be `Bearer {access_token}`, where the `{access_token}` token is generated in the previous steps.
   * This is the example final header value. Note the space between `Bearer` and the token itself:

     ```
     Bearer eyJhbGciOiJIUzI1NiIsInR5cCI6IkpXVCJ9.eyJqdGkiOiJTbWFydEV2ZXJ5dGhpbmciLCJ1c3IiOiJhbHZhcm9sYiJ9.0Qb48c_ToBiIVcCOdvXU2Kn51mTnGLDcN44shVRzNls
     ```
8. The final step is to configure the `Body` and its `Content type`. For content type, we will set `application/json` as the bucket can store arbitrary JSON data. The body will then contain all the information we want to store, formatted in JSON. In Sigfox, the body can be defined using available variables, which include those provided by the platform (such as device ID, link quality, or device location) and those defined by the payload configuration. In our case, we defined variables `temp`, and `hum`, that will be included with other Sigfox variables. For this example, the payload is:&#x20;

   ```javascript
    {
       "device" : "{device}",
       "snr" : {snr},
       "rssi" : {rssi},
       "station": "{station}",
       "latitude": {lat},
       "longitude": {lng},
       "temperature" : {customData#temp},
       "humidity" : {customData#hum}
    }
   ```

   Notice that we are mixing Sigfox variables, like `{device}`, with our own custom data in the payload, like `{customData#temp}`. This body is then processed on every message reception, and the variables will be replaced with the current values. So, the server will receive a JSON payload with the device identifier, device temperature, humidity, coarse location (km accuracy), and signal quality.

After these steps, we should now have a callback completely configured to push data to our data bucket.

### Programming Sigfox Devices

Now it is time to program our Sigfox Device that will be sending data to our buckets. In this case, we provide examples for the [SmartEverything](http://www.smarteverything.it/) device and the [Arduino MKRFOX1200](https://www.arduino.cc/en/Main.ArduinoBoardMKRFox1200).

#### Arduino MKRFOX1200

Arduino MKRFOX1200 has been designed to offer a practical and cost-effective solution for makers seeking to add SigFox connectivity to their projects with minimal previous experience in networking. It is based on the Microchip SAMD21 and an ATA8520 SigFox module. Can run for over six months on 2 AA 1.5V batteries with typical usage. The design includes the ability to power the board using two 1.5V AA or AAA batteries or an external 5V.

![](/files/-LpXt-fy0A0Sbjyy3CYJ)

**Initial Setup**

To program this device, we will use the [Arduino IDE](https://arduino.cc). In this case, it is necessary to install or update the board toolchain, which can be done directly from the Boards Manager, searching for `mrk`, and selecting the Arduino SAMD Boards.

![](/files/-LpXt-g-xqx3HyRE6dc4)

Install the `Arduino SigFox for MKRFox1200` library that is available from the Library Manager, and it is also **NECESSARY** to install the `Arduino Low Power`, and the `RTCZero` libraries.

![](/files/-LpXt-g1Pgb00MK7omWN)

After a successful installation, we can now select the Board in the Arduino IDE. Just select the Arduino MKRFOX12000. Select, as with any other Arduino board, the port where de device is connected.

![](/files/-LpXt-g3xs4u5TFBFdVq)

Check that everything is up and running by flashing this example, which will provide information about the module, like the board ID and PAC. This information is necessary for registering the device in Sigfox.

```cpp
#include <SigFox.h>

void setup() {
  Serial.begin(9600); 

  while(!Serial) {};

  if (!SigFox.begin()) {
    Serial.println("Shield error or not present!");
    return;
  }

  String version = SigFox.SigVersion();
  String ID = SigFox.ID();
  String PAC = SigFox.PAC();

  // Display module information
  Serial.println("MKRFox1200 Sigfox first configuration");
  Serial.println("SigFox FW version " + version);
  Serial.println("ID  = " + ID);
  Serial.println("PAC = " + PAC);

  Serial.println("");

  Serial.print("Module temperature: ");
  Serial.println(SigFox.internalTemperature());

  Serial.println("Register your board on https://backend.sigfox.com/activate with provided ID and PAC");

  delay(100);

  // Send the module to the deepest sleep
  SigFox.end();
}

void loop() {
  // put your main code here, to run repeatedly:
}
```

**Notice:** From this point on, it is assumed that the board has already been registered on the Sigfox account. If not, refer to the [First Configuration](https://www.arduino.cc/en/Tutorial/SigFoxFirstConfiguration) tutorial from Arduino.&#x20;

**Pushing data to Sigfox**

Now that we have our toolchain running, it is time to code something to push data to the Sigfox Backend. Before presenting the code, **remember** that in the callback we have defined in the Sigfox, we established a payload config that is expecting to receive two floats representing both temperature and humidity. So, our payload must match this definition:

```
 temp::float:32:little-endian hum::float:32:little-endian
```

In our code, this payload can be easily represented by a `struct` that holds two floats. Defining custom structs with different data types is possible, but **structure padding** and **architecture** must be carefully considered. The **Sigfox payload** will require reconfiguration to ensure proper decoding of the transmitted fields.

```cpp
 struct data{
  float temp;
  float hum;
 };
```

In this case, we are using the Arduino MKRFOX1200 along with a DHT sensor providing temperature and humidity required for the callback we have configured in the Sigfox back-end. If a DHT sensor is unavailable, the board's internal temperature sensor can be utilized by calling `SigFox.internalTemperature()`, and setting the humidity value to zero or any other value.

```cpp
 #include <SigFox.h>
 #include <SimpleDHT.h>
 #include <ArduinoLowPower.h>

 #define DHT11_PIN 0

 void setup() {
   Serial.begin(9600);
   pinMode(LED_BUILTIN, OUTPUT);
 }

 void blink(unsigned int count, unsigned long ms){
   for(int i=0; i<count; i++){
     digitalWrite(LED_BUILTIN, HIGH);
     delay(ms);
     digitalWrite(LED_BUILTIN, LOW);    
     delay(ms);
   }
 }

 void send_data(){
   //Initialize Sigfox module
   SigFox.begin();
   delay(100);

   // Enable debug LED and disable automatic deep sleep
   SigFox.debug();

   // clears all pending interrupts
   SigFox.status();
   delay(1);

   // define Sigfox payload data structure
   struct data{
     float temp;
     float hum;
   };

   // read temperature and humidity from DHT sensor connected at pin DHT11_PIN
   SimpleDHT11 dht11;
   byte temp, hum;
   dht11.read(DHT11_PIN, &temp, &hum, NULL);

   // NOTE! It is not quite efficient sending bytes as floats over the net, but this is just for illustrative purposes
   struct data reading;
   reading.temp = temp;
   reading.hum = hum;

   // send the structure to Sigfox (8 bytes)
   Serial.println("Sending SigFox message!");

   // start a packet
   SigFox.beginPacket();

   // write our buffer
   SigFox.write((const char*)&reading, sizeof(reading));

   // send buffer to SIGFOX network
   int ret = SigFox.endPacket();  
   if (ret > 0) {
     Serial.println("No transmission");
     // 3 quick blinks on error
     blink(3, 500);
   } else {
     Serial.println("Transmission ok");
     // 1 blink on success
     blink(1, 1000);
   }

   SigFox.end();
 }

 void loop() {
   send_data();
   delay(10*60*1000);
   // deep sleep the device if needed
   //LowPower.sleep(10*60*1000);
 }
```

**Notice**, The `LowPower.sleep` function call can be uncommented, and the standard `sleep` function call commented out, to enable deep sleep on the Arduino MKRFOX1200, which is beneficial when operating on batteries. It is possible to avoid using the `Serial`, and the `SigFox.debug()` that is, they're just for debugging purposes. In sleep mode, the device requires a manual reset before flashing it again.

#### SmartEverything

SmartEverything is an IoT device specially designed for rapid prototyping, as it has full Arduino compatibility, with multiple sensors ready to use, like MEMS Pressure Sensor, Proximity and Ambient Light Sensor, iNEMO 9-axis inertial module, humidity and temperature sensors, and even NFC NTAG, or a GPS/GNSS integrated antenna. If these features are quite interesting by themselves, this board also integrates a Bluetooth Low Energy (BLE) and, of course, a Sigfox Module (Telit LE51-868 S 868MHz module).

![](/files/-LpXt-g5tfOBySotnXHF)

With these awesome features, we can use the board for multiple purposes, like vehicle tracking with the GPS, building a micro meteorological station, registering vibrations and impacts with the accelerometers, or any other use case. For this example, we will register just the temperature and humidity. This way, we have created a simple code that will register temperature and humidity every 10 minutes.

**Initial Setup**

To program this device, we will use the [Arduino IDE](https://arduino.cc). In this case, it is necessary to install the board toolchain, which can be done directly from the Boards Manager, searching for `smarteverything`and selecting the Arrow Boards by Axel Elettronica.

![](/files/-LpXt-g7I0RJl3_HjsZF)

After a successful installation, we can now select the Board in the Arduino IDE. Just select the SmartEverything Fox (Native USB Port). Select, as with any other Arduino board, the port where de device is connected.

![](/files/-LpXt-g90ZzedOVchedp)

**Pushing data to Sigfox**

Now it is time to write a simple sketch to send our sensor readings to Sigfox. The provided sample sketch will basically initialize, in the setup, the Sigfox Modem, the sensors, and the USB Serial port for some debugging. Then, in the loop, our sketch will read both the temperature and humidity and will transmit the data to Sigfox. It will also check if the transmission is OK to blink a green LED on success or a red LED otherwise. After that, it will sleep for 10 minutes, as we mentioned in the introduction, Sigfox will allow only 140 messages a day.

Before presenting the code, **remember** that in the callback we have defined in the Sigfox, we established a payload config that is expecting to receive two floats representing both temperature and humidity. So, our payload must match this definition:

```
temp::float:32:little-endian hum::float:32:little-endian
```

***

In the code, this payload can be easily represented by a `struct` containing two floats. It is possible to define custom structs with different data types (though **structure padding** and **architecture** should be considered). However, the **Sigfox payload** must be reconfigured to properly decode the fields being sent.

```cpp
struct data{
 float temp;
 float hum;
};
```

**Notice** that this code has not been optimized for battery-powered use cases. Use the power-saving mode on the device if needed, but this is out of the scope of this example.

```cpp
#include <Wire.h>
#include <SmeSFX.h>
#include <Arduino.h>
#include <HTS221.h>

void setup() {
  // init temp & hum sensor
  Wire.begin();
  smeHumidity.begin();

  // init serial
  SerialUSB.begin(115200);

  // init sigfox module
  sfxAntenna.begin(19200, &SigFox);
  sfxAntenna.setSfxDataMode(); 
}

void send_data(){
  // define Sigfox payload data structure
  struct data{
    float temp;
    float hum;
  };

  // read sensor data into the struct
  struct data reading;
  reading.temp = smeHumidity.readHumidity();
  reading.hum = smeHumidity.readTemperature();

  // send the structure to Sigfox (8 bytes)
  SerialUSB.println("Sending SigFox message!");
  sfxAntenna.sfxSendData((const char*)&reading, sizeof(reading));
}

void loop() {
  // send Sigfox data
  send_data();

  // wait for a response
  bool response=false;
  do{
    if (sfxAntenna.hasSfxAnswer()) {
      switch (sfxAntenna.sfxDataAcknoledge()) {
      case SFX_DATA_ACK_OK:
          ledGreenLight(HIGH);
          SerialUSB.println("Answer OK! :)");
          delay(2000);
          ledGreenLight(LOW);
          response = true;
          break;
      case SFX_DATA_ACK_KO:
          ledRedLight(HIGH);
          SerialUSB.println("Answer KO :(");
          delay(2000);
          ledRedLight(LOW);
          response = true;
          break;
      }
    }
  }while(!response);

  // sleep ten minutes for the next message
  delay(10*60*1000);
}
```

## Checking Sigfox Setup

After we have both the device code running, the Sigfox callback configured, and the data bucket created, we should check that everything is up and running.

We can start by checking that the Sigfox platform is receiving our messages. Just go to the device in the Sigfox back-end, and open the `Messages` section that is on the left panel. Here, some messages have been received. See the payload being sent (in hexadecimal), and some other information like link quality, timestamp, or callback result.

![](/files/-LpXt-gBYdAzcryrpO8U)

It is interesting here to check that our callback response is successful, as the callback icon changes from green to red depending on the result. In our case, our callbacks are in green, so the request was ok. Click on the icon to see the server response, which is a 200 OK HTTP response.

![](/files/-LpXt-gD2N-sjPzzZNTq)

Then we can also check that our data bucket is being populated with the data received from Sigfox. So, open the data bucket in Thinger.io. Nice! We have our data now being stored. **Notice** that the columns in the bucket are just the fields we configured in the Sigfox callback body.

![](/files/-LpXt-gFU9tUFG93RHhL)

## Building a Dashboard

Now that we have our data in the bucket, we can just create a real-time dashboard from our Sigfox data. Create the widgets by selecting the bucket as the data source, and that's all!

![](/files/-LpXt-gH5oVdViO5Ck7A)


# LoRaWAN

LoRaWAN (Long Range Wide Area Network) is a low-power, wide-area networking protocol designed to connect wireless battery-powered devices to the internet across regional, national, or even global deployments. It is optimized for low energy consumption while providing secure bi-directional communication, localization capabilities, and support for mobility.

As one of the most widely adopted technologies in the IoT market, LoRaWAN provides several advantages:

* **Long Range:** Coverage of several kilometers in rural environments and a few kilometers in dense urban areas.
* **Low Power Consumption:** Devices can operate for years using standard batteries.
* **High Capacity:** A single gateway can manage thousands of devices simultaneously.
* **Cost Efficiency:** Reduced infrastructure and operational costs compared to cellular alternatives.
* **Secure Communication:** End-to-end encryption ensures data confidentiality and integrity.

Device integration is usually achieved through a **LoRaWAN Network Server (LNS)**, which manages communication between gateways and applications.

## Compatible LNS

Thinger.io maximizes interoperability with LoRaWAN by offering plugins that integrate with the most widely used LNS providers in the market

<table data-view="cards"><thead><tr><th></th><th></th><th data-type="content-ref"></th><th data-hidden data-card-cover data-type="image">Cover image</th></tr></thead><tbody><tr><td><strong>The Things Stack</strong></td><td>The world’s largest community-driven LoRaWAN network, freely accessible and widely adopted for collaborative and educational projects. It enables quick onboarding and extensive global coverage.</td><td><a href="https://marketplace.thinger.io/plugins/ttn/">https://marketplace.thinger.io/plugins/ttn/</a></td><td><a href="https://iot.wifx.net/wp-content/uploads/2021/03/TTN_TTS.png">https://iot.wifx.net/wp-content/uploads/2021/03/TTN_TTS.png</a></td></tr><tr><td><strong>LORIOT LNS</strong></td><td>A professional-grade solution offering advanced enterprise services, including scalability, high availability, and SLA-backed support. It is commonly chosen for commercial and industrial deployments.</td><td><a href="https://marketplace.thinger.io/plugins/loriot/">https://marketplace.thinger.io/plugins/loriot/</a></td><td><a href="https://www.venturelab.swiss/demandit/files/M_BB941CC4DCEF687AD98/dms/Image/B08590E7-C129-F91B-01CDA7FE6BCAEEC4.jpg">https://www.venturelab.swiss/demandit/files/M_BB941CC4DCEF687AD98/dms/Image/B08590E7-C129-F91B-01CDA7FE6BCAEEC4.jpg</a></td></tr><tr><td><strong>ChirpStack</strong></td><td>An open-source LNS that must be self-hosted and maintained. It provides maximum control and customization for developers, but requires infrastructure management and operational expertise.</td><td></td><td><a href="https://encrypted-tbn0.gstatic.com/images?q=tbn:ANd9GcQU-IfBY3PQzSQ1ZoAAunH5tmimuVqf9Kw9wQ&#x26;s">https://encrypted-tbn0.gstatic.com/images?q=tbn:ANd9GcQU-IfBY3PQzSQ1ZoAAunH5tmimuVqf9Kw9wQ&#x26;s</a></td></tr></tbody></table>

> **Note:** Some LoRaWAN gateways include built-in LNS functionality. Support for this type of integration is currently being explored.

Thinger.io does not endorse one LNS provider over another. Multiple integrations are provided to reach the broadest possible range of user communities. It remains the responsibility of the user to evaluate and decide which service best suits the requirements of a specific project and deployment scenario.

## Integrating LoRaWAN Devices

### The Challenge

When you build a LoRaWAN IoT product, your devices send data (uplinks) and receive commands (downlinks) through a LoRaWAN Network Server (LNS). Each LNS provider uses its own JSON schema for device uplinks and downlinks, which makes it impossible to create a generic product configuration. That is why each LNS plugin parses each LNS request into a Thinger.io standardized format.

Consider a temperature monitoring product initially configured with LORIOT. The product reads device properties, configures dashboard widgets, and defines data processing rules based on LORIOT's specific JSON structure. Six months later, you decide to switch to The Things Stack. **Without standardization**, you would need to:

* Rewrite data processing rules to match the new schema
* Update device property mappings
* Modify automation workflows and API integrations

### The Solution

**Thinger.io's LoRaWAN plugins implement a protocol adaptation layer that normalizes data from any LNS provider into a unified schema.** Each plugin acts as a bidirectional parser, translating between the LNS-specific format and Thinger.io's standard format.

#### The Standarized UpLink Schema

Every uplink message processed by a Thinger.io LoRaWAN plugin conforms to a canonical JSON schema, regardless of the originating LNS:

```json
{
  "deviceEui": "1234567890ABCDEF",
  "deviceId": "sensor-room-101",
  "source": "loriot",
  "appId": "building-monitoring",
  "fPort": 1,
  "fCnt": 42,
  "payload": "01A5CB1288A",
  "decodedPayload": null,
  "metadata": {
    "ack": false,
    "battery": 254,
    "offline": false,
    "seqNo": 12345
  }
}
```

<table><thead><tr><th width="162.51953125">Field</th><th width="155.359375">Type</th><th width="434.0234375">Definition</th></tr></thead><tbody><tr><td>deviceEui</td><td>string</td><td>Device Extended Unique Identifier</td></tr><tr><td>deviceId</td><td>string</td><td>Human-readable device identifier. This is usually used to autoprovision the device.</td></tr><tr><td>source</td><td>string</td><td>LNS provider identifier (lowercase: "loriot", "chirpstack", "ttn")</td></tr><tr><td>appId</td><td>string</td><td>Application identifier within the LNS</td></tr><tr><td>fPort</td><td>integer</td><td>LoRaWAN application port</td></tr><tr><td>fCnt</td><td>integer</td><td>Uplink frame counter</td></tr><tr><td>payload</td><td>string (hex) | null</td><td>Hex-encoded raw payload bytes (when LNS doesn't decode)</td></tr><tr><td>decodedPayload</td><td>object | nulll</td><td>Decoded uplink data (when LNS provides decoding)</td></tr><tr><td>metadata</td><td>object</td><td>Optional LNS-specific metadata</td></tr></tbody></table>

{% hint style="info" %}
Exactly one of `payload` or `decodedPayload` must be present
{% endhint %}

#### The Standarized Downlink Schema

For the same reason as Uplinks, Downlink data format must properly formatted and forwarded to Thinger.io LNS plugin. As an example;

```json
{
  "data": "FF0164",
  "port": 85,
  "priority": 3,
  "confirmed": false,
  "uplink": {
    "deviceEui": "1234567890ABCDEF",
    "fCnt": 42,
    ...
  }
}
```

<table><thead><tr><th width="167.75">Field</th><th width="232.7265625">Type</th><th>Definition</th></tr></thead><tbody><tr><td>data</td><td>string (hex)</td><td>Hex-encoded payload bytes</td></tr><tr><td>port</td><td>integer</td><td>LoRaWAN FPort</td></tr><tr><td>priority</td><td>integer (0, 1 ... 5, 6)</td><td>Queue priority (0=lowest, 6=highest)</td></tr><tr><td>confirmed</td><td>boolean</td><td>Request MAC-layer acknowledgment</td></tr><tr><td>uplink</td><td>object</td><td>Last Recieved Uplink</td></tr></tbody></table>

### Product Configuration Profile

The [LoRaWAN Product Template](https://marketplace.thinger.io/plugins/lorawan-product-template/) in the [Marketplace](https://marketplace.thinger.io/) has been specifically designed to be used as a generic template for any LoRa-driven device working through any LNS supported in Thinger.io. To start building a LoRaWAN device, this integration would be as simple as installing this generic template, clone it to change the device\_id and start working!

This generic template provides a product with the following basic configuration

#### Uplink Property

This Uplink Property stores the last uplink received from the device. It is used to recall essential information needed to send downlinks to the device or to visualize specific device metadata in dashboards.

<figure><img src="/files/1tqKcLKyxqYYGdXdVIUr" alt="" width="415"><figcaption><p>Uplink Property</p></figcaption></figure>

#### Generic Data Bucket

A pre-configured data bucket is also created within this product template to provide a generic "end-of-pipeline" storage solution for the data. This bucket automatically stores time-series data from device uplinks.

<figure><img src="/files/LJT7mkh9iUROxHzKg6I4" alt="" width="407"><figcaption><p>Generic Data Bucket</p></figcaption></figure>

{% hint style="info" %}
It is **recommended** (though not required) to perform **data decoding at the bucket stage** rather than at the API resource level. This approach ensures that the **raw uplink message** stored in the product property remains **unaltered**, preserving the exact payload format originally received from the LNS plugin.
{% endhint %}

#### API Resource&#x20;

Pre-configured uplink and downlink endpoints have been created within the product profile configuration, defining a unified data communication bridge with the LNS Thinger.io Plugin. These channels communicate directly with the LNS plugin, so all data incoming to and outgoing from these endpoints is expected to be correctly formatted according to the standardized schema.

<figure><img src="/files/SgLYoOoDdp7jYK8cgShg" alt="" width="461"><figcaption><p>API resources</p></figcaption></figure>

{% hint style="info" %}
These API endpoints use the standardized format described in the plugin documentation. Do not modify the endpoint structure unless you understand the implications for cross-LNS compatibility.
{% endhint %}

#### Auto Provision

The Device autoprovisioning will need to be configured in the application that has been created in the LNS Thinger Plugin. This device ID comes in two parts:&#x20;

* The **prefix** needs to be specified in both the product autoprovision schema and in the LNS application plugin configuration. This ensures consistent device identification across both systems.

<figure><img src="/files/muNbD1xvSINYgjVF09gK" alt=""><figcaption><p>Autoprovision Configured in Product Profile</p></figcaption></figure>

<figure><img src="/files/PQYu5ogZqo8mAuHUzSQq" alt="" width="482"><figcaption><p>Device ID Prefix configured in LNS Plugin (in this case, The Things Stack)</p></figcaption></figure>

* The device ID **sufix**: This id sufix is the device EUI wich will be appended in the LNS Thinger Plugin.


# HTTP DEVICES

To integrate any kind of third party device or third party data resource with thinger.io

Some projects require the integration of third-party data sources, such as a Cloud Service, devices without the Thinger.io library in their source code, or a custom program. In this section it is explained how to use the "HTTP device" profile at Thinger.io, that allows receiving data via REST API from whatever source that can create a connection with Thinger.io Server and send an HTTP request, taking advantage of all Thinger.io features such as display real-time data in dashboards, store in data buckets or process it using a plugin.&#x20;

This integration provides bidirectional communication between Thinger.io and the data source by making use of HTTP requests and response data, which consist of basic HTTP POST messages with JSON-encoded data.&#x20;

<figure><img src="/files/SKEnf7JvVLzvm19ag7XV" alt="" width="563"><figcaption></figcaption></figure>

{% hint style="info" %}
Note that this integration can't expose 100% of Thinger.io features and benefits in terms of communication efficiency, real-time data and device administration, so it is strongly recommended to integrate the devices using the Thinger.io software client if it is available.
{% endhint %}

In the next sections, it is explained how to create and configure the HTTP Device Profile at Thinger.io Platform and how to link it with the data source.

## Creating an HTTP Device Profile

The first step to work with this interface consists of creating the device profile at the "devices" main menu tab and clicking on the "new device" button. Then, select "HTTP Device (Sigfox, LoRa, cURL)" type and fill `Device ID` , `Device Name`  and `Description` slots as required. &#x20;

<figure><img src="/files/ACdhf2Jfrox4RFo5cVdM" alt=""><figcaption></figcaption></figure>

Once the profile has been created, it is possible to find it in the devices list, then clicking the device identifier will open the "device dashboard", which is an interface that shows device status and connection information and also allows working with the callback configuration and properties.&#x20;

<figure><img src="/files/skn3SCQmwTExZnXNXFBg" alt=""><figcaption></figcaption></figure>

Also, scrolling down a little, we can see the Daily Data Transmission:

<figure><img src="/files/ir6PZHAo24PEkz4ZMhi2" alt=""><figcaption></figcaption></figure>

However, when this page is first accessed (before making the first call to the REST API), there won't be any information to show it will have the same aspect as the previous image. Note that this interface contains two additional tabs: the "Callback" tab allows managing the device behavior and capacities, and each of these features will be explained in the "[**Managing Callback Functionalities**](https://docs.thinger.io/hardware-devices/http-devices#managing-callback-functionalities)" section of this document.  On the other hand, the "Properties" tab allows creating and managing device properties, which are variables related to this device stored in Thinger.io Server, that can be edited, displayed, or forwarded to the device using callback menu functionalities.

{% hint style="success" %}
[Learn more about Thinger.io **Device Properties** at THIS section of our documentation](https://docs.thinger.io/console#device-properties)
{% endhint %}

## Building the HTTP request

It is necessary to obtain the HTTP request and the authorization that allows interacting with Thinger.io and start sending data from an external system. Clicking into the "Callback" tab, it is possible to show all callback details and build the request in a simple way, as explained in the next steps:

1\) Going to the Device profile, and clicking on the right-top menu, which will open, among others, the `Callback` tab:&#x20;

<figure><img src="/files/SyhMClnMEmJ0mWOXXklJ" alt=""><figcaption></figcaption></figure>

2\) Then, going to `Callback/Overview` tab, a specification of the REST API that provides access to this device will be shown, ready to be copied into the program or HTTP request entry.&#x20;

<figure><img src="/files/QEMpguP0kpBUXM7JqSVm" alt=""><figcaption></figcaption></figure>

After following the first step, the authorization token that is shown on this interface will be fixed, being also the same as the one shown at the "settings" tab, so it can be copied too in order to create the HTTP Request. &#x20;

{% hint style="success" %}
[Click here to find additional documentation about how to implement HTTP requests over different systems in the section **"Building the HTTP request in the data source."**](https://docs.thinger.io/hardware-devices/http-devices#building-the-http-request-in-the-data-source)
{% endhint %}

3\) Now the system is ready to start sending data to Thinger.io via HTTP request; however, note that this system is aimed at receiving application/JSON data codified messages. If the system messages do not contain JSON data, the server will answer with a 200 OK message to the communication, but no data will be stored. An example of well-defined JSON is shown at the bottom of this tab:

![](/files/-LqppjHxI4DCJOfizOiZ)

## Managing Callback Functionalities&#x20;

Once the callback has been integrated with the system,  the developer will be able to use almost all Thinger.io Platform features by selecting them in the `Callback/Settings` tab. The next section shows a complete specification of the features that can be exploited:

<figure><img src="/files/aMgHP4lRyvCrDzxkyOQj" alt=""><figcaption></figcaption></figure>

### **Store data in Buckets**

Thinger.io data Buckets is a scalable system that allows storing devices' data simply. Allowing support for historical data analysis or downloading IoT data into a file. The Callback manager allows associating an existing data bucket with the HTTP Device data in order to store it as it is retrieved.&#x20;

<figure><img src="/files/eYj7OL9Z8eAowXWQekmu" alt=""><figcaption></figcaption></figure>

To make this assignment, just check the checkbox and click into the text entry to select or search a previously defined data bucket, as shown in the previous image.&#x20;

{% hint style="success" %}
[Click here to find additional documentation about Data Buckets' definition and management. Click here to open Data Bucket documentation](/features/buckets)
{% endhint %}

### **Call Endpoints**

Thinger.io allows defining endpoint profiles that simplify the execution of a service such as sending an email, sending an SMS, calling a REST API, interacting with IFTTT, calling a device from a different account, or calling any other HTTP endpoint.

![](/files/-LqqA00p2hhBVlbNXYhM)

The Callback Manager allows for easy association of the device data with a previously defined Endpoint profile that will be called in real time when the data is processed by the Thinger.io server.&#x20;

{% hint style="success" %}
[Click here to find additional documentation about Thinger.io Endpoint definition and management at the Endpoints documentation](https://docs.thinger.io/console#endpoints)
{% endhint %}

### **Set device properties**

This feature provides an easy way to select a property of this device in order to store just the last-received data from a device or set a specific attribute, such as location data. This feature allows using the Thinger.io server as a persistent memory for the device. To select the property that will be modified, just select the checkbox and find its ID in the text entry.

![](/files/-LqqDvgoYpIFI5pGxOsW)

The device properties can also be shown and managed by just going to the "Device Properties" tab of the device dashboard. &#x20;

<figure><img src="/files/60TuIySRMf6V1iOHIE3K" alt=""><figcaption></figcaption></figure>

### HTTP Response Data

HTTP communications allow sending data to the device in the confirmation message. This feature can be used to create bidirectional communication with these kinds of devices using the "Response Data" section of the Device Callback management interface.

To start sending response data, just click on the check box and select a device property from the list:

![](/files/-LrtT_Oz7ZorRZHQ1suj)

This feature is aimed at introducing an existing device's property into the HTTP response, so if there is any previously created property, the first step will be adding a new one using the "Properties" menu.&#x20;

{% hint style="success" %}
[Learn more about Thinger.io **Device Properties** at THIS section of our documentation](https://docs.thinger.io/console#device-properties)
{% endhint %}

Note that the device properties will be sent using JSON content type, so the device codification has to be ready to retrieve and work with this data.

### **Connection Timeout**

This parameter allows the establishment of a device connection timeout in minutes, so the platform can consider the device as "disconnected" after a fixed time without receiving messages. This will be shown with the red dot:

<figure><img src="/files/n11fv4Vpp8EHjHX4kIBA" alt=""><figcaption></figcaption></figure>

## Building the HTTP request in the data source

Finally, it is necessary to introduce the API given in the "callback overview" section in the system or device, allowing it to connect with the platform and start sending data. If everything is done correctly, the device dashboard will start displaying information:

<figure><img src="/files/CzlSpJnQ7iJ7V6KyBjbt" alt="" width="563"><figcaption></figcaption></figure>

As there are different ways to make this integration, in this section, it is explained how to properly implement the request over different platforms. &#x20;

### Coding the request

For those users who need to create the complete HTTP request manually, the next segment shows how to make this properly. Note how the request body is formed: `REST API` + `?authorization=` + `Token`

```
https://trincado.do.thinger.io/v3/users/jt/devices/Example_Device/callback/data?authorization=eyJhbGciOiJIUzI1NiIsInR5cCI6IkpXVCJ9.eyJqdGkiOiJEZXZpY2VDYWxsYmFja19FeGFtcGxlX0RldmljZSIsInVzciI6Imp0In0.RhNQsRz-Ngu7_KPMJxUikPzEvPck1VeZjwUN4YuyhfQ
```

### Using Postman / HTTP request manager

These services provide a useful way to test HTTP integrations in a simple way. It is only necessary to follow the next steps to configure a request:

![](/files/-LrDyheHhZHFPGQr2Vgw)

1. Select \<POST> message type
2. Introduce the device callback into the main textbox
3. Create an Authorization header with the "bearer" command
4. Create a Content-Type header with application/json type
5. Write some valid JSON data and send the query

![](/files/-LrE-290s079dVMNsUPQ)

An empty 200 OK status message should be received.&#x20;

### Using cURL

If the source system supports cURL instructions, there is an integration example into `Callback / Overview`tab, and scroll down until the Curl Example, ready to copy and modify:

<figure><img src="/files/qwtsxC8StMCj1yxkPX6G" alt=""><figcaption></figcaption></figure>


# MQTT CLIENTS

## Introduction to MQTT

MQTT is an M2M communication protocol that has become very popular for IoT purposes due to its simplicity and lightness. It uses a pub-sub messaging paradigm in which the devices, also called **"clients",** maintain a TCP/IP connection with a server, being able to perform two different types of communication:&#x20;

* **Publish** messages with an identification that is called "topic". In this way, the devices can send data to the server.&#x20;
* **Subscribe** to a specific topic to receive data from the server.&#x20;

The server, also called **"broker"**, keeps a register of all connected devices and their pub-sub behavior, allowing fast, efficient, and asynchronous data communications.

## Integration of MQTT devices&#x20;

Thinger.io Platform has been provided with a custom MQTT broker that can be used to integrate devices with this protocol with ease, allowing publish and subscribe communications. The next sections explain how to work with both to integrate MQTT data with the platform.

The process is carried out in two parts: on the one hand, the definition of the device at Thinger.io Platform Server that will act as a Broker, and on the other hand, the configuration of an MQTT Client.

### Create an MQTT device at Thinger.io &#x20;

Creating the device on Thinger.io is done like any other resource on the platform, just accessing the device list, available in the "devices" section of the main menu and clicking on the "Add device" button:&#x20;

<figure><img src="/files/XilnZr3MAa3k80jkyO2r" alt="" width="461"><figcaption></figcaption></figure>

Then the "new device form" will appear, allowing for the introduction of device information:

<figure><img src="/files/hVniqN73pscfznbhGyxL" alt=""><figcaption></figcaption></figure>

* **Device Type**: MQTT device should be selected
* **Device identifier:** Must be unique within the devices
* **Device description:** Additional information that may help to identify each device
* **Device credentials:** This is the device security password, it can be randomly created using the bottom button.

When all the information has been introduced, pressing the "Add Device" button will create a new device profile in the device list. If everything is right, a confirmation message will appear, meaning that Thinger.io Platform is ready to receive data from the MQTT devices. &#x20;

### Configure the MQTT client to connect with Thinger.io&#x20;

The integration's second part is configuring any device or program as a client to connect to Thinger.io and start publishing or subscribing data. In any case, the following parameters must be introduced to the client in order to create the connection:&#x20;

* **Broker Address**: The server web domain (without http\:// command). When working with the freemium server use:&#x20;

  ```
  backend.thinger.io
  ```
* **Broker Port**: 1883 for non-secure connections, or 8883 for SSL/TLS
* **User Name**: Thinger.io username (not email address)
* **Client ID**: The device identifier that was configured at the device form
* **Password**: Must be the same password that was placed on Thinger.io "Device Credentials" parameter
* **MQTT version**: Currently, Thinger.io supports 3.1 or 3.1.1 versions of the protocol

![example using MQTT.fx client with an "acme" server](/files/-MVLuv5nvXbVSdDWzG2Q)

It is mandatory to enable SSL/TLS if the Broker Port = 8883:

<figure><img src="/files/6dBn20xutJRpyrsQtFpj" alt="" width="533"><figcaption></figcaption></figure>

{% hint style="info" %}
It is recommended to use SSL/TLS communication using the port 8883
{% endhint %}

Once the client has been configured, it should be able to publish and subscribe data with the server, for example, using the `mosquit_pub` client:

```
mosquitto_pub -d -h backend.thinger.io -p 1883 -i MQTT -u jt -P testCredential -t telemetry -m '{"temperature":5}'  

Client MQTT sending CONNECT
Client MQTT received CONNACK (0)
Client MQTT sending PUBLISH (d0, q0, r0, m1, 'telemetry', ... (17 bytes))
Client MQTT sending DISCONNECT
```

Where `MQTT` is the  Client ID, `jt` is the user account, and `testCredentials` is the device password.&#x20;

Note that the Thinger.io MQTT broker has been designed to support multi-tenancy by default. It supports multiple clients/organisations to use the same broker without overlapping topics.

## Working with MQTT data

Once the MQTT device is connected to the platform, there are different ways to work with its data:&#x20;

{% hint style="success" %}
The most recommended way to work with MQTT device data is to configure a **`Product`** profile, which allows building interfaces between the MQTT broker topics and the platform features. [**Check the "Products" section**](/business-features/products) to learn how to work with this feature.
{% endhint %}

However, it is also possible to store raw MQTT data using the data buckets feature as explained below.

### Storing data in buckets

Thinger.io data buckets are a virtual storage where any kind of time series data can be saved. This information can be used to be plotted in dashboards or exported in different formats for offline processing.\
\
Configure a data bucket to store data from a specific MQTT topic just requires going to the "Buckets" section of the main menu and pressing the "Add Bucket" button to access the "new bucket form", which introduces the topic configuration: &#x20;

<figure><img src="/files/V8OdSgxmwT7m9Ab9a46c" alt=""><figcaption></figcaption></figure>

The next parameters need to be configured:&#x20;

* **Bucket ID**: Unique identifier for the bucket.&#x20;
* **Bucket name**: Use a representative name to remember the bucket scope, like `WeatherData`.
* **Bucket Description**: Fill here any description with more details, like Temperature and humidity in the house.
* **Enabled**: Data bucket recording can be enabled or disabled. Just switch it on to enable it.
* **Data Source**: Commonly, this defines the Thinger.io device or resource that will be subscribed by the server. In this situation, "From MQTT Topic" must be placed
* **MQTT Topic**: place here the MQTT topic that will be subscribed by the server&#x20;

This way, Thinger.io Platform server will be configured as an MQTT broker but also as a topic consumer in order to provide additional features. Then, the client must be configured to send data in JSON format.

{% hint style="success" %}
Use **JSON** as the payload type for the device messages stored by buckets.
{% endhint %}

### Showing data in Dashboards

Now that the MQTT data is being stored in the data bucket, it is possible to show it on dashboards, where multiple widgets can be used to create real-time or historical representations by selecting the bucket as the data source:&#x20;

<figure><img src="/files/ou9ET4ZtZa5ZV00ZbY26" alt="" width="503"><figcaption></figcaption></figure>

Dashboard widgets can show data from different devices and have been configured to create flexible data representations, as we have explained in the [**dashboard section of this documentation**](/features/dashboards).&#x20;

![](/files/-M3SE8P19rEYMk6N3Ikr)


# LINUX / RASPBERRY PI

IOTMP Client for Linux Devices

This how-to will cover how to get the first steps while using the thinger.io platform in the Raspberry Pi or any other Linux device. This includes how to install dependencies, clone the source code, and compile and execute the main example available in the [GitHub Repository](https://github.com/thinger-io/IOTMP-Linux).

## Requirements

* A Raspberry Pi running Raspbian, and a terminal or SSH access. Other OS like Ubuntu or Debian may work but have not been tested yet. This tutorial has been tested with Debian Buster version.
* Register a device in the thinger.io console and keep the credentials by hand. If any help is needed, please check this other [how-to](https://community.thinger.io/t/register-a-device-in-the-console/23).

## Install Dependencies

Thinger.io implementation for Linux requires some tools and libraries for its compilation:

* A C++ compiler (GCC or Clang)
* CMake to guide the compilation and search for installed libraries
* OpenSSL for using secure connections with the platform
* Boost Libraries used for high-performance async input/output&#x20;

To install these dependencies, update the apt repository and install packages first.

```
sudo apt update
sudo apt upgrade
```

Then, install the described packages:

```bash
sudo apt install gcc g++ cmake libssl-dev libboost-system-dev libboost-filesystem-dev libboost-thread-dev libboost-program-options-dev libboost-regex-dev
```

## Compile Client

Download the latest Linux Client version from GitHub.

```bash
git clone https://github.com/thinger-io/IOTMP-Linux.git
```

Enter the IOTMP-Linux folder we just cloned.

```bash
cd IOTMP-Linux
```

Create a build folder and enter it:

```bash
mkdir build
cd build
```

Run CMake

```bash
cmake ../
```

If everything goes fine, it should display something like:

```bash
pi@RevPi20679:~/thinger_iotmp_linux_client/build $ cmake ../
-- The C compiler identification is GNU 8.3.0
-- The CXX compiler identification is GNU 8.3.0
-- Check for working C compiler: /usr/bin/cc
-- Check for working C compiler: /usr/bin/cc -- works
-- Detecting C compiler ABI info
-- Detecting C compiler ABI info - done
-- Detecting C compile features
-- Detecting C compile features - done
-- Check for working CXX compiler: /usr/bin/c++
-- Check for working CXX compiler: /usr/bin/c++ -- works
-- Detecting CXX compiler ABI info
-- Detecting CXX compiler ABI info - done
-- Detecting CXX compile features
-- Detecting CXX compile features - done
-- Performing Test COMPILER_SUPPORTS_CXX17
-- Performing Test COMPILER_SUPPORTS_CXX17 - Success
-- Looking for pthread.h
-- Looking for pthread.h - found
-- Performing Test CMAKE_HAVE_LIBC_PTHREAD
-- Performing Test CMAKE_HAVE_LIBC_PTHREAD - Failed
-- Looking for pthread_create in pthreads
-- Looking for pthread_create in pthreads - not found
-- Looking for pthread_create in pthread
-- Looking for pthread_create in pthread - found
-- Found Threads: TRUE  
-- Found OpenSSL: /usr/lib/arm-linux-gnueabihf/libcrypto.a (found version "1.1.1n")  
-- OpenSSL Version: 1.1.1n /usr/include /usr/lib/arm-linux-gnueabihf/libssl.a;-lpthread;dl /usr/lib/arm-linux-gnueabihf/libcrypto.a;-lpthread;dl
-- Found Boost: /usr/include (found version "1.67.0") found components: system thread regex program_options date_time chrono atomic 
-- Configuring done
-- Generating done
-- Build files have been written to: /home/pi/thinger_iotmp_linux_client/build
```

Then, run make to generate the binary.

```bash
make
```

&#x20;Take a coffee now ☕️. It can take some minutes to complete.

## Run Client

After it compiles, it is possible to execute the binary by providing the username, device, and credentials parameters.

```bash
pi@RevPi20679:~/thinger_iotmp_linux_client/build $ ./thinger -u username -d device -p credential --host "perf.aws.thinger.io"
[1] 2442
pi@RevPi20679:~/thinger_iotmp_linux_client/build $ date       time         ( uptime  ) [ thread name/id ]                   file:line     v| 
2022-09-06 19:54:46.635 (   0.001s) [main thread     ]             loguru.cpp:647   INFO| arguments: ./thinger -u alvarolb -d macbook -p macbook --host perf.aws.thinger.io
2022-09-06 19:54:46.636 (   0.001s) [main thread     ]             loguru.cpp:650   INFO| Current dir: /home/pi/thinger_iotmp_linux_client/build
2022-09-06 19:54:46.636 (   0.002s) [main thread     ]             loguru.cpp:652   INFO| stderr verbosity: 0
2022-09-06 19:54:46.636 (   0.002s) [main thread     ]             loguru.cpp:653   INFO| -----------------------------------
2022-09-06 19:54:46.643 (   0.009s) [main thread     ]        asio_client.hpp:97    INFO| [CLIENT] Starting ASIO client...
2022-09-06 19:54:46.644 (   0.009s) [main thread     ]              thinger.h:242   INFO| [SOCKET] Connecting to perf.aws.thinger.io:25206 (TLS: 1)
2022-09-06 19:54:46.763 (   0.129s) [main thread     ]              thinger.h:251   INFO| [SOCKET] Connected!
2022-09-06 19:54:46.763 (   0.129s) [main thread     ]              thinger.h:263   INFO| [THINGER] Authenticating. user: '', device: ''
2022-09-06 19:54:46.764 (   0.130s) [main thread     ]              thinger.h:719   INFO| [MSG_OUT] (CONNECT) (2:1) (3:["username","device","password"]) (1:17767) 
2022-09-06 19:54:46.793 (   0.159s) [main thread     ]              thinger.h:677   INFO| [MSG__IN] (OK) (1:17767) 
2022-09-06 19:54:46.794 (   0.160s) [main thread     ]              thinger.h:266   INFO| [THINGER] Authenticated!
2022-09-06 19:54:47.795 (   1.161s) [main thread     ]              thinger.h:719   INFO| [MSG_OUT] (KEEP_ALIVE) 
2022-09-06 19:54:47.818 (   1.184s) [main thread     ]              thinger.h:677   INFO| [MSG__IN] (KEEP_ALIVE) 
2022-09-06 19:54:47.818 (   1.184s) [main thread     ]              thinger.h:278   INFO| [THINGER] Keep alive received
```


# USER ACCOUNTS

## Sign-in Methods

This section displays all the methods available to access your account. To access your security settings, navigate to **Account** → **Security**.

### Email & Password

Your primary email address is displayed along with its verification status. You can set or update your password from this section:

* **Set Password**: If you signed up using a federated identity provider (like Google or Microsoft), you may not have a password set. You can create one to have an alternative sign-in method.
* **Update Password**: If you already have a password, you can change it by entering your current password followed by the new one.

Password requirements are configured by your platform administrator and typically require a minimum length of 6-8 characters.

### Passkeys

Passkeys provide a modern, passwordless way to sign in to your account using biometric authentication (fingerprint, face recognition) or a hardware security key. Passkeys are:

* **More secure** than passwords - they can't be phished or stolen
* **Easier to use** - no need to remember complex passwords
* **Cross-platform** - can sync across your devices (depending on your platform)

#### Adding a Passkey

1. In the **Passkeys for Sign-in** section, enter a descriptive name for your passkey (e.g., "MacBook Pro", "iPhone", "Windows PC")
2. Click **Add Passkey**
3. Your browser will prompt you to authenticate using:
   * Biometric authentication (Touch ID, Face ID, Windows Hello)
   * A hardware security key
   * Your device PIN
4. Once verified, the passkey is registered and appears in your list

#### Managing Passkeys

Your registered passkeys are displayed in a list showing:

* **Name**: The identifier you assigned
* **Authenticator type**: The type of authenticator used (when available)
* **Created**: When the passkey was registered
* **Last used**: When you last signed in with this passkey

To remove a passkey, click the delete icon next to it and confirm the action.

#### Signing in with a Passkey

When passkey login is enabled on your platform:

1. On the login page, click **Sign in with Passkey**
2. Your browser will prompt you to select and authenticate with a registered passkey
3. After successful authentication, you're signed in directly

> **Note**: Passkeys require a compatible browser and device. If your browser doesn't support WebAuthn, the passkey options won't be visible.

### Connected Accounts

If your platform has federated identity providers configured (such as Google, Microsoft, Auth0, or others), this section displays your linked accounts.

For each connected account, you can see:

* **Provider**: The identity provider (with logo)
* **Email**: The email address associated with that provider
* **Linked date**: When you connected the account

#### Unlinking an Account

You can disconnect a federated identity by clicking the unlink button. However, to maintain access to your account, you must have at least one of the following:

* A password set on your account
* Another connected identity provider

If you only have one connected account and no password, you'll need to set a password before you can unlink it.

***

## Two-Factor Authentication (2FA)

Two-factor authentication adds an extra layer of security to your account. After entering your password, you'll need to provide a second form of verification.

Your platform supports two types of second factors:

### Authenticator App (TOTP)

Time-based One-Time Passwords (TOTP) work with authenticator apps like:

* Google Authenticator
* Microsoft Authenticator
* Authy
* 1Password
* Any TOTP-compatible app

#### Setting up an Authenticator App

1. Click **Enable Authenticator App**
2. **Step 1 - Scan QR Code**:
   * Open your authenticator app and scan the displayed QR code
   * Alternatively, manually enter the secret key shown below the QR code
3. **Step 2 - Verify Code**:
   * Enter the 6-digit code displayed in your authenticator app
   * Click **Verify**
4. **Step 3 - Save Backup Codes**:
   * You'll receive 10 single-use backup codes
   * **Save these codes in a safe place** - they're your recovery option if you lose access to your authenticator app
   * Use the **Copy** button to copy all codes to your clipboard
   * Use the **Print** button to print a formatted page with your codes
5. Click **Done** to complete setup

Once enabled, you'll see the status showing "Authenticator app is enabled" along with the number of remaining backup codes.

#### Disabling the Authenticator App

Click **Disable Authenticator App** and confirm the action. This will remove TOTP as a second factor and invalidate all backup codes.

### Security Keys (WebAuthn)

Hardware security keys provide phishing-resistant two-factor authentication. Compatible devices include:

* YubiKey
* Google Titan Security Key
* Feitian keys
* Any FIDO2/WebAuthn compatible security key

#### Adding a Security Key

1. In the **Security Keys** section, enter a name for your key (e.g., "YubiKey 5", "Titan Key")
2. Click **Add Security Key**
3. When prompted by your browser:
   * Insert your security key (if USB)
   * Tap or activate the key when it blinks
4. The key is registered and appears in your list

#### Managing Security Keys

Your registered security keys are displayed showing:

* **Name**: The identifier you assigned
* **Authenticator type**: The detected key type
* **Created**: Registration date
* **Last used**: When you last used this key for authentication

You can register multiple security keys for redundancy. To remove a key, click the delete icon and confirm.

### Backup Codes

Backup codes are generated when you enable the authenticator app. Each code:

* Can only be used **once**
* Is 8 characters long
* Should be stored securely offline

#### Using a Backup Code

During login, when prompted for your two-factor code:

1. Click **Use a backup code instead**
2. Enter one of your backup codes
3. The code is consumed and can't be used again

#### Checking Remaining Codes

Your security settings show how many backup codes you have remaining. If you're running low, consider disabling and re-enabling the authenticator app to generate a fresh set of 10 codes.

***

## Authentication Flow with 2FA

When two-factor authentication is enabled, your login process becomes:

1. Enter your username and password (or use a federated identity)
2. You're prompted for your second factor
3. Choose your verification method:
   * **Authenticator App**: Enter the 6-digit code from your app
   * **Security Key**: Insert and activate your hardware key
   * **Backup Code**: Enter an 8-character backup code
4. After successful verification, you're signed in

If you have multiple 2FA methods configured, you can switch between them using the **Try another method** link.

> **Note**: Signing in with a Passkey bypasses password and 2FA entirely, as passkeys already provide strong authentication.

***

## Best Practices

1. **Enable at least one form of 2FA** to protect your account from unauthorized access
2. **Register multiple passkeys or security keys** on different devices for redundancy
3. **Store backup codes securely** - consider a password manager or a physical safe
4. **Don't share your backup codes** - treat them like passwords
5. **Remove old or unused credentials** - if you no longer use a device, remove its passkey or security key
6. **Keep your authenticator app backed up** - some apps offer cloud sync for recovery


# DEVICES ADMINISTRATION

\
A device in Thinger.io is typically a virtual representation of a physical object connected through an IoT terminal. This instance will receive a series of capabilities on the Thinger.io platform, such as:

* State registration (connection, IP, data bandwidth)
* A unique access REST API
* Storage of attributes through properties. These can be individual or inherited from a group or product profile.
* Storage capabilities in data buckets

Device instances can be provisioned in two ways:

## Create a Single Device

The first step to start any IoT project with Thinger.io (except for not connected devices like Sigfox) is creating a device profile, which relates the hardware device to the user account. Any device in Thinger.io must be registered to get access to the cloud. Each one has its identifier and credentials and is related to the user account. This section describes the required steps to register a new device in your account.

All device creation and management processes are performed from the devices tab in the main menu

![](/files/AMoEr5GbLonhqIczrKmw)

This section allows us to show all registered devices and some information about their connection status:

<figure><img src="/files/eVKtft4fWgDYMZfTWxUd" alt=""><figcaption></figcaption></figure>

If it's your first time on Thinger.io, this list will be empty. Next, we'll show you how to create your first device. First of all, click on **Add Device,** which will open a form in which you can introduce your device identification credentials and select a **Device Type** from the drop-down list, selecting one of these types:&#x20;

* **IOTMP device**: For devices with the Thinger.io software client installed on them. Such as Raspberry Pi, Linux, or Arduino devices, that will work using IoTMP (Internet of Things Message Protocol)  to transfer the status information and data points.&#x20;
* **HTTP device**: This option allows creating a virtual device to integrate data via REST API Callback, providing nice integration with third-party platforms and other frameworks (Java, Python) and allowing them to work with their data in a simple way.&#x20;
* **MQTT devices:** For MQTT devices that will work with the Thinger.io embedded broker (only for private instances).

<figure><img src="/files/XS9rW7xsB4nSdWfrKgK1" alt=""><figcaption></figcaption></figure>

Once you select your device type, the form will automatically adjust the device definition parameters according to its specific requirements needed to create the device profile.

* **Device identifier:** It must be unique within your devices
* **Device name:** An optional human-readable name for the device. It’s useful for UI display and should be unique across your devices for clarity.
* **Device description:** A free-text field to describe the purpose or location of the device, making it easier to recognize and manage within your project.
* **Device credentials:** A secure authentication key required for the device to connect to the Thinger.io platform. You can enter your own credentials or generate a random one using the “Random” button. Keep it safe, as it will be used by the device to authenticate its communication.All your passwords on the server are stored securely using `PBKDF2 SHA256` with a 32-byte salt generated with `PRNG` and a non-depreciable amount of iterations.&#x20;
* **Asset Type:** Optionally assign a type/category to the device (e.g., sensor, gateway, actuator), helping with filtering and organization.
* **Asset Group:** Select or assign a group or cluster the device belongs to. Useful for grouping devices by location, customer, or function.
* **Product:** Link the device to a product definition, allowing you to reuse standardized resources (e.g., inputs, outputs, properties) across multiple devices of the same type.
* **Enable**: Toggle to activate or deactivate the device. A disabled device cannot connect or report data until re-enabled.

\
Keep your **Device identifier** and **Device credentials**, as you will need them for connecting your device (the password cannot be recovered later).

Right after, you will be redirected to the device profile, where you will see its status, which shows: data transmitted and received, IP address, device state (online or offline), last connection, device location and the daily data transmitted.

{% hint style="info" %}
Depending on your device, you will need to install the required libraries or development environment, so check out the following sections according to your device:
{% endhint %}

{% content-ref url="/pages/-LpXslzGO\_pZsPlDBBWP" %}
[DEVICES](/arduino)
{% endcontent-ref %}

{% content-ref url="/pages/-LpXslzKjYiSNWUOdM6N" %}
[LINUX / RASPBERRY PI](/linux)
{% endcontent-ref %}

Remember that Sigfox devices do not share the concept of "connected devices", as they are by default offline devices that send information periodically. To store information from these devices, please check the documentation.

{% content-ref url="/pages/-LpYhfDDV\_ePM5qDqnmI" %}
[SIGFOX](/lpwan/sigfox)
{% endcontent-ref %}

***

For this example, the Arduino IDE will be used with an ESP8266 device, such as the NodeMCU. The example code for the ESP8266 can be opened and filled in with the device details: the username, the device ID, and the device credentials established during device creation. These pictures illustrate the relationship between the code and the device created in the account.

<figure><img src="/files/deVaBZdAnBMLHml4YJqD" alt=""><figcaption></figcaption></figure>

Once we have established in the code our account identifier, device identifier, and device credentials, we can compile and flash the program. Meanwhile, we can open our device in the cloud console, just by clicking its identifier in the devices list. On the device screen, information regarding the device will be visible, such as its IP address, connection status, and sent/received data in real time. By default, the device will appear as disconnected:

<figure><img src="/files/Hle4xaGSXUYDF8PQjBwZ" alt=""><figcaption></figcaption></figure>

Once the device gets connected to the account, the interface will change its status, showing "Online" status, and some connection data like the IP address or the upload/download data amount:

![](/files/EcPIHZYfahQsgH3IoV8S)

Note that the connected device profile can show an estimated location of the device, which can be customized when modifying the "location" property as explained in the [**properties**](https://docs.thinger.io/console/devices-administration#device-properties) section of this documentation.&#x20;

Also, there is an additional section below, the Daily Transmission Data:

<figure><img src="/files/GVevfnc1svnVr6eT4REb" alt="" width="563"><figcaption></figcaption></figure>

Having the first connected device, we are ready to discover all the other Thinger.io features.

## Create a Large Device Network

By means of the `Products` feature, Thinger.io enables efficient management of large fleets of IoT devices through self-provisioning. This means that, instead of manually registering each device, create a 'product profile' that represents a specific type of device or category with common characteristics.

Once a product is configured, you can define its characteristics, such as common data buckets to store the historical data of each device, default properties that will be inherited, device dashboard, and data processing scripts.&#x20;

Thinger.io facilitates this process by providing unique access tokens for each device, ensuring a secure and reliable connection. Additionally, through the self-provisioning functionality, devices can automatically register on the platform without manual intervention.

This is especially useful when managing a large number of devices, as it greatly simplifies the onboarding process and subsequent management. In summary, the 'products' functionality with self-provisioning in Thinger.io is a powerful tool for scaling and effectively managing IoT device fleets.

## Device Explorer

Each device comes with an explorer and administration interface that allows showing and configuring different device features. This interface is common for all device types in thinger.io, but note that some features, such as the "device API explorer", may not be available if the device does not have an actual real-time connection with the server.&#x20;

In the next sections, it is explained each different feature of the device explorer:

### Device API

***

A notable feature of the Thinger.io platform is its ability to discover resources defined within a device. A resource can represent a sensor reading, such as temperature, humidity, or pressure, or an actionable element like a light, relay, or motor. Generally, any device resource functions as a callback that can be invoked on demand via a REST API. This section explains how to interact with device resources through the cloud console and demonstrates how to issue custom REST API calls to query a device.

Once a device is connected to an account, as described in the preceding section, its resources and API REST endpoints can be accessed and explored using the API Explorer. This screen is accessible from the Device Dashboard by clicking the small blue "Device API" button.

Within the API Explorer interface, a distinct box will be visible for each resource defined in the code. Each resource possesses an identifier linked to the resource name established in the code. The Thinger.io platform supports four different types of resources: one for input (sending data to the device), one for output (the device sending information), one for input/output (allowing both sending and receiving information in a single call), and a callback resource (which can be executed without sending or receiving information). From an API perspective, input and output data can be any JSON document. Consult the library documentation for details on defining these various resource types.

For example, the default ESP8266 example in the Arduino libraries defines two different resources. One input resource, called `led`for controlling the `LED_BUILTIN`, and one output resource, called `millis` to extract the current "millis" value of the device. Notice that a resource name can be any arbitrary text to identify the underlying resource, as they are not tied to any constant defined in the platform.

So, these are our sample resources:

```cpp
thing["Led"] << digitalPin(LED_BUILTIN);
thing["button"] >> outputValue(millis());
```

If our device is connected to the platform, we can open our device API explorer and see the defined resources in the platform:

![](/files/Y6w5mAEJupeIkZa2stcw)

<figure><img src="/files/VXYUKPHougQnHpoFaU59" alt=""><figcaption></figcaption></figure>

Defined resources within the device are now available on the platform, as the device is capable of reporting its available resources and their format or current state. The intent is to allow for real-time testing and interaction with these resources. In this case, it will be possible to switch the LED state or read the current milliseconds from the Arduino device. Each click of the "Run" button will execute the resource, i.e., forcing a read from a sensor, calling the `millis()` function, or sending a new state for the actuator, depending on the resource type (input or output).

Thanks to this feature, every device resource can be translated to a REST API endpoint in a very simple way, so it can be consumed or interacted with by any other devices or applications using standard REST queries, i.e., using a `POST` method to send values to the device, or using a `GET` method to read information from the device.&#x20;

It is also possible to create more complex resources with both input and output functionalities. This example returns the sum and multiplication between two integer numbers:

```cpp
thing["in_out"] = [](pson& in, pson& out){
    out["sum"] = (int)in["value1"] + (int)in["value2"];
    out["mult"] = (int)in["value1"] * (int)in["value2"];
};
```

This resource definition will be translated to the following resource in the platform, where it is possible to both test input values and view the output result. So, try entering some values, click on `Run`, and see the output reported by the device. This example also emphasizes the functionality of resources, highlighting that they are not merely static values but rather callbacks that can be invoked with any input or output value. When our device API explorer is opened, it shows other defined resources in the platform:

<figure><img src="/files/PpFvZvqYksLSlnhngiHb" alt="" width="520"><figcaption></figcaption></figure>

***

Beyond the useful device API explorer, which facilitates interaction with devices, specific information about the REST API endpoint can be obtained by clicking the Show Query button. This reveals details such as the method type, URL, content type, request body, and response body. Additionally, clicking `Curl`allows for copying the command to interact with the device directly from the console. The preceding example translates to the following REST API call:

<img src="/files/-LqHOFHv2orfiCH4JJSl" alt="" width="563">

There is more information available about the API for interacting with the devices [here](http://docs.thinger.io/api/#devices-api-access-device-resources).

### Device Tokens

***

All interactions with connected devices, such as those using the REST API endpoints mentioned previously or a mobile phone, require authentication against the platform. By default, when interacting with devices via the Thinger.io console, all requests to the platform are implicitly signed with an access token obtained from the username and password. This type of authorization grants access to all account resources, allowing for the configuration of devices, buckets, and so on. However, this authorization expires frequently (though it is automatically renewed by the browser) and cannot be used to grant device access to other users or platforms, as it would provide access to the entire account.

In this scenario, it is possible to create specific access tokens for granting access to devices and even to particular resources on those devices. Furthermore, the token's validity can be defined by enabling an expiration date. Thus, if access to certain device resources needs to be provided to a third-party tool like IFTTT, an external web page, a mobile phone, or any other service, creating a device token is highly recommended.

To create a device token, open the device profile and take a look at the subsection called "Device Tokens". Then, click on the green button `Add` on the right of the box. Then, a modal window will appear, where different parameters can be configured:

* Token name: Use a representative name to remember why the token was issued, i.e., IFTTT Access, Mobile phone, etc.
* Token access: Configure the token to allow accessing all device resources or limit access to a set of resources.
* Token expiration: Configure the token to expire at some given date or be available indefinitely.

While configuring a device token, click on  `Select Resources` :

<figure><img src="/files/o4ESmeaghG3xyKZmOlHY" alt="" width="563"><figcaption></figcaption></figure>

Once the token is saved, the interface will show the access token to be used in the REST API Calls. If any help is needed to integrate this access token in the REST API calls, check out [this](http://docs.thinger.io/api/#authentication-api-rest-api-authentication) documentation.

<figure><img src="/files/cmah4pvz5SERB5pS8mt7" alt=""><figcaption></figcaption></figure>

Note that it is possible to create a QR code in order to share this resource access with third parties or APPs.

<figure><img src="/files/ot2rV0sjOmZpXtNSk8cO" alt="" width="563"><figcaption></figcaption></figure>

### HTTP devices Callback <a href="#http-devices-callback" id="http-devices-callback"></a>

Because of the nature of these devices, [thinger.io](http://thinger.io/) applies a special treatment, based on the use of callbacks, to make the integration. A callback is a functionality of the server that can be used to request a process with device data by means of an HTTP query, such as storing it in a bucket, calling an endpoint profile, or registering the information contained in a JSON that should be sent with the query.

To create a callback, first, navigate to the device profile.&#x20;

In the top right corner of the menu, a three-line icon will be found. Clicking it will reveal a drop-down menu that includes the desired callback option:

<figure><img src="/files/3q2CutyzpyG15tqTBIuS" alt=""><figcaption></figcaption></figure>

After clicking "callback", different options in the callback details will be displayed:

<figure><img src="/files/B5FnlgVdCTBZpoAYzslz" alt=""><figcaption></figcaption></figure>

Different functionalities can be requested from the server using a callback, by just clicking the checkbox and selecting the resource that will receive the data, such as:

* Data storage in scalable [Data Buckets](http://docs.thinger.io/console/#data-buckets)
* Calling [Endpoint Profiles](http://docs.thinger.io/console/#endpoints) to integrate with third parties
* Retrieving or modifying [Device Properties](http://docs.thinger.io/api/#Device-properties) using `Set device property` or `response data` features.

Note that it is not possible to create properties, data buckets, or endpoints through callback requests, so it is necessary to initialize them first using the web console or via REST API.

Once the callback details have been configured, the system will be ready to receive a request. Similar to the "show query" feature in the Connected device's dashboard, a precise specification of the HTTP request structure and a complete cURL example can be found by clicking on the `Callback / Overview`context:

<figure><img src="/files/DmxoPlvOPKhsfefXxq1J" alt="" width="563"><figcaption></figcaption></figure>

Scrolling down, this cell will appear:

<figure><img src="/files/BDuXtt4HdoziesDJQST0" alt=""><figcaption></figcaption></figure>

Finally, to create a Callback HTTP request, take into account that the `Authorization Header` must be included in the HTTP request:

```
https://<Thinger_Server>/v3/users/<Username>/devices/<Device_ID>/callback?authorization=<Authorization_Header>
```

### Device Properties <a href="#device-properties" id="device-properties"></a>

[Thinger.io](http://thinger.io/) provides a simple way to store additional information related to a specific device, such as location, identification, or even configuration parameters that may be retrieved by devices using common JSON files. In this way, the platform can be used as a device's persistent memory. To create a device property, open the device profile and take a look at the subsection called "Properties".

<figure><img src="/files/6jW6Vh84iHTo6rCHiHG7" alt=""><figcaption></figcaption></figure>

This menu provides an easy way to create, manage, or delete the device's properties. Note that the property created in this example specifies the device location. The [Thinger.io](http://thinger.io/) system has been designed to detect this configuration and automatically represent it on the device profile map. To add a new property, click the "Add" button located within the Properties section. If location is written as a Property Identifier, this will show:

<figure><img src="/files/HOPzgtFRqVHPzGvQtKXh" alt="" width="434"><figcaption></figcaption></figure>

***

If a different word is entered, it becomes possible to adjust the specific JSON variables to be targeted:

<figure><img src="/files/YuEy8fw8HKu7Qk0iHwQT" alt="" width="534"><figcaption></figcaption></figure>

Property declarations and modifications are made by means of a special context, provided with a JSON validator that enhances the text and checks morphological mistakes.

#### Coding with properties <a href="#coding-with-properties" id="coding-with-properties"></a>

It is also possible to create, retrieve and modify data properties from devices. However, at this point, we must differentiate between HTTP devices or [thinger.io](http://thinger.io/) software client devices, which will use `set_property()` or `get_propery()` commands:

* **Setting a property**

```
                    /*set property value*/
void loop(){
thing.handle();

if(event){    //must be flow controlled

    //create a pson with new values
    pson data;
    data["longitude"]=-4.056;
    data["latitude"]=41.40;

    //sending new values to the platform
    thing.set_property("location", data, true);
    }
}
```

* **Reading a property**

Where "location" is the property\_ID, "data" is the PSON to be sent, and the boolean (true/false) to get writing confirmation.&#x20;

```
                /*retrieve property value*/
void loop(){
thing.handle();

//creating a pson to store the property values
pson data;

//retrieving data from the platform
thing.get_property("My_Property", data);
  float lng=data["longitude"];
  float lat=data["latitude"];
  Serial.print("L: ");
  Serial.print(lng);
  Serial.print(" , l: ");
  Serial.println(lat);
}
```

{% hint style="info" %}
More details about property codification functions at the **"**[**codification**](/coding-guide)**"** section of this documentation.
{% endhint %}

Using HTTP devices, it's also possible to interact with properties through the callback configuration submenu tools under `Callback Details` . For example, the Response Data:

<figure><img src="/files/UUDRRyVCf5PyzLcnqa1F" alt=""><figcaption></figcaption></figure>

According to this configuration, when the [Thigner.io](http://thigner.io/) server receives any transmission from "SigfoxDevice1", the payload data will be stored in the "data" property, creating a JSON with all variables. In the opposite situation, thanks to the "Response Data" feature, the values stored in the parameter, which was called "downlink\_data", will be sent to the device through the Sigfox infrastructure.

### Device Online Terminal <a href="#device-settings" id="device-settings"></a>

This feature has been designed to work as a common program terminal, allowing printing of debug or execution messages from the device program, but working online through a device resource.&#x20;

{% hint style="info" %}
This feature is only available for generic devices equipped with the Thinger.io software client code library
{% endhint %}

To open a terminal, first, navigate to the device profile. Then, in the top right corner of the menu, find a three-line icon. Clicking it will reveal a drop-down menu that includes the terminal option:

<figure><img src="/files/jqlpa4jMklN8998dZiMU" alt=""><figcaption></figcaption></figure>

### Device Settings <a href="#device-settings" id="device-settings"></a>

***

Some device details, such as its description or credentials, can be adjusted by navigating to the "Settings" subsection of the device dashboard. This allows for changing the device credentials to new ones in case they have been forgotten (the password cannot be recovered from a database as it is encrypted). It should be noted that changing the device password will not disconnect the device, but it will prevent its reconnection once disconnected.

To access the settings, first, navigate to the device profile. Then, in the top right corner of the menu, a three-line icon will be found. Clicking it will reveal a drop-down menu that includes the desired settings option.

<figure><img src="/files/FpAHLPmHnxvK6V5erDA8" alt=""><figcaption></figcaption></figure>

If changing the device identifier is needed, it is necessary to delete the device and register a new one with the desired one.


# DATA BUCKETS

A data bucket is a type of virtual storage that can hold time series data, such as temperature or humidity measurements over time. However, it can also be used to store other types of events, such as motion detections, garage door openings, temperature alerts, and more.

This information can be used to plot information in dashboards or can be exported in different formats for offline processing.

## Create Bucket

To create a data bucket, access the `Data Buckets` feature, by clicking on this section:

![](/files/cV2MELFbsXjeqrzwt9sE)

To create the bucket, just press the **Add Bucket** button, which will show the following screen:

![](/files/coz52Y4eAVpyBJOFK9qg)

Here, it is necessary to configure different parameters:

* **Bucket ID**: Unique identifier for the bucket.&#x20;
* **Bucket name**: Use a representative name to remember the bucket scope, like `WeatherData`.
* **Bucket description**: Fill here any description with more details, like Temperature and humidity in the house.
* **Enabled**: Data bucket recording can be enabled or disabled. Just switch it on to enable it.
* **Data source:** This parameter allows setting the behavior of the data bucket by selecting the data source and also the sampling method. As there are many different options, this feature is detailed in the section below.

The following sections explain the different data bucket data acquisition modes and timing configurations:&#x20;

### **From Device Resource**

&#x20;This option subscribes Thinger.io Server to a specific device resource (such as temperature, motion, and so on). It can be configured to retrieve data from the device in a specific sampling interval or wait for asynchronous communications from devices by means of the "Refresh mode" parameter.\
\
Note that this option is only compatible with devices that have been provided with Thinger.io Software client libraries (Arduino, Linux or Raspberry), and it will only work properly if the device maintains a permanent connection with the server.

* **Sampling interval:**  Configure the bucket profile to retrieve data from device resources at a specific timing, which can be changed on demand, without modifying the device sketch. Another benefit is that no additional codification is needed to implement this feature and start storing data. The next basic code example will store two variables in the data bucket when using the "sampling interval" configuration.

```
// define the resource just once in the setup() section

thing["TempHum"] >> [](pson &out){ 
  out["temperature"] = dht.readTemperature();
  out["humidity"] = dht.readHumidity();
};
```

* **Update by Device:** This option allows the device to stream the information when required, i.e., by raising an event when detected. In this case, refresh mode must be set as the `Update by Device` option while configuring the bucket, and the device source code will contain a streaming instruction for the resources (also described in more detail [**here**](http://docs.thinger.io/arduino/#coding-streaming-resources)). This way, the data bucket will be listening to a device resource, and its information is registered in every stream call.

```cpp
/*"TempHum" resource was declared in the setup() function
but the stream instuction is added in the loop*/

void loop() {
  thing.handle();
  // use own logic here to determine when to stream/record the resource.
  if(requires_recording){
      thing.stream("TempHum");
  }
}
```

{% hint style="warning" %}
This instruction should NEVER be called each loop execution or at lower than 60s streaming rates, as the bucket system will only store data every 60s. &#x20;
{% endhint %}

### **From device Write Call**

&#x20;This option sets the bucket in passive mode, waiting to be called by any Thinger.io "Generic Device" (with Thinger.h libraries on it) by means of the `write_bucket()` method. The distinguishing feature of this mode is its ability to store data from multiple devices in a single data bucket.

Here is an example of an ESP8266 device writing information to a bucket using the `write_bucket` function:

```cpp
void setup() {
  // define the resource with temperature and humidity
  thing["TempHum"] >> [](pson &out){ 
    out["temperature"] = dht.readTemperature();
    out["humidity"] = dht.readHumidity();
  };
}

void loop() { 
  // handle connection
  thing.handle();
  // write to bucket BucketId the TempHum resource
  thing.write_bucket("BucketId", "TempHum");
  // sleep the device SLEEP_MS milliseconds
  ESP.deepSleep(SLEEP_MS*1000, WAKE_RF_DEFAULT); 
}
```

### **From API Request (for 3rd parties):**

This configuration allows to store data from any other device or data source that can't be equipped with Thinger.io libraries on its codification. The data bucket will be set in passive mode, waiting to receive data from any [**HTTP Device Callback**](/http-devices) that has been properly configured to send data to this data bucket.&#x20;

{% hint style="info" %}
This feature can also be used to store data directly from any third-party platform just calling the data bucket REST API and sending information in JSON format. But it is preferable to use the[ HTTP device way.](/http-devices)
{% endhint %}

### **From MQTT Topic**

Data buckets can be configured to subscribe to an MQTT topic in the same way as another MQTT client can. This feature enables storing published data within the same topic. Therefore, caution is advised if multiple devices are publishing to it. This configuration can be applied during the creation of a new data bucket or later using the Settings tab.

![](/files/22BjxVMAQj0WGoaGNH5m)

Once this source has been selected, the interface will show a new input text in which the topic trace can be written:

![](/files/QwJjvsQJIgoddyZZJK7E)

{% hint style="info" %}
Note that the data buckets system has been created to store JSON format messages, so the data from the MQTT device must be in this format.&#x20;
{% endhint %}

## Custom data timestamp&#x20;

Thinger.io data bucket feature has been created using time series databases, The system has been programmed to store the data points using the timestamp of the instant they are stored in the database as the indexing variable, however, it is possible to customize this variable by entering a timestamp in the payload using this key-value structure:

```
// example of datapoint with custom timestamp

{
  "ts":1671536877360
  "lat": 40.416775,
  "lng": -3.70379,
  "temperature": 23.33,
  "humidity": 32.44
}
```

The time must be expressed with a standard Epoch Timestamp expressed in milliseconds. This functionality allows storing data by the time they were produced instead of being stored. It also allows to correct or modify data already stored in the platform.

{% hint style="warning" %}
Note that if the TS of a new datapoint matches with an old data bucket entry, it will be overwritten.
{% endhint %}

## Review Bucket Data

Once the data bucket has been configured and it starts to record data from a device or from write calls, it will display the information inside a table. Every record contains the server timestamp in UTC (but shown in local time zone in the console) and the record value. The value stored in the data bucket can be a single value or any other JSON document. If the JSON document is composed of key-value pairs, like in the previous examples, they will be displayed in tabular format:

<figure><img src="/files/6q6QGNixaVJnBaWgT9sQ" alt=""><figcaption></figcaption></figure>

## Bucket Data Import

In order to make bulk data upload or buckets backup processes, the data bucket system has been provided with an import feature that is able to retrieve information from .csv files from a Thinger.io [**File System**](/business-features/file-system) and store its data using the timestream specified in the file rows.&#x20;

Note that using this feature has **a few restrictions**.

1. Each row must contain just one variable and use a ";" separation mark.&#x20;
2. The file must contain a column identified as "**ts**" with the Linux Timestream in milliseconds, which will be used to create the temporary serial.

Also, the user account must be able to use File Systems, which is a premium feature, so freemium users can't perform these processes. The accompanying image serves merely as an example; labels such as "File Storage" and "File Name" may vary in the interface:

<figure><img src="/files/90bVCHmeiIXnNQbDLKN4" alt=""><figcaption></figcaption></figure>

{% hint style="info" %}
Files resulting from a data bucket export are completely suitable for the import feature, so they are perfect examples to observe a valid data frame
{% endhint %}

The import process allows filling the data bucket with the same data contained in the CSV, ordered based on the TimeStamp in milliseconds included in the file.

To execute an import, the following steps must be carried out:

1. Create a new File System ([following **these** instructions](/business-features/file-system)) profile with public access configuration, or open an existing one and upload the .csv file to be imported into the File System.&#x20;
2. Create the new data bucket
3. Select the source File System and place the file identifier in the "Filename" section.
4. Click on the "Import Data" button.

## Export Bucket Data

***

It is possible to export all stored information in various file formats, allowing for offline data processing, such as applying Artificial Intelligence, Business Analytics, Big Data, and so on. To do this, access the bucket and configure the export process:

![](/files/rCadcmMsFGbvs3nfjdeA)

&#x20;The data bucket download configurable parameters are:

* **Export format:** To obtain a CSV, ARFF, or JSON format file
* **Timestamp:** Timestamp or ISO date format
* **Export range:** This section allows downloading the complete data bucket or selecting a custom range.&#x20;
* **Callback:** To set how the ending of the data bucket export process will be notified. Currently, there are two ways:&#x20;
  * Sending an email to the account's associated address&#x20;
  * Calling an endpoint. This option allows sending the download link to third parties using an [**Endpoint profile**](/features/endpoints-1)**.**

Once the export data range and format have been selected, the system will create a download link that will be stored in the "Export List" section below. These links can be used to provide customers with custom data reports from the IoT data.

![](/files/H6R3r3eCxSIco2TloRUI)

The download links will be available for 3 months if the instance administrator has not specified a different interval.&#x20;

## Clear Bucket Data

Sometimes it can be useful to clear the bucket information without deleting the whole bucket, creating and configuring it again. Therefore, the bucket, or a portion of it, can be easily cleared from the bucket page. During the clearing process, the bucket can still record information from devices.

![](/files/B1ZCz51fxQBMyNOYKlWD)

Data bucket profiles can also be deleted from the data bucket list by selecting the profiles to be deleted and pressing the red "Remove Bucket" button:

![](/files/ZR9WQA9qN2TraxYDWo8m)


# DASHBOARDS

Thinger.io dashboard system is a feature that allows creating nice data representation interfaces within minutes in a very simple way. No coding is required, just selecting different widgets from a list and using drag & drop technology to configure the layout of the dashboard. Then, using the configuration forms, it is possible to set the data sources, sampling interval, and other behaviors of each widget. The main types of these widgets are:&#x20;

* **Real-time** data representation.
* **Historical** data representation from buckets.
* **Control** device functions or change values with On/Off buttons or sliders.

Here is an example dashboard with some widgets defined, like time series charts, donut charts, maps, or single values, but many other ones can be used:

<figure><img src="https://discoursefiles.s3-eu-west-1.amazonaws.com/original/1X/c05197985d9ee92a9e12aaa71ab7508682bc3fbc.gif" alt=""><figcaption></figcaption></figure>

Once created, dashboards can be shared with third parties through a link or configured as templates to analyze data from different devices of the same type. In the sections below, we will explain how to create awesome dashboards in a few and very easy steps. ready to create your own dashboard?

## Create a Dashboard

The **Dashboards** section provides access to the workspace where visualization panels are configured and managed. To begin creating a new dashboard, navigate to the **Dashboards** menu item located in the main interface.

![](/files/mO1w8YadcoG2jELUzDDw)

Once in this section, select the **Add Dashboard** button to open the configuration panel, where the dashboard's name, layout, and data sources can be defined.

<figure><img src="/files/HWET5VUgqYkkyOFF4DvZ" alt=""><figcaption></figcaption></figure>

It is necessary to configure different parameters:

* **Dashboard ID**: Unique identifier for your dashboard.&#x20;
* **Dashboard name**: A representative name of your dashboard, in a more friendly way than its identifier.
* **Dashboard description**: Fill here any description or detailed information required to keep about the dashboard in the long term.&#x20;

Clicking on the blue "Add Dashboard" button, the new dashboard will be added to the account, and the browser will be automatically redirected to the empty board in order to start adding widgets as explained in the sections below.

## Edit Dashboard

Initially, the dashboard is empty and set to view mode, which means no changes can be made. To enable modifications, first click the button in the top-right corner to activate edit mode. This action will then reveal a new menu containing options for settings, adding a new tab, or inserting a widget:

<figure><img src="/files/geK2kmR7GGUfH8be4V02" alt=""><figcaption></figcaption></figure>

The dashboard edition mode allows moving or resizing existing widgets, but also enables different options using the left-side buttons, such as:

* **Add Widget**:  To create new elements from the list. There are two different widget types depending on their objective: **Display widgets** allow showing real-time data from devices or historical data from buckets, and **Control Widgets** allow connecting the dashboard with device functionalities in order to control them in real-time.&#x20;
* **Add Tab**: This button allows to create an additional dashboard tab that will appear associated with the original one in order to provide simple navigation over related boards.&#x20;
* **Settings**: There are multiple parameters that can be configured in order to set the dashboard behavior, such as the number of columns, the background image or the sharing options. &#x20;

These three options have been explained in more detail in the sections below.

## Widgets introduction

When the edit mode is enabled in the dashboard, a new button `Add Widget` will appear. Clicking on it will show a pop-up where it is possible to select the widget type to add in the dashboard. There are different widgets, both for displaying information and controlling connected devices.

<figure><img src="/files/OoWKzGz33gpOR01bwgKd" alt="" width="563"><figcaption></figcaption></figure>

* **Title**: Optional title for the widget.&#x20;
* **Subtitle**: Optional subtitle for the widget.
* **Link to:**  This option enables the image chart to function as a clickable link. When activated, it can be selected as a target dashboard from the dropdown, allowing users to navigate directly to it by clicking the widget.&#x20;
* **Show Update:** This toggle controls the visibility of an update mechanism for the image, which can be useful for manually refreshing dynamic image content.
* **Show Offline:** This dropdown determines the widget's behavior when its associated device or data source is offline, allowing to choose what is displayed in such a scenario.
* **Show Fullscreen:** This toggle, when enabled, displays an option to expand the image chart to full-screen view for better visibility.
* **Background**: Optional color for the widget background (defaults to white).
* **Type:** Click on 'Select widget type' to see a wide variety of widgets available

### Widget list

| **Category**          | **Widget**                                                                         | **Description**                                                    |
| --------------------- | ---------------------------------------------------------------------------------- | ------------------------------------------------------------------ |
| **Display**           | [Assets Map](#asset-map)                                                           | Displays geolocated devices on a map.                              |
|                       | [Assets Table](#html-time-series)                                                  | Shows asset data in a tabular format.                              |
|                       | [Apex Charts](#apex-charts)                                                        | Advanced charts (line, bar, area) using ApexCharts library.        |
|                       | [Time Series Chart](https://docs.thinger.io/features/dashboards#time-series-chart) | Plots historical data over time using line charts.                 |
|                       | [Donut Chart](https://docs.thinger.io/features/dashboards#donut-chart)             | Visualizes percentages or parts of a whole.                        |
|                       | [Progressbar](https://docs.thinger.io/features/dashboards#progressbar)             | Displays a value within a horizontal bar.                          |
|                       | Gauge                                                                              | Circular meter to indicate a value within a range.                 |
|                       | [Tachometer](https://docs.thinger.io/features/dashboards#tachometer-chart)         | Speedometer-style gauge with dynamic needle.                       |
|                       | [Google Map](https://docs.thinger.io/features/dashboards#google-maps)              | Shows device locations using Google Maps.                          |
|                       | [Image/MJPEG](https://docs.thinger.io/features/dashboards#image-mjpeg)             | Displays or streams image content, like camera feeds.              |
|                       | [Text/Value](https://docs.thinger.io/features/dashboards#text-value)               | Simple display of numeric or text values.                          |
|                       | [Led Indicator](https://docs.thinger.io/features/dashboards#virtual-led)           | Color-coded LED icon reflecting a binary or threshold state.       |
|                       | [Clock](https://docs.thinger.io/features/dashboards#clock)                         | Shows the current time or a timestamp from data.                   |
|                       | [HTML Widget](https://docs.thinger.io/features/dashboards#html-widget)             | Fully custom content using raw HTML.                               |
|                       | [HTML Time Series](#html-time-series)                                              | Custom time-series visualizations with HTML formatting.            |
|                       | [Group Widget](#group-widget)                                                      | Groups multiple widgets in one frame for better layout.            |
| **Device Control**    | [On/Off State](https://docs.thinger.io/features/dashboards#on-off-state)           | Switch to toggle a boolean device property (true/false).           |
|                       | [Slider](https://docs.thinger.io/features/dashboards#slider)                       | Adjusts a numeric value in a defined range via slider.             |
|                       | Property Button                                                                    | Triggers an action or sends a value when clicked.                  |
|                       | Property Table                                                                     | Displays or controls multiple properties in table form.            |
| **Dashboard Control** | [Source Switcher](https://docs.thinger.io/features/dashboards#source-switcher)     | Allows switching the data source dynamically for multiple widgets. |

As soon as a Widget type is selected, a new tab will pop up:

### **Data Sources**

This section serves as an introduction to configuring data visualization, enabling the user to specify the origin of the information. It offers choices such as real-time data from connected devices, historical data from devices or data buckets, device properties, or direct manual input. Subsequently, the different parameters pertinent to each widget type are described:

<figure><img src="/files/iPqOgSJBGGUv4ckXuGYv" alt="" width="563"><figcaption></figcaption></figure>

* **From Device Resource**: Displays real-time data from a connected device; data is volatile and not retained on dashboard reload.
* **From Data Bucket**: Retrieves persistent historical data from a user-configured Data Bucket, available across sessions.
* **From Device Bucket**: Accesses historical or aggregated data linked to a specific device’s properties.
* **From Device Property**: Retrieves static or infrequently changing device parameters, useful for configuration or last-known values.
* **Manual**: Allows manual input of values for testing or simulating widget behavior without live data sources.

<figure><img src="/files/rh0YtJ0uK863xlRvfv3m" alt="" width="538"><figcaption></figcaption></figure>

* **Timeframe**: This parameter is only visible when configuring a time series widget that will represent historical data, as it allows defining the range of data to be displayed on the chart.&#x20;
  * **Latest Value:** Displays only the most recent data point received.
  * Once a Data Source is selected, this parameter becomes available. It is essential to specify the range of data to be rendered.
  * **Relative:** Displays data from a rolling time window, defined in relation to the current moment. Users can specify the duration of this window and the time units (in hours, minutes, or seconds).
  * **Absolute:** Presents data within a precisely defined, static time frame. Users set both a fixed start date and time, as well as a fixed end date and time, for the data to be displayed.
  * **Configurable:** Provides advanced options to dynamically set the timeframe based on other dashboard elements or custom logic.
* **Time Period**: Is shown when the selected Data Source is a real-time value such as a "Device Resource" or a "Device Property", permite representar los valores que va adquiriendo la variable a lo largo del tiempo indicado en este periodo, aunque no sean almacenados en la base de datos permanentemente .&#x20;

<figure><img src="/files/c7Zof8yoVYiPw6Y1pm1u" alt="" width="537"><figcaption></figcaption></figure>

Some display-type widgets provide aggregation features that can be selected in order to process the device's data before being displayed, which is quite interesting when working with raw senor-data in order to obtain the most accurate representation.&#x20;

* **Data Aggregation**: Showing raw data directly from a Bucket could be tricky when there are a lot of data points, especially if the measures are very noisy or irregular. This feature allows aggregating data using different statistics such as medians, means, minimum and maximum values, a counter of data points per period, and a data summary. The aggregation can be applied over different intervals that go from five minutes to one week, by using the next configuration inputs in the widget form, and also using the upper-right parameters on each time series chart widget.
* **Data Transformation:** Some display-type widgets (time-series chart, HTML series) have a **Transform** selector, which works as an on-the-fly filter applied *after* the raw value is fetched from the device or bucket but *before* the widget renders it. The goal is to save users from rewriting firmware or setting up a separate data-processing pipeline just to polish how the metric is presented. According to the Thinger.io documentation, these functions “allow processing data before being used in widgets” for example, rounding numbers, computing rates, or converting units in place.
* **Dashboard processing:** Some widgets allow the execution of a custom "processing function", which can be previously defined in the dashboard **Settings > Functions** section. [As explained in this section of the documentation. ](https://docs.thinger.io/features/dashboards#functions)

## Display widgets

### Time Series Chart

A time-series chart is a graph that can display values over time. In this sense, this is quite useful when it is required to display time-series data, like a temperature variable that changes over time. It is possible to plot a single variable or multiple values in the same chart. The initial configuration of this widget is as shown in the following figure:

![](/files/-LpXt-oU2LC7PuJy1mza)

To configure this widget, select "Time Series Chart" from the Widget menu's "Type" tab. This will reveal a new configuration panel. Then, adjust the appropriate parameters:

<figure><img src="/files/BGaAjQYmO5oxmxCm3MPH" alt="" width="547"><figcaption></figcaption></figure>

* **Name:** The name of the source to be called.
* **Color**: A color can be assigned to a data source by selecting it from the color picker. The color can be adjusted using the color spectrum bar, by manually entering RGB (Red, Green, Blue) values, or by moving the dot within the color gradient area. Depending on the data source, it may be possible to configure a single color or multiple colors for different data series.
* **Data Source**: Designates the origin of the information utilized for visualization or analysis. For comprehensive details, refer to the '**Data Sources**' section above.
* **Timeframe**: When working with historical data stored in *Data Bucket* or *Device Bucket* sources, the Timeframe parameter defines the specific period to be rendered. It provides multiple predefined and configurable range options.
  * **Latest Value:** Displays only the most recent data point received.
  * **Relative:** Displays data from a rolling time window, defined in relation to the current moment. Users can specify the duration of this window and the time units (in hours, minutes, or seconds).
  * **Absolute:** Presents data within a precisely defined, static time frame. Users set both a fixed start date and time, as well as a fixed end date and time, for the data to be displayed.
  * **Configurable:** This parameter offers crucial advanced configuration within the dashboard profile, enabling dynamic adjustment of the timeframe based on other dashboard elements or custom logic. These powerful options are essential for precisely tailoring the time duration and other settings to your specific visualization needs.
* **Time Period**: This option allows setting up the time range during which the widget should retrieve and represent real-time data or the last received value.
* **Data Aggregation**: Given potentially noisy or irregular raw Bucket data with numerous points, this feature enables data aggregation. Statistics, as detailed in the table below, can be applied over intervals ranging from five minutes to one week. Configuration is handled via widget form inputs and the upper-right parameters of each time series chart widget.

{% hint style="info" %}
A detailed Data Aggregation list is available here.
{% endhint %}

* **Data Transformation:** The Transform selector functions as an on-the-fly filter, processing raw values before widget rendering. This feature eliminates the need for firmware rewrites or separate data-processing pipelines, allowing for in-place data polishing such as rounding numbers, computing rates, or converting units.&#x20;

{% hint style="info" %}
A detailed Data Transformation list is available here.
{% endhint %}

* **Multiple sources**: Sources can be added, cloned (recommended for similar sources), or removed. Every source will appear in the same widget.

Finally, the "**Display Options**" tab allows to customize the final appearance and behavior of the widget. From this section, the parameters that modify the widget's aesthetics and visual behavior:

<figure><img src="/files/PkYFIHOTgbMlICImUJHL" alt="" width="563"><figcaption></figcaption></figure>

The next image shows four different representations of the same dataset and time interval, aggregated using different algorithms: &#x20;

![](/files/-Lrx82G0sm1lInGz06hB)

{% hint style="warning" %}
Note that the Data Aggregation system is only available in **private server** instances&#x20;
{% endhint %}

### Apex Charts

An ApexChart is a modern JavaScript charting library that enables the creation of interactive and responsive data visualizations. It supports a wide range of chart types, **including line, bar, area, pie, and more**, and is commonly used for embedding charts in web applications with minimal configuration.

<figure><img src="/files/n01XmMCKjCG48enUpDYQ" alt=""><figcaption></figcaption></figure>

This widget is able to display data from multiple data sources in the same chart. Note that the configuration interface allows to add variables or clone a source configuration to make it easier.

<figure><img src="/files/WjG6hM7IdrqIQVS9s8Ge" alt="" width="563"><figcaption></figcaption></figure>

* **Name:** The name of the source to be called.
* **Color**: A color can be assigned to a data source by selecting it from the color picker. The color can be adjusted using the color spectrum bar, by manually entering RGB (Red, Green, Blue) values, or by moving the dot within the color gradient area. Depending on the data source, it may be possible to configure a single color or multiple colors for different data series.
* **Data Source**: Designates the origin of the information utilized for visualization or analysis. For comprehensive details, refer to the '**Data Sources**' section above.
* **Timeframe**: When working with historical data stored in *Data Bucket* or *Device Bucket* sources, the Timeframe parameter defines the specific period to be rendered. It provides multiple predefined and configurable range options.
  * **Latest Value:** Displays only the most recent data point received.
  * **Relative:** Displays data from a rolling time window, defined in relation to the current moment. Users can specify the duration of this window and the time units (in hours, minutes, or seconds).
  * **Absolute:** Presents data within a precisely defined, static time frame. Users set both a fixed start date and time, as well as a fixed end date and time, for the data to be displayed.
  * **Configurable:** This parameter offers crucial advanced configuration within the dashboard profile, enabling dynamic adjustment of the timeframe based on other dashboard elements or custom logic. These powerful options are essential for precisely tailoring the time duration and other settings to your specific visualization needs.
* **Time Period**: This option allows setting up the time range during which the widget should retrieve and represent real-time data or the last received value.
* **Data Aggregation**: Given potentially noisy or irregular raw Bucket data with numerous points, this feature enables data aggregation. Statistics, as detailed in the table below, can be applied over intervals ranging from five minutes to one week. Configuration is handled via widget form inputs and the upper-right parameters of each time series chart widget.

#### Apex charts customization options

Una parcitularidad de los apex charts es que permiten personalizar la visualización de los datos aportando una gran variedad de templates con los que ajustar mejor al tipo de datos y el aspecto deseado. La sección Widget Settings contiene las siguientes funciones con esta finalidad:

<figure><img src="/files/RkkEDFaAW8mfTKOAeAMd" alt=""><figcaption></figcaption></figure>

### Tachometer Chart

It is a quite visual widget that allows showing device data in a traditional "dial gauge" representation, which could be customized with different value ranges and color marks, making it more accurate or simplifying the inspection with just a glance.

![](/files/-LrxmYbe3o-lP_xiVV-5)

To begin configuring the Tachometer widget, start by filling in the general settings such as the title, subtitle, and background color (note that it can change in real time depending on the data value, as shown in the image below). then, select "Tachometer" from the widget type dropdown to define the visualization style.

![](/files/-LrxtHyeSOxDsv_ts2HO)

Then select the Tachometer data source from the dropdown menu:

<figure><img src="/files/d7PVzx4gRC7CvLaVlWVr" alt="" width="499"><figcaption></figcaption></figure>

* **From Device Resource**: Displays real-time data from a connected device; data is volatile and not retained on dashboard reload.
* **From Data Bucket**: Retrieves persistent historical data from a user-configured Data Bucket, available across sessions.
* **From Device Bucket**: Accesses historical or aggregated data linked to a specific device’s properties.
* **From Device Property**: Retrieves static or infrequently changing device parameters, useful for configuration or last-known values.
* **Manual**: Allows manual input of values for testing or simulating widget behavior without live data sources.

Finally, the "**Display Options**" tab allows to customize the final appearance and behavior of the widget. This is the most important section in order to create nice and attractive dashboards.&#x20;

<figure><img src="/files/MAIMBFS0fUlavj4YlyJV" alt="" width="563"><figcaption></figcaption></figure>

* **Display options:**
  * **Units**: Optional information that will display the variable unit, like ºC.
  * **Ranges Values**: This parameter configures the total data range that will be shown in the chart, and also allows adding sub-ranges that can be configured with different colors in order to simplify the visual checking.
  * **Plate Color**: Configure the background plate color.
  * **Text Color**: Configure the text color.
  * **Tick Color**: Configure the division tick color.&#x20;
  * **Major Ticks**: Allows to configure the range of each tick
  * **Show Value**: To display or hide the numeric representation of the value in a digital textbox.

### LED Indicator

Using LED spots is a common way to create simple graphical interfaces in electronic projects in order to represent system status, alerts, etc. This widget has been included in Thinger.io Platform with the same purpose, so it can be used to show binary status by changing its color, create alerts by setting blink behavior or show multiple data by including more than one color range in a kind of RGB simulation.&#x20;

![](/files/-Lry14QUxCne-lJOaf3Y)

This widget can be configured in many different ways through the three-step form. First of all, select "Led Indicator" in the Widget menu tab, write a title and select a data source from:&#x20;

<figure><img src="/files/iPqOgSJBGGUv4ckXuGYv" alt="" width="563"><figcaption></figcaption></figure>

* **From Device Resource**: Displays real-time data from a connected device; data is volatile and not retained on dashboard reload.
* **From Data Bucket**: Retrieves persistent historical data from a user-configured Data Bucket, available across sessions.
* **From Device Bucket**: Accesses historical or aggregated data linked to a specific device’s properties.
* **From Device Property**: Retrieves static or infrequently changing device parameters, useful for configuration or last-known values.
* **Manual**: Allows manual input of values for testing or simulating widget behavior without live data sources.

The **"Display Options"** tab defines the visual behavior of the LED widget, by means of the following parameters that modify the widget's aesthetics and visual behavior. The image below shows an example of an RGB led to represent a three-state variable:

<figure><img src="/files/AosTSEYpKvjR9UCFQOEk" alt=""><figcaption></figcaption></figure>

* **Led Size**: Configure the diameter of the led spot pixels
* **Color**: configures the LED default color, and also allows creating color ranges by pressing the green "+" button on the right side.
  * **Color ranges**: Multiple color ranges can be configured as required. When a new color range profile is added, it requires specifying a value range and the corresponding color to be displayed when the input value belongs within that range.
  * **Blinking led option:** The right side switch allows adding a blinking behavior to the led when this range profile begins active. It is also possible to disable the blinking by pressing on the led widget.&#x20;

### Donut Chart

This widget is quite useful when the variable to be displayed oscillates between a known minimum and maximum value.&#x20;

![](/files/-LpXt-oblpD9JC8mEyUe)

This widget can be configured in many different ways through the three-step form. First of all, select "Donut Chart" in the Widget menu tab, and select a data source with the dropdown selector:&#x20;

<figure><img src="/files/PunLkTaxP4zTqukAkf6H" alt="" width="563"><figcaption></figcaption></figure>

* **From Device Resource**: Displays real-time data from a connected device; data is volatile and not retained on dashboard reload.
* **From Data Bucket**: Retrieves persistent historical data from a user-configured Data Bucket, available across sessions.
* **From Device Bucket**: Accesses historical or aggregated data linked to a specific device’s properties.
* **From Device Property**: Retrieves static or infrequently changing device parameters, useful for configuration or last-known values.
* **Manual**: Allows manual input of values for testing or simulating widget behavior without live data sources.

functionsIt is also possible to apply **Dashboard processing funtions** over donut charts.  Some widgets allow the execution of a custom "processing function", which can be previously defined in the dashboard **Settings > Functions** section in order to apply custom data transformations. [As explained in this section of the documentation. ](https://docs.thinger.io/features/dashboards#functions)

Finally, the "**Display Options**" tab allows to customize the final appearance and behavior of the widget. This is the most important one in order to create nice and attractive dashboards.&#x20;

<figure><img src="/files/ZHhdJqfS5dktPl8VRFBw" alt=""><figcaption></figcaption></figure>

* **Units**: Optional information that will display the variable unit, like ºC.
* **Min Value**: The expected minimum value of the variable.
* **Max Value**: The expected maximum value of the variable.
* **Donut Color**: The color to display inside the donut.

### Progressbar

The **Progress Bar** widget provides a visual representation of a variable that changes between known minimum and maximum values. It is ideal for displaying percentages, charge levels, task completion, or other indicators that fluctuate within a defined range.

![](/files/-LpXt-of-b9vFQIPQsFJ)

Before configuring the **Progress Bar** widget, make sure you select a variable whose **minimum and maximum values are clearly known**. This is essential to ensure the progress bar accurately reflects the value within the defined range. The image above shows the initial step, where the widget data source is selected.&#x20;

<figure><img src="/files/swwCBZCrGRKLH5OCZeKg" alt="" width="563"><figcaption></figcaption></figure>

**Data source**: is fundamental for configuring how values are fed to a widget. It allows determining the origin of the information to be visualized, choosing between real-time data from a connected device, historical data stored in a data or device bucket, device properties, or even manual input.

Finally, the "**Display Options**" tab allows to customize the final appearance and behavior of the widget. This is the most important one in order to create nice and attractive dashboards.&#x20;

<figure><img src="/files/tppMMRz3FddMDlymLsOg" alt="" width="563"><figcaption></figcaption></figure>

* **Units**: Optional information that will display the variable unit, like %.
* **Min Value**: The expected minimum value of the variable.
* **Max Value**: The expected maximum value of the variable.
* **Icon:** It is used to select the visual symbol representing the widget.
* **Icon Size:** To adjust the dimensions of the icon.

### Google Map

A map can be used to represent, at this moment, a single location on a map. It is quite convenient to track devices in real-time as the chart can be fed in real-time from a connected device, like over a GPRS connection. It is also possible to plot locations from a data bucket, so devices like Sigfox can also be tracked.

![](/files/-LpXt-ojs7AvsMx7oQAi)

Here is an example of this widget working in real-time with a connected device:

Then, the Google Map menu tab allows selecting the data source, which can be a connected device or a data bucket:

<figure><img src="/files/Y9CHa77AjzukH3QB87wF" alt=""><figcaption></figcaption></figure>

* **Name:** The name you want the source to be called.
* **Color**: Both on data selected from a device or from a data bucket, it is possible to configure series colors. Depending on the information available in the resource, it will show only one configurable color or a color for each series, like in the previous screenshot, next to Source 1.&#x20;

**Data Source**: is fundamental for configuring how values are fed to a widget. It allows selecting the origin of the information to be visualized, choosing between real-time data from a connected device, historical data stored in a data or device bucket, device properties, or even manual input.

The different options are described below:

Finally, the "**Display Options**" tab allows to customize the final appearance and behavior of the widget. This is the most important one in order to create nice and attractive dashboards.&#x20;

<figure><img src="/files/5SPc5EGSC59NwAGZ925e" alt=""><figcaption></figcaption></figure>

* **Center**: Force the map to automatically keep the location in the center.
* **Zoom Level:** To determine the amount of zoom for the map.
* **Map Type:** Which will show the next options:

<figure><img src="/files/ZJEZ411b1Kz2mJu4r5of" alt=""><figcaption></figcaption></figure>

* **Waypoints**: Toggle this option to render a sequence of historical locations on the map, useful for tracking a device's journey or data points over time.
* **Location**: Configure how to feed the location into the map. It is possible to feed the information from a connected **device** or a **data bucket**. When feeding the plot from a data bucket or a device, it is required to match the required latitude and longitude (in degrees) with the variables present in the bucket or in the device resource.
* **Geofences**: Check this box to overlay geofences on the map. Then, using the 'Select Device...' dropdown to associate these boundaries with a particular device, enabling visual monitoring of its location relative to the defined areas.
* **Hide Controls:** Toggle this option to hide the standard user interface controls of the map, useful for creating a more streamlined or embedded visual.

{% embed url="<https://www.youtube.com/watch?t=51s&v=3QDDOPMg22g>" %}

### Asset Map

The **Asset Map** widget allows users to display the geographic locations of assets in real-time using a map interface. It provides powerful visual insight for tracking the deployment, status, and grouping of assets across regions. This is especially beneficial for operations teams, asset managers, and analysts who require spatial awareness of device locations and statuses.

<figure><img src="/files/q9190aQi105RsLJhdoGp" alt=""><figcaption></figcaption></figure>

Note that devices can be plotted from different aggrupations, so once this widget is selected, it's possible to choose from:&#x20;

* **From Asset Type**: Selecting this option provides a dropdown to choose a specific type of asset. Only assets belonging to the selected type will be displayed. This is useful when the goal is to analyze or visualize a particular category of assets.
* **From Asset Group:** Choosing this option presents a dropdown to select a specific asset group. This is beneficial when assets are organized into logical groups and the focus is on data from a particular group.
* **From Asset Product:** If this option is selected, a dropdown appears for choosing a specific product asset. This is helpful when interested in the performance or status of assets associated with a particular product line.

<figure><img src="/files/X8DWcg2Z2xBJzsISCDWO" alt="" width="563"><figcaption></figcaption></figure>

Then the "display options" menu allows to custom the looc and feel  of the map with multiple options such as:&#x20;

* **Map Type**: This crucial dropdown determines the base visual style of the map itself. It offers various cartographic representations:
  * &#x20;**Roadmap**: Shows standard road networks, labels, and general geographical features. It's good for general navigation and understanding locations.
  * **Satellite**: Displays satellite imagery, offering a realistic view of the terrain and buildings. Useful for detailed visual inspection of asset locations.
  * **Hybrid**: This option combines satellite imagery with road and label overlays, providing the realism of a satellite view alongside navigational aids from a roadmap.
  * **Terrain**: This displays geographical features such as mountains, valleys, and elevation changes, which is useful for understanding the topography surrounding assets
* **Show Options**: It groups further display-related configurations.
* **Show Search**: If activated, displays a search bar on the map widget. This allows users to search for specific locations or addresses directly on the map.
* **Connected**: This toggle controls the visibility or special styling of assets that are currently connected or online within the system. If active, connected assets appear in a specific color or with an icon to denote their live status.
* **Disconnected**: Similar to "Connected," this toggle likely controls the visibility or styling of assets that are currently disconnected or offline. If active, disconnected assets might be shown with a different color, icon, or even filtered out if the toggle is off.
* **Clustering**: This is a very common feature in map widgets, especially when dealing with many assets. If active, assets that are geographically close to each other will be grouped into a single "cluster icon". Zooming in, these clusters break apart to reveal individual assets. This prevents the map from becoming too cluttered when many assets are in a small area.

### Image/MJPEG

The image/MJPEG widget can be used to represent both a still image, like your business logo, or a live stream from an MJPEG source, like a surveillance camera. To feed this widget, it is necessary to provide the image/MJPEG URL.

![](/files/-LpXt-opwhJ3X61-SUam)

To configure this widget, click the **Add Widget** button to open the widget configuration panel. In the **Widget** tab, enter a title and select **"Image/MJPEG"** as the widget type. Next, choose the **Image Source** as either **"Still Image"** or **"MJPEG Stream"**, and specify the corresponding **URL** that will be used to load the image or video stream.

*

![](/files/-LpXt-otEKYjeZuOrzDo)

### Text/Value

The text/value widget is a useful widget to display any arbitrary data, especially text values that cannot be represented with other widgets. Like any other widget, it can display data from both connected devices and data buckets.

![](/files/-LpXt-ovOKTgqO4sIERS)

This widget can be configured in many different ways through the three-step form. First of all, fill the widget Title and the type: "Text/Value" in the "Widget" menu tab. Then, the Text/Value menu tab allows selecting the data source, which can be a connected device or a data bucket.&#x20;

Finally, the "**Display Options**" tab allows to customize the final appearance and behavior of the widget. This is the most important one in order to create nice and attractive dashboards.&#x20;

<figure><img src="/files/xVKJuazbSOZM2fxmI0o5" alt=""><figcaption></figcaption></figure>

* **Decimal Places**: Determines the number of digits to display after the decimal point for numerical values.
* **Units**: Optional information to display the units of the displayed information.
* **Text Color**: Configure the text color.
* **Text Size**: Controls the font size of the primary displayed value, typically measured in pixels (px), allowing adjustment of its visual prominence.
* **Text Weight**: Defines the boldness or lightness of the displayed text, offering options like 'Thin', 'Normal', or 'Bold' to influence its visual style.
* **Units Size**: Specifically adjusts the font size of the units suffix, distinct from the main text size, ensuring the units are displayed at an appropriate scale.
* Icon: Enables the selection of a visual symbol (e.g., a Font Awesome class such as `fas fa-tachometer-alt`) to accompany the displayed value, enhancing the widget’s visual appeal."
* **Open URL** enables the widget to act as a clickable link. When a URL is entered, clicking the widget will redirect the user to the specified web address.

### Clock

This widget is just a clock widget that can display the current time both in the local time zone and in UTC, which can be useful when monitoring processes in real-time. Note that this widget takes the current time just from the web browser, so it should be the same as your computer.

![](/files/-LpXt-ozrcn0CgNjD7Sh)

This widget can be configured in many different ways through the two-step form. First of all, select "Clock" in the Widget menu tab, and customize the clock behavior, note that the time value can be displayed in UTC format if preferred:&#x20;

<figure><img src="/files/AHmQY9BGnjym4LrbILuC" alt="" width="563"><figcaption></figcaption></figure>

* **Color**: Color for the text.
* **UTC**: Display the clock in UTC of the bworser  the local timezone.

### HTML Widget&#x20;

This widget allows creating custom data representation interfaces by programming it with standard web source code languages such as HTML, CSS and JavaScript. Being also able to represent data from Thinger.io devices or data buckets, or show data from third-party sources on the same dashboard.&#x20;

This widget can be configured in many different ways through the three-step form. First of all, select "HTML Widget" in the Widget menu tab, which allows selecting one of the common Thinger.io data sources:

<figure><img src="/files/USZPNGyOeaHf3tBR24li" alt=""><figcaption></figcaption></figure>

**Processing option**: Some widgets support the use of **processing functions**, which allow you to transform or manipulate the data before it's displayed. These functions can be defined directly within the widget configuration, under the section "**Settings > Functions".**&#x20;

<figure><img src="/files/gAI2FVGuGaAEzYWRG8R3" alt=""><figcaption></figcaption></figure>

Finally,  the "**Display Options**" tab allows to customize the final appearance and behavior of the widget. From this section, it is possible to define custom HTML code to be displayed.

<figure><img src="/files/KEA3m1awJoKL4M6U8Rds" alt=""><figcaption></figcaption></figure>

#### From Code Snippet

To create a basic widget with a simple code, such as a data table, a ready-to-paste script from any website, or any other easy integration. The source code can be written using a small text editor in the widget form. Note that this code will be executed in the browser as a part of an AngularJS directive, where some scope has already been defined and initialized. In particular:

* `ts`: Timestamp of the data.
* `value`: Value with the selected value in the configuration, i.e., a device property, bucket data, or real-time data from a device.

Those values can be used in the HTML content with the AngularJS two-way data binding using double brackets, i.e., using `{{ts}}` or `{{value}}.` The property's data is displayed on the view, and at the same time, the property will be updated when there is any change.

{% tabs %}
{% tab title="Basic Code Snippet" %}
Example hello world displaying timestamp, timestamp formatted as a date, and the selected value.

![Simple HTML widget displaying data timestamp and its value.](/files/KJ6fvZmLFGti72OWSiGl)

The widget code is the following:

```html
<h1>Hello World!</h1>
<p>Ts: {{ts}}</p>
<p>Date: {{ts | date:'medium'}}</p>
<p>Value: {{value}}</p>
```

{% endtab %}

{% tab title="Table Code Snippet" %}
Using the HTML Time Series widget, it is possible to plot information in a given timespan, i.e., latest values from a data bucket. The following example represents an HTML widget holding a list of values from bucket:

![HTML Widget with a table](/files/TvvgEQwWHfzrzmBbSGFm)

The code to represent this table is like the following:&#x20;

```html
<div style="width=100%; height:100%; overflow-y:scroll">
    <table class="table table-striped">
      <thead>
        <tr>
          <th>Time</th>
          <th>Inst Water Flow</th>
          <th>Inst Water Flow (l)</th>
        </tr>
      </thead>
      <tbody>
        <tr ng-repeat="entry in value">
            <td>{{entry.ts | date:'medium'}}</td>
           <td>{{entry.inst_waterFlow}}</td>
           <td>{{entry.inst_waterFlow_liter}}</td>
        </tr>
      </tbody>
    </table>
</div>
```

{% hint style="info" %}
Note that this code is using ``ng-repeat from AngularJS to iterate over all entries available in the `value` variable.``
{% endhint %}
{% endtab %}

{% tab title="Third Party Scripts" %}
It is possible to insert any other code snippet, i.e., those offered by third party services, i.e., weather predictions, banners, etc.

![Widget example with weather conditions](/files/-Lz8CPqNtT6fadNKUqzz)

Next script can be used as example to create an HTML widget with another weather forecast provider:

```
<div id="c_c1374694634f9f99525990d7fe6508ae" class="ancho"></div><script type="text/javascript" src="https://www.eltiempo.es/widget/widget_loader/c1374694634f9f99525990d7fe6508ae"></script>
```

Will result on a widget with the following forecast information.

![Widget example with weather forecast](/files/-Lz8DFAzYErJqH3_tDTC)
{% endtab %}
{% endtabs %}

#### From File Storage

For more complex developments over the HTML Widget, where several source code files are required, it is possible to use the [**File Storage**](https://docs.thinger.io/console/file-system) feature. This allows the development of more complex interfaces that exploit all the representation capabilities of the browser, such as 3D object representation, animated widgets, etc. Moreover, widgets from File Storage can be shared between multiple dashboards is required, so it is much more maintainable in the long term.&#x20;

It is possible to point the widget to an HTML file inside a file storage by selecting the `File Storage` from `HTML Source` option and then typing the file name.&#x20;

The most interesting option is to create a custom AngularJS directive for custom widgets, as it allows isolating the widget scope, defining custom functions, reacting to changes, and in general, it is possible interacting more easily with the Thinger.io API via dependency injection.&#x20;

#### AngularJS Directive Example: Hello World

Similar to the Basic Code Snippet example, in this one, a simple directive is created that will display basic information captured in the widget, i.e., the timestamp, the value, and the source configuration. For working with this example, it is required to:

* Create a new `File Storage` to store your widgets.

{% hint style="info" %}
Set public read access to the storage so the widgets can be retrieved when sharing your dashboard via Projects or shared links.
{% endhint %}

* Create two files named `htmlWidget.js`, and `htmlWidget.html` inside the storage. The JavaScript file is the place where you will set your widget code and logic. On the other side, the HTML widget will hold your widget view.
* Initialize the code of both files from the following code:

{% tabs %}
{% tab title="helloWidget.js" %}

```javascript
angular.module('helloWidget', [])
.directive('helloWidget', function () {
    return {
        restrict: 'EA',
        scope: {
            source : "=",
            ts:      "=",
            value:   "="
        },
        templateUrl: function(){
            let url = document.querySelector("script[src*='helloWidget.js']");
            return url.src.replace('.js','.html');
        },
        controller: ["$scope", function($scope){
            console.log("controller initialized! scope is", $scope);
            
            // listeners for process source changes (if required)
            $scope.$watch('source', function(newVal, oldVal) {
                console.log("Source has changed:", newVal, oldVal);
            });
            
            // listeners for process value changes (if required)
            $scope.$watch('value', function(newVal, oldVal) {
                console.log("Value has changed:", newVal, oldVal);
            });
            
        }]
    }
});
```

{% endtab %}

{% tab title="helloWidget.html" %}

```html
<div>
    <h3>Hello World from AngularJS directive!</h3>
    <p><strong>Source</strong> is {{source}}</p>
    <p><strong>Timestamp</strong> is: {{ts}}</p>
    <p><strong>Value</strong> is: {{value}}</p>
</div>
```

{% endtab %}
{% endtabs %}

* Create a new widget pointing to the `helloWidget.js` file. Note that we are loading the file with the `.js` extension that will load the counterpart `.html` file as specified in `templateUrl` function.&#x20;

<figure><img src="/files/i0mGyCDiwZy5bjWIbeC1" alt="" width="563"><figcaption></figcaption></figure>

* Now it will be displayed a similar widget to the Basic Code Snippet example. However, there are many differences from basic example, as now we have Javascript file where we can add more values to the scope, process incoming value changes, detect source changes, and more interesting, we can inject dependencies to other Thinger.io console components, like UI widgets, or API methods to update configurations, call devices, etc.

![HTML Widget with a simple AngularJS directive](/files/HHVAqpyJMeGqNSS3DNhk)

{% hint style="success" %}
Ensure your widgets use a `camelCase` name for file names.&#x20;
{% endhint %}

#### AngularJS Directive Example: React to Value Changes

In this example, an advanced widget is created that will display an animation every time the source value is updated, i.e., when it is streamed by the device, it is updated inside a single property, or a new entry is created in a bucket. &#x20;

![HTML Widget example with SVG](/files/GMbJE7gQ4fbOEGPCnhT9)

The complex part here is to create an SVG and the corresponding CSS animations. The AngularJS directive just listens for value changes to trigger the animation.

Then, the On/Off State menu tab allows selecting the data source, which can be a connected device. Finally, the "**Display Options**" tab allows to customize the final appearance and behavior of the widget. From this section, it is possible to define custom HTML code to be displayed.

<figure><img src="/files/0OMi6nqxlQJOEUXaLueq" alt=""><figcaption></figcaption></figure>

* **Target Value -> From Device Resource**: This option requires the device to be connected in real-time. The widget will display data as it is received from the device. It's important to note that, when fed directly from a device resource, the widget will not retain the information if the dashboard is closed or refreshed, as it only displays live data from your device to your dashboard.
* **Target Value -> From Device Property:** This option is ideal for retrieving data from a device's configurable properties, making it particularly useful for visualizing static or infrequently changing device configuration data, such as firmware versions or location IDs, as well as displaying the last received data from HTTP devices that do not maintain a persistent connection.

Finally,  the "**Display Options**" tab allows to customize the final appearance and behavior of the widget:

<figure><img src="/files/aZsYeYZom08QAfqigWHL" alt=""><figcaption></figcaption></figure>

This widget can be shown in different appearances, which can be specified in the **Switch Style** menu:

* [x] **Switch** is the standard configuration with a little horizontal switch
* [x] **Button,** which is an improved face that can be configured with different colors and icons
* [x] **Push button** it configurates the button to be automatically switched off when it is not being clicked. This option is perfect to implement the toggle switches behavior on the devices.

Using Button or Push button configuration, it is possible to configure the following parameters:

<figure><img src="/files/MnHxCudIZIIyaVwU9Sq2" alt=""><figcaption></figcaption></figure>

* **On Color**: The color that will be displayed when the boolean value of this resource is true.
* **Off Color**: The color that will be displayed when the boolean value of this resource is false.
* **Icon**: This button is able to show a customizable icon from a favicon library or any other icon library URL.
* **Icon Color**: Icon color is also configurable with a hexadecimal value. Note that there are different color options for both button statuses, so you can customize them as you want.

Upon completion, a result similar to this will be displayed:

![](/files/-LrxIOVq1PktuUA66ir-)

### Slider

The slider widget allows controlling a numeric state of a connected device, like setting a threshold, a target temperature, or any other internal device state that is likely to be controlled remotely. The device should expose a numeric input. The resource is then mapped to this widget, which can change the target value in real-time. If the input resource is properly defined and [implemented](http://docs.thinger.io/arduino/#coding-adding-resources-input-resources), this widget is also able to show the current device state.

![](/files/-LpXt-p8FWNZna8jHm5a)

This widget can be configured in many different ways through the three-step form. First of all, select "Slider" in the Widget menu tab, and then, in the Slider menu tab, allows selecting the data source, which can be a connected device.

<figure><img src="/files/fC7R72u7JP1qfd56wuop" alt=""><figcaption></figcaption></figure>

* **Target Value:**
  * &#x20;**Device Resource**: This option requires the device to be connected in real-time. The widget will display data as it is received from the device. It's important to note that, when fed directly from a device resource, the widget will not retain the information if the dashboard is closed or refreshed, as it only displays live data from your device to your dashboard.
  * **Device Property:** This option is ideal for retrieving data from a device's configurable properties, making it particularly useful for visualizing static or infrequently changing device configuration data, such as firmware versions or location IDs, as well as displaying the last received data from HTTP devices that do not maintain a persistent connection.

<figure><img src="/files/mhShJ5WzgnKQg2Ev0i2X" alt=""><figcaption></figcaption></figure>

Finally,  the "**Display Options**" tab allows to custom behavior of the widget:

* **Min Value**: Maximum value of the slider.
* **Max Value**: Minimum value of the slider.
* **Step Width**: Slider precision.

### HTML Time Series&#x20;

The **HTML Time Series** widget in Thinger.io is a versatile component designed primarily for rendering **custom data tables** within a dashboard. It enables advanced, fully customizable representations of time-series or real-time data through user-defined HTML templates, supporting precise formatting and layout control. As it plot historical data points over time using customizable HTML-based charting it's perfect to enable detailed analysis of trends and variations.

<figure><img src="/files/gjRnCuqVqPzhTWs9SdLd" alt=""><figcaption></figcaption></figure>

To configure this widget, select "HTML Time Series" from the Widget menu's "Type" tab. This will reveal a new configuration panel. Then, the HTML Time Series menu tab allows selecting multiple data sources, blending data from device resources, data buckets or properties into the same table; however, it is recommended to choose data that comes from the same source.&#x20;

<figure><img src="/files/jj8TsUfc3UWjuurpEhJk" alt="" width="563"><figcaption></figcaption></figure>

Finally, using the "code snippet" section, it's possible to customize the appearance of the table structure. It's important to take care of the data structure when calling the variables. The example above has been created by means of a simple source code in HTML, whose variable ID's must fit with the ones introduced in the source "Name" input box.&#x20;

```html
<div style="width=100%; height:100%; overflow-y:scroll">
    <table class="table table-striped">
      <thead>
        <tr>
          <th>Date</th>
          <th>Temperature</th>
          <th>Humidity</th>
        </tr>
      </thead>
      <tbody>
        <tr ng-repeat="entry in value">
          <td>{{entry.ts| date:'medium'}}</td>
           <td>{{entry.temperature}}</td>
           <td>{{entry.humidity}}</td>
        </tr>
      </tbody>
    </table>
</div>
```

### Group Widget

The **Group Widget** is a container element designed to organize and group multiple individual widgets within a single visual unit. This structure allows for a semantically meaningful layout, enabling users to associate related widgets visually and functionally.

<figure><img src="/files/CJcFzFByTus6I6NrgQgI" alt=""><figcaption></figcaption></figure>

Upon creation, the Group Widget appears as an empty placeholder, as shown in the first image. However, a **“+” button** is located in the upper-right corner, which allows users to add widgets to the group. Clicking this button reopens the standard widget creation interface—meaning any compatible widget can be embedded within the group.

Once added, the child widgets are arranged in a flexible grid layout. Users can add any combination of widgets, such as time series charts, indicators, text blocks, or numeric gauges, as illustrated in the second image, which shows a live humidity visualization with both gauge and time-series representations.

<figure><img src="/files/TrjAYnQNB4wmcfasdr5D" alt=""><figcaption></figcaption></figure>

**Key Functionalities:**

* **Semantic Grouping**: Allows logically related widgets to be grouped for better visualization and usability.
* **Flexible Composition**: Supports any widget type inside the group, maintaining full configuration and behavior.
* **Independent Layout**: Widgets inside the group can be freely rearranged using drag-and-drop in edit mode.
* **Encapsulation**: Makes it easier to duplicate or template grouped components across dashboards.

This widget is ideal for creating modular, reusable UI components—especially in large dashboards—by isolating sections like “Environmental Sensors,” “Device Stats,” or “Alarms” in well-defined visual blocks.

{% hint style="info" %}
Note: The Group Widget does not hold data directly. It merely acts as a visual container for organizing child widgets.
{% endhint %}

## Dashboard Control Widgets

There are some widgets that allow modifying the Dashboard behaviour, i.e., modifying data sources.

### Source Switcher

The Source Switcher widget allows you to modify the data source from a dashboard. This way, it is possible to create a single dashboard for all devices or buckets of the same type or within a project.

<figure><img src="/files/04h16JM1SDmJkOavp7M0" alt=""><figcaption></figcaption></figure>

The widget will appear as a dropdown with the current device or bucket being used by the dashboard. When clicked, it is possible to select or search a new data source, which will update the dashboard automatically.

![Source Switcher widget example when used to switch a device source in a dashboard.](/files/Zeq2gxdmRlz5LYQdh8Vk)

## Dashboard Tabs

A Dashboard Tab is an additional work page that can be added to a dashboard to organize the visualization of data and simplify navigation between related panels. The widgets and data sources of each tab can be completely independent of the others, but all the tabs will share the same configuration settings (column number, background image, widgets border-radius, etc).&#x20;

This feature also has the advantage of keeping all the tabs of a dashboard open even if they are not being visualized, so the data of the devices shown in real-time will not be lost when changing from one tab to another.&#x20;

### Adding a new tab

To add a tab to a dashboard, you only need to click on the blue "add tab" button. This button can be clicked as many times as tabs are desired to create, they will be labeled as "new tab" and will show a generic icon. The label can be modified just by typing a new name, but the icon can also be customized by pressing over the existing one, deploying a menu with all available icons.

First, a new tab needs to be created. This is the process:

<figure><img src="/files/PCkJooffSWt6ExJzNG0w" alt=""><figcaption></figcaption></figure>

Then, clicking on the settings symbol next to the New Tab, the list of icons will appear:

<figure><img src="/files/rb01OumULpvIkL2CiniQ" alt=""><figcaption></figcaption></figure>

<figure><img src="/files/lx8ZkPdl9KMmCMRBe9ys" alt=""><figcaption></figcaption></figure>

Note that, when the editing mode is enabled, the tabs order can also be customized by dragging them to the desired position.&#x20;

<figure><img src="/files/ViddDCi0s1pifElu1AoA" alt=""><figcaption></figcaption></figure>

## Dashboard Settings

Thinger.io allows setting some parameters of the dashboard behavior. Accessing the settings menu just requires activating the dashboard edit mode and then clicking on the blue "Settings" button in the upper area of the dashboard. The next context will appear, which has three main tabs to organize the work that can be done with this menu:

<div data-full-width="false"><figure><img src="/files/j2qkkvZlpmxZtqaPWZko" alt=""><figcaption><p>Layout tab in dashboard settings</p></figcaption></figure></div>

### Layout

This section allows you to customize the main dashboard configuration parameters, such as:

* **Name**: Dashboard name that will be shown on the header and browser tab.
* **Description**: Dashboard description for additional information.&#x20;
* **Columns**: This number allows selecting the logical number of horizontal places that can be used to insert widgets on the dashboard. Each widget can be scaled to fill more than one position.&#x20;
* **Row Height**: This number sets the minimum height of a dashboard row in pixels.
* **Background**: Either the background image or a hexadecimal color can be set in order to customize the dashboard's appearance.
* **Border radius**: Widget corners will be rounded according to this parameter.
* **Hide Header**: Shared dashboards have been provided with a header that shows the dashboard name, but this header can be hidden if the developer switches this option on.&#x20;

### Share

By default, any dashboard is private to the account owner. This feature allows you to share an isolated read-only version of the dashboard so others can display the information. To share a dashboard, just enter the dashboard config and enable the `Share` switch. After enabling the dashboard sharing, a URL will be generated, which can be publicly shared.

![Share tab in dashboard settings](/files/klHuy6UpAvJlid4hMP9o)

{% hint style="info" %}
Any modification on a shared dashboard widget that includes new device or data bucket resources must be updated in the authorization by means of the Access Tokens menu or by re-generating the link by turning the shared dashboard option off and on again.&#x20;
{% endhint %}

### Developer

For more advanced users, the dashboard settings section allows access to the JSON file where all interface parameters are configured. This allows you to customize each element in a flexible way, but it is also the best way to copy a dashboard for replication or to post it in the community discussion forum.

![Developer tab in dashboard settings](/files/Pv4OpzuPmmwpyOEZ19GL)

### Placeholders

Dashboard placeholders allow defining variables to be used in any part of the dashboard by using their placeholder name inside double braces. The value can be extracted from a device property or set manually.

<figure><img src="/files/nKHMBSbdLH0KBitaJljj" alt=""><figcaption><p>Placeholders tab in dashboard settings</p></figcaption></figure>

These placeholders can then be used in widget titles, widget subtitles, values, HTML templates, etc. Here is an example of using the above placeholder as the value of a text widget.

<figure><img src="/files/aIpDptLKLGEKGwqzpe8b" alt=""><figcaption><p>Configuration of a text widget value with a placeholder</p></figcaption></figure>

<figure><img src="/files/zm6pSPaTIu6VlrNJR33a" alt=""><figcaption><p>Text widget with the placeholder value</p></figcaption></figure>

### Functions

Dashboard functions allow processing data before being used in widgets, i.e., limiting a number of decimals, converting units, etc.

By clicking on the 'Add Function' button, a new function will be declared, which we can then use to transform the value of a widget source.

<figure><img src="/files/rIClxCg9K2xVMlS9SQZ0" alt=""><figcaption><p>Functions tab in dashboard settings</p></figcaption></figure>

Afterwards, when configuring a widget's sources, the processing function needs to be set.

<figure><img src="/files/E6hHRuYgJnjBP17pCvik" alt=""><figcaption><p>Setting the processing function in a widget source</p></figcaption></figure>

Additionally, previously defined dashboard placeholders can be used in the functions by using a variable named \`shared.placeholders\`. Check the following images:

<figure><img src="/files/obATKea5JQbQgvnM6bkd" alt=""><figcaption><p>Device property used as dashboard placeholder</p></figcaption></figure>

<figure><img src="/files/wq30AyMTVJairsy3bGKY" alt=""><figcaption><p>Dashboard placeholder value as the property value</p></figcaption></figure>

<figure><img src="/files/olZ5uRzq1fWSfKOwg8pa" alt=""><figcaption><p>Dashboard function using the value of a placeholder</p></figcaption></figure>

{% hint style="info" %}
Transformation of value is done for each individual value, and not over a whole series.
{% endhint %}

### Controls

In the controls tab, some additional dashboard configuration can be done regarding time selection for time series sources, when a widget source belonging to a dashboard has a configurable timeframe and aggregation window.

<figure><img src="/files/Kz9tpxVy47JS0PymZIMC" alt=""><figcaption></figcaption></figure>

<figure><img src="/files/W9r4gwhy2PisDy8qF5Sc" alt=""><figcaption></figcaption></figure>

* **Aggregations**: Limits the available aggregations that can be selected in the dashboard.
* **Range Selector**: Limits the available time range selectors that can be selected in the dashboard.
* **Hide hours**: Hides the hours in the absolute time range selector

<figure><img src="/files/jpnXTbbzgv4SX4EsyRCZ" alt=""><figcaption></figcaption></figure>

## Widget data transformations list

Data aggregation list

| **count**  | Returns the total number of data points in the selected time range.         | Checking how many samples were received (e.g., to ensure sensor is reporting regularly). |
| ---------- | --------------------------------------------------------------------------- | ---------------------------------------------------------------------------------------- |
| **mean**   | Calculates the average value of all data points.                            | Analyzing general trends like average temperature or humidity.                           |
| **median** | Returns the middle value in a sorted list of data points.                   | Useful when want to avoid distortion from outliers.                                      |
| **mode**   | Returns the most frequently occurring value.                                | Ideal for identifying recurring sensor states (e.g., ON/OFF events).                     |
| **spread** | Calculates the difference between the maximum and minimum values.           | Understanding variability or range in data, such as temperature fluctuations.            |
| **stddev** | Calculates the standard deviation, measuring how spread out the values are. | Evaluating the consistency or stability of sensor data.                                  |
| **max**    | Returns the highest recorded value.                                         | Monitoring peak values like max voltage or pressure.                                     |
| **min**    | Returns the lowest recorded value.                                          | Identifying dips or low thresholds, such as minimum battery level.                       |
| **sum**    | Adds up all the data points                                                 | Calculating total usage or accumulated metrics (e.g., energy consumption over time).     |

Data Transformation list

| Option in the dropdown        | What it does                                                                   | Typical use-case                                                                    |
| ----------------------------- | ------------------------------------------------------------------------------ | ----------------------------------------------------------------------------------- |
| **None**                      | Leave the value untouched.                                                     | Raw sensor read-outs.                                                               |
| **abs**                       | Returns the *absolute* value.                                                  | Converting ± current readings into a unipolar magnitude.                            |
| **ceil**                      | Rounds up to the nearest integer.                                              | Guaranteeing that never display less than the true amount (e.g., inventory pieces). |
| **floor**                     | Rounds down to the nearest integer.                                            | Showing whole-number counts such as completed batches.                              |
| **round**                     | Rounds to the nearest integer.                                                 | Tidying noisy decimals for dashboards aimed at non-technical audiences.             |
| **difference**                | Computes the delta between consecutive samples.                                | Displaying incremental energy consumption from a cumulative meter.                  |
| **derivative**                | Calculates the rate of change per second (can be negative).                    | Turning distance into velocity or bytes into bandwidth.                             |
| **non\_negative\_derivative** | Same as *derivative* but clips negative spikes—handy when counters reset to 0. | Network-interface byte counters, water meters that roll over.                       |
| **cumulative\_sum**           | Adds each new sample to a running total.                                       | Tracking production totals without changing the device firmware.                    |
| **elapsed**                   | Returns milliseconds/seconds since the previous data point.                    | Measuring event spacing, e.g., time between machine cycles.                         |


# ENDPOINTS

An endpoint is the entry point to a service, a process, or any other destination. So, in Thinger.io, an endpoint can be defined like a target destination that can be called by devices to perform any action, like sending an email, sending an SMS, calling a REST API, interacting with IFTTT, calling a device from a different account, or calling any other HTTP endpoint.

Calling those endpoints directly by devices can be complex in small microcontrollers, and would require more bandwidth in devices. This way, Thinger.io can handle endpoint calls that can be requested directly by devices, activating them by using their identifier and passing any information required. It also adds some flexibility, as the endpoint request can be dynamically changed as necessary, while the deployed code in the device remains the same.

## Create Endpoint

To manage all the endpoints, it is necessary to access the Endpoints section, by clicking on the menu item:

![](/files/27UhBqO7qq5IbMjB540H)

Then click on the Add Endpoint button, which will open a new interface for entering the endpoint details:

![](/files/UJ1Dvyt8K080ZmOOLiLS)

Here, it is necessary to configure different parameters:

* **Endpoint Identifier**: Unique identifier for the endpoint (*the device must use this identifier for activating the endpoint*).&#x20;
* **Endpoint Name**: Unique name for the endpoint.
* **Endpoint Description**: Fill here any description or detailed information needed to keep about the dashboard.
* **Endpoint Type**: Defines the endpoint type, depending on the selected type, the endpoint will present different fields. In the following sections are described some of these types.

## Useful Endpoint types

### Email Endpoint

An email endpoint enables the sending of emails from devices. The target email address, subject, and email body can be defined.

The configurable parameters are:

* **Email Address**: The target email address of the message.
* **Email Subject**: The email subject.
* **Email Body**: Allows defining the email body, which can be a plain JSON text with the data sent from the device, or a custom body that can also contain information gathered from the device.

There is an example of an email endpoint that contains some text and variables that are filled when the device calls the endpoint, adding the current temperature and humidity reported by the device. Notice that `temperature` and `humidity` variables are closed inside double brackets `{{}}`, so the endpoint will be expecting this information to complete the body.

<img src="/files/-LpXt-pIG6uBrrX6c6Fd" alt="" width="563">

Calling endpoints is well documented [here](http://docs.thinger.io/arduino/#coding-using-endpoints-calling-endpoints), but it is basically required to call the endpoint by using the `call_endpoint` method, which requires the endpoint id, `ExampleEmail` in this example, the optional data to be sent to the endpoint, which is a `pson` document (quite similar to JSON) with two keys named `temperature` and `humidity` holding the readings from a DHT sensor:

```cpp
pson data;
data["temperature"] = dht.readTemperature();
data["humidity"] = dht.readHumidity();
thing.call_endpoint("ExampleEmail", data);
```

**Note**: To include a single value in the email body, use the double bracket `{{}}` without any key, and send a `pson` document from the device with a single value:

```
Temperature is: {{}} ºC
```

Can be filled with this call in the device:

```cpp
pson data = dht.readTemperature();
thing.call_endpoint("ExampleEmail", data);
```

### HTTP Endpoint

An HTTP endpoint is a generic type of endpoint that can be used to interact with any other web service or web application. So, this endpoint can be configured to make any HTTP request by configuring the method, URL, headers, and body.

The configurable parameters are:

* **Request URL**: Configure the method (GET, POST, PUT, PATCH, or DELETE), and the request URL.
* **Request Headers**: It is possible to add headers to the request, which can be useful for adding authorizations, controlling caches, configuring content type, etc.
* **Request Body**: The body can be either a custom body with a specific content or a JSON payload with the information sent by the device. In a custom body, it is possible to add custom variables, as shown in the email example. This way, it is possible to create content in different formats like XML, SOAP, etc (remember to add the adequate content-type in this case).

<img src="/files/-LpXt-pKPEzViX6tNXBL" alt="" width="563">

### Telegram Bot Endpoint

This endpoint is pre-configured to send data to a Telegram bot in a simple way and thus use the messaging platform to get alerts or data from the IoT devices through Thinger.io.

![](/files/djXbsfOpxd7W0cX0TOhY)

The next parameters need to be configured to work with Telegram bot:

* **Bot Token**: Is the bot identification and authorization stream; this parameter can be left empty on this form in order to specify it directly in the device source code with the key "token".
* **Chat Identifier**: Is a 10-digit chat identifier that can be obtained from Telegram conversation information. It can be left empty at this configuration and be called in the source code with the key "chat".
* **Chat Message**: The text and device data that is to be sent in the message can be specified here or hardcoded in the device to be sent on the endpoint call with the key "message".


# ALARMS

Alarms are mechanisms that allow users to receive real-time notifications about specific events or conditions related to their IoT devices. These alarms are essential for proactive management.

Alarms in Thinger.io serve several important purposes:

1. **Real-Time Monitoring**: This feature enables users to monitor their devices in real-time and receive immediate notifications about critical events, such as device failures or abnormal conditions.
2. **Predictive Maintenance**: They help anticipate problems before they occur, which is essential for predictive maintenance. For example, receiving an alarm when a motor's temperature exceeds a specific threshold can prevent major failures.
3. **Security and Control**: They enhance security by alerting users about unauthorized access or suspicious activities. Alarms can also be used for control, activating other devices or services in response to an event.
4. **Operational Optimization**: They facilitate operational optimization by providing information on device performance, allowing for continuous adjustments and improvements in processes.
5. **Customized Notifications**: Users can define custom alarms according to their specific needs, ensuring that relevant information is delivered to the right people at the right time.

## Alarm Console&#x20;

***

To access the alarm functionality, click on the "Alarms" tab in the main menu. This will lead to the alarm's terminal, where all currently active alarm events can be viewed. This interface provides useful information related to each alarm, including the time of triggering, severity, and current status. Details about the affected device and any relevant data points that caused the alarm to be triggered are also visible.

<figure><img src="/files/w581gUiW8kj5l9qWnzNP" alt="" width="188"><figcaption></figcaption></figure>

This comprehensive overview allows for the real-time monitoring of device status and a prompt response to any issues. But if more detail is required, there is also an "Alarms Inspector" accessible using the top-right corner menu, which allows for review of the raw data of the server events that are being produced by each alarm rule.&#x20;

## **Creating new Alarms**

Alarms are generated by the server when the criteria specified in a rule are met. Users can define these alarms by accessing the "Rules" section of the alarm console.&#x20;

<figure><img src="/files/QIhhhKUyUuH84DvdYrsL" alt=""><figcaption></figcaption></figure>

In this section, find a list of existing rules, which allow for their management, as well as the option to create new rules by clicking the "+ Add Rule" button:

<figure><img src="/files/jLEg0J4BjiwJm8HY2TIK" alt=""><figcaption></figcaption></figure>

#### Rule information

* **Rule Identifier:** A unique identifier without spaces and special characters must be used&#x20;
* **Name**: Mnemonic identification for users&#x20;
* **Description**: Additional information to help recognize the rule in the long term

#### Configuration

* **Enabled**: Allows enabling or disabling the execution of the rule
* **Severity**: This is used to categorize and prioritize alarms based on their importance or impact. It helps users manage and respond to different types of events more effectively.&#x20;
* **Check interval:** Is used to define how frequently the system evaluates the conditions set in a rule to determine if an alarm should be triggered. It allows users to adjust the check interval based on the specific needs of their monitoring setup.&#x20;

{% hint style="warning" %}
Note that setting an appropriate check interval helps balance the frequency of evaluations with system resource usage. In scenarios requiring high responsiveness, a shorter interval may be chosen, while less critical scenarios may use a longer interval. If the interval is too long, critical issues might not be detected promptly, while a very short interval may lead to excessive checks and potential performance impacts.
{% endhint %}

## Rule definition

Este submenú permite especificar el comportamiento de la regla, especificando qué variables se van a  monitorizar, cual es el valor de consigna y qué resultado tendrá  cuando se produzcan evaluaciones positivas de la condición. También se especifica el comportamiento de desactivación de la regla.

### Data sources

This section allows users to specify which data sources will be evaluated by the rule. Data sources may include data from buckets, device properties, or the device status (allowing also to monitor device disconnections).&#x20;

<figure><img src="/files/GhajFh1fkzjjpZV9oAM4" alt=""><figcaption></figcaption></figure>

* **Name**: Use a unique identifier, avoiding spaces or special characters. This name will be used to identify the JSON that contains the data point.&#x20;
* **Data source**: Note that depending on the data source type, the menu may expose filtering options that allow working with multiple devices with the same behavior, so just one rule can be used to monitor multiple devices. There are multiple options:
  * From Device Resource: This option requires the device to be connected in real-time. The widget will display data as it is received from the device. It's important to note that, when fed directly from a device resource, the widget will not retain the information if the dashboard is closed or refreshed, as it only displays live data from the device to the dashboard.
  * From Data Bucket: With this option, the widget takes information from a Data Bucket previously configured in the account to display historical data. This means that the information will persist even if the dashboard is closed or reloaded.
  * From Device Bucket: This option is used to retrieve historical data specifically from a Device Bucket, which stores a history of device properties or aggregated data. It functions similarly to a Data Bucket but is intrinsically linked to a device's historical properties.
  * From Device Property: This option is ideal for retrieving data from a device's configurable properties, making it particularly useful for visualizing static or infrequently changing device configuration data, such as firmware versions or location IDs, as well as displaying the last received data from HTTP devices that do not maintain a persistent connection.

{% hint style="success" %}
When working with device data, it is recommended to use a product data bucket instead of individual data buckets. This way, just one rule will monitor every product devices.
{% endhint %}

#### Multiple data sources

In the "Data Sources" section of the rule configuration menu in Thinger.io, the **"+ Add Source"** button allows users to add variables to a specific rule. This feature is essential for configuring the rule with the necessary data for evaluation.&#x20;

### Activation

The alarm activation refers to the process where the system monitors the variables specified in the "Sources" section and generates notifications when these conditions are met. This means the system continuously checks the data against the defined criteria to detect any deviations or specific events. It's also important to note that it is possible to define confirmation criteria that prevent false activations.

The alarm activation section in Thinger.io consists of a form with three main sections: **Conditions, Confirmation,** and **Notification**. Each of these sections plays a crucial role in defining how and when alarms are triggered and how notifications are managed.

<figure><img src="/files/v8LUpTLanTGdpkbFTODV" alt=""><figcaption></figcaption></figure>

{% hint style="info" %}
In this example, we are using the variable "temperature" which comes from a datapoint that contains multiple variables:

`Data1`

`{"temperature":20,`

&#x20;`"humidity":50,`

&#x20;`"pressure":850`

`}`

The desired variable can be selected through the following structure in the input text: "Data1.temperature"
{% endhint %}

* **Conditions**: allows users to define one or more comparisons of a selected variable and a setpoint. These conditions specify the exact criteria that must be met for the alarm to be activated. By setting these conditions, users can precisely monitor the desired metrics and ensure alarms are only triggered when specific thresholds or ranges are met. The comparisons can be:
  * Greater than
  * Less than
  * Equal to
  * Not equal to
  * Within a range
  * Outside of a range

{% hint style="info" %}
Note that it is possible to create more complex behaviors by adding additional conditions to the rule
{% endhint %}

* **Confirmation**: This section helps to avoid false activations of the alarm. It is an essential step for filtering out transient or spurious events that do not require immediate attention, thus ensuring that alarms are only generated for sustained or repeated conditions. This can be configured in several ways:
  * Immediate Confirmation: The alarm is triggered as soon as the condition is met.
  * Sequence: The alarm is activated if the condition is met multiple times&#x20;
  * Timespan: The alarm is only triggered if the condition remains true for a specified number of consecutive valid comparisons.
* **Notification**: This section allows users to define the endpoint profile (previously defined) that will be used to send the notification if the alarm is necessary. By configuring the notification settings, users can ensure that the right people are informed promptly about critical conditions, facilitating a quick and appropriate response.&#x20;

{% hint style="info" %}
**Understanding Alarm Activation Fields**

The following fields are available to determine when an alarm should be activated:

* **device**: The unique identifier of the device.
* **created**: Timestamp indicating when the device was originally created.
* **modified**: Timestamp of the last modification to the device's settings or status.
* **enabled**: Whether the device is currently enabled. Alarms are typically only triggered for devices that are enabled.
* **connection.ts**: The timestamp of the last known connection attempt or session.
* **connection.active**: This is the most critical field. It indicates whether the device is currently online and connected to the Thinger.io server. Use this field to detect connectivity issues or trigger alerts when a device goes offline.

These fields allow alarms to be precisely tuned to changes in device state, ensuring that only relevant alerts are generated.
{% endhint %}

### Normalization

The normalization section of the rules configuration allows users to define the platform's behavior for deactivating an alarm when the necessary conditions for it to be cleared are met in the device's data. This configuration uses the same elements as in the activation section, but with the focus on setting values that ensure a reliable deactivation of the alarm.

<figure><img src="/files/a1xMJGoSFTiryGsZjqlh" alt=""><figcaption></figcaption></figure>

### Reminders

The **Reminder** section of the alarm configuration is designed to provide ongoing notifications at regular intervals when an alarm remains active. This feature ensures that critical alarms are not overlooked or forgotten over time. It is possible to select two elements:&#x20;

* Interval: Users can specify the time interval at which the reminders should be sent. This can be configured to match the urgency of the alarm, with shorter intervals for more critical issues and longer intervals for less urgent ones.
* Notification:  Users can define the endpoint profile for the reminder notifications. This includes the communication method (e.g., email, SMS, push notifications) and the details for delivering these reminders.

## Alarm list

The alarm list Thinger.io is a comprehensive interface that displays all the active alarms generated by the system when the specified conditions are met. It provides a detailed overview of all current alarms that have been triggered. This list helps users to track and manage ongoing issues across their IoT devices and systems.

<figure><img src="/files/NIVOkAGuS92xJ9u4ZN4c" alt=""><figcaption></figcaption></figure>

**Key Data Displayed in the Alarms List**

* **Alarm:** Each alarm is assigned a unique ID for easy reference and tracking.
* **Origin:** It's the source of the alarm, it indicates the device or data source that triggered the alarm. This helps identify the exact point of origin of the alarm.
* **Severity:** Displays the severity of the alarm, as it was defined in the rule configuration. This feature is aimed at helping to prioritize response actions. Severity levels might include *Critical, High, Medium, Low* and *None.*
* **State:** The status of the Alarm, which shows the current state of the alarm and could be:
  * **Activated:** The alarm is currently active and has not been resolved.
  * **Latch:** The alarm has been acknowledged but remains active.
  * **Shelve:** The alarm has been temporarily suppressed or postponed.
* **Values:** Displays the trigger Variable, the specific variable that triggered the alarm, along with its current value, helping to understand the cause of the alarm.

1. **Visualized Time**
   * **Timestamp:** Indicates the moment when the user first viewed the alarm. This helps in tracking how long the alarm has been known to the team.
2. **Elapsed Time**
   * **Duration:** Shows the time elapsed since the alarm was activated. This information is critical for measuring response times and understanding the persistence of issues.

### Alarm management&#x20;

The alarm list also includes several control functions that appear when one or more alarm instances are selected. These controls allow users to manage the alarms effectively.&#x20;

<figure><img src="/files/HQBjPGDsTv1cK6d2djWG" alt=""><figcaption></figcaption></figure>

**Alarm Management in the Alarm List** is a critical function that allows users to maintain control over active alarms, ensuring they are addressed appropriately and efficiently. Here’s how each control contributes to effective alarm management:

* **Acknowledge:** When users acknowledge an alarm, it signifies that the alarm has been noticed and is being addressed. This step is essential in a team environment to prevent multiple people from unknowingly working on the same issue.
* **Shelve:** Shelving an alarm allows users to temporarily suppress it, reducing noise and distraction from alarms that are known but not immediately actionable. This helps in focusing on more urgent alarms while ensuring less critical ones are revisited later.
* **Latch:** Latching an alarm ensures it remains active until a manual action is taken to clear it. This is particularly useful for severe issues that require explicit confirmation of resolution, ensuring accountability and thoroughness in alarm management.
* **Clear:** Clearing an alarm is the final step once the issue has been resolved. This keeps the alarm list up-to-date and focused only on current, unresolved issues, helping users to quickly identify and respond to ongoing problems.
* **Set Projects:** Assigning alarms to projects helps organize and manage them within specific contexts. This is particularly useful in larger deployments where alarms may pertain to different devices, locations, or operational areas.
* **Remove:** Removing alarms from the system is necessary for cleaning up outdated or irrelevant alarms. This ensures the Alarm List remains relevant and uncluttered, making it easier to manage current alarms.

## Alarms Inspector

The Alarms Inspector in Thinger.io is a tool designed to provide detailed insights into alarm behavior. It helps users track and analyze the alert system by displaying the event history of alarms. It aids in understanding the lifecycle and behavior of each alarm by providing a detailed timeline of events.

## **Filtering Options**&#x20;

The Alarms Inspector offers several filtering options, allowing users to **focus on specific alarm event types**. These filters include:

* **alarm\_instance\_activate:** Shows events where an alarm instance is activated.
* **alarm\_instance\_create:** Displays events where a new alarm instance is created.
* **alarm\_instance\_delete:** Shows events where an alarm instance is deleted.
* **alarm\_instance\_normalize:** Displays events where an alarm instance is normalized, indicating that the triggering condition is back to normal.
* **alarm\_instance\_update:** Shows events where an alarm instance is updated with new information or conditions.
* **alarm\_rule\_create:** Displays events where a new alarm rule is created.
* **alarm\_rule\_delete:** Shows events where an alarm rule is deleted.
* **alarm\_rule\_execute:** Displays events where an alarm rule is executed, showing the process of checking conditions and triggering alarms.
* **alarm\_rule\_update:** Shows events where an alarm rule is updated with new parameters or conditions.

## Device-events&#x20;

The platform provides access to a set of system-generated signals that represent the current **state and metadata** of each device. These signals can be used for monitoring, automation, and alarm generation.

The available fields include:

* **device**: The unique identifier (device ID).
* **created**: Timestamp indicating when the device was initially created.
* **modified**: Timestamp of the most recent configuration change.
* **enabled**: Boolean flag indicating whether the device is currently enabled or disabled.
* **connection.ts**: Timestamp of the last known connection activity.
* **connection.active**: Boolean indicating whether the device is currently connected.

These signals are particularly useful for building automation logic or triggering alerts based on device status. For instance, a common practice when defining alarms is to **verify that a device is both disconnected and enabled**, in order to avoid generating alerts for devices that are intentionally disabled (e.g., under maintenance or decommissioned).

By leveraging these signals, users can implement reliable and meaningful monitoring flows that reflect the real operational status of their IoT infrastructure.


# ACCESS TOKENS

All Thinger.io Platform features can be accessed using REST API Calls in order to integrate our service as a back-end server for any project. In fact, the console is just an Angular REST client interacting with the API to manage devices, buckets, endpoints, dashboards, and so on. Every REST API request must be authenticated in order to take effect, so any client needs to provide an authorization code in every call. This way, access tokens are the way to provide authorization to third-party services or applications to make API Requests, without having to share the username and password. Moreover, with access tokens, it is possible to grant access to specific resources and actions of the account, like reading a specific device or writing to a custom bucket (like in [this example](http://docs.thinger.io/sigfox/#steps-in-thingerio-create-an-access-token)).

{% hint style="info" %}
**Note:** Using an access token via API is covered in more detail [here](http://docs.thinger.io/api/#authentication-api-rest-api-authentication).
{% endhint %}

All Tokens can be easily managed by going to the "Access Tokens" section of the main menu.

<figure><img src="/files/RU7fII13iIcW43GboF5j" alt="" width="169"><figcaption></figcaption></figure>

## Create Token Profile

Clicking the green `Add Token` button will open the "Token details context", which allows creating a new token profile and managing the associated permissions:

<figure><img src="/files/GrPctS34Dgzokj2M1AtO" alt=""><figcaption></figcaption></figure>

The configurable parameters are:

* **Token ID**: Unique Token ID within the user account.
* **Token Name**: The Token name to easily recognize the token scope.
* **Enabled**: Controls whether the token is enabled or disabled.
* **Token Permissions**: In this section, it is possible to define the scope, or the level of access of the token. Depending on the given permissions, the token will have access to different parts of the account. Adding a new permission will normally require selecting the permission type (access a device, bucket, dashboard, etc.), the level of access (some specific resource or all of their type), and the allowed actions (all or some of them). This configuration is handled by the "Add Token Permission" interface:&#x20;

<figure><img src="/files/FZXnTsHf8hdBzirghpZ4" alt="" width="548"><figcaption></figcaption></figure>

When all the parameters are filled, a new Access Token Profile will be added by pressing again the green "New Access Token" button, then, the authorization stream will be displayed in a blue text box at the bottom of the interface:

![](/files/-Lv5y6-HDPP8PnNlHPLr)

This authorization can be added as bearer auth. to allow a third-party system to work with Thinger.io Platform features.&#x20;

### Adding Permissions to an Access Token

Each Access Token profile can contain authorization to many different features. The next list shows all the available permission types and the actions that can be defined for each one:

* **Admin Access**: Provides access to the whole account.
* **Device**: Provides access to a single device or all devices. It is possible to define the action between:
  * `AccessDeviceResources`: Grants access to executing device resources, like reading a sensor variable.
  * `ListDeviceResources`: Grants access to list the device resources' names.
  * `GetDeviceStats`: Grants access to read device statistics like public IP, connected time, bandwidth, etc.
  * `CreateDeviceToken`: Grants access to create device tokens.
  * `ListDeviceTokens`: Grants access to read device tokens.
  * `DeleteDeviceToken`: Grants access to delete device tokens.
  * `ListDevices`: Grants access to list the account devices.
  * `DeleteDevice`: Grants access to delete devices.
  * `CreateDevice`: Grants access to create a new device.
  * `UpdateDevice`: Grants access to modify a device, like its description or credentials.
  * `ListDeviceLocations`: Grants access to fetch the locations of the connected devices.
* **Bucket**: Provides access to a single bucket or all buckets. It is possible to define the action between:
  * `ReadBucket`: Grants access to read information stored in a bucket.
  * `WriteBucket`: Grants access to write information to a bucket.
  * `ExportBucket`: Grants access to export the information stored in a bucket.
  * `ClearBucket`: Grants access to clear the information stored in a bucket.
  * `ListBuckets`: Grants access to list the account buckets.
  * `DeleteBucket`: Grants access to delete buckets.
  * `CreateBucket`: Grants access to create a new bucket.
  * `UpdateBucket`: Grants access to modify the bucket configuration, like data sources, description, etc.
  * `ReadBucketConfig`: Grants access to read the current bucket config.
* **Endpoint**: Provides access to a single endpoint or all endpoints. It is possible to define the action between:
  * `ListEndpoints`: Grants access to list the account endpoints.
  * `CreateEndpoint`: Grants access to create a new endpoint.
  * `ReadEndpointConfig`: Grants access to read the current endpoint config.
  * `UpdateEndpoint`: Grants access to modify the endpoint configuration.
  * `DeleteEndpoint`: Grants access to delete endpoints.
  * `CallEndpoint`: Grants access to execute an endpoint.
* **Dashboard**: Provides access to a single dashboard or all dashboards. It is possible to define the action between:
  * `ListDashboards`: Grants access to list the account dashboards.
  * `CreateDashboard`: Grants access to create a new dashboard.
  * `ReadDashboardConfig`: Grants access to read the current dashboard config.
  * `UpdateDashboard`: Grants access to modify the dashboard configuration.
  * `DeleteDashboard`: Grants access to delete dashboards.
* **Token**: Provides access to a single token or all tokens. It is possible to define the action between:
  * `ListTokens`: Grants access to list the account tokens.
  * `CreateToken`: Grants access to create a new token.
  * `ReadTokenConfig`: Grants access to read the current token config.
  * `UpdateToken`: Grants access to modify the token configuration.
  * `DeleteToken`: Grants access to delete tokens.

## Modifying Permissions

The Access Token profile permissions can be modified anytime from the "Edit Token" interface, by clicking the profile identifier in the token list and pressing the green  "+Add" button of the Token Permissions section. This will open the "Add Token Permission" interface again so additional permissions can be added in the same way as in the initial configuration. &#x20;

## Remove Access Token

One or more Access Token profiles can be deleted from the Access Token list by selecting them in the left-side checkbox and pressing the "Remove" button. Also, a Token could be cloned, as it is shown:

<figure><img src="/files/JMy1AgDX185fdFMt9DlW" alt="" width="563"><figcaption></figcaption></figure>


# GEOFENCING

## Geofencing &#x20;

Geofencing is a technique that allows defining a virtual perimeter over geographical areas, it can be defined as a radius around a point or tracing polygons. This is a very useful functionality to monitor automatically and in real-time a fleet of devices, allowing the creation of customized alerts based on geolocation.

Thinger.io server will compare the location of the device, create alerts according to the custom configuration that can be managed below. To start creating Geofence areas, the edition switch on the right-top-side of the map must be clicked ON. Then a new menu allows selecting the geofence shape that can drown circular, square, or free.&#x20;

### Creating a new geofence

![](/files/-MHqiD4TPKx1BBy-UKg2)

Each defined geofence will create in the lower panel a profile that will allow configuring its behavior. The next image shows the configuration options for the geofences created above for each situation in which any device can be located

![](/files/-MHqimBlJmWcygxusqTj)

* **name**: Identification of the geofence area
* **On Enter**: Allows selecting an endpoint that will be called automatically when the device just **entered** the area, i.e. when the last position was out of the border and the new position is within the border.&#x20;
* **On Exit**: Allows selecting an endpoint that will be automatically called when the devices are just **leaving** the area, i.e when the last position was within the geofence area and the new position is out.&#x20;
* **While Inside**: This endpoint will always be called when the device is within the area. So, it is preferable not to use this option if the device sampling interval is short
* **While Outside**: This endpoint will always be called when the device is out of the area. So, it is preferable not to use this option if the device sampling interval is short
* **Color**: To select the color of the representation on the geofences map.
* **Enabled**: Each geofence can be disabled/enabled using the right-side switch.&#x20;

Note that, when a new geofence is created, the device (or each device of the type/group) will obtain two properties from the geofences configuration. These properties can be checked or edited in the device (Asset/group) properties section:

<figure><img src="/files/G87C81TTMYO8BKj5MYGd" alt=""><figcaption></figcaption></figure>

### Configuring Geofence output

Geofences output can be configured for each of the four possible states (in, out, in, out) through the lower menu, where the endpoint profiles created in the account can be selected. The endpoints are very versatile tools that allow configuring messages that leave the platform in a simple way, allowing the programming of automatic behaviors. Learn much more about the endpoints feature in the [Endpoints section](/features/endpoints-1) of this documentation.&#x20;

![](/files/-MIK9McEuzr3iPBnFYpn)

To configure a geofence in a certain state, click on the checkbox located on the left side and display the menu to choose the desired endpoint profile.

### Configuring Devices to work with Geofences

The device code must be prepared to make use of the platform's location services. It is only necessary to include among the variables sent to the platform the corresponding cardinal coordinates with the identifiers in their payload `"lat", "lng"`, `"lat", "long"` or `"latitude", "longitude"` as shown in the example of the callback of the HTTP devices:

![](/files/-MIKB7Bd74nC2UNRji52)

{% hint style="warning" %}
The first release of this feature doesn't work with Thinger.io software client devices and MQTT devices.&#x20;
{% endhint %}


# ASSET TYPES & GROUPS

This section allows you to define sets of IoT devices, in order to group those that have common characteristics or purposes, so we will distinguish types of devices for those that are units with the same purpose and Groups to associate devices for OTHER REASONS. Note that a device can be of one type and belong to a group at the same time.&#x20;

These groupings improve the organization of projects, but also support the following functionalities:&#x20;

* Hereditary Properties. It is possible to define group properties and properties of a type, which will be inherited by the devices that are associated.
* Geofencing: Within the types and groups, it is possible to define areas to monitor the location of devices and generate alerts without one of them entering or leaving the established area.
* Data processing (Geofencing, alerts, data transformation).&#x20;

The assets section has the overview tool that allows us to visualize on the map all the devices created in the selected project, and allows us to quickly check the location and connection status of each device. The green circle will be displayed if the device is connected and the red one if the device is disconnected.

&#x20;

<figure><img src="/files/cX6aPgIRq8U4qPDOzjxJ" alt=""><figcaption></figcaption></figure>

This tool allows several display options to show only the connected or disconnected devices or, by selecting the "clustering" option, the possible grouping by nearby locations. In the following sections, the use of asset types and groups will be explained in more detail.

## Asset types

They are devices deployed with the same objective, which perform the same function, so they match the same configuration parameters. For example, we can create a device type "Temperature sensors", "freezers", "Smart Cars".&#x20;

### &#x20;Creating Asset Types

To create a new device type, go to the `Assets > Types` tab, displaying the list of previously created asset types, if any. Then, clicking on the green "Add Asset Type" button will open the "new Asset Type" form, in which the identifiers must be filled in:&#x20;

<figure><img src="/files/xqe67zGkbS7K0DVvACHY" alt=""><figcaption></figcaption></figure>

Once the form filled properly, clicking again on the "Add Asset Type" button will create the new Type and displays its configuration panel, in which the de overview devices map will be shown as well as Properties and Geofencing configuration tabs that can be used to define the properties and geofences for all the devices included into this Asset Type.

<figure><img src="/files/jSwvYTFZ94ihST4EgOtX" alt=""><figcaption></figcaption></figure>

Note that no devices will be shown until anyone begins attaching to this specific device Type.

### Attaching devices to an Asset Type

To start adding devices to the new Asset Type, you must access the devices section of the main menu and display the Devices List. Note that each device can be selected by means of a checkbox on the left side of the list.&#x20;

<figure><img src="/files/KKt5EURYdsThhdoTlZ78" alt=""><figcaption></figcaption></figure>

Selecting one or several devices will display new buttons in the upper area of the list. Pressing the green "Set Type" button, a new context will be displayed where the asset type can be selected by means of a drop-down list.&#x20;

<figure><img src="/files/silRyPG7V9DMC4KZ0H92" alt=""><figcaption></figcaption></figure>

<img src="/files/-MHq-0-kKvfZhj4u1Z4z" alt="" width="563">

All the devices that were checked will be associated with the selected Type, from then on they will inherit their properties and the alert and geofences configuration, so let's explain how to configure those features.

### Deleting an Asset Type&#x20;

Any resource can be deleted from the asset type by reassigning it to an empty type in the list or by accessing the settings section of the resource and checking off the box, after this, the properties and geofences inherited from your asset type will be deleted.

![](/files/-MHqcz3vA8Sb0GVndHeK)

It is also possible to completely delete an asset type by selecting its profile in the Types list and clicking on the "Delete Type" button, but note that none of the assigned resources will be deleted, they will only cease to be associated with this category.

![](/files/-MHqdG4vDOeZ-vk_zD4C)

## Groups

They are different devices with a common semantic characteristic, for example, the devices installed in the kitchen of a smart home can be grouped under the name "kitchen devices".

### Creating a new Asset Group

To create a new assets group, go to the `Assets > Group` tab of the main menu, this will display the list of previously created Groups, if any. Then, clicking on the green "Add Asset Type" button will open the "new Group" form,  in which the data must be introduced:

<figure><img src="/files/B8XijEPmnsupaC3MA7lf" alt=""><figcaption></figcaption></figure>

Once the form is completed, clicking again on the "Add Group" button will create a new Group profile and display its configuration panel in which the de devices overview map will be shown as well as Properties and Geofencing configuration tabs, that can be used to define the behavior of this features for all the devices included into this Assets Group.

<figure><img src="/files/7mEPmuXvWZOPCbLaHJDq" alt=""><figcaption></figcaption></figure>

Note that no devices will be shown until anyone begins attaching to this specific device Group profile.

### Grouping devices

Start adding devices to the new Assets Group just require getting access to the devices section of the main menu and displaying the `Devices List`. Note that each device can be selected by means of a checkbox on the left side of the list. When doing this, new buttons appear on the top side of the menu, allowing you to manage the device association into a specific Group, Asset or Project.&#x20;

<figure><img src="/files/tyju4ibSrpe7dC79H1ES" alt=""><figcaption></figcaption></figure>

Selecting one or several devices will display new buttons in the upper area of the list. Pressing the desired button allows you to aggregate those devices to any of the previously created aggregations. A new context will be displayed in order to select the Group from a drop-down list.

<figure><img src="/files/uGRaric4BiH0DC1FESND" alt=""><figcaption></figcaption></figure>

Since the moment of the association, all the devices will inherit the properties and geofence configuration.

### Deleting Devices Group

Any resource can be deleted from the Asset Group by reassigning it to an empty type in the list or by accessing the settings section of the resource and checking off the box, after this, the properties and geofences inherited from the Asset Group will be deleted.

![](/files/-MHw6ycPfbTp-olrRiZ5)

It is also possible to completely delete an asset type by selecting its profile in the Groups list and clicking on the "Delete Group" button, but note that none of the assigned resources will be deleted, they will only cease to be associated with this category.

![](/files/-MHw6VU2TGEdMcsV64e9)

## Asset Type Properties

Properties created in an Asset Type will be inherited by every associated device. This establishes a scalable way to configure large networks of devices in a short time and easily. The properties allow you to enter configuration parameters or any other context information you want to make available to the devices or other resources of the platform.

To create a new property on an Asset Type, go to `Asset > Types` section of the main menú, then access the Type profile to be modified and select the properties tab on the right-side menu of the configuration panel. Then, creating a property only requires pressing on `+Add` button and implementing a JSON file format to structure the data that is to be included in the property.

![](/files/-MHqgfrBgpnXURQxh-d_)

Note that, on the device properties section, each property source will be identified in the "source" column.

<figure><img src="/files/mJuAFnMCKg66kRQiT4rM" alt=""><figcaption></figcaption></figure>

## Geofencing &#x20;

Geofencing is a technique that allows defining a virtual perimeter over geographical areas. It can be defined as a radius around a point or tracing polygons. This is a very useful functionality to monitor automatically and in real-time a fleet of devices, allowing the creation of customized alerts based on geolocation.

Thinger.io server will compare the location of the device, create alerts according to the custom configuration that can be managed below. To start creating Geofence areas, the edition switch on the right-top-side of the map must be clicked ON. Then a new menu allows selecting the geofence shape that can be drawn circular, square or free.&#x20;

![](/files/-MHqiD4TPKx1BBy-UKg2)

Each defined geofence will create in the lower panel a profile that will allow you to configure its behavior. The next image shows the configuration options for the geofences created above for each situation in which any device can be located:

![](/files/-MHqimBlJmWcygxusqTj)

* **name**: Identification of the geofence area
* **On Enter**: Allows selecting an endpoint that will be called automatically when the device just **entered** the area, i.e. when the last position was out of the border and the new position is within the border.&#x20;
* **On Exit**: Allows selecting an endpoint that will be automatically called when the devices are just **leaving** the area, i.e when the last position was within the geofence area and the new position is out.&#x20;
* **While Inside**: This endpoint will always be called when the device is **within the area**. So, it is preferable not to use this option if the device sampling interval is short
* **While Outside**: This endpoint will always be called when the device is **out of the area**. So, it is preferable not to use this option if the device sampling interval is short
* **Color**: To select the color of the representation on the geofences map.
* **Enabled**: Each geofence can be disabled/enabled using the right-side switch.&#x20;


# PLUGINS MARKETPLACE

***

At Thinger.io, IoT integration is designed to be straightforward and accessible. On the dedicated page, comprehensive information is available regarding the platform's compatibility with various tools and the range of plugins offered.

{% embed url="<https://marketplace.thinger.io/>" %}

Thinger.io's plugin collection extends the platform's capabilities, offering a range of solutions from data visualization to device management. These extensions are designed to complement the core Thinger.io platform.

### &#x20;Communication and Control

* [Node-RED](https://marketplace.thinger.io/plugins/node-red/)
* [The Things Stack](https://marketplace.thinger.io/plugins/ttn-stack/)
* [Chirpstack](https://marketplace.thinger.io/plugins/chirpstack/)
* [LORIOT](https://marketplace.thinger.io/plugins/loriot/)
* [HTTP Device](https://marketplace.thinger.io/plugins/http-device/)
* [Sigfox](https://marketplace.thinger.io/plugins/sigfox/)

### Development and OTA

* [VS Code](https://marketplace.thinger.io/plugins/vscode/)

### Monitoring and Visualization

* [Alertmanager](https://marketplace.thinger.io/plugins/alertmanager/)
* [Grafana](https://marketplace.thinger.io/plugins/grafana/)
* [Prometheus Exporter](https://marketplace.thinger.io/plugins/prometheus-exporter/)
* [Prometheus](https://marketplace.thinger.io/plugins/prometheus/)

### Data Visualization and Processing

* [InfluxDB2](https://marketplace.thinger.io/plugins/influxdb2/)
* [Jupyter Minimal](https://marketplace.thinger.io/plugins/jupyter-minimal/)
* [Jupyter R](https://marketplace.thinger.io/plugins/jupyter-r/)
* [Jupyter TensorFlow](https://marketplace.thinger.io/plugins/jupyter-tensorflow/)

### Smart Home and Energy Management

* [Shelly 1L](https://marketplace.thinger.io/plugins/shelly-1l/)
* [Shelly EM](https://marketplace.thinger.io/plugins/shelly-em/)
* [Shelly Plug S](https://marketplace.thinger.io/plugins/shelly-plug-s/)
* [Shelly Plus 1PM](https://marketplace.thinger.io/plugins/shelly-plus-1pm/)

### File Transfer

* [SFTPGo](https://marketplace.thinger.io/plugins/sftpgo/)


# PRODUCTS

Streamlined Management and Analysis of Large IoT Fleets

Have an IoT product and want to simplify its management at scale? Configure data to be stored, create dashboard templates, set custom data processors, or build custom REST APIs for them, including MQTT devices.

## Features

A product inside Thinger.io is a way to define behaviors for a set of devices of the same type. At this moment, it is able to offer different capabilities:

* [**Product Profile**](/business-features/products/product-profile)**:** The product profile in Thinger.io serves as the central hub for configuring a product, providing access to various tools such as setting device properties, time series data storage, custom API creation, and custom scripts for tailored payloads and functionalities.
  * [**Properties**](/business-features/products/product-profile/properties): Store and manage various metadata related to the devices in a fleet, including the latest device state, owner information, device information, location, custom configuration, and more. This helps organizations to keep track of their devices and make quick updates when needed.
  * [**Buckets**](/business-features/products/product-profile/buckets): Automatic storage of time-series data for a specified resource name/interval or MQTT topic. This helps organizations effectively manage and analyze data from large numbers of IoT devices.
  * [**API Resources**](/business-features/products/product-profile/api-resources): Unified API access for various devices and protocols, payload processing capabilities, and compatibility with MQTT and the Device API Explorer. These features simplify the integration of different devices and systems, making it easier to test and manage them.
  * [**Scripts**](/business-features/products/product-profile/scripts): All data related to a Product can be handled and processed through Scripts for processing payloads in different formats, converting units, creating virtual functions to generate calculated data, etc. There are endless possibilities.
* [**Product Dashboard**](/business-features/products/product-dashboard): Create a single dashboard layout for each Product. Each device will display this dashboard automatically with its own set of data from properties and data buckets, and will be able to interact with the device using the unified API Resources. Example of a Shelly Plug S dashboard:

<figure><img src="/files/YC4V42nyA5I71l8Q968r" alt=""><figcaption><p>Product Dashboard example over a Shelly Plug S device</p></figcaption></figure>

* [**Product Services**](/business-features/products/product-dashboard): Devices using the IOTMP protocol can provide extended features aside from remote sensing and actuation. At this moment, it includes the possibility to access web services remotely (using Linux Clients). For example, it will allow controlling the router/gateway admin panel, 3D Printer monitoring page, or any other Industrial product that includes a web frontend for its management. All without using any VPN. Here is an example of remote PLCs management, using in this case PiCtory from [Revolution Pi](https://revolutionpi.com/).

<figure><img src="/files/0Cf5tA0iiWqHBtCQuFyD" alt=""><figcaption><p>Product Remote Web Services - Kunbus Revolutiion Pi Example</p></figcaption></figure>

## Examples

Don´t want to read the whole documentation? Take a look at some of the available examples:

<table data-view="cards"><thead><tr><th></th><th></th><th data-hidden data-card-target data-type="content-ref"></th><th data-hidden data-card-cover data-type="files"></th></tr></thead><tbody><tr><td><strong>Shelly Plug S</strong></td><td>Wi-Fi smart plug with power metering</td><td><a href="/pages/yurI8i0A8zjJ9pRBPdXj">/pages/yurI8i0A8zjJ9pRBPdXj</a></td><td><a href="/files/1YhfdfKmPZh9wF6E6i3R">/files/1YhfdfKmPZh9wF6E6i3R</a></td></tr><tr><td><strong>Kunbus RevPi</strong></td><td>Open Source IPC based on Raspberry Pi</td><td><a href="/pages/ba2BvLYe0U5H3GdUSPWb">/pages/ba2BvLYe0U5H3GdUSPWb</a></td><td><a href="/files/gokG7ywLRMmCJ2kyBzke">/files/gokG7ywLRMmCJ2kyBzke</a></td></tr><tr><td><strong>Shelly Plus 1 PM</strong></td><td>Wi-Fi-operated smart relay with Power Metering</td><td><a href="/pages/WNT9rZxMo8AzOxbKP680">/pages/WNT9rZxMo8AzOxbKP680</a></td><td><a href="/files/GaNNAqRZlc8uAzUuldzt">/files/GaNNAqRZlc8uAzUuldzt</a></td></tr></tbody></table>

## Marketplace

Want to integrate the Product into our Plugin Marketplace? Just [**become a Partner**](https://thinger.io/become-a-partner)!

Some of its benefits are:

* The product is directly available as a Plugin from the Thinger.io Marketplace.&#x20;
* Zero-pain integration for the customers. Just a few clicks to have hundreds of devices managed at scale.
* The products and brand are featured on our website and marketplace. It provides broad visibility in one of the largest IoT Communities.
* Best-in-class integration for the products. On-demand training and integration development by Thinger.io experts.
* Private Cloud for demos and POCs with the customers.

{% embed url="<https://thinger.io/become-a-partner>" %}


# Product Profile

Manage properties, buckets, API Resources, or custom scripts within a Product.

The product profile in Thinger.io serves as the central hub for configuring a product, providing access to various tools such as setting device properties, data storage, custom API creation, and custom scripts for tailored payloads and functionalities:

![Product Profile Overview](/files/Q9CxwVqEMcUFvCrvMJvB)

The next subsections describe the different configurable options inside the Product Profile:

* [Properties](/business-features/products/product-profile/properties)
* [Buckets](/business-features/products/product-profile/buckets)
* [API Resources](/business-features/products/product-profile/api-resources)
* [Product Scripts](/business-features/products/product-profile/scripts)
* [Payloads](/business-features/products/product-profile/payloads)


# Properties

Store device configuration, latest values, or any other metadata.

A property in a device is a way to store arbitrary data, i.e., store device configuration, latest device state, or any other data required for the use case.&#x20;

Some of the use cases for the properties are:

* Store device configurations, like preferred sampling intervals, alarm thresholds, or enabled features, to mention a few.
* Store device location. Each device can adjust its location so it can be displayed on the device dashboard or asset maps.
* Store device information, like serial number, model, current firmware version, etc.
* Store device owner information, like notification email, notification configurations, etc.
* Store the latest device state, i.e., if it has been configured on/off, or the latest measurement from a sensor.

{% hint style="info" %}
Take a look at [Device Properties](/features/devices-administration#device-properties) for more information.
{% endhint %}

Defining a property inside a Product Profile enables scalable property management. It can be used for:

* Update a device property automatically from an MQTT topic or IOTMP device resource.
* Placing a default value for all devices inside a Product, that can be overridden by each device.&#x20;
* Use custom scripts to process the property value, i.e., modifying measurement units, filtering undesired data, etc.

By default, the Product profile presents a Properties table that is empty:

<figure><img src="/files/1IZ8NTWJQGNKamFrFWXR" alt=""><figcaption><p>Product Property - Properties section on a Product Profile</p></figcaption></figure>

To create a new Property, click on `Add` button from the table, and a pop-up will appear for its configuration. It is quite similar to the process of configuring a [Bucket](/business-features/products/product-profile/buckets).

<figure><img src="/files/4PNhXjmR08EzwQc36ZUz" alt="" width="563"><figcaption><p>Product Property - Property creation</p></figcaption></figure>

The following sections describe the different options available.

## Property Identifier

Each product (and the devices) can have any number of properties, and each property is uniquely identified by its id. A property identifier can be shared among multiple devices and/or products, as they are defined at the device level.

Choose a property identifier that represents its purpose, i.e., "config", "location", "state", etc.&#x20;

<figure><img src="/files/tlUJJMTG5CWIoLphxXN8" alt=""><figcaption><p>Product Property - Property Identifier</p></figcaption></figure>

## Property Source

A property can be updated automatically from different sources:

* [**None**](#none)**:** Used if the property should not be updated from any source.
* [**Device Resource**](#device-resource): Used if the property value must be updated from an IOTMP device resource.
* [**Device Topic**](#device-topic): Used if the property value must be updated from a topic (MQTT).

<figure><img src="/files/bPlaB8WOk7qbUk0fimko" alt="" width="563"><figcaption><p>Product Property - Property Source Configuration: </p></figcaption></figure>

### None

Setting the property source to `None` will prevent the property from being updated automatically. It can be useful to provide just a [Default value ](#property-default-value)or a common configuration for all devices.

### Device Resource

Setting the property source to `Device Resource` will configure the Product to automatically update the device property from a given Device Resource. A device resource is any [output resource](/coding-guide#output-resources) defined inside the IOTMP protocol (i.e., using Thinger.io Arduino or Linux client). As with any resource in IOTMP, it can be configured to be updated at a given sampling interval, or by letting the device update the value by itself.

The configuration fields are:

* **Resource Name**: Used to specify the device resource name that will be used as a source for the property value.
* **Sampling Interval**: Used to specify the resource sampling interval (in seconds). The default is 0, which means that the device should update the value by itself via [stream](/coding-guide#streaming-resource-data) calls. Any other value greater than 0 will configure the Product to fetch the resource value at the provided interval. &#x20;
* **Payload**: Used to configure the resulting value that will be stored on the property. The value that arrives from the device resource becomes available at the `{{payload}}` placeholder, which is the default configuration. Take a look at the [Payloads](/business-features/products/product-profile/payloads) section to know more about the possibilities when defining payloads, like using Product Scripts for data conversion.

<figure><img src="/files/AGJifzvVXQblxirEdAlo" alt="" width="563"><figcaption><p>Product Property - Device Resource configured as Property source</p></figcaption></figure>

#### Available Payload Placeholders

The placeholders that are available for the Payload configuration are all values that come from the `device_resource_stream` event, which include:

* **payload**: Hold the data captured from the configured Device Resource.
* **user:** Hold the device owner identifier that is sending the information.
* **product**: Hold the device product identifier that is sending the information.
* **asset\_group**: Hold the device asset group identifier that is sending the information.
* **asset\_type**: Hold the device type identifier that is sending the information.
* **device**: Hold the device identifier that is sending the information.
* **ts**: Hold the event timestamp in milliseconds.

### Device Topic

Setting the property source to `Device Topic` will configure the Product to automatically update the device property from a given Device Topic (MQTT). This way, anytime a value is sent to the specified topic, it will be stored in the device property.

The configuration fields are:

* **Topic**: Used to specify the topic that will be used as a source for the property value. Use topic placeholders like `{{device}}` or MQTT single-level wildcards `(+)` to capture data from multiple devices. For example, devices providing information on the topic `my_product/device_aabbccdd/temperature` can be configured both as `my_product/{{device}}/temperature` or `my_product/+/temperature`.
* **Payload**: Used to configure the resulting value that will be stored on the property. The value that arrives from the topic becomes available at the `{{payload}}` placeholder, which is the default configuration. Take a look at the [Payloads](/business-features/products/product-profile/payloads) section to know more about the possibilities when defining payloads, like using Product Scripts for data conversion.

<figure><img src="/files/hGKKTtIVfcRbr3zeI967" alt="" width="563"><figcaption><p>Product Property - Device Topic configured as Property Source</p></figcaption></figure>

#### Available Payload Placeholders

The placeholders that are available for the Payload configuration are all values that come from the `device_topic_publish` event, including:

* **payload**: Hold the data captured from the configured Device Topic.
* **user:** Hold the device owner identifier that is sending the information.
* **product**: Hold the device product identifier that is sending the information.
* **asset\_group**: Hold the device asset group identifier that is sending the information.
* **asset\_type**: Hold the device type identifier that is sending the information.
* **device**: Hold the device identifier that is sending the information.
* **ts**: Hold the event timestamp in milliseconds.

## Property Default Value

It is possible to define a default property value for all devices within a Product. In the property configuration, there is a tab for the Default Value. The Default Value accepts any JSON value, i.e., for placing a default configuration.

<figure><img src="/files/cU7jInYJD7WRsY5ARQEx" alt="" width="563"><figcaption><p>Product Property . Default Value configuration</p></figcaption></figure>

When a device is configured within a Product, it will automatically inherit the default product properties (in the same way it happens with Asset Types and Asset Groups). For example, the above property with a default value can be observed inside the device properties. The `Source` column in the properties table indicates that this property comes from a Product. Note that inherited properties from Products, Asset Types, or Asset Groups, cannot be removed or edited directly from the device properties to avoid undesired changes on all devices. However, it is possible to create a new property with the same identifier to override the default one inherited from Products, Asset Types, or Asset Groups.

<figure><img src="/files/wNc8SRrP2zKqSmg1ozJB" alt=""><figcaption><p>Product Property - Inherited default values from Product</p></figcaption></figure>

## Property Settings

Each property defined inside a Product can be enabled or disabled independently, for example, to temporarily disable the automatic update from a topic or a device resource. It can include a description for a better understanding of its purpose, usage, or source.

<figure><img src="/files/1EvoYFpZ5gL3uRXHYDS5" alt="" width="563"><figcaption><p>Product Property - Property configuration</p></figcaption></figure>


# Buckets

Store time series data from your devices with a few clicks.

A data bucket is a way to store time series data, i.e., data that is collected and recorded at regular time intervals over a period of time. This data is typically used to track changes in physical parameters, such as temperature, humidity, or pressure, over time. The collected data can then be analyzed to identify trends and patterns, and used to make decisions or take actions in real-time. Time series data is a critical aspect of IoT, as it enables organizations to monitor and control their connected devices and equipment more effectively.

Time series data can be used in a wide range of industries and applications, like:

* Predictive maintenance: Time series data from IoT sensors can be used to monitor the health of equipment and predict when maintenance is required, reducing downtime and increasing efficiency.
* Energy management: Time series data from smart meters can be used to optimize energy usage in buildings and reduce costs.
* Supply chain optimization: Time series data can be used to monitor the movement of goods and optimize the supply chain, reducing waste and increasing efficiency.
* Healthcare: Time series data from wearable devices can be used to monitor patients' health and provide insights for treatment and care.
* Environmental monitoring: Time series data from sensors in the environment can be used to monitor air and water quality, and track changes in weather patterns and wildlife populations.

{% hint style="info" %}
Take a look at [Data Buckets](/features/buckets) for more information.
{% endhint %}

Defining a Bucket inside a Product Profile allows scaling the buckets management. It can be used for:

* Automatic bucket provisioning and configuration.
* Automatic bucket ingestion from the MQTT topic or IOTMP device resource for devices associated with the product.
* Automatic data tagging inside the bucket. Use just one bucket for multiple devices. Each measurement is tagged by device and its group, which can be easily filtered when using dashboards or querying data
* Data preprocessing before its insertion, i.e., modifying measurement units, filtering undesired data, etc.

By default, the Product profile presents a Buckets table that is empty:

<figure><img src="/files/qo146eY8kE8OreNeUd39" alt=""><figcaption><p>Product Bucket - Buckets section on a Product Profile</p></figcaption></figure>

To create a new Bucket, click on `Add` button from the table, and a pop-up will appear for its configuration. It is quite similar to the process of configuring a [Property](/business-features/products/product-profile/properties).

<figure><img src="/files/QwzhA2E3Q7cbFrbxNKtT" alt="" width="563"><figcaption><p>Product Buckt - Bucket creation</p></figcaption></figure>

The following sections describe the different options available.

## Bucket Identifier

Each product can define any number of buckets, and each bucket is uniquely identified by its id. A bucket identifier **must be unique within the user account**, as they are created as regular buckets.

Choose a bucket identifier that represents its purpose, i.e., "productA\_temperature", "productA\_location", "productB\_consumption", etc.&#x20;

<figure><img src="/files/O7RK1kbi8xtnZOfilQcO" alt="" width="563"><figcaption><p>Product Bucket - Bucket Identifier</p></figcaption></figure>

{% hint style="danger" %}
There is no need to manually initialize the bucket, as the Product automatically handles its initialization with the first data item.
{% endhint %}

The bucket must **NOT** be created manually, as the product is able to initialize it automatically with the required configuration.  It is created with the arrival of the first data point. If the bucket is removed, it is created again automatically.

Any bucket with a fixed identifier, i.e., "productA\_temperature", will be created with two tags on it: `device` and `group`. As multiple devices can be writing to the same bucket simultaneously, tags let the platform differentiate all the different sources (and groups) that are writing to the bucket:

* **device**: This will contain the identifier of the device that originated the data (i.e., the publisher on a specific topic). It is automatically populated by the product and should not be part of the payload.
* **group**: This will contain the device group, as it can be useful for creating dashboards with aggregated data by groups, i.e., average consumption of devices on floor 1. It is automatically filled by the product and should not arrive in the payload.

#### Dynamic Bucket Identifiers

It is possible to use placeholders on the identifier, i.e., by using {{device}}, {{user}}, or {{product}}. It can be useful for generating dynamic bucket identifiers, i.e., one for each device within a product, i.e., by using `{{product}}_{{device}}`. It can be useful if it is required to isolate each device's data from other devices, i.e., because they are owned by different clients.

The placeholders that are available for the Identifier name are all values that come from the `device_resource_stream` or `device_topic_publish` event. It involves some common fields like:

* **device**: Hold the device identifier that is sending the information.
* **asset\_type**: Hold the device type identifier that is sending the information.
* **asset\_group**: Hold the device asset group identifier that is sending the information.
* **product**: Hold the device product identifier that is sending the information.
* **user:** Hold the device owner identifier that is sending the information.

Note that if the bucket identifier on the Product contains the `{{device}}` placeholder, the product will not initialize the device and group tags mentioned before, as now there is one bucket for each device.

## Bucket Source

A bucket can fetch time series data automatically from different sources:

<figure><img src="/files/xuZxj4fH8bFOJ4TGZjmk" alt="" width="563"><figcaption><p>Product Bucket - Bucket Source Configuration</p></figcaption></figure>

### None

Setting the bucket source to `None` will prevent the bucket from being updated automatically.

### Device Resource

Setting the bucket source to `Device Resource` will configure the Product to automatically insert new data in the Bucket from a given Device Resource. A device resource is any [output resource](/coding-guide#output-resources) defined inside the IOTMP protocol (i.e., using Thinger.io Arduino or Linux client). As with any resource in IOTMP, it can be configured to be updated at a given sampling interval, or by letting the device update the value by itself.

The configuration fields are:

* **Resource Name**: Used to specify the device resource name that will be used as a source for inserting new values in the bucket.
* **Sampling Interval**: Used to specify the resource sampling interval (in seconds). The default is 0, which means that the device should update the value by itself via [stream](/coding-guide#streaming-resource-data) calls. Any other value greater than 0 will configure the Product to fetch the resource value at the provided interval. &#x20;
* **Payload**: Used to configure the resulting value that will be stored in the bucket. The value that arrives from the device resource becomes available at the `{{payload}}` placeholder, which is the default configuration. Take a look at the [Payloads](/business-features/products/product-profile/payloads) section to know more about the possibilities when defining payloads, like using Product Scripts for data conversion.

<figure><img src="/files/AGJifzvVXQblxirEdAlo" alt="" width="563"><figcaption><p>Product Bucket - Device Resource configured as Bucket source</p></figcaption></figure>

#### Available Payload Placeholders

The placeholders that are available for the Payload configuration are all values that come from the `device_resource_stream` event, which include:

* **payload**: Hold the data captured from the configured Device Resource.
* **user:** Hold the device owner identifier that is sending the information.
* **product**: Hold the device product identifier that is sending the information.
* **asset\_group**: Hold the device asset group identifier that is sending the information.
* **asset\_type**: Hold the device type identifier that is sending the information.
* **device**: Hold the device identifier that is sending the information.
* **ts**: Hold the event timestamp in milliseconds.

### Device Topic

Setting the bucket source to `Device Topic` will configure the Product to automatically insert data in the bucket from a given Device Topic (MQTT). This way, anytime a value is sent to the specified topic, it will be stored in the data bucket.

The configuration fields are:

* **Topic**: Used to specify the topic that will be used as a source for the new bucket values. Use topic placeholders like `{{device}}` or MQTT single-level wildcards `+` to capture data from multiple devices. For example, devices providing information on the topic `my_product/device_aabbccdd/temperature` can be configured both as `my_product/{{device}}/temperature` or `my_product/+/temperature`.
* **Payload**: Used to configure the resulting value that will be stored in the data bucket. The value that arrives from the topic becomes available at the `{{payload}}` placeholder, which is the default configuration. Take a look at the [Payloads](/business-features/products/product-profile/payloads) section to know more about the possibilities when defining payloads, like using Product Scripts for data conversion.

<figure><img src="/files/hGKKTtIVfcRbr3zeI967" alt="" width="563"><figcaption><p>Product Bucket - Device Topic configured as Bucket Source</p></figcaption></figure>

#### Available Payload Placeholders

The placeholders that are available for the Payload configuration are all values that come from the `device_topic_publish` event, including:

* **payload**: Hold the data captured from the configured Device Topic.
* **user:** Hold the device owner identifier that is sending the information.
* **product**: Hold the device product identifier that is sending the information.
* **asset\_group**: Hold the device asset group identifier that is sending the information.
* **asset\_type**: Hold the device type identifier that is sending the information.
* **device**: Hold the device identifier that is sending the information.
* **ts**: Hold the event timestamp in milliseconds.

## Bucket Settings

Each bucket defined inside a Product can be enabled or disabled independently, for example, to temporarily disable the automatic data insertion from a topic or a device resource. It can include a description for a better understanding of its purpose, usage, or source.

<figure><img src="/files/Y3oDIIFHkbv8abo68sgl" alt="" width="563"><figcaption><p>Product Bucket - Bucket configuration</p></figcaption></figure>


# Flows

Automate product pipelines between device datapoints and Thinger.io resources

Product flows enable automated data pipelines and event-driven workflows within devices. A flow acts as an **event-driven automation layer** that listens to device activity and triggers specific actions in response.

Flows automate the orchestration between different components of a device lifecycle. When a device performs an action—such as updating a property, subscribing to an MQTT topic, or receiving data through an endpoint—a flow can automatically trigger downstream events without manual intervention.

This capability allows products to remain generic and flexible, delegating device-specific logic to the flow layer while keeping the core product architecture clean and maintainable.

#### Common Use Cases

* **Property Update Cascade**: When a device property changes (e.g., `temperature` exceeds a threshold), publish a MQTT event with a custom payload.
* **Endpoint Handler**: automatically trigger pre-configured Thinger.io [endpoints](/features/endpoints-1) from any source, enabling seamless integration with external APIs and webhooks.
* **Auto Provision devices from non-HTTP data entrypoints**: get the device ID from a MQTT topic or create device instances dynamically when data arrives from message brokers.

By default, the Product profile presents a Flow table that is empty:

<figure><img src="/files/N03WcFFKLTwbaWxRkfWI" alt=""><figcaption><p>Products - Flows section on a Product Profile</p></figcaption></figure>

### Defining a Flow

To create a new Flow, press de button `add` in the Flow section of the Product Profile configurator. Once selected, a pop-up with the flow configuration will appear:&#x20;

<figure><img src="/files/4BEw9U9VsL02qVOCPexJ" alt=""><figcaption><p>Products - Flow Configurator</p></figcaption></figure>

## Flow Identifier

Following the schema of other product-profile configurations, each flow must have a unique identifier. This identifier is used internally by the system to reference and manage the flow.

Choose a resource identifier that represents its purpose, i.e. "Device Alarm Handler", "Message forwarder", etc.

<figure><img src="/files/u5nD9rmwxTjwdYXiMLZm" alt=""><figcaption><p>Products - Flows Identifier</p></figcaption></figure>

## Flow Source

The Source tab defines what event will trigger the flow. Thinger.io supports multiple trigger types to accommodate different integration patterns.

## Flow Target Tab

The Actions tab defines what happens when the flow is triggered. Multiple actions can be configured to execute sequentially when a single trigger event occurs.


# API Resources

Create custom API devices for interacting with the devices.

Using API resources inside a Product provides unified API access for various devices and protocols, including payload processing capabilities. These features simplify the integration of different devices and systems, making it easier to test and manage them.&#x20;

This is especially useful for MQTT or HTTP devices, as they will behave exactly the same as IOTMP devices inside Thinger.io, so they can be used easily on dashboards, use the API explorer, etc.

{% hint style="info" %}
Any API Resource defined inside a Product will generate a REST API on each device.
{% endhint %}

The advantages of designing IOT products to become accessible over REST APIs are:

* Scalability: REST APIs are designed to be scalable, making them well-suited for IoT applications that involve large numbers of devices.
* Flexibility: REST APIs are flexible, allowing them to accommodate changes in device capabilities and requirements over time.
* Interoperability: REST APIs use standard HTTP methods, making them interoperable with a wide range of systems and applications.
* Easy to use: REST APIs use simple and well-documented standards, making it easy for developers to integrate them into their applications.
* Security: REST APIs are secured using standard security measures, such as SSL/TLS encryption and OAuth authentication.
* Easy to test: REST APIs can be easily tested using tools such as the API explorer or Postman, making it easier to debug and troubleshoot integration issues.

By default, the Product profile presents an API Resources table that is empty:

<figure><img src="/files/hJhUTb1JGlbxj7F4oVY5" alt=""><figcaption><p>Products - API Resources section on a Product Profile</p></figcaption></figure>

To create a new API Resource, click on `Add` button from the table, and a pop-up will appear for its configuration. It is quite similar to the process of configuring a [Property](/business-features/products/product-profile/properties) or a [Bucket](/business-features/products/product-profile/buckets) for the product.

<figure><img src="/files/RpGSRFl69yr3v4hQkreN" alt="" width="563"><figcaption><p>Products - API Resource creation</p></figcaption></figure>

The following sections describe the different options available.

## API Resource  Identifier

Each product can define any number of API resources, and each resource is uniquely identified by its id. A resource identifier can be shared among multiple devices and/or products, as they are defined at the device level.

Choose a resource identifier that represents its purpose, i.e., it can be used to control device actions: "power", "reboot", "configure", or for reading sensor data:  "temperature", ·"humidity".&#x20;

<figure><img src="/files/HP9fZTZPBK6EI52OSfWA" alt="" width="563"><figcaption><p>Products - API Resource Identifier</p></figcaption></figure>

## API Resource Request

Each API Resource can define a target destination, where the incoming request payload will be forwarded, i.e., for its transmission to a topic, to a device resource, for calling a custom function, etc.&#x20;

The target options available are:

<table><thead><tr><th width="184">Target</th><th>Description</th></tr></thead><tbody><tr><td>None</td><td>The request will not reach any destination.</td></tr><tr><td>Device Resource</td><td>The request will be forwarded to a connected IOTMP device resource.</td></tr><tr><td>Device Stream</td><td>The request will generate a device resource stream event that can be used by an event subscriber, or used within the product profile for writing to a data bucket, updating a property, and calling to an endpoint. (HTTP devices).</td></tr><tr><td>Device Property</td><td>The request will be forwarded to a Device Property.</td></tr><tr><td>Device Topic</td><td>The request will be published on a given topic (MQTT).</td></tr><tr><td>Device Function</td><td>The request will be forwarded to a Product Function.</td></tr></tbody></table>

<figure><img src="/files/3FE9fG32ZTHjfIusjFzH" alt="" width="563"><figcaption><p>Product - APi Request Configuration</p></figcaption></figure>

### None

Setting the target API Request to `None` indicates that the API resource is not expecting any input and the request will not reach any destination. This is useful if the [API Resource Response](#api-resource-response) is returning a value, i.e., from a device resource, a property, from a function call, etc.

### Device Resource

Setting the target API Request to `Device Resource` configures the Product to automatically forward the incoming request to a Device Resource. A device resource should be any [input resource](/coding-guide#input-resources) defined inside the device (i.e., using Thinger.io Arduino or Linux client).

The configuration fields are:

* **Resource Name**: Used to specify the device resource name that will be called inside the device.
* **Payload**: Used to configure the final payload that will be forwarded to the device resource. The value that arrives from the API request becomes available at the `{{payload}}` placeholder, which is the default configuration. Take a look at the [Payloads](/business-features/products/product-profile/payloads) section to know more about the possibilities when defining payloads, like using Product Scripts for data conversion.

<figure><img src="/files/Czvw7QL3D3VfkJD4wjS8" alt="" width="563"><figcaption><p>Product - API Resource configuration for Device Resource target</p></figcaption></figure>

#### Available Payload Placeholders

The placeholders that are available for the Payload configuration are:

* **payload**: Hold the payload captured from the API request.
* **user:** Hold the username that is calling the API request.
* **device**: Hold the device identifier used in the API request.
* **resource**: Hold the API resource name that is being called in the API request.
* **property**: Online fetch data from a property, i.e., `{{property.propertyId}}`, `{{property.propertyId.value}}`.
* **api**: Online fetch data from an API, i.e., `{{api.resourceA}}`, `{{api.resourceB.value}}`.

### Device Property

Setting the target API Request to `Device Property` configures the Product to automatically store the incoming request payload to a Device Property.

The configuration fields are:

* **Property**: Used to specify the device property name that will be written.
* **Payload**: Used to configure the final payload that will be stored on the device property. The value that arrives from the API request becomes available at the `{{payload}}` placeholder, which is the default configuration. Take a look at the [Payloads](/business-features/products/product-profile/payloads) section to know more about the possibilities when defining payloads, like using Product Scripts for data conversion.

<figure><img src="/files/KzfdvPwJ4tjjBBBmosnj" alt="" width="563"><figcaption><p>Product - API Resource configuration for Device Property target </p></figcaption></figure>

#### Available Payload Placeholders

The placeholders that are available for the Payload configuration are:

* **payload**: Hold the payload captured from the API request.
* **user:** Hold the username that is calling the API request.
* **device**: Hold the device identifier used in the API request.
* **resource**: Hold the API resource name that is being called in the API request.
* **property**: Online fetch data from a property, i.e., `{{property.propertyId}}`, `{{property.propertyId.value}}`.
* **api**: Online fetch data from an API, i.e., `{{api.resourceA}}`, `{{api.resourceB.value}}`.

### Device Topic

Setting the target API Request to `Device Topic` will configure the Product to automatically publish data in the provided topic (MQTT).

The configuration fields are:

* **Topic**: Used to specify the topic that will be used as the target destination. Use topic placeholders like `{{device}}` or MQTT single-level wildcards `+` to capture data from multiple devices. For example, devices providing information on the topic `my_product/device_aabbccdd/temperature` can be configured both as `my_product/{{device}}/temperature` or `my_product/+/temperature`.
* **Payload**: Used to configure the resulting value that will be published to the topic. The value that arrives from the API request becomes available at the `{{payload}}` placeholder, which is the default configuration. Take a look at the [Payloads](/business-features/products/product-profile/payloads) section to know more about the possibilities when defining payloads, like using Product Scripts for data conversion.

<figure><img src="/files/KIdQxCIvMGVJ0mYo57Xk" alt="" width="563"><figcaption><p>Product - API Resource configuration for Device Topic target </p></figcaption></figure>

#### Available Payload Placeholders

The placeholders that are available for the Payload configuration are:

* **payload**: Hold the payload captured from the API request.
* **user:** Hold the username that is calling the API request.
* **device**: Hold the device identifier used in the API request.
* **resource**: Hold the API resource name that is being called in the API request.
* **property**: Online fetch data from a property, i.e., `{{property.propertyId}}`, `{{property.propertyId.value}}`.
* **api**: Online fetch data from an API, i.e., `{{api.resourceA}}`, `{{api.resourceB.value}}`.

### Product Function

Setting the target API Request to `Product Function` will configure the Product to automatically call a function inside the Product Script.

The configuration fields are:

* **Function**: Used to specify the target function name to be called.
* **Payload**: Used to configure the resulting value that will be used in the function call. The value that arrives from the API request becomes available at the `{{payload}}` placeholder, which is the default configuration. Take a look at the [Payloads](/business-features/products/product-profile/payloads) section to know more about the possibilities when defining payloads, like using Product Scripts for data conversion.

<figure><img src="/files/5lQOQzM0ynqjZej2YuX2" alt="" width="563"><figcaption><p>Product - API Resource configuration for Product Function target </p></figcaption></figure>

#### Available Payload Placeholders

The placeholders that are available for the Payload configuration are:

* **payload**: Hold the payload captured from the API request.
* **user:** Hold the username that is calling the API request.
* **device**: Hold the device identifier used in the API request.
* **resource**: Hold the API resource name that is being called in the API request.
* **property**: Online fetch data from a property, i.e., `{{property.propertyId}}`, `{{property.propertyId.value}}`.
* **api**: Online fetch data from an API, i.e., `{{api.resourceA}}`, `{{api.resourceB.value}}`.

## API Resource Response

Each API Resource can define a source response that is used to return a response payload to the REST API call. For example, it is possible to generate a response based on a property value, a device resource, a device topic, or even generate a response based on the request response.

The source options available are:

* **None:** The response will not generate any payload.
* **Device Resource**: The response payload will be based on an IOTMP device resource.&#x20;
* **Device Property**: The response payload will be based on a Device Property.
* **Device Topic**: The response payload will be based on the data captured from a topic (MQTT).
* **Product Function**: The response payload will be based on de data returned by a Script function.
* **Request Response**: The response payload will be based on the data returned by the request.

<figure><img src="/files/Hk4vJULzEu8X97vCmqWW" alt="" width="563"><figcaption><p>Product - API Response Configuration</p></figcaption></figure>

### None

Setting the source API Response to `None` indicates that the API resource is not will not generate any output, i.e., will return an empty body.

### Device Resource

Setting the source API Response to `Device Resource` configures the Product to automatically read the response value from a Device Resource.

The configuration fields are:

* **Resource Name**: Used to specify the device resource name that will be called inside the device.
* **Payload**: Used to configure the final payload that will be returned to the API caller. The value that arrives from the Device resource becomes available at the `{{payload}}` placeholder, which is the default configuration. Take a look at the [Payloads](/business-features/products/product-profile/payloads) section to know more about the possibilities when defining payloads, like using Product Scripts for data conversion.

<figure><img src="/files/rNU0Ye4r39DxHwXhGkss" alt="" width="563"><figcaption><p>Product - API Resource configuration for Device Resource source</p></figcaption></figure>

#### Available Payload Placeholders

The placeholders that are available for the Payload configuration are:

* **payload**: Hold the payload captured from the Device Resource.

### Device Property

Setting the source API Response to `Device Property` configures the Product to automatically read the response value from a Device Property.

The configuration fields are:

* **Property**: Used to specify the device property name that will be used to generate the response payload.
* **Payload**: Used to configure the final payload that will be returned to the API caller. The value that arrives from the Device property becomes available at the `{{payload}}` placeholder. Take a look at the [Payloads](/business-features/products/product-profile/payloads) section to know more about the possibilities when defining payloads, like using Product Scripts for data conversion.

<figure><img src="/files/dqC5qYJBnBQMJbl5Iip5" alt="" width="563"><figcaption><p>Product - API Resource configuration for Device Porperty source</p></figcaption></figure>

#### Available Payload Placeholders

The placeholders that are available for the Payload configuration are:

* **payload**: Hold the payload captured from the Device Property.

### Device Topic

Setting the source API Response to `Device Topic` configures the Product to automatically read the response value from a Device Topic. This response source is specifically designed for request-response over MQTT, where the request publishes on a topic, and the device publishes a response on a different topic. The product will be listening to a topic until it receives a response (or timeout after 15 seconds).

The configuration fields are:

* **Topic**: Used to specify the topic that will be used as the source value for the response. Use topic placeholders like `{{device}}` or MQTT single-level wildcards `+` to capture data from multiple devices. For example, devices providing information on the topic `my_product/device_aabbccdd/response` can be configured both as `my_product/{{device}}/response` or `my_product/+/response`.
* **Payload**: Used to configure the final payload that will be returned to the API caller. The value that arrives from the topic becomes available at the `{{payload}}` placeholder, which is the default configuration. Take a look at the [Payloads](/business-features/products/product-profile/payloads) section to know more about the possibilities when defining payloads, like using Product Scripts for data conversion.

<figure><img src="/files/AcRYbsX9226kXBh9ye5k" alt="" width="563"><figcaption><p>Product - API Resource configuration for Device Topic source</p></figcaption></figure>

#### Available Payload Placeholders

The placeholders that are available for the Payload configuration are:

* **payload**: Hold the payload captured from the response topic.

### Request Response

Setting the target API Response to `Request Response` will configure the Product to automatically return the value resulting from the target request. For example, if the API Resource was configured to target a Device Resource that provides an output. Then, use a `Request Response` source to manage the data returned from the resource. It also applies when the API Resource is targeting Device Properties or Product Functions. It does not apply to Device Topic targets, as by default, MQTT does not provide any output on publish (use a [Device Topic](#device-topic-1) source instead).

The configuration fields are:

* **Payload**: Used to configure the final payload that will be returned to the API caller. The value returned from the API Resource Request becomes available at the `{{payload}}` placeholder. Take a look at the [Payloads](/business-features/products/product-profile/payloads) section to know more about the possibilities when defining payloads, like using Product Scripts for data conversion.

<figure><img src="/files/TyqzWrvXUOiCcBAvlu3C" alt="" width="563"><figcaption><p>Product - API Rresource configuration for Request Response source</p></figcaption></figure>

#### Available Payload Placeholders

The placeholders that are available for the Payload configuration are:

* **payload**: Hold the payload captured from the API request.

## API Resource Settings

Each API Resource defined inside a Product can be enabled or disabled independently, for example, to temporarily disable an API endpoint. It can also include a description for a better understanding of its purpose, usage, or source.

<figure><img src="/files/QdPxipZIBGWf4QryLGU3" alt="" width="563"><figcaption><p>Product - API Resource configuration</p></figcaption></figure>


# Scripts


# Payloads


# Product Dashboard

<figure><img src="/files/oDiGmxeCacPOQEQFpuQW" alt=""><figcaption></figcaption></figure>


# Product Services

<figure><img src="/files/0Cf5tA0iiWqHBtCQuFyD" alt=""><figcaption></figcaption></figure>


# Examples


# Shelly Plug S

WiFi Smart Plug with Power Metering

## Product Description

<figure><img src="/files/4STKBD5aGd06cpLdckg3" alt="" width="392"><figcaption><p>Shelly Plug S</p></figcaption></figure>

Shelly Plug S is a WiFi Smart Plug with power metering, that can be easily integrated into the platform. As it supports the MQTT protocol by default, it is not required to re-flash the device, keeping the device warranty.

It can control a wide range of home appliances and office equipment (lights, power lines, security systems, space heaters, radiators, air conditioners, etc.) from anywhere.

* Allows you to manage and power monitor electrical supplies with power up to 2500W (10A)
* Easy control through the Shelly app, or various protocols, platforms, and voice assistants.
* Has an embedded web server and connects to your Wi-Fi network

## Integration

To integrate Shelly Plug S into the platform, it is not required to flash a custom firmware. By default, Shelly PLUG S supports connecting to external MQTT servers.

<figure><img src="/files/2Dzk7L9eFNg2gkaBNUYa" alt="" width="563"><figcaption><p>Shelly Plug S Configuration Options</p></figcaption></figure>

Under the "Internet & Security" menu, it is possible to configure "Advanced - Developer Settings". The configuration parameters are:

* Username: The username of the Thinger.io account.
* Password: The password for the device
* Server: Thinger.io hostname + port. Example: `acme.aws.thinger.io:1883`
* The device identifier (MQTT client id) can be observed under the Will Topic. In this case, it is "`shellyplug-s-C18B12`"

<figure><img src="/files/BkTLCerPgzhKM6OdjzFE" alt="" width="563"><figcaption><p>Shelly Plug S - Advanced MQTT server configuration</p></figcaption></figure>

## Product Profile

### Properties

For the Shelly Plug S device example, we will define two different properties to store the latest device state. Shelly Plug S can connect to an MQTT broker, and once connected, it periodically sends information like temperature, relay state, real-time power consumption, available updates, etc. In this example, we will use the current power consumption and rely on the state, so <mark style="color:purple;">power</mark> and <mark style="color:green;">relay</mark> are defined as device properties:

<img src="/files/9WMptlyVBrUm7TUfAvsf" alt="Properties definition for Shelly Plug S SmartPlug" width="563">

Both properties are updated from this device topics:

* <mark style="color:blue;">power</mark> is updated from the topic `shellies/{{device}}/relay/0/power`
* <mark style="color:green;">relay</mark> is updated from the topic `shellies/{{device}}/relay/0`

To configure the properties in the product profile, just click  `Add` on the properties section. On the dialog, enter the property identifier (i.e., power or relay), select the `Device Topic` source, fill the `Topic`, and configure the payload:

<div align="left"><figure><img src="/files/kMnQBq0R3AqF9NrRmNDS" alt="" width="563"><figcaption><p>Shelly Plug S - Property configuration for storing current power</p></figcaption></figure></div>

By default, the payload established on the property is`{{payload}}`, which is a placeholder that will be replaced with the contents received from the configured source. In this case, from the configured MQTT topic. Consequently, any information received there is automatically saved to the respective device property. Cool!

The information about topics and payloads can usually be obtained from vendor documentation. In Thinger.io, we can even use the device inspector feature, where it is possible to sniff any MQTT packet sent by the device. For example, the captured packet for the relay topic:

![MQTT message captured from device event inspector](/files/rdB82fdvGIH2EMuwiQfj)

Notice here that the published topic from the device is `shellies/shellyplug-s-0C5F11/relay/0` while the topic used in the configuration is `shellies/`<mark style="color:purple;">`{{device}}`</mark>`/relay/0`. In this case, a placeholder with the <mark style="color:purple;">`device`</mark> name is used, so it can capture any device identifier, but it is possible to use the standard single-level MQTT wildcard '+' like `shellies/+/relay/0.`

{% hint style="info" %}
`Use topic placeholders like {{device}} or single-level wildcards (+) to capture data from multiple devices.`
{% endhint %}

Moreover, the payload sent by the device to report the relay state is just a raw 'on' or 'off'.  The bytes 111 and 110 indicate that the relay is 'on'. This payload is not a valid JSON that we can use easily on dashboards or REST APIs, so we need to convert them to a valid JSON representation, i.e., to a boolean.

This is where Product Scripts come into play. Product scripts will be described further in the following sections, but basically, it is possible to write custom JavaScript/NodeJS code to process or transform payloads. Taking into account the 'on' and 'off' raw payload sent by the device, it is possible to create a function that converts it to a boolean, for example:

```javascript
function toBoolean(value){
    return value == "on" ? true : false; 
}
```

This code can be easily modified inside the Product Script section on the Product Profile.

<img src="/files/rO6Jln9bYcUpNtHEVble" alt="Product script example for transforming payloads" width="563">

To use this function, it is only required to reference it when configuring the payload. In this case, it is used `:` to indicate that the payload must be replaced with the contents returned from the function name:&#x20;

```javascript
{{payload:toBoolean}}
```

This way, the `toBoolean` function is called with the payload contents, and the final payload will be replaced with the value returned by the function. This configuration must be placed inside the `Payload` configuration on the Property dialog:

<figure><img src="/files/6cIkkbV6gt0Ui7qVJidE" alt="" width="563"><figcaption><p>Shelly Plug S - Property configuration for storing relay state</p></figcaption></figure>

If your device transmits its payload directly in JSON, then it is not required to create processing functions, unless you want to customize the fields, change measurement units, etc. In the Shelly device used in the example, the power consumption is sent just as a number, i.e., '6.6', which is a valid JSON value. So, it will display normally on the device inspector. In this case, the payload does not require processing.

![MQTT message captured from device event inspector (no processing required)](/files/6slvTDidbUnRvx7CXEzb)

After this configuration is done, any device attached to the product will start to receive updates on its properties automatically. For example, the Shelly product is updating both <mark style="color:purple;">power</mark> and <mark style="color:green;">relay</mark> of a connected device. Moreover, our <mark style="color:green;">relay</mark> property is keeping `true`/`false` after processing its payload with the `toBoolean` function described above.&#x20;

![Example of device properties updated from Product configuration.](/files/G4OcxlUZPSyciiwYJddN)

### Buckets

For the Shelly Plug S device example, we will define 3 different buckets to store some device information, like device status (firmware version, mac, IP, updates), device temperature (and overheating), and total energy and current power consumption. These scenarios are described in the following sections.

#### Storing device temperature and overheating

As before, we should rely on the device inspector or the vendor documentation to identify the available information and its transmission method from the device.

{% hint style="info" %}
Use the device inspector to detect the messages sent by connected MQTT devices
{% endhint %}

In this case, we will use the inspector to detect the messages and their pattern. For example, regarding the device temperature or overheating, each device is publishing on two different topics:

* shellies/shellyplug-s-0CCF6B/temperature
* shellies/shellyplug-s-0CCF6B/overtemperature

![MQTT capture of messages sent by Shelly Plug S regarding temperature and overheating](/files/XPDqdgpRRZWwbpg1b3Af)

With this information, we could configure one bucket for temperature and one bucket for overheating. One bucket for each publish topic. This configuration is straightforward, and it is quite similar to the power property defined in the previous section.

However, it could be better to just merge the information from both topics into a single bucket, so related data remains together. This approach can save some resources on data storage and maintenance.

The regular topic configuration for listening to both of them:

```
shellies/{{device}}/temperature
shellies/{{device}}/overtemperature
```

In this case, we can merge both topics: &#x20;

```
shellies/{{device}}/{{field=temperature|overtemperature}}
```

In this example, a placeholder is defined with the notation {{<mark style="color:orange;">field</mark>=<mark style="color:blue;">temperature</mark>|<mark style="color:green;">overtemperature</mark>}}, which specifies two measurement fields: <mark style="color:blue;">temperature</mark> and <mark style="color:green;">overtemperature</mark>. This means that the payload from the topics `shellies/{{device}}/temperature` and `shellies/{{device}}/overtemperature` will be stored together in the same bucket, using the corresponding field name. A topic configuration works when storing data in a bucket:

<img src="/files/lOQLo7oIpdyugMEu9yMO" alt="Topic Configuration to bucket data example" width="563">

This is the configuration for a bucket:

<figure><img src="/files/PCXLyKRYwBkRzgTMEvk8" alt="" width="563"><figcaption><p>Shelly Plug S - Bucket Configuration for storing temperature</p></figcaption></figure>

#### Storing device energy and power

Using the device inspector, it is easy to guess how the device transmits the data, with the total energy consumption and power.&#x20;

![MQTT capture of messages sent by Shelly Plug S regarding power and energy](/files/uY3MdCuYiQsVvG3eMFZa)

Using the notation described in the previous example, it is possible to define a topic to capture both of them and merge them in a single bucket:

```
shellies/{{device}}/relay/0/{{field=energy|power}}
```

In this case, we will introduce a payload processing calling a function that will convert from wat-min to kWh. The payload configuration will be:

```
{{payload:processData}}
```

And the code to process the information:

```javascript
function processData(value){
    // convert energy from watt-min to kWh
    value.energy = value.energy/60/1000;
    return value;
}
```

Notice that the function still receives a single parameter that holds both fields captured in the topic configuration, so the function input is:

```javascript
{
    energy: 1386640,
    power: 6.55
}
```

After the processing is done, the data is stored in the bucket with the desired unit (kWh) instead of the default wat-min provided by the vendor.&#x20;

![Data bucket example for storing Shelly Plug S energy and power](/files/6nBgI6T0slSd9Ylb11GY)

It is worth mentioning how the protocol implemented by the vendor could support different relays, as the topic contains a `/relay/0`, indicating the relay number 0.&#x20;

```
shellies/{{device}}/relay/0/{{field=energy|power}}
```

This way, this topic could represent different data sources. If we need to process them independently (plot or calculate averages from a single relay), it is possible to define a bucket tag that will hold the relay identifier, following the same notation used with `{{device}}`. This way, the topic configuration can be changed:

```
shellies/{{device}}/relay/{{relay}}/{{field=energy|power}}
```

{% hint style="info" %}
Use a placeholder in the topic, i.e., {{relay}} to define a bucket tag that identifies or categorizes the data source.
{% endhint %}

Using this topic in the configuration will include the relay identifier as a bucket tag, so it is possible to apply filtering both on the device identifier and the relay index.

![Data Bucket example with additional 'relay' bucket tag.](/files/xsgCjDxFkB1R07t8JTLj)

{% hint style="warning" %}
Bucket tags can only be defined on bucket creation. Remove the bucket and let the product recreate it again if any tag configuration is modified on the topic.
{% endhint %}

#### Storing device state

Shelly devices auto-announce themselves periodically or after requesting them to 'announce' over the `sellies/command` topic. It is possible to see the reported information directly on the inspector. In this case, the device sends a JSON payload with information like firmware version, identifier, local IP address, MAC, or a flag to indicate if there are software updates available. An event captured on the MQTT inspector:

![Shelly announce with information about the device](/files/253doJOeclQQab6kdA0g)

Storing this information is quite straightforward. It is only required to create a new bucket in the product profile, pointing to a source MQTT topic:

```
shellies/announce
```

Then, store the message payload using:

```
{{payload}}
```

Which will store all the information related to the announcement in the bucket:

![MQTT Data sample captured in a bucket for Shelly Announce information](/files/sjhGOIHhhOTzyoFOv2Eh)

In addition, it is possible to define a custom payload, i.e., using different field names without using functions. For example, suppose that we want to store only the `new_fw`, and `ip` fields, and change the `new_fw` field to `update`. It is possible to create a JSON using the required placeholders:

```javascript
{
    "update" : {{payload.new_fw}},
    "ip" : "{{payload.ip}}"
}
```

That will store the information according to our definition:

<img src="/files/fd428uPHOcnRAgB7xWCa" alt="MQTT Data sample modified before bucket insert" width="563">

### API Resources

Following our previous examples with the Shelly Smart Plug S, makes sense to create an endpoint to switch on/off the relay. The approach for building the API Resources is quite similar to the previous sections regarding properties and buckets. Just click on the 'Add' button on the API Resources section and start setting an identifier, like `relay`.

<figure><img src="/files/eOmQHQacTVyOmnHIdHQS" alt="" width="563"><figcaption><p>Shelly Plug S - API Resource to modify on/off state</p></figcaption></figure>

Then, there are two sections inside the API Resource. The first one is the `Request`, where the request that will be sent to the device is configured. The other one is the `Response`, that configures the response that will be sent to the API Rest client that originates the request.

In this case, we want to send a command to the Shelly Device, so it is required to configure the Request section within `Device Topic` in Target field, as we are interacting with an MQTT device. Then, in the topic field, we can set a topic, as described in the [vendor documentation](https://shelly-api-docs.shelly.cloud/gen1/#shelly-plug-plugs-overview):&#x20;

```
shellies/{{device}}/relay/0/command
```

Then we must set the message payload, which must be 'on' or 'off' depending on the desired state. If we configure `{{payload}}` as the Request payload, then any body sent to the API will be transmitted to the device. The standard 'on'/'off' representation in JSON is true/false, so we can configure a processing function to convert an input JSON boolean to the required values by the device. In the Product Script section can be coded a function function like this:

```javascript
function toOnOff(value){
    return value ? "on" : "off";
}
```

As described in [Properties](/business-features/products/product-profile/properties) and [Buckets](broken://pages/3pDG42OCCQAgVBHl147K) sections, it is possible to configure the API Resource payload to call this function to transform the incoming payload.

```
{{payload:toOnOff}}
```

After saving the new API Resource, we can go to the device API, and the new `relay`resource will appear.

<img src="/files/eZeWLlPqwybnWn18VsVA" alt="Device API for resource created over Product " width="563">

However, there seems to be something wrong there! The API can detect that the resource is expecting an input (`Resource Input` header is present), but nothing more appears. We are expecting here a true/false input, or just a switch to turn the relay on and off.&#x20;

This can be solved by assigning a default payload value on the API definition, which lets the API explorer know the expected values by default. This can be done by changing the API Resource payload to something like this:

```
{{payload:toOnOff=false}}
```

Now, refreshing the API explorer will display the relay resource expecting a boolean that can be easily changed over the GUI. At this moment, it is possible to turn on and off the switch button. It will call the API Resource on the product, which will convert the incoming payload to 'on' and 'off', and then will be transmitted to the required topic for the Shelly Plug S device. Cool! :sunglasses:

<img src="/files/B9NXXUb0kZGoOd3AJ2s7" alt="Device API for resource created over Product " width="563">

However, this use case can be improved a little bit. For example, suppose that it is required to display the current relay state to avoid always showing the default 'false' value set before. For this purpose, we can reference other properties or even API responses. To reference a property, i.e., the 'relay' one configured on the [Properties](/business-features/products/product-profile/properties) section, we can set a default value with `=property.<property_name>`:

```
{{payload:toOnOff=property.relay}}
```

Subsequently, the next time the API explorer or a dashboard, 'inspect' the device resource, will obtain the value stored in the property. In this case, the property is updated periodically with the current relay status, or even if the status is changed with the device's physical on/off button. Now, we can easily use this API resource on a dashboard, just as with any other device. Here are some sample dashboard widgets created for our MQTT Shelly Plug S device, allowing power switch and plotting some device information like real-time power consumption, total consumption, temperature, etc.

<figure><img src="/files/AmbECDAcN3t1mXtKIZAn" alt=""><figcaption><p>Shelly Plug S - Dashboard</p></figcaption></figure>


# Kunbus RevPi

Open Source IPC based on Raspberry Pi

## Product Description

<div align="center"><figure><img src="/files/nooQSVgVuNzOrzbv3SNu" alt=""><figcaption><p>Open Source IPC based on Raspberry Pi</p></figcaption></figure></div>

Revolution Pi is an open, modular, and inexpensive industrial PC based on the well-known Raspberry Pi. Housed in a slim DIN-rail housing, the three available base modules can be seamlessly expanded by a variety of suitable I/O modules and fieldbus gateways. The 24V-powered modules are connected via an overhead connector in seconds and can be easily configured via a graphical configuration tool.

To achieve real industrial suitability according to EN 61131-2 or IEC 61131-2, the rather unknown Raspberry Pi Compute Module was used as a basis. The module, which looks like a notebook RAM bar, is limited to the essentials and does not have any external interfaces. With the Raspberry Pi Compute Module, the foundation has been laid for equipping the Raspberry Pi with a robust and industry-compatible periphery developed by us, which meets all important industrial standards. On the software side, the Revolution Pi has a specially adapted Raspberry Pi OS (formerly known as Raspbian) operating system, which is equipped with a real-time patch. The use of Raspberry Pi OS ensures that most of the applications developed for the Raspberry Pi can also be used on the Revolution Pi.

## Integration

To integrate Kunbus RevPi with Thinger.io, just connect it to a server instance with the standard [Linux/Raspberry Pi client](/linux).

## Product Services

### PiCtory

[PiCtory](https://revolutionpi.com/tutorials/what-is-pictory/) is a browser-based application that allows you to communicate between your RevPi and connected devices using a configuration file. This configuration file is created by means of PiCtory.

The main functions of a configuration file are:

* Communicating the type and position of the expansion modules to the base module
* Communicating mutually the basic settings of your RevPi and connected devices
* Using the configuration values of your RevPi in other applications

<figure><img src="/files/0Cf5tA0iiWqHBtCQuFyD" alt=""><figcaption><p>Pictory Running on Kunbus RevPi and managed from Thinger.io</p></figcaption></figure>

To access Pictory from Thinger.io, it is required to create a [Product Service](#product-services) with the following configuration:

<figure><img src="/files/uPUEtjfohrodeR3Lk1L3" alt="" width="563"><figcaption></figcaption></figure>

### Node-RED

Node-RED is a programming tool for wiring together hardware devices, APIs, and online services in new and interesting ways.

It provides a browser-based editor that makes it easy to wire together flows using the wide range of nodes in the palette that can be deployed to its runtime with a single click.

Kunbus Rev-PI integrates Node-RED. The [node-red-contrib-revpi-nodes](https://flows.nodered.org/node/node-red-contrib-revpi-nodes) provides a set of nodes in [Node-RED](https://nodered.org/) to read and write to the I/O Pins of your [Revolution Pi](https://revolution.kunbus.de/).

<figure><img src="/files/XY3ApTnzR5nDwGjZphjA" alt=""><figcaption><p>Node-RED Running on Kunbus RevPi and managed from Thinger.io</p></figcaption></figure>

To access Node-RED from Thinger.io, it is required to create a [Product Service](#product-services) with the following configuration:

<figure><img src="/files/96EfCgWmEcwAimKsrV1h" alt="" width="563"><figcaption></figcaption></figure>

## Terminal

To access the system terminal of the Kunbus RevPi, additional setup is not required. Once the device is connected to Thinger.io, just access the Terminal section on the device and click "Connect".

<figure><img src="/files/jew0GkxNK3sdh86T4NPm" alt=""><figcaption><p>Kunus RevPi terminal managed from Thinger.io</p></figcaption></figure>


# Shelly Plus 1 PM

Wi-Fi-operated smart relay, 1 channel 16A, with Power Metering

<figure><img src="/files/nJ7n17yA5pOKMbC9rv7J" alt=""><figcaption><p>Wi-Fi-operated smart relay, 1 channel 16A, with Power Metering</p></figcaption></figure>


# FILE STORAGES

Thinger.io provides a flexible cloud storage system that allows uploading files to the IoT server in order to provide support to other platform features, such as the HTML Widget or the OTA System. The information will be stored in a non-volatile memory of the server host.

{% hint style="success" %}
Note that this feature is only available for [**private instances**](/server/deployment), as it requires a cloud storage system.&#x20;
{% endhint %}

## File Storages

File Storages provide a flexible file management system for storing and serving files within the platform. You can use storages for hosting static websites, storing firmware files, managing custom assets, exporting data, and more.

To manage your storages, navigate to **Storages** in the console.

### Creating a Storage

Click **Add Storage** to create a new storage. The configuration includes:

#### Basic Information

* **Storage ID**: A unique identifier for the storage (alphanumeric and underscores, max 25 characters). This ID is used in URLs and API calls.
* **Storage Name**: A display name for the storage.
* **Storage Description**: Optional description for administrative purposes (max 255 characters).

#### Access Configuration

* **Public Read**: Enable to allow public access to files without authentication. When disabled, all file access requires authentication or a valid access token.
* **Index File**: The default file served when accessing the storage root URL (e.g., `index.html`). Useful for hosting static websites.

#### Terminal Configuration

* **Terminal Image**: A Docker image to use for the integrated terminal environment (e.g., `alpine:latest`, `python:3.12-alpine`). This allows running shell commands directly within the storage context.

#### HTTP Access

Once created, your storage is accessible via HTTP at:

```
https://your-platform.com/v2/users/{username}/storages/{storage_id}/files/
```

For public storages, files can be accessed directly without authentication. For private storages, include an authorization header or access token.

***

## File Explorer

The File Explorer provides a modern interface for managing files within your storage, similar to VS Code's file browser.

### Navigation

* **Tree View**: Browse your file structure in a collapsible tree on the left panel
* **Breadcrumbs**: Navigate using the path breadcrumbs at the top
* **Lazy Loading**: Large directories load content on demand for better performance

### File Operations

#### Uploading Files

1. Click the **Upload** button in the toolbar
2. Select one or multiple files from your computer
3. Monitor the upload progress
4. Files appear in the tree once uploaded

You can also drag and drop files directly into the file explorer.

#### Creating Files and Folders

* **New File**: Click the new file icon or use the context menu to create an empty file
* **New Folder**: Click the new folder icon or use the context menu to create a directory

#### Managing Files

* **Rename**: Right-click a file or folder and select Rename, or use the context menu
* **Delete**: Right-click and select Delete, or select files and use the delete button
* **Download**: Click the download button or right-click and select Download
* **Move**: Drag and drop files between folders

### Code Editor

The integrated Monaco editor (the same editor used in VS Code) provides a rich editing experience for text files:

* **Syntax Highlighting**: Automatic language detection based on file extension
* **Multiple Files**: Open multiple files in tabs
* **Unsaved Changes**: Visual indicator for files with unsaved changes
* **Find & Replace**: Full text search within files

Supported file types include JavaScript, TypeScript, Python, HTML, CSS, JSON, YAML, Markdown, and many more.

### File Preview

The explorer includes built-in preview support for various file types:

* **Images**: PNG, JPG, GIF, SVG rendered natively
* **PDFs**: Integrated PDF viewer
* **Videos**: Built-in video player
* **Text/Code**: Displayed in the Monaco editor
* **Other**: File metadata and information panel

***

## VS Code Integration

For a full IDE experience, access the VS Code integration:

1. Navigate to your storage
2. Click **VS Code** in the storage menu
3. A full VS Code environment opens with your storage mounted

The storage is mounted at `/home/coder/storages/{storage_id}` within the VS Code environment.

***

## Terminal Access

The integrated terminal allows running shell commands directly within your storage context:

1. Ensure a **Terminal Image** is configured in storage settings
2. Open the terminal panel in the File Explorer
3. The terminal connects via WebSocket to a container running your specified image
4. Execute commands with direct access to your storage files

Common use cases:

* Running build scripts
* Installing dependencies
* Processing files with command-line tools
* Git operations

***

## Common Use Cases

### Hosting Static Websites

1. Create a storage with **Public Read** enabled
2. Set **Index File** to `index.html`
3. Upload your HTML, CSS, JavaScript, and asset files
4. Access your site at the storage URL

### Firmware Storage

Store device firmware files for OTA updates:

1. Create a storage for firmware files
2. Organize by device type or version (e.g., `/firmware/v1.0.0/device.bin`)
3. Devices can download firmware via the storage URL
4. Use access tokens for secure, authenticated downloads

### Data Exports

Export data from buckets to file storage:

1. Configure bucket export to target a storage
2. Exported files (CSV, JSON) are saved to the storage
3. Download or process exported data as needed

### Custom Dashboard Widgets

Host custom HTML widgets for dashboards:

1. Create HTML/JavaScript widget files
2. Upload to a storage with **Public Read** enabled
3. Reference the file URL in dashboard HTML widgets

### Email Templates

Store custom email templates:

1. Create HTML email templates
2. Upload to a storage
3. Reference in notification configurations

***

## Integration Examples

File Storages can be accessed programmatically via the REST API, enabling integration with external systems, scripts, and devices. All examples use the v2 API endpoints.

### Authentication

All requests to private storages require a Bearer token:

```bash
Authorization: Bearer YOUR_ACCESS_TOKEN
```

Public storages (with **Public Read** enabled) allow GET requests without authentication.

### Listing Files

List contents of a directory:

```bash
curl -H "Authorization: Bearer YOUR_TOKEN" \
  "https://iot.thinger.io/v2/users/USERNAME/storages/STORAGE_ID/files/"
```

List including hidden files:

```bash
curl -H "Authorization: Bearer YOUR_TOKEN" \
  "https://iot.thinger.io/v2/users/USERNAME/storages/STORAGE_ID/files/?hidden=true"
```

List recursively (all subdirectories):

```bash
curl -H "Authorization: Bearer YOUR_TOKEN" \
  "https://iot.thinger.io/v2/users/USERNAME/storages/STORAGE_ID/files/?recursive=true"
```

### Downloading Files

Download a file:

```bash
curl -H "Authorization: Bearer YOUR_TOKEN" \
  -o firmware.bin \
  "https://iot.thinger.io/v2/users/USERNAME/storages/STORAGE_ID/files/firmware/v1.0.0/firmware.bin"
```

For public storages, no authorization is needed:

```bash
curl -o firmware.bin \
  "https://iot.thinger.io/v2/users/USERNAME/storages/STORAGE_ID/files/firmware/v1.0.0/firmware.bin"
```

### Uploading Files

Upload a binary file (e.g., firmware):

```bash
curl -X PUT \
  -H "Authorization: Bearer YOUR_TOKEN" \
  -H "Content-Type: application/octet-stream" \
  --data-binary @firmware.bin \
  "https://iot.thinger.io/v2/users/USERNAME/storages/STORAGE_ID/files/firmware/v2.0.0/firmware.bin"
```

Upload a text file:

```bash
curl -X PUT \
  -H "Authorization: Bearer YOUR_TOKEN" \
  -H "Content-Type: text/plain" \
  -d "Hello, World!" \
  "https://iot.thinger.io/v2/users/USERNAME/storages/STORAGE_ID/files/hello.txt"
```

Upload without overwriting existing files (returns 409 if file exists):

```bash
curl -X PUT \
  -H "Authorization: Bearer YOUR_TOKEN" \
  -H "Content-Type: application/octet-stream" \
  --data-binary @config.json \
  "https://iot.thinger.io/v2/users/USERNAME/storages/STORAGE_ID/files/config.json?overwrite=false"
```

Upload with progress indicator (useful for large files):

```bash
curl -X PUT \
  -H "Authorization: Bearer YOUR_TOKEN" \
  -H "Content-Type: application/octet-stream" \
  --data-binary @large_file.zip \
  --progress-bar \
  "https://iot.thinger.io/v2/users/USERNAME/storages/STORAGE_ID/files/backups/large_file.zip"
```

### Creating Directories

Create a directory (note the trailing slash):

```bash
curl -X PUT \
  -H "Authorization: Bearer YOUR_TOKEN" \
  "https://iot.thinger.io/v2/users/USERNAME/storages/STORAGE_ID/files/new_folder/"
```

Create nested directories:

```bash
curl -X PUT \
  -H "Authorization: Bearer YOUR_TOKEN" \
  "https://iot.thinger.io/v2/users/USERNAME/storages/STORAGE_ID/files/path/to/nested/folder/"
```

### Deleting Files

Delete a file:

```bash
curl -X DELETE \
  -H "Authorization: Bearer YOUR_TOKEN" \
  "https://iot.thinger.io/v2/users/USERNAME/storages/STORAGE_ID/files/old_file.txt"
```

Delete a directory and its contents:

```bash
curl -X DELETE \
  -H "Authorization: Bearer YOUR_TOKEN" \
  "https://iot.thinger.io/v2/users/USERNAME/storages/STORAGE_ID/files/old_folder?recursive=true"
```

### Renaming and Moving Files

Rename a file:

```bash
curl -X PATCH \
  -H "Authorization: Bearer YOUR_TOKEN" \
  -H "Content-Type: application/json" \
  -d '{"path": "/new_name.txt"}' \
  "https://iot.thinger.io/v2/users/USERNAME/storages/STORAGE_ID/files/old_name.txt"
```

Move a file to a different directory:

```bash
curl -X PATCH \
  -H "Authorization: Bearer YOUR_TOKEN" \
  -H "Content-Type: application/json" \
  -d '{"path": "/archive/2024/report.pdf"}' \
  "https://iot.thinger.io/v2/users/USERNAME/storages/STORAGE_ID/files/report.pdf"
```

### Getting File Information

Get metadata about a file without downloading it:

```bash
curl -H "Authorization: Bearer YOUR_TOKEN" \
  "https://iot.thinger.io/v2/users/USERNAME/storages/STORAGE_ID/files/firmware.bin?info=true"
```

Response:

```json
{
  "name": "firmware.bin",
  "path": "/firmware.bin",
  "type": "file",
  "size": 524288,
  "modified": 1707123456
}
```

### Device Integration Example

A typical IoT device firmware update flow:

```bash
# 1. Check for new firmware version
LATEST=$(curl -s "https://iot.thinger.io/v2/users/USERNAME/storages/firmware/files/latest.txt")

# 2. Download firmware if newer
curl -o /tmp/firmware.bin \
  "https://iot.thinger.io/v2/users/USERNAME/storages/firmware/files/releases/${LATEST}/firmware.bin"

# 3. Verify and apply update
# ... device-specific update logic
```

***

## Access Control

### Permissions

File Storages use fine-grained permissions:

| Permission              | Description                         |
| ----------------------- | ----------------------------------- |
| `ReadStorageFiles`      | List, read, and download files      |
| `UpdateStorageFiles`    | Upload files and create directories |
| `DeleteStorageFiles`    | Delete files and directories        |
| `RenameStorageFiles`    | Rename and move files               |
| `AccessStorageTerminal` | Access the integrated terminal      |

### Access Tokens

Create access tokens with limited permissions for external access:

1. Navigate to the storage settings
2. Create an access token with specific permissions (e.g., read-only)
3. Use the token in API requests or share for limited access

This is useful for:

* Providing read-only access to firmware downloads
* Allowing external services to upload files
* Sharing files without exposing full account credentials

***

## Best Practices

1. **Use descriptive storage IDs** - Choose meaningful names like `firmware`, `website`, `exports` rather than generic names
2. **Organize with directories** - Structure files in logical folders for easier management
3. **Set appropriate access levels** - Only enable public read when necessary
4. **Use access tokens** - Create scoped tokens instead of sharing account credentials
5. **Configure index files** - For web-accessible storages, set an index file for cleaner URLs
6. **Monitor storage usage** - Keep track of storage consumption, especially for large files


# PROJECTS MANAGER

This section explains how to use the project management tool to classify resources and share them with other user accounts

The **Projects** feature in Thinger.io is designed to enable secure and flexible **collaborative access to IoT resources** within a shared platform environment. It provides a mechanism to group and share devices, dashboards, data buckets, file storages, and endpoints with other user accounts under controlled permission rules.

## Creating a new project

To start working with projects, go to the main menu and click on the `Projects` tab, which gives access to the project list.  Then, press the `Add project`button and fill the "project details" form:

<figure><img src="/files/Gj1o8YuFZfLnE4EOCfk6" alt=""><figcaption></figcaption></figure>

Once a new project is created, it is initialized as an empty container with no associated resources or collaborators. In order to make it functional, it is necessary to manually assign resources such as devices, dashboards, data buckets, or endpoints, as well as invite user accounts to collaborate within the project. These resources and users can be added through their respective management sections within the project interface, allowing precise control over what is shared and how it is accessed.

### Add members to a project

In this context, it is possible to assign access to existing user accounts already registered in the Thinger.io server, or to create new user accounts directly from the project environment. Newly created users are automatically assigned the default role of *project member*. For each user, access permissions can be configured individually, allowing fine-grained control over which actions the user can perform within the project. Alternatively, predefined roles can be used to apply a consistent set of permissions across multiple users, streamlining project access management.&#x20;

<figure><img src="/files/DjLALfU757O4FGjpqGS2" alt=""><figcaption></figcaption></figure>

### Project roles

This section allows defining custom sets of permissions that are specific to the current project. Instead of assigning individual permissions to each member, create a named role (e.g., 'Viewer', 'Operator', 'Admin') with predefined access levels, and then assign that role to multiple project members. This simplifies permission management and ensures consistent access control within the project. Once `Add Role`is clicked and the desired options are selected, the new role will be displayed in the list:

<figure><img src="/files/tfEQ89EmpsL1KVTRz5HH" alt=""><figcaption></figcaption></figure>

### Global Roles

This option allows to create roles that will be available for every project, having the same permissions, so it's simple and faster to configure new project members. To create a new Global Role profile, it's required to go back to the *Projects List,* hit the "Add Role" button, and complete the form, including permissions to the required feature&#x73;*.* Note that the Global Role configuration is the same as the one shown in the *Project Role* or the individual permissions context explained in the section below.&#x20;

<figure><img src="/files/7WpaNSuoqoprMSHGjY1K" alt=""><figcaption></figcaption></figure>

### Adding project members

Once the project is created, this tab will appear. It allows for adding members, refreshing the view, and accessing other functionalities such as project roles and the dashboard.

<figure><img src="/files/vxE4M7x3jyKkavPW2tmI" alt="" width="563"><figcaption></figcaption></figure>

After clicking the `Add Member`button, this menu will appear:&#x20;

<figure><img src="/files/M5E3Oj9afdLJIIi1DIa7" alt=""><figcaption></figcaption></figure>

When configuring a project member, these options are available:

* **Member Details**

  * **Existing User:** This switch allows either creating a new user account for the project or selecting an existing user from the current Thinger.io instance. If enabled, it typically reveals a field to search for an existing user.

  <figure><img src="/files/83s4pyS2NzsomM3rV9v4" alt=""><figcaption></figcaption></figure>

  * **Username:** Defines the unique username for a new member being added to the project.
  * **Email:** Specifies the email address associated with the new member's account.
  * **Password:** Sets the initial password for the new member's account.
* **Member Configuration**
  * **Enabled:** This switch allows enabling or disabling the member's access to the project without removing their shared configuration or permissions.
  * **Hide Menu:** When activated, this option hides the main navigation menu for the member when they access the project dashboard, often used for dedicated or kiosk-style views.
* **Member Permissions**
  * **Global Roles:** This field allows assigning predefined global roles to the member, which grant them a set of permissions across the entire Thinger.io instance, influencing their access within this and other projects.
  * **Project Roles:** Enables the assignment of specific roles defined *within this particular project* to the member, controlling their permissions exclusively within the scope of the current project.
  * **Project Groups:** Allows adding the member to existing project groups, where they will inherit permissions previously defined for that group within the project.
* **Specific Permissions**
  * **Allow:** This section allows assigning specific permissions to the selected user account, explicitly granting them authorization for certain actions or resources within the project. It also displays all currently granted "allow" permissions.
  * **Deny:** This section explicitly denies specific permissions to the selected user account. This is a powerful feature for fine-grained control; for instance, if the "Allow" section provides broad authorization (e.g., full device capacities), this "Deny" section can be used to prevent specific actions, such as deleting a device, even if the general permission is granted.

Additionally, it is important to note that the user who creates the project has the power to select the roles of each member, defining their specific permissions. Each role offers various configurable options, which in turn unlock new possibilities. There's a wide array of configurations possible!&#x20;

{% hint style="info" %}
Be sure to click the `Add Member`button at the end to save the process.
{% endhint %}

This will open the project's member list, in which the user accounts that belong to the same project will be displayed, allowing to modify permissions in the future. It will be empty the first time we access a recently created project, but as soon as a Member is added, it will appear in the list:

<figure><img src="/files/DVQW2bmDmDwmuF55DEfh" alt=""><figcaption></figcaption></figure>

#### Managing member permissions&#x20;

Permissions can be added individually for each resource, but it is also possible to select the Admin Access option, allowing the other user full power over the administration of all the resources we share in the project. To add a new permission, press the green **`+Add`** button will open the Add token permission context in which the resource whose authorization is going to be managed can be selected:

<figure><img src="/files/TD1BdtxaBRAhfiFDyWMO" alt="" width="456"><figcaption></figcaption></figure>

When a resource type is selected on the list (for example: buckets), the interface will show additional options to provide permissions to  all profiles `Any Bucket` or to an individual profile from the existing buckets list `Specific Bucket` :&#x20;

<img src="/files/-M78Q1QZOb6UTRRbVmn5" alt="" width="563">

Finally, the same logic is applied to the `Actions` section, allowing to provide full permissions to the selected resource profile `Any Action` or to select only one specific permission `Select specific action` .

![](/files/-M78Z2zy9MFkq3P8Unrh)

### Project Dashboard

Each project can have its own dashboard in order to display data from multiple resources on the same screen.  This dashboard will replace the default "Statistics" section in the main navigation menu of the Thinger.io platform, adopting the name of the corresponding project. It serves as the primary interface for visualizing and interacting with project-specific data.

By enabling project-level dashboards, Thinger.io allows full customization of the platform’s look and feel, tailoring the visual experience to the specific context and requirements of each use case. This approach enhances clarity, usability, and stakeholder engagement by presenting only the relevant metrics, widgets, and controls associated with the selected project.

The operation is the same as that of any common dashboard, so for further details, refer to the [Dashboard section](/features/dashboards).&#x20;

Clicking the 3-bars icon will reveal 'Settings' and 'Inspector' options:

<figure><img src="/files/iROx5slYkgXycVZBCxYp" alt=""><figcaption></figcaption></figure>

**Project Settings**

It is possible to rename the project, change its description, or limit the data bucket:

<figure><img src="/files/ANo9W5JXu59jdL5d92QP" alt=""><figcaption></figcaption></figure>

* **Inspector**: Enables users to monitor and troubleshoot project events and data in real-time.

<figure><img src="/files/AEDGcxIIwBIMoSIswRZy" alt=""><figcaption></figcaption></figure>

The Event Inspector is a vital tool for real-time monitoring and debugging within a project. It provides a continuous live feed and a historical log of all events and data being generated or processed by devices, assets, and rules. Its primary purpose is to verify correct data transmission, expected rule triggering, and proper functioning of all system communications. If something isn't behaving as it should, the Inspector is the first place to look to see what data is arriving, while also maintaining a running tally of recent events for historical review.

To manage this event stream, the Inspector offers several control options: a 'Connected' indicator that shows the live-streaming status, a 'Filter Events' option to narrow down the displayed events by specific types or criteria, a 'Pause' function to temporarily halt the live feed for detailed analysis, and a 'Clear' button to empty the current display for a fresh monitoring session. In essence, the Event Inspector functions as a comprehensive "console log" or "debug window" for an IoT project, providing immediate visibility into the flow of information and enabling effective troubleshooting of any issues.

### Projects Navigation&#x20;

The same user account can participate in many projects, that's why the Thinger console has a tool on the top bar that allows selecting the project:

<figure><img src="/files/NtxTrcYER2e2pvIp3gdv" alt="" width="347"><figcaption></figcaption></figure>

This tool allows moving between different projects, displaying only the devices associated with each one. It also allows disabling the project's filtering functions, allowing to show every resource created in the user account, i.e. other users' resources will no longer be visible.

<figure><img src="/files/Z8YaNnukEbIlPxUJZ2Yq" alt="" width="472"><figcaption></figcaption></figure>

{% hint style="warning" %}
NOTE that by default, the member does not log in with any project opened, so it is necessary to select after the first login (we are working on it, so a default project can be established for members)
{% endhint %}

### Adding project resources

Once the project is created, we can start to associate resources such as device profiles, data buckets or representation dashboards, allowing them to be shared with other developers of the same project. There are two different ways to attach resources to a specific project:

#### Attach when creating new resources

The resources are associated with the project in which they were created. So if a project is selected during the creation of any resource, this new profile will be automatically attached to the project:

1. Enabling projects as shown in the section above&#x20;
2. Selecting a project from the drop-down list
3. Creating a new device / data bucket / Endpoint / dashboard to be shared with project members&#x20;

#### Aggregating existing resources to a new project

The lists allow the administration of resources to associate them with projects, asset types or groups. It is possible to assign previously created resources to a new project by selecting them in the list and pressing the black `Set Projects` button that will be shown on the top of the list:&#x20;

<figure><img src="/files/QbdfOIRs4mTNDLWqhou5" alt=""><figcaption></figcaption></figure>

## Working with projects

#### Shared resources identification

The "project" column of the resources list (devices, dashboards, endpoints or data buckets) allows identifying the project in which the resource has been attached. Those items that appear in the lists with a user icon, together with the name, are resources shared by another user.&#x20;

Some devices are shown, most of which are shared devices from other accounts, and two of them have been created by their own account.

<figure><img src="/files/96VGvLZZMiFmRlYb0KWc" alt=""><figcaption></figcaption></figure>

The association of any resource to a project can be checked using the REST API, which will show the project it belongs to:

![](/files/-M78_Fgkx3qszWQoqOi5)

Note that in the API of a third-party device, in addition to the project identifier, we can display the account it belongs to from that device:

![](/files/-M78_5Oh9femhvJya7Ym)


# USER ACCOUNTS

Professional and Enterprise Thinger.io Server Instances have been equipped with support for multiple user accounts with different authorization levels, which can be managed from the administration account. This feature has been developed to allow organizations to create project working groups and provide support for B2C or B2B2C products, in which it is necessary to create a network of end-user accounts with read-only permissions.

Each user account is isolated from the rest of the accounts of the instance. This means that they will not share devices or other resources that have not been explicitly shared through a project. The different roles explained below only limit the action capabilities of each account.

{% hint style="info" %}
Note that the use of user accounts is closely related to project management. If unfamiliar with this feature, please go to [**Projects Manager**](/business-features/projects) section of the documentation.&#x20;
{% endhint %}

## User Roles

Three different user account roles are available, depending on the usage privileges to be granted to a user. This section describes each of them and the considerations to be taken into account when deploying them.

### Administrator account

Each instance can have more than one administrator account. Only the original account indicated during the subscription will have permission to modify the parameters of the subscription or the Addons amount, but the administrator accounts will have full permissions to:

* [x] Create and manage IoT resources
* [x] Work with server plugins
* [x] Projects and Assets aggrupation
* [x] Accounts Administration
* [x] Domains or Rebrandings

An Administrator user must be someone the main developer trusts since he will be able to perform all kinds of operations on the branding and other resources of the instance. In order to deploy these accounts, the subscription must be extended with an additional Add-on.

### **Domain admin**

The "domain admin" role has administrator role capacities within a specific web domain that is specified in the. `domain` section of the "new account" form. This role typically grants broad privileges for performing administrative tasks in a multitenant hierarchy such as user management, device configuration, access control, and project monitoring across the entire domain.&#x20;

Some typical functions associated with the "domain admin" role in Thinger.io might include:

* [x] Create and manage IoT resources
* [x] Work with server plugins
* [x] Projects and Assets aggrupation
* [x] Accounts Administration
* [ ] Domains or Rebrandings

In summary, the "domain admin" role in Thinger.io provides a high level of control and responsibility for administering the platform and resources within a specific domain.

### **Developer account**

This account is aimed at other collaborators of the organization to develop on the instance with full development capacities but some limitations on administration privileges:

* [x] Create and manage IoT resources
* [x] Work with server plugins
* [x] Projects and Assets aggrupation
* [ ] Accounts Administration
* [ ] Domains or Rebrandings

### **User account**

Guest accounts are created for displaying data or work only with the IoT resources that has been specifically shared with him  by an administrator or developer account. They will not be able to create new resources or use the plugins.&#x20;

* [ ] Create and manage IoT resources
* [ ] Work with server plugins
* [ ] Projects and Assets aggrupation
* [ ] Accounts Administration
* [ ] Domains or Rebrandings

The creation of this User accounts are free of charge for Thinger.io privated instances, as they have been included to allow the creation of large B2C and B2B2C projects. As they are lightweight accounts, they do not place a high load on the server, so a large network of users can be created without overloading the host.

## Create new user accounts

To start working with the user's network, scroll down to the "Administration" section of the main menu and click the "User Accounts" tab to access the accounts management interface, which will display each user account profile and the `Add User` button that allows creating them as explained in the sections below.

<figure><img src="/files/b6LLb17l3IgbMwTJ3lKK" alt=""><figcaption></figcaption></figure>

Then, pressing the **`+ Add User`** button of the user administration list opens the `User details` form context in which the new user properties can be introduced:&#x20;

<figure><img src="/files/RhK0NyfLGqNpngE7zA4J" alt="" width="563"><figcaption></figcaption></figure>

* **Username**: Account username, this parameter also works as a user identifier.&#x20;
* **Role**: Allows setting the new profile as administrator, User or Project member.
* **Email**: needs to be a valid email account. Only emails introduced on this list can create a user account in order to prevent intruders.
* **Password**: Is the security key for logging into this new user account.
* **Enabled**: Each user account can be enabled/disabled just by clicking this switch
* **Email Verified**: Put this off will send a mail verification to the user when signing up in order to confirm the authenticity of the email.

When a user account is created in Thinger.io, it is possible to impose specific **Account Limits** to control their access and resource consumption. These limits allow administrators to define the maximum number or capacity of various resources—such as Access Tokens, Buckets, Dashboards, Devices, Endpoints, Plugins, Projects, Project Members, Alarm Rules, Alarm Instances, Syncs, Storages, Asset Types, and Asset Groups—that a user can create or manage.

This feature provides granular control over resource allocation, ensuring efficient system management and helping to manage overall platform load. Limits can be set to 'Default', adhering to the system's predefined configurations, or customized to specific numerical values based on individual user needs or subscription tiers. Additionally, 'Storage Limits' like 'Bucket Retention' can be configured to control data storage duration for the account.

When the form is completed, a new user profile will be added to the IoT server by pressing the `+ Add user` button.

### Managing project member authorizations:&#x20;

Project members are light accounts created to share IoT resources with customers or other guests who only require read or display capabilities. Therefore, once a new member profile has been created, it is required to associate it with at least one project using the project manager and set the privileges that it will obtain.

<figure><img src="/files/USgXTbZWKnkArcwbQqS9" alt=""><figcaption></figcaption></figure>

Go to **`Projects`** menu tab and select a previously created project. A project with one member already added:

<figure><img src="/files/khbLcFVIYVlFQpZk5gRd" alt=""><figcaption></figcaption></figure>

Then click the **`Add Member`**   button. This new menu drops down, and the new user account created will appear:&#x20;

<figure><img src="/files/XUYjg08ES4ej296wWZJa" alt=""><figcaption></figcaption></figure>

Once a project member has been associated with the project, select the profile and then use the **`Allow`** section to provide permissions to the user or the **`Deny`** section to manage explicitly forbidden actions, it is possible to select the specific resources and operations that can be used by each account.&#x20;

<figure><img src="/files/gYV2gBYhuA3XygiId7Uj" alt=""><figcaption></figcaption></figure>

Upon clicking this button, **`Add Member` ,** the new member will appear in the project's member list.

<figure><img src="/files/1ZTJdAfe4bHVKBcVZlsi" alt=""><figcaption></figcaption></figure>

### Subscribe developer accounts amount

Only Admin accounts are able to create other user accounts. The number of user accounts that can be created in an instance is defined during the contracting and deployment of the server. If this value is reached (or if no additional user account was contracted), an error message will appear:

![](/files/-MLt-43o35lFlL71td9J)

This threshold can be upgraded on "Grow" or "Startup" licenses by going to the management portal, which is only accessible with the administration account using the link below. To access this portal, a one-time password will be required. It can be obtained by introducing the appropriate administration e-mail account in the text box.

{% hint style="success" %}
[**Click here to access the subscription administration portal**](https://thinger.chargebeeportal.com/)
{% endhint %}

The administration portal will display all licenses subscribed using this e-mail address, allowing for the selection of the one to be updated. Just select the one that wants to be modified and press the option "Edit Subscription", finally pressing the option "Addons", the portal will show all the available options and pricing in the Add-ons menu:

<img src="/files/-MCBaLSOYblkQKh2KJI_" alt="" width="375">

After selecting any of them, it is possible to select the amount just before checking out, note that the price  will be fixed per each unit, but it is possible to introduce a discount coupon that will be provided by Thinger.io team if the business model is quite intensive on any of these features in order to hold a cost-effective solution&#x20;

<img src="/files/-MCBbAJYRru6uIY0m3fe" alt="" width="375">

When the subscription begins updated, a confirmation email will be received with an extract of the subscription cost variations. &#x20;

{% hint style="warning" %}
After modifying any of the subscription parameters Thinger.io server instance needs to be reset in order to update de configuration file values.&#x20;
{% endhint %}

This process can be executed using the server administration panel:&#x20;

First, select Cluster Hosts in the Thinger menu.

<figure><img src="/files/9ta48RtEUzjB4HojK5H4" alt=""><figcaption></figcaption></figure>

For example, an existing one has been selected:

<figure><img src="/files/RYvtq76ygtV044NqX82Q" alt=""><figcaption></figcaption></figure>

In the top right corner, a settings button is visible. When being clicked on, this will appear:

<figure><img src="/files/dbed1VJtWG2O4eQbUg61" alt=""><figcaption></figcaption></figure>

Finally, go to Restar Server and click the "Restart Now" button.

<figure><img src="/files/hsep1a6VWL2plFz7np1U" alt=""><figcaption></figcaption></figure>

## Remove User Account

User accounts can also be deleted from the Server Instance, just by selecting the checkbox on the left side of the user account profile and clicking the "Remove" button:

<figure><img src="/files/fQEB8iwJxlbmVSNQUQdu" alt=""><figcaption></figcaption></figure>

{% hint style="danger" %}
Note that when a user account is removed, all its IoT devices, buckets, configurations and personal information will be deleted. It won't be possible to restore them.
{% endhint %}


# WHITE-LABELING

This feature allows to custom the appearance of Thinger.io web console to a different brand.

Thinger.io instances support multi-tenant web console customizations. By means of a management tool that is available at the main menu "Rebranding" section, it is possible to create and manage multiple web customizations, in order to customize the aspect of the web console to different customers or projects by changing some elements such as:

* [x] Branding Colors
* [x] Web, Favicon and Main Menu logotypes
* [x] Links, Email accounts and copyright

{% hint style="info" %}
Note that each web console rebrand needs to be supported by an individual web domain, which can be managed in the "Domain" section of the main menu, or use the default domain.
{% endhint %}

## New Console Rebranding

Select "Brands" on the Thinger menu:

<figure><img src="/files/JNBHeODRhyp62CyLC2fk" alt=""><figcaption></figcaption></figure>

Clicking into "Add Brand" button of the "Rebranding" section allows creating a new branding profile. The process starts by introducing a web domain name, which will be the identification for the brand profile:

<figure><img src="/files/EuFTm9xOLDrJfJ0sr0ZV" alt="" width="563"><figcaption></figcaption></figure>

If the instance subscription doesn't include any rebranding add-on, the next message will be shown in the web console: &#x20;

<figure><img src="/files/zNUlBK8ErLnAx8FoNbNb" alt=""><figcaption></figcaption></figure>

Check out the pricing page for information regarding the branding.

### Adding Branding Details

If the Domain Name is valid, the form context will expand, allows completing the branding details sections by editing the standard Thinger.io values:

<figure><img src="/files/rydA95Ckr7eq4KDrMsjW" alt=""><figcaption></figcaption></figure>

All elements in this tab are optional and will not be added to the web page if left empty. Here's a breakdown of the fields available for configuration:

* **Domain Name:** URL of the new, rebranded web console. This Web Domain needs to be introduced in the system, as explained in the CUSTOM WEB DOMAIN section. The default domain may also be used.
* **Description:** Additional information about the rebranding profile in order to identify it from the others.
* **Page title:** Name for the web browser tabs.
* **Page URL:** Link to the company, customer, or project website.
* **Meta Description:** Brief summary of a web page used as a meta field, displayed as part of search engines.
* **Meta Keywords:** Keywords used for search engine indexing.
* **Share Image:** Image that appears in social networks and messaging apps when a user shares a link to the site.
* **Company Name:** Name of the project, customer, or company this rebranding belongs to.
* **Contact Email:** Address for the main menu "Email" button that users are going to use to contact for support.
* **Copyright:** The bottom of the website includes a copyright declaration that can be customized here to protect the rebranding rights.
* **Community Links:** Toggle that enables or disables the display of the default community support link from Thinger.io on the rebranded console.
* **Server version:** Toggle that controls whether the server version is displayed in the bottom left corner of the rebranded website.

### Accounts

Here are the configurable options:

* **Cross Sign-in:** This toggle enables or disables the ability for users to sign in to this brand's console using credentials from other linked Thinger.io brands or integrated external services. This feature streamlines the user experience by allowing a single sign-on across connected platforms.
* **Public Sign-up:** This toggle controls whether new users can directly register an account through this brand's web console login page. When enabled, users can create their own accounts without requiring an invitation from an administrator.
* **Account Role:** This dropdown allows selecting the default role that will be automatically assigned to any new user accounts created under this brand, especially those signing up via the public sign-up option. This sets their initial permissions and access levels within the platform.

<figure><img src="/files/RAiwJkjdOOY59wY1CNlC" alt="" width="563"><figcaption></figcaption></figure>

Once configured, the 'Update Brand' button is clicked to save the changes.

### Scripts

Specifically, the **"Index Scripts"** area provides an HTML editor where custom HTML, JavaScript, or CSS code can be embedded. This enables adding bespoke elements, integrating third-party services (like analytics or chat widgets), or modifying the behavior and appearance of the main console pages beyond the standard branding options. This feature provides powerful control for tailoring the user interface and functionality to specific needs:

<figure><img src="/files/ktVIKGPBEcWISZ194A9D" alt="" width="563"><figcaption></figcaption></figure>

### Login

The login page serves as the initial destination for users. Incorporating the company's distinctive image and colors enhances the overall platform experience.

In this form, we will be able to set the background color or background image, with support for animated images. Select where the box should be located and its style.&#x20;

<figure><img src="/files/XdmrtZmAap0eJC4qv2zB" alt=""><figcaption></figcaption></figure>

These settings will render a login page:

<figure><img src="/files/we0vKpioU9KdTX2H6s21" alt=""><figcaption></figcaption></figure>

### Custom Logo

What really makes the difference when creating a rebrand is the use of custom logotypes. The third tab of the branding editor allows changing each web console logo separately. To obtain good results, it is important to take care of the background color of each logotype in order to obtain enough contrast:

<figure><img src="/files/mssF3Cp2bGrcO2wyMG8l" alt=""><figcaption></figcaption></figure>

And also, the menu icon, before clicking on "Add Brand" if it hasn't been created, or "Update Brand", if it has already been created:

<figure><img src="/files/eTj2skO3KpCPbe9TS94U" alt=""><figcaption></figcaption></figure>

{% hint style="info" %}
Logotypes need to be introduced in a PNG file format with a transparent background&#x20;
{% endhint %}

### **Custom Top Bar**

The top bar also has a big impact on the website aspect. The branding menu allows changing its aspect in two ways, the Top Bar Color and the text color:

<figure><img src="/files/CjtteaGnNCXCCElE8Hrx" alt="" width="563"><figcaption></figcaption></figure>

It is also important to take care of selected colors in order to obtain a nice contrast between the texts and background.&#x20;

### **PWA**

Thinger.io web console has been prepared with PWA Smartphone responsive features, allowing to create web apps with web console custom preferences that, when used on the smartphone allow a user experience very similar to a common APP, thanks to the creation of a custom logo in the main menu and hiding the web browser navigation bar.

<figure><img src="/files/AqN86f3HgcMrTS58o6YA" alt=""><figcaption></figcaption></figure>

To use the PWA on a smartphone, simply click on the "add to the main menu" option in the browser menu. This functionality can be applied in any of the web console interfaces, even in shared dashboards:

<figure><img src="/files/mnJJrJjq9IL97w57cmEw" alt="" width="302"><figcaption></figcaption></figure>

The PWA function parameters will be automatically configured based on the preferences of the other tabs of the web console rebranding. So it is not possible to introduce different ones. &#x20;

<img src="/files/-MF59frICGq3LKxM6MbO" alt="" width="563">

### Email Templates

When working on multi-user projects, the platform has a series of communications that allow basic communication with users to `Email Verification`, `Create Password`, `Forgot Password` and `Device Disabled`. These emails can also be customized by the developer, allowing the modification of:

1. Email Verification:

<figure><img src="/files/e4Sc5vf0MEuSzDlBy2wK" alt=""><figcaption></figcaption></figure>

* **From**: Is the sender's mail address that will be sent in the mail. Leave it empty to use the default configured address in the SMTP section
* **Name**: Sender's contact mail. Leave it empty to use the default name configured in the SMTP section
* **Subject**: Email subject.
* **Template**:  Configure the email template, working directly with the text or with the HTML code. This is a completed template:

<figure><img src="/files/JzFSHMbZQ1xFWD0YW329" alt=""><figcaption></figcaption></figure>

While this is the HTML code:

<figure><img src="/files/1rpILbzfks8VIR2R5Ayn" alt=""><figcaption></figcaption></figure>

{% hint style="info" %}
Every Template can be tested. The HTML code will be shown by pressing the 'Show Code' button, which then becomes the 'Hide Code' button.
{% endhint %}

2. Create Password:

* **From**: Is the sender's mail address that will be sent in the mail. Leave it empty to use the default configured address in the SMTP section
* **Name**: Sender's contact mail. Leave it empty to use the default name configured in the SMTP section
* **Subject**: Email subject.
* **Template**:  Configure the email template, working directly with the text or with the HTML code.

<figure><img src="/files/ZU3LrrDsrvXL6GfVZxUa" alt=""><figcaption></figcaption></figure>

3. Forgot Password:

* **From**: Is the sender's mail address that will be sent in the mail. Leave it empty to use the default configured address in the SMTP section
* **Name**: Sender's contact mail. Leave it empty to use the default name configured in the SMTP section
* **Subject**: Email subject.
* **Template**:  Configure the email template, working directly with the text or with the HTML code.

<figure><img src="/files/RqHGctlx2rdvzISl7PVF" alt=""><figcaption></figcaption></figure>

4. Device Disabled:

* **From**: Is the sender's mail address that will be sent in the mail. Leave it empty to use the default configured address in the SMTP section
* **Name**: Sender's contact mail. Leave it empty to use the default name configured in the SMTP section
* **Subject**: Email subject.
* **Template**:  Configure the email template, working directly with the text or with the HTML code.

<figure><img src="/files/wB5I0eeS6OLWmuhB3ZW8" alt=""><figcaption></figcaption></figure>

### Email Settings

This section allows customizing the email server for this specific brand. Note that it is also possible to modify it in the Server Settings to create a default configuration for the whole host, which will be applied to all the rebrands.&#x20;

<figure><img src="/files/3pH50LMzKcx50ZwoTQNV" alt=""><figcaption></figcaption></figure>

#### SMTP Configuration

The **Simple Mail Transfer Protocol**, better known as SMTP, is a protocol used to transmit email messages over the Internet. Thinger.io server instances contain an SMTP server that allows sending notifications to the instance users, which has been configured by default to use the same web domain as the IoT server host and the standard parameters, however,  these parameters can be customized by changing the server:

<figure><img src="/files/crzpDFXoGtR1MGlWdQoZ" alt=""><figcaption></figcaption></figure>

* **Host:** Is the SMTP address or web domain
* **Port:** Custom port to be used in order to send the notifications
* **Username**: SMTP username credentials&#x20;
* **Password:** SMTP username password
* **SSL/TLS** **Connection:** should be enabled if the SMTP has been installed on a different host, but can be disabled if it is running on the same one.

#### Amazon SES Configuration

The integration with Amazon SES provides a much simpler and scalable mailing tool. It can be selected instead of the common SMTP by selecting it on Email Type, and placing the credentials in its appropriate section. These credentials can be obtained on the AWS SES configuration section, as explained on[ **this link**](https://ongage.atlassian.net/wiki/spaces/HELP/pages/13795743/Amazon+SES+Setup+Tutorial)**.**

<figure><img src="/files/CisWhO5hQf92lSYPiWGl" alt=""><figcaption></figcaption></figure>

## **Modify Console Rebranding**

When the Console Rebranding profile is finished, a new entry will appear in the rebranding administration list:

<figure><img src="/files/LUFqBGwQruI7ovGYRDoG" alt=""><figcaption></figcaption></figure>

It is possible to access the configuration form and edit all parameters by clicking on the brand profile identifier, which is the associated web domain.

## Remove a Console Rebranding Profile

A rebranding profile can be easily deleted just selecting it in the Brand List and clicking the "Remove" button.

<figure><img src="/files/XNb1TkpAmHBwSIe63Pp8" alt=""><figcaption></figcaption></figure>

## Increase Rebranding Limits&#x20;

This feature is reserved for professional uses, so only Medium and Large subscriptions can create custom rebranding profiles. If the subscription didn't include any branding, it may be upgraded to a superior plan by contacting us at <support@thinger.io>.


# CUSTOM WEB DOMAIN

The private instance's default web domain can be replaced with different custom web domains, providing an additional white labeling feature and supporting multi-tenant deployments in which each customer can use its own URL to access a different rebrand of the cloud console. This feature can be easily managed using the Domain Administration Manager, available at the Thinger.io main menu.

{% hint style="warning" %}
This feature is only available in professional licenses, so only Medium, Large and Unlimited licenses can create custom web domain profiles. &#x20;
{% endhint %}

## Create a new Web Domain

Select "Domains" on the Thinger menu:

<figure><img src="/files/SEb2ulrWYDsGz9aCvunE" alt=""><figcaption></figcaption></figure>

Pressing the "Add Domain" button in the Domains List interface allows access to a domain creation form context, in which it is possible to introduce the new web domain for the instance and description as shown in the image below:&#x20;

<figure><img src="/files/GhUhkTwOlzryTIjModtD" alt="" width="563"><figcaption></figcaption></figure>

After adding the new web domain, it is necessary to verify the availability and create a secure certificate that will provide secure communications with the web console. To make this, press the "Verify Domain" button:

<figure><img src="/files/CIrTVtxDC4HVxmpWKGfs" alt=""><figcaption></figcaption></figure>

### Redirecting the CNAME Entry&#x20;

An important part of this process is to resolve the redirection between the new web domain and the private server's original web domain by going to the domain administration service.&#x20;

<img src="/files/-LuayrVw98WlaNs9ShrL" alt="" width="563">

Once the redirection has been made and the DNS service has propagated the A record, it is possible to verify the domain using the Domain Details button. If it is not validated, an error message will pop up. If it is validated, the following will be shown:

<figure><img src="/files/XnOvGI6SUtlozB4tZ3kI" alt=""><figcaption></figcaption></figure>

After this process, the domain will be ready to be used in a rebranding profile, allowing users to access the private instance with the custom URL.

## Modify Web Domain

In the Domain List, clicking on the domain name opens the web domain parameters. It is not possible to change the URL, if it needs to be modified, it is necessary to remove the profile and create a new one.&#x20;

## Remove Web Domain

Any Web Console profile can be easily deleted just selecting it in the Domain List and clicking the "Remove" button.

<figure><img src="/files/INcaeZLN4DfCFPg5r7EL" alt=""><figcaption></figcaption></figure>

Note that if a web domain is associated with a web console rebranding, removing it will prevent access to the console.


# OAUTH2 CLIENTS

Coming Soon...


# PROXIES

This feature that enables seamless integration of IoT devices and third-party platforms with Thinger.io platform and its plugins by means of raw server ports.

This feature allows the creation of bidirectional pipes with specific IoT resources, enhancing the interoperability of Thinger.io and other IoT ecosystems. The definition of a new Proxy profile will open a server port to receive traffic from a source in order to be pointed to a specific target port.  It is particularly useful to integrate **NB-IoT devices or to integrate with web servers located in remote devices without implementing a VPN.**&#x20;

The `proxies` feature is accessible at the administration section of Thinger.io's main menu, which displays the list of all the existing proxy profiles to be managed.&#x20;

## Create a new proxy

{% hint style="info" %}
Note that this feature is reserved for Admin role accounts, so other users with fewer privileges must contact the instance administrator to configure a proxy to point their account resources.
{% endhint %}

To configure a new proxy, just click the "Add Proxy" button and fill out the form according to the next instructions:&#x20;

<figure><img src="/files/BI04Xy3aiDct4WCgRWkp" alt=""><figcaption></figcaption></figure>

Starting from the top, the Proxy Settings section contains the parameters that will help to identify the specific proxy profile, and configure its behavior to be adapted to each particular use case:&#x20;

* **Proxy ID:** Unique identification, must not contain special characters&#x20;
* **Proxy name:** Mnemonic identification name for the proxy profile
* **Proxy Description**: A description will help in the future to understand the objective of the  proxy
* **Protocol:**  This parameter defines the behavior of the Thinger.io instance according to the purpose of the integration, as explained in the sections below.   &#x20;
* **Enabled:** The proxy profile can be created without changes to the infrastructure if this button is unswitched. This switch is also useful to stop the work of a proxy without removing the profile.&#x20;

The source configuration section allows specifying the port that will receive the connection from the external system.&#x20;

<figure><img src="/files/EZiNnCdBcCOsy9g6vAW9" alt=""><figcaption></figcaption></figure>

The `Target configuration` shows the destiny of the data received at the source port. Note that depending on the selected protocol, these parameters will change:&#x20;

### TCP/UDP

Data from `Source Port` will be sent to another TCP or UDP port accessible by the instance. It could be another internet server (specifying the IP address and port) or an instance in the same local host, such as Node-RED or a Grafana plugin. This behavior can be managed using the "Target Type" menu, which will modify the available properties as shown below:&#x20;

#### Host Address target type

Data from the raw port will be sent to a third-party internet server:

<figure><img src="/files/zSdZPfKZTluqjGJgVluj" alt=""><figcaption></figcaption></figure>

* **Target type** `Host Address`
* **Target Address:** Host IP Address that will receive data from the Thinger.io instance
* **Target Port:** Host port that will receive data from the Thinger.io instance
* **SSL/TLS (only with TCP):** Allows to secure the communication between Thinger.io instance and the target host. It is not required for localhost destinations, but strongly recommended when data is being sent to an external internet host.&#x20;

#### Plugin target type

The data from the raw port will be sent to a plugin port

<figure><img src="/files/eUzfuj3ZDLIykuYNSfaf" alt=""><figcaption></figcaption></figure>

* **Target type** `plugin`
* **Target Plugin:** To select one of the deployed plugins that is being executed on the server
* **Target Port:** Write here the port of that plugin that will receive de data from thinger.io
* **SSL/TLS (only with TCP):** Allows securing the communication between Thinger.io instance and the target host. IT is not mandatory for plugin communication, as they are on the same host.&#x20;

### TCP over IoTMP

This option allows for the retrieval of data from a third-party service that is accessible by an IoTMP device vía TCP communication. This means that we can extract data from SQL, files or any other resource that is not supported by an HTTP connection. &#x20;

<figure><img src="/files/b4MGLylUObiKG6y4rrRf" alt=""><figcaption></figcaption></figure>

* **Target type** `Host Address`
* **Target Username:** Account username that will own the connection
* **Target Device:** ID of the device that will host the connection
* **Target Address:** IP Address of the device that will receive data from the Thinger.io instance
* **Target Port:** The communication port of the device that will host the connection
* **SSL/TLS (only with TCP):** Allows to secure the communication between Thinger.io instance and the target host. IT is not required for localhost destinations, but strongly recommended when data is being sent to an external internet host.&#x20;

### HTTP over IoTMP

This proxy configuration allows connecting HTTP servers in the same network as the IoTMP device. Hosted itself or by other machines. The HTTP integration allows access to its web portal by means of an Iframe on the device profile.

<figure><img src="/files/deUXu4YwLchMY0BCBeT5" alt=""><figcaption></figcaption></figure>

* **Target type** `Host Address`
* **Target Address:** Host IP Address that will receive data from the Thinger.io instance
* **Target Port:** Host port that will receive data from the Thinger.io instance
* **SSL/TLS (only with TCP):** Allows to secure the communication between Thinger.io instance and the target host. It is not required for localhost destinations, but strongly recommended when data is being sent to an external internet host.&#x20;

## Edit Proxies

Clicking the identification of any profile allows opening the proxy settings form in order to modify any setup parameter (with the exception of the ID, which will require removing the profile to create a new one from scratch).

After applying the required changes, don't forget to press the blue "Update Proxy" button.&#x20;

## Remove Proxies

To delete one or multiple proxy profiles, select them from the list and click the remove button. Once a profile is deleted, it is not possible to restore it, so if in doubt, please consider using the "enable" switch located at the proxy settings menu.&#x20;

<figure><img src="/files/yaQua16AoHFD4NJKMTqI" alt=""><figcaption></figcaption></figure>


# CLAIM

The Claim feature is designed for developers who have built a commercial IoT product and need to **simplify and automate management tasks**. Instead of manually assigning resources to each customer, the claim process allows the end user (or their customer) to complete the onboarding and assignment themselves just using a link or QR code.

This approach significantly reduces operational overhead and enables scalable device and customer management.

#### What does a Claim do?

The Claim feature allows end users to **automatically associate platform resources** (such as devices, dashboards, etc.) into their own account, without the intervention of the developer or server administrator.&#x20;

The resources will be Shared from the developer’s account (the one that created the claim), and assigned through a Project (workspace) that is automatically created with predefined access permissions and roles.&#x20;

This ensures that each customer only has access to their own resources, while the developer retains centralized control.

## Configure a New Claim

Configuring a claim requires completing steps across two different features of the platform. While the claim profile must first be created, additional permissions must be granted to allow the end user to access the shared resources.

#### Required preconfiguration steps

1. **Create a Global Member Role**\
   A global role must be created and assigned to provide appropriate access permissions to the user during the claim process.  [***learn how to create Global Roles here.***](/business-features/projects#global-roles)

   > Optionally, it is also possible to request the user to provide configuration variables during the claim process (e.g., thresholds, calibration values, etc.).
2. **Enable Public Sign-Up** *(if required)*\
   If new users are expected to self-register in the platform, public sign-up must be enabled on the server instance.

<figure><img src="/files/o07XnUH4ciwxNh6fwXLc" alt=""><figcaption></figcaption></figure>

3. **Assign Claim Resources**\
   The **Claim Resources** section defines which existing resources, owned by the developer, will be shared with the user when the claim is executed.\
   Claims do not create new resources — they **share selected ones** with the end user via a **project** that is created automatically during the claim execution.

#### Adding resources

To create a new claim, go to the **Claims** section from the main menu.

<figure><img src="/files/nDBF1AzZDhlFU26lqqRb" alt="" width="262"><figcaption></figcaption></figure>

This view will display the list of existing claims, together withthe number of times each claim has been executed, along with the corresponding dates.

<figure><img src="/files/35LiJ1yfHqB4NA1JQfS3" alt=""><figcaption></figcaption></figure>

By clicking the `+Add Claim` button, you will access the claim configuration panel, where you can define a unique **identifier**, as well as a **name** and **description** for the claim profile in the **Claim Information section.**

Then, there are some configuration options that must be used to custom de claim behavior:

* **Enabled switch**: Allows controlling whether a claim is active, without the need to delete it.
* **Max Claims**: Defines the number of times the claim can be executed.\
  A value of `0` or an empty field allows **unlimited claims**, as indicated in the interface:\
  *“Number of maximum claims that can be done. 0 or empty for unlimited claims.”*
* **Claim resources:** Select the **Resource Type,** it can be anyone of Thinger.io resources and choose **one or more resources** from the list.

<figure><img src="/files/gqKK0opWu3g6D4sHPdgw" alt=""><figcaption></figcaption></figure>

The selected resources will be available to the user once the claim process is completed.

<figure><img src="/files/54r34B7RTWS6IGkwfFJO" alt=""><figcaption></figcaption></figure>

Finally, the advanced options section allows defining additional capacities for the claim, which are not mandatory to be filled but become quite interesting when managing complex infrastructures.&#x20;

* **Claim Domain**: Optional setting to define the domain where the claim code can be used. If no domain is specified, the platform will use the request’s hostname by default. This is useful in multi-tenant or branded environments where claims need to be restricted to specific domains.
* **Additional Project**: Useful to organize claimed devices under a specific project, allowing for centralized access and management.
* **Additional Members**: Users from the account’s member list who will also gain access to the shared resources through the claim.
* **Members Roles**: Optional global roles that will be applied to the additional members included in the claim’s project. These roles define their permissions over the assigned resources.

Once a Claim profile has been configured, the platform generates a claim URL and a QR code that can be used to start the claiming process:&#x20;

<figure><img src="/files/asPK9AHJhgvJBChYKEv9" alt=""><figcaption></figcaption></figure>

## Claiming a resource

This section describes the process of executing a claim to obtain access to a resource. It is the procedure intended for **end users**, starting from a QR code or URL provided in advance. The process involves a few simple steps, including resource verification and optional configuration of parameters.

#### Step 1: Account Authentication

The first step requires logging into the platform or creating a new user account.&#x20;

{% hint style="warning" %}
Public sign-up must be enabled on the server in order to allow new users to register.
{% endhint %}

<figure><img src="/files/ffdwbxoRk7HQieOEPz7b" alt="" width="375"><figcaption></figcaption></figure>

Once the account is created and access granted, the **Claim Resources** process begins. This consists of three steps. In the first step, the **Claim Identifier** is displayed, allowing verification that the correct claim process is being used.

<figure><img src="/files/naELXwrg5HAdOR1vvIOr" alt=""><figcaption></figcaption></figure>

#### Step 2: Resource Review

The second step presents an overview of all resources that will be assigned to the user account, along with the project where they will be placed.

> If the user account already contains other resources claimed through previous claim executions, the same project will be reused to group them consistently.

<figure><img src="/files/OC1yzPCDrwiwRF2kr7g7" alt=""><figcaption></figcaption></figure>

#### Step 3: Optional Resource Configuration

Before completing the process, it is possible to configure certain **resource parameters**. This is done by clicking the **"Configure"** button shown next to the claimed resource.

<figure><img src="/files/A7XXseB4ekMrOBUjKDew" alt=""><figcaption></figcaption></figure>

This functionality is especially useful for requesting contextual input from the end user, such as sensor calibration values, alert thresholds, or notification email addresses.

<figure><img src="/files/qYVaj6pV0AzLYQnDoXKk" alt=""><figcaption></figcaption></figure>

Once the claim process is completed, the assigned resource (e.g., a device) will appear in the **user’s resource list** (e.g., under *Devices*). However, ownership of the resource remains under the administrator’s account. This structure enables scalable management of large device networks while maintaining centralized control.


# IDENTITY PROVIDERS

## Identity Providers

Identity Providers allow users to sign in to your platform using external authentication services like Google, Microsoft, Auth0, Okta, PingOne, or any OpenID Connect (OIDC) compliant provider. This enables Single Sign-On (SSO) and simplifies user management by delegating authentication to trusted third-party services.

To manage identity providers, navigate to **Identity Providers** in the admin console.

### Creating an Identity Provider

Click **Add Identity Provider** to configure a new provider. The configuration is organized into several sections:

#### Basic Information

* **Identifier**: A unique lowercase identifier for this provider (e.g., `google`, `azure-ad`, `okta-prod`). This identifier is used internally and in URLs.
* **Name**: The display name shown to users on the login page (e.g., "Google", "Company SSO").
* **Description**: Optional notes for administrators about this provider's purpose or configuration.
* **Type**: The authentication protocol. Currently, only **OIDC** (OpenID Connect) is supported.
* **Enabled**: Toggle to enable or disable the provider. Disabled providers won't appear on the login page.

#### OIDC Configuration

This section contains the core settings for connecting to your identity provider.

**Domain**

The domain of your identity provider. This is used to discover the OIDC endpoints automatically via the `.well-known/openid-configuration` endpoint.

Examples:

* Google: `accounts.google.com`
* Microsoft/Azure AD: `login.microsoftonline.com/{tenant-id}/v2.0`
* Auth0: `your-tenant.us.auth0.com`
* Okta: `your-org.okta.com`
* PingOne: `auth.pingone.com/{environment-id}/as`

Use the **Test Connection** button to verify the domain is correct. A successful test displays:

* Issuer URL
* Authorization endpoint
* Token endpoint
* JWKS URI with key count
* Supported signing algorithms

**Client ID**

The OAuth2 client identifier provided by your identity provider when you register your application.

**Client Secret**

The OAuth2 client secret provided by your identity provider. This value is stored securely and masked in the interface.

**Authentication Method**

How credentials are sent to the token endpoint:

* **client\_secret\_post** (default): Client ID and secret sent in the request body
* **client\_secret\_basic**: Client ID and secret sent via HTTP Basic Authentication header
* **none**: No client authentication (for public clients using PKCE only)

Choose the method supported by your identity provider. Most providers support `client_secret_post`.

**Scopes**

The OAuth2 scopes to request during authentication. Enter scopes separated by commas or spaces.

Common scopes:

* `openid` (required for OIDC)
* `profile` - User's name and profile information
* `email` - User's email address
* `groups` - Group memberships (if supported)
* `offline_access` - Request refresh tokens

Default recommendation: `openid profile email`

**Callback URL**

The OAuth2 redirect URI that must be configured in your identity provider. This field is read-only and automatically generated based on your platform URL:

```
https://your-platform.com/oauth/callback
```

Copy this URL and add it to the "Allowed Redirect URIs" (or similar) setting in your identity provider's application configuration.

#### User Provisioning

Controls how users are created and managed when they sign in through this provider.

**Provisioning Mode**

* **Auto Provision** (default): Automatically create new user accounts when users sign in for the first time. User profile information is populated from the identity provider's claims.
* **Match Only**: Only allow sign-in for users that already exist in the platform. New users will be rejected.

**Allowed Domains**

Restrict sign-in to users with email addresses from specific domains. Leave empty to allow all domains.

Examples:

* `company.com` - Only allow users with @company.com emails
* `company.com, subsidiary.com` - Allow multiple domains

This is useful for enterprise deployments where you want to ensure only employees can access the platform.

**Email Trust Mode**

Determines how email verification is handled for users signing in through this provider:

* **Verify with Claim** (default): Trust the email only if the identity provider sends an `email_verified: true` claim. Otherwise, send a verification email.
* **Trust IdP**: Always trust emails from this provider without verification. Use this for enterprise providers where you control the user directory.
* **Always Verify**: Always send a verification email, regardless of the provider's claims. Use this for maximum security.

#### Display Options

Customize how the provider appears on the login page.

**Logo**

Upload a logo image for the provider. This appears on the login button.

* Recommended size: 64x64 pixels (for high-DPI displays)
* Supported formats: PNG, JPG, SVG

**Button Text**

Custom text for the login button. If not specified, defaults to "Login with {Provider Name}".

Examples:

* "Sign in with Google"
* "Company SSO"
* "Employee Login"

#### Attribute Mapping

Map claims from the identity provider's ID token to user profile fields. Most OIDC providers use standard claim names, but some may use custom attributes.

| Platform Field | Default Claim        | Description                  |
| -------------- | -------------------- | ---------------------------- |
| Username       | `preferred_username` | User's unique identifier     |
| Email          | `email`              | User's email address         |
| Name           | `name`               | User's full display name     |
| Picture        | `picture`            | Profile photo URL            |
| Website        | `website`            | User's website               |
| Company        | `organization`       | Company or organization name |
| Location       | `locale`             | User's locale or location    |

Only modify these mappings if your identity provider uses non-standard claim names.

***

## Provider-Specific Setup Guides

### Google

1. Go to the [Google Cloud Console](https://console.cloud.google.com/)
2. Create a new project or select an existing one
3. Navigate to **APIs & Services** → **Credentials**
4. Click **Create Credentials** → **OAuth client ID**
5. Select **Web application**
6. Add your callback URL to **Authorized redirect URIs**
7. Copy the Client ID and Client Secret

**Configuration:**

* Domain: `accounts.google.com`
* Scopes: `openid profile email`

### Microsoft / Azure AD

1. Go to the [Azure Portal](https://portal.azure.com/)
2. Navigate to **Azure Active Directory** → **App registrations**
3. Click **New registration**
4. Enter a name and select the appropriate account types
5. Add your callback URL as a **Redirect URI** (Web platform)
6. After creation, copy the **Application (client) ID**
7. Go to **Certificates & secrets** → **New client secret**
8. Copy the secret value

**Configuration:**

* Domain: `login.microsoftonline.com/{tenant-id}/v2.0`
  * Use `common` for multi-tenant apps
  * Use your specific tenant ID for single-tenant apps
* Scopes: `openid profile email`

### Auth0

1. Go to your [Auth0 Dashboard](https://manage.auth0.com/)
2. Navigate to **Applications** → **Create Application**
3. Select **Regular Web Application**
4. Go to the **Settings** tab
5. Add your callback URL to **Allowed Callback URLs**
6. Copy the Domain, Client ID, and Client Secret

**Configuration:**

* Domain: `your-tenant.us.auth0.com` (or your custom domain)
* Scopes: `openid profile email`

### Okta

1. Go to your [Okta Admin Console](https://your-org-admin.okta.com/)
2. Navigate to **Applications** → **Create App Integration**
3. Select **OIDC - OpenID Connect** and **Web Application**
4. Add your callback URL to **Sign-in redirect URIs**
5. Copy the Client ID and Client Secret

**Configuration:**

* Domain: `your-org.okta.com`
* Scopes: `openid profile email`

### PingOne

1. Go to your [PingOne Admin Console](https://admin.pingone.com/)
2. Navigate to **Connections** → **Applications**
3. Create a new **OIDC Web App**
4. Add your callback URL to the redirect URIs
5. Copy the Client ID and Client Secret
6. Note your Environment ID

**Configuration:**

* Domain: `auth.pingone.com/{environment-id}/as`
* Scopes: `openid profile email`

### Custom OIDC Provider

Any OIDC-compliant identity provider can be configured:

1. Register an application/client in your provider
2. Configure the callback URL as an allowed redirect URI
3. Obtain the Client ID and Client Secret
4. Find the OIDC discovery URL (usually `https://provider/.well-known/openid-configuration`)
5. Extract the domain from the issuer URL

Use the **Test Connection** button to verify your configuration is correct before saving.

***

## Enabling Federated Login

After configuring identity providers, you must enable federated login for users to see the providers on the login page.

1. Navigate to **Settings** → **Accounts**
2. In the **Authentication** section, enable **Federated Login**
3. Select which identity providers should be available
4. Save your settings

The login page will now display the configured providers in the "Or continue with" section.

{% hint style="info" %}
Note: Federated login can also be enabled at the brand level, allowing different brands to have different identity provider configurations.
{% endhint %}

***

## User Experience

### Signing In

When federated login is enabled, users see additional sign-in options on the login page:

1. Click the provider button (e.g., "Sign in with Google")
2. Redirect to the identity provider's login page
3. Authenticate with the provider (may include the provider's own MFA)
4. Redirect back to the platform
5. User is signed in (or account is created if auto-provisioning is enabled)

### Linking Accounts

Existing users can link their account to an identity provider:

1. Sign in with username/password
2. Go to **Account** → **Security**
3. In the **Connected Accounts** section, click to link a provider
4. Authenticate with the provider
5. The account is now linked

### Managing Connected Accounts

Users can view and manage their connected accounts in the Security settings:

* View all linked identity providers
* See the email associated with each provider
* See when each account was linked
* Unlink providers (with restrictions - see below)

#### Unlinking Restrictions

To maintain account access, users cannot unlink an identity provider if:

* It's their only authentication method, AND
* They don't have a password set

Users must either set a password or link another provider before unlinking.

***

## Troubleshooting

### Connection Test Fails

* Verify the domain is correct and accessible
* Check that the OIDC discovery endpoint is publicly accessible
* Ensure there are no firewall rules blocking the connection

### Invalid Client Error

* Verify the Client ID and Client Secret are correct
* Check that the callback URL matches exactly what's configured in the provider
* Ensure the application is not disabled in the provider's console

### User Not Created

* Check the provisioning mode - if set to "Match Only", users must exist beforehand
* Verify allowed domains if domain restrictions are configured
* Check the email trust mode settings

### Claims Not Mapping

* Use the provider's token debugger to inspect the actual claims
* Update attribute mapping to match the provider's claim names
* Ensure requested scopes include the claims you need

### Redirect Loop

* Verify the callback URL is correctly configured in both the platform and provider
* Check for cookie/session issues in the browser
* Ensure HTTPS is properly configured


# SERVER DEPLOYMENT

This section explains how to perform the process of subscription and deployment of a private Thinger.io platform server.

Freemium accounts are perfect for learning and testing the Thinger.io platform with only a few limitations. However, for getting the best performance and reliability of this platform and access to some advanced features that are essential for professional use, it is necessary to deploy a private Thinger.io Server.&#x20;

## Private Instance Benefits

Thinger.io supports private cloud deployments that can be automatically launched from the pricing page. Private instances are isolated servers for each customer, so the instance is not shared with thousands of other users from our community.&#x20;

The next list details every Thinger.io Private instance's advantages:&#x20;

* 100% **Private Server** hosted in the cloud or on-premise.
* **Unlimited** sampling intervals
* **Plugins** System Deployment with different extensions available.&#x20;
* **File Storage System** that allows saving context data or any kind of files
* **Multiple User Support** allows creating and managing individual customer accounts on the server. &#x20;
* **Multi-Tenancy Support** with multiple web-console rebranding profiles and web domains hosted by just one server instance. &#x20;
* Support for real-time **data aggregation**

## Hosting options

Private instances can be deployed within minutes over the main cloud provider hosts, but also in an On-premise server:

{% content-ref url="/pages/-Ly-0O\_dwTaD-BB1WN3b" %}
[Thinger.io Cloud](/server/deployment/thinger.io-cloud-server)
{% endcontent-ref %}

{% content-ref url="/pages/-Ly-0U0QerAhrMQEE14w" %}
[On-Premise](/server/deployment/on-premise)
{% endcontent-ref %}

## Managing subscription

The administrator of a private instance of Thinger.io can edit the preferences of the subscription using the management portal. For this, access the website [**https://billing.stripe.com/p/login/00g9D1fN50SIcpOfYY**](https://billing.stripe.com/p/login/00g9D1fN50SIcpOfYY)**,** a One Time Password will be obtained and sent to the associated email address upon execution of the request.

![](/files/hMAPhsnrQQ4VtpRgFHLm)

This portal allows managing subscription preferences such as **changing the administration email** accoun&#x74;**, modifying payment details** and also editing the **subscription Addons** for each license that has been contracted on the Thinger.io system:

![](/files/jmWVN9oyHhmaB3YzdnJV)

### Manage Payment Methods

It is possible to modify the payment method by accessing the section "Payment Methods", and choosing to make payments with a Credit Card or a Direct Debit that allows the domiciliation of the payment with SEPA transfers.

<img src="/files/TgOOXpxlURvJ3hVNBFsp" alt="" width="401">

### Addons contracting

Currently, Addons are contracted through the Thinger.io Billing department. [Contact us](https://thinger.io/contact-us) for more information.

* **App Rebranding**: Businesses interested in application rebranding are invited to inquire. Customization options are offered to align the app with a brand’s identity, providing a seamless experience for users.
  * **Brand Colors**: The app’s color scheme can be customized to match a brand.
  * **Logo and Icons**: Default icons and logos can be replaced with custom ones.
  * **Feature Adjustments**: The app’s features can be tailored to better suit specific business needs.
* **Extended Support**: This option is recommended in order to obtain Thinger.io engineers' development support with a 24-48h response time. All accounts can use the [community discussion](https://community.thinger.io) forum to obtain support from other community developers.

### Cancel subscription

Any subscription can be cancelled, with changes being applied at the end of the contracted billing period. Please note that Thinger.io does not refund partial subscription fees unless otherwise agreed.&#x20;

To cancel a subscription:&#x20;

1. Log in to the [subscription management portal](https://billing.stripe.com/p/login/00g9D1fN50SIcpOfYY)
2. Select the subscription to be canceled.
3. In the subscription administration panel, click on the `cancel subscription` option.

<img src="/files/AJUFFRv0e4ZJ5wzm4zyC" alt="" width="353">


# Thinger.io Cloud

## Subscribing and Deploying a Cloud Instance

This section describes the process to deploy a private Thinger.io Cloud instance within minutes by just accessing the [**Pricing Page**](https://thinger.io/pricing). This pricing is also a deployment system that will set up a private Thinger.io Server instance within minutes, just following the next three steps:&#x20;

### 1. Select a license

Private cloud instances can be deployed with different licenses, depending on the requirements, like host performance, bandwidth or other platform features like branding, custom domains, additional support,  plugins, etc. Once the cloud provider is selected, it is necessary to select the desired license:

![](/files/k2BFJ29ay8W96QCPRhiO)

This pricing includes the software license and all cloud expenses. Note that yearly subscriptions offer a discount over the monthly ones.&#x20;

The next table shows all the different features provided by each license as well as a desirable purpose specification. It is possible to select one license and change it in the future using the [subscription management portal](https://billing.stripe.com/p/login/00g9D1fN50SIcpOfYY).

<table><thead><tr><th width="191">Features</th><th width="178">SMALL</th><th width="184">MEDIUM</th><th width="211">LARGE</th></tr></thead><tbody><tr><td><strong>Devices</strong></td><td>100</td><td>1000</td><td>2500</td></tr><tr><td><strong>Plugins</strong></td><td>1</td><td>3</td><td>5</td></tr><tr><td><strong>Multi-tenant</strong></td><td></td><td>✓ (Up to 5)</td><td>✓ (Up to 15)</td></tr><tr><td><strong>White-labels</strong></td><td></td><td>✓ (Up to 1)</td><td>✓ (Up to 5)</td></tr><tr><td><strong>Server size</strong></td><td>M1</td><td>M2</td><td>M3</td></tr><tr><td><strong>Extended</strong> <strong>Features</strong></td><td>Extended</td><td>Business</td><td>Business Plus</td></tr><tr><td><strong>Support</strong></td><td>Community</td><td>Extended Support Available (Paid)</td><td>Extended Support Available (Paid)</td></tr><tr><td><strong>MQTT Support</strong></td><td>✓</td><td>✓</td><td>✓</td></tr><tr><td><strong>Daily Backups</strong></td><td>As a service</td><td>As a service</td><td>✓</td></tr></tbody></table>

Additionally, all these subscriptions provide:

* Unlimited Data Points, only limited by the underlying instance storage
* Advanced Analytics, meaning that aggregation windows are provided

#### Dedicated server

<table><thead><tr><th width="128">Size</th><th width="113">CPU</th><th>RAM</th><th>Storage</th><th>Network Transfer</th></tr></thead><tbody><tr><td><strong>M1</strong></td><td>2</td><td>1GB</td><td>40GB SSD</td><td>2TB</td></tr><tr><td><strong>M2</strong></td><td>2</td><td>4GB</td><td>80GB SSD</td><td>4TB</td></tr><tr><td><strong>M3</strong></td><td>4</td><td>16GB</td><td>320GB SSD</td><td>6TB</td></tr></tbody></table>

#### Additional features

<table><thead><tr><th width="198"></th><th>Small</th><th>Medium</th><th>Large</th></tr></thead><tbody><tr><td>Dashboards</td><td>Unlimited</td><td>Unlimited</td><td>Unlimited</td></tr><tr><td>Data Buckets</td><td>Unlimited</td><td>Unlimited</td><td>Unlimited</td></tr><tr><td>Endpoints</td><td>Unlimited</td><td>Unlimited</td><td>Unlimited</td></tr><tr><td>Access Tokens</td><td>Unlimited</td><td>Unlimited</td><td>Unlimited</td></tr><tr><td>File Storages</td><td>Unlimited</td><td>Unlimited</td><td>Unlimited</td></tr><tr><td>Asset Management</td><td>Unlimited</td><td>Unlimited</td><td>Unlimited</td></tr><tr><td>Projects</td><td>Unlimited</td><td>Unlimited</td><td>Unlimited</td></tr><tr><td>Syncs</td><td>Unlimited</td><td>Unlimited</td><td>Unlimited</td></tr><tr><td>Claims</td><td>-</td><td>Unlimited</td><td>Unlimited</td></tr><tr><td>Products</td><td>1</td><td>10</td><td>20</td></tr><tr><td>Proxies</td><td>-</td><td>10</td><td>20</td></tr><tr><td>Oauth Clients</td><td>-</td><td>3</td><td>5</td></tr></tbody></table>

### 2.  Configure license

After license selection and completion of the payment process, an email will be received containing a link to a page where the desired base hostname and deployment region can be chosen.

![Instance license preferences](/files/dNucy8gbSZlKwa0Gezmk)

These options are described in more detail:

* **E-mail**: This is the e-mail address that must be used when creating the Thinger.io account in the private instance deployed. It will be the main account with admin privileges, allowing the creation (if contracted) of new users, domains, brands, etc. It does not need to match the billing e-mail address.
* **Hostname**: Enter the hostname for the private IoT instance. This hostname will always be accompanied by the subdomain "aws.thinger.io" to access the host.
* **Region**: Cloud providers provide servers in different geographic locations. This option allows selecting the closest region to the business or project in order to minimize latency between the instance and the devices, users consuming information, etc. It is recommended to select the closest region to the project location.

### 3. Instance deployment

After the configuration has been done, a launch process will execute to deploy the environment, and a progress bar will be shown to give feedback on the current status of the deployment.

![Billing email](/files/39sNAlri0Yh4gqqhYrxV)

Once the process is done, follow the [Steps After Cloud Deployment](#steps-after-cloud-deployment).

## Steps After Cloud Deployment

As soon as the deployment process has been completed, a confirmation email will be sent to the `Admin E-mail` configured in the configuration process, meaning that the server is completely ready to be used. To start working with it, just follow the next steps:

### First Login

1. Access the server by writing the configured domain in a web browser, for example: <https://acme.aws.thinger.io>. This step shows the Thinger.io login screen.
2. Note that this server has never been accessed before, and it is a completely isolated instance, so no user account has been created. Then, it is necessary to click on `Create an account`button, and fill the form to create a new user profile using the `Admin E-mail` address provided while configuring the instance (any other address will not be authorized to sign up).
3. After creating the new account, it is possible to access the new server. It is not necessary to confirm the email address.

### Device Connection

When working with a private Thinger.io Cloud Instance, it is necessary to point devices to the newly created hostname. If the [Arduino](/arduino) or [Linux](/linux) client libraries are being used (e.g., for Arduino, ESP8266, ESP32, Raspberry Pi, etc.), a definition should be added at the top of the code to point to the host. The sketch should be modified as follows:

```
#define THINGER_SERVER "acme.aws.thinger.io"

// the rest of the code goes here
```

{% hint style="info" %}
If this host definition is not provided, the devices will try to connect with the public instance.&#x20;
{% endhint %}


# On-Premise

## Subscribing and Deploying On-premise Instances

Thinger.io IoT instances can be deployed on-premise or on any kind of cloud or local host, providing users with full control over the entire infrastructure. This license is particularly well-suited for enterprises that need to host their own data. This section outlines the process of obtaining an on-premise license and deploying a private Thinger.io on-premise instance within minutes.

### 1. Select the right license

On-premise instances can be deployed with different licenses, depending on the project requirements, mainly in terms of platform features like rebrands, custom domains, additional support, plugins, etc. License codes can be purchased [here](https://thinger.io/pricing).<br>

| Features                  | MEDIUM                            | LARGE                                | PERPETUAL                         |
| ------------------------- | --------------------------------- | ------------------------------------ | --------------------------------- |
| **Devices**               | 1000                              | 2500                                 | Unlimited                         |
| **Plugins**               | 3                                 | 5                                    | 5                                 |
| **Multi-tenant**          | Up to 5                           | Up to 15                             | Single                            |
| **Extended** **Features** | Business                          | Business                             | Business                          |
| **White-labels**          | 1                                 | 5                                    | 1                                 |
| **MQTT Support**          | ✓                                 | ✓                                    | ✓                                 |
| **Guest accounts**        | Unlimited                         | Unlimited                            | Unlimited                         |
| **Support**               | Extended Support Available (Paid) | Extended Support Available (Paid)    | Extended Support Available (Paid) |
| **Recommended use**       | Business B2B or B2B2C IoT product | Consultancies with multiple projects | Companies without limits          |

### 2.  Checkout and payment options

***

After payment is processed, an email will be received containing a link to begin the setup and installation process, along with the license token.

### 3.  On-premise install

Once the license token has been received by email, Thinger.io can be easily deployed on the host with a few commands. Before starting this guide, please install [Docker Engine](https://docs.docker.com/install/) and [Docker Compose](https://docs.docker.com/compose/install/) on the computer or server.&#x20;

{% hint style="success" %}
Install [Docker Engine](https://docs.docker.com/install/) and [Docker Compose ](https://docs.docker.com/compose/install/)before following this guide.
{% endhint %}

This guide assumes Thinger.io is being installed on a fresh Linux host with Docker support, as it will run databases like `MongoDB`, and will start listening on several ports: `80`, `443`, `1883`,`8883`, `25200`, `25202`, `25204` and `25206` . It will also create a root directory in `/data` where all the Thinger.io data and database information will be stored.

To start, just launch this command that will download the `docker-compose` file associated with the license:

```bash
curl https://subscriptions.thinger.io/v1/docker-compose.yml?token={LICENSE} -o docker-compose.yml
```

{% hint style="warning" %}
Never share or publish the LICENSE key as it may pose a security risk for the host. License keys are issued per host, so do not reuse them between hosts. &#x20;
{% endhint %}

Ensure that the `docker-compose` file has been downloaded correctly:

```bash
cat docker-compose.yml
```

It should display:

{% code title="docker-compose.yml" %}

```yaml
networks:
  backend:
    name: backend

services:

  # Thinger.io server
  thinger:
    image: thinger/server:alpha
    container_name: thinger
    user: root
    volumes:
      # for controlling docker engine
      - /var/run/docker.sock:/var/run/docker.sock
      # folder for storing thinger generated data (maxmind, certificates, plugins...)
      - /data/thinger:/data
    entrypoint:
      - thinger
      - -v0
      - --runpath=/data
    environment:
      - TOKEN={{TOKEN}}
      - HOST_VOLUME=/data/thinger
    network_mode: host
    restart: always
    logging:
      driver: "json-file"
      options:
        max-size: "200k"
        max-file: "10"
    healthcheck:
      test: ["CMD", "curl", "-f", "http://localhost/v1/server/healthcheck"]
      interval: 1m
      timeout: 5s
      retries: 3
      start_period: 2m
    depends_on:
      - mongodb

  # mongodb
  mongodb:
    image: mongo:8.0
    container_name: "mongodb"
    environment:
      - MONGO_DATA_DIR=/data/db
      - MONGO_LOG_DIR=/dev/null
      - MONGO_INITDB_ROOT_USERNAME=thinger
      - MONGO_INITDB_ROOT_PASSWORD={{SALT}}
      - MONGO_INITDB_DATABASE=thinger
    volumes:
      - /data/mongodb:/data/db
    networks:
      - backend
    ports:
      - 127.0.0.1:27017:27017
    command: mongod --maxConns 10000 --quiet
    restart: always
    logging:
      driver: "json-file"
      options:
        max-size: "200k"
        max-file: "10"

  # ouroboros
  ouroboros:
    container_name: ouroboros
    hostname: ouroboros
    image: pyouroboros/ouroboros
    environment:
      - CLEANUP=true
      - INTERVAL=600
      - LOG_LEVEL=info
      - SELF_UPDATE=true
      - MONITOR=thinger
    restart: always
    volumes:
      - /var/run/docker.sock:/var/run/docker.sock
    logging:
      driver: "json-file"
      options:
        max-size: "200k"
        max-file: "10"
    depends_on:
      - thinger

```

{% endcode %}

Then, if everything seems to be correct, just run this command to start all the processes defined in `docker-compose.yml` and run them in detached mode with `-d` option:

```yaml
docker-compose up -d
```

If everything goes fine, it should show something like this information (it may take several minutes to complete depending on the network connection):

```bash
root@docker-s-1vcpu-1gb-fra1-01:~# docker-compose up -d
Creating network "root_default" with the default driver
Pulling thinger (thinger/server:latest)...
latest: Pulling from thinger/server
da6fc00e4d0b: Pull complete
c3c0be9d84b3: Pull complete
9c1dda927878: Pull complete
4b8880231fa0: Pull complete
ec7cf4588dfa: Pull complete
f03c87626902: Pull complete
2c927b4e662e: Pull complete
0c0ed4ba2578: Pull complete
db577de2586f: Pull complete
Digest: sha256:156bb95f155ce9d3706c6a2f17d2a6750cf62e91777a610625910c7ebf780894
Status: Downloaded newer image for thinger/server:latest
Pulling mongodb (mongo:8)...
8: Pulling from library/mongo
2746a4a261c9: Pull complete
4c1d20cdee96: Pull complete
0d3160e1d0de: Pull complete
c8e37668deea: Pull complete
fc3987a82b4c: Pull complete
c75f139e0836: Pull complete
4acc9c8680b4: Pull complete
fb02df30d947: Pull complete
ae725ef3d2ce: Pull complete
e30f54ed6b43: Pull complete
bca9e535ddb8: Pull complete
9c3edad81b2a: Pull complete
6dbcf78fe5ae: Pull complete
Digest: sha256:7a1406bfc05547b33a3b7b112eda6346f42ea93ee06b74d30c4c47dfeca0d5f2
Status: Downloaded newer image for mongo:8
Pulling ouroboros (pyouroboros/ouroboros:)...
latest: Pulling from pyouroboros/ouroboros
8e402f1a9c57: Pull complete
cda9ba2397ef: Pull complete
d7153c29df0e: Pull complete
cbbf0d0a5ee3: Pull complete
c142a4eca653: Pull complete
829de03e02e7: Pull complete
499113b78598: Pull complete
7a2dcb0f00c1: Pull complete
2cd0c4b889bd: Pull complete
01c721e4643e: Pull complete
Digest: sha256:cfa29916459fb8c578fce084ce839a0d3bee478b83a21b6b1d10c6b78bc4a372
Status: Downloaded newer image for pyouroboros/ouroboros:latest
Creating mongodb   ... done
Creating ouroboros ... done
Creating thinger   ... done
```

Then, the Thinger.io instance and the associated databases will be running:

```bash
root@docker-s-1vcpu-1gb-fra1-01:~# docker ps
CONTAINER ID        IMAGE                   COMMAND                  CREATED             STATUS                    PORTS                                                                          NAMES
c7075dd45e5d        mongo:8                 "docker-entrypoint.s…"   43 minutes ago      Up 43 minutes             127.0.0.1:27017->27017/tcp                                                     mongodb
8ee8b4c924dd        thinger/server:latest   "thinger -v0 --runpa…"   47 minutes ago      Up 43 minutes (healthy)                                                                                  thinger
eee1b9479368        pyouroboros/ouroboros   "ouroboros"              47 minutes ago      Up 47 minutes                                                                                            ouroboros
```

Then, the on-premise instance can be accessed by pointing a browser to the host's IP address.

{% hint style="info" %}
The latest versions of Ubuntu come with `UFW` (The default firewall configuration tool for Ubuntu). It may be blocking Thinger.io ports by default. Configure it properly or disable it (not recommended)  with `sudo ufw disable`
{% endhint %}

## Steps After On-premise Deployment

To start working with the on-premise installation, just follow the next steps:

### First Login

1. Access the server by writing the local IP address of the host, for example: [https://1](https://acme.do.thinger.io)92.168.1.100. This step should show the Thinger.io login screen after accepting to use a self-signed certificate (The browser will prompt a security issue regarding the certificate).
2. Note that this server has never been accessed before, and it is a completely isolated instance, so no user account has been created. Then, it is necessary to click on `Create an account`button, and fill the form to create a new user profile using the `Admin Email` address provided in the license configuration (any other address will not be authorized to sign up).
3. After creating the new account, it is possible to access the new server. It is not necessary to confirm the email address.

### Device Connection

When working with a private Thinger.io instance, it is necessary to point devices to the newly created server. If the [Arduino](/arduino) or [Linux](/linux) client libraries are being used (e.g., for Arduino, ESP8266, ESP32, Raspberry Pi, etc.), a definition should be added at the top of the code to point to the host. The sketch should be modified as follows:

```
#define THINGER_SERVER "192.168.1.100"

// the rest of the code goes here
```

{% hint style="info" %}
If this host definition is not provided, the devices will try to connect with the public instance.&#x20;
{% endhint %}


# SERVER ADMINISTRATION

The **SERVER ADMINISTRATION** section serves as the central control panel for managing the core operations and configurations of the Thinger.io server instance. This comprehensive area provides administrators with essential tools to maintain, monitor, and troubleshoot the server environment effectively.

Within this section, detailed options are available for **License Setting**, to manage a server's licensing; **Server Settings**, for configuring critical operational parameters; **Cluster / Server Status**, to monitor the health and performance of a server or cluster; and **Server Logs**, for reviewing system activity and error records.


# License Setting

Any management related to the subscription of a Thinger.io license will be carried out through the customer portal, available at the following link:

{% hint style="success" %}
<https://billing.stripe.com/p/login/00g9D1fN50SIcpOfYY>
{% endhint %}

To access the portal, obtain a one-time key, which will be sent to the email address entered in the portal. The server administration email address provided during the subscription should be used.

<figure><img src="/files/hMAPhsnrQQ4VtpRgFHLm" alt=""><figcaption></figcaption></figure>

Once logged in to the platform, select the instance to be managed and follow the steps to upgrade or cancel the license.

{% content-ref url="/pages/-LpXslzFTUmRnSTJWV2l" %}
[SERVER DEPLOYMENT](/server/deployment)
{% endcontent-ref %}


# Server Settings

<figure><img src="/files/ZckJByJtCnXTJvHCwuZJ" alt=""><figcaption></figcaption></figure>

To provide managers of private Thinger.io instances with full service configuration capabilities, the web console offers a host management tool. This tool features various sections that allow for simply setting operational criteria. It is accessible in the "**Cluster Hosts**" tab of the main menu, which will display the Host List:

<figure><img src="/files/A6PMLjvW5uWxuhsiLLea" alt=""><figcaption></figcaption></figure>

After selecting a server profile, in the top-right corner of the server status dashboard, it is possible to select the option "Settings", in which the next configuration options will be displayed:

## IoT Server Settings

This platform allows the connection of various device types, for which it is equipped with different data ingestion engines. Each section explained below enables configuring the IP addresses and ports through which each device type is connected.

### HTTP Server configuration

First, enter the host in the host list. Then, click **'Settings'** to access its configuration. To set the connection parameters of the [**HTTP devices integration**](/http-devices) module on Thinger.io private instances:

<figure><img src="/files/EVL1dDcbEJBIdGYxabdY" alt=""><figcaption></figcaption></figure>

The configurable parameters are:&#x20;

* **Enabled:** Allows to disable the functionality of this ingest module.
* **Listen Address:** Allows to indicate the fixed IP address of the server, leaving it at 0.0.0.0 will use the default IP of the host.
* **TCP Port:** To configure the standard HTTP communications port with a customized value.
* **TLS Port:** To configure the standard TLS request collection port with a customized value.

### IOMTP Server configuration

It allows setting up the parameters for connecting Thinger.io to devices running the Thinger.io software client.

<figure><img src="/files/VfpdjbfObAyvKVDlfTNf" alt=""><figcaption></figcaption></figure>

The configurable parameters are:&#x20;

* **Enabled:** Allows to disable the functionality of this ingest module.&#x20;
* **Listen Address:** Allows to indicate the fixed IP address of the server, leaving it at 0.0.0.0 will use the default IP of the host.
* **TCP Port:** To configure the standard TCP communications port with a customized value.
* **TLS Port:** To configure the standard TLS request connection port with a customized value.

### MQTT Server configuration

This section allows setting the connection and data entry parameters of [**MQTT devices**](/mqtt) with Thinger.io's built-in MQTT broker.

<figure><img src="/files/RqEoRcqo6Aj2jkMWoiBE" alt=""><figcaption></figcaption></figure>

The configurable parameters are:&#x20;

* **Enabled:** Allows to disable the functionality of this ingest module.
* **Listen Address:** Allows to indicate the fixed IP address of the server, leaving it at 0.0.0.0 will use the default IP of the host.
* **TCP Port:** To configure the standard MQTT communications port with a customized value.
* **TLS Port:** To configure the standard MQTT TLS connection request port with a customized value.

## Proxies

This area is crucial for managing how the Thinger.io instance handles proxy connections, which are often used to establish secure and direct communication with devices, especially those located behind firewalls or Network Address Translators (NATs).

<figure><img src="/files/OU9Zv1RR7dKDJxbKiX2W" alt=""><figcaption></figcaption></figure>

Specifically, this screen allows configuring the **'Dynamic Ports Range'**. This feature defines a pool of ports that the server can dynamically assign to individual proxy connections. This is particularly useful for scenarios where devices establish outgoing connections (e.g., tunnels) that require a unique and temporary port for each session. The **'Port Start'** field sets the lowest port number in this range, while the **'Port End'** field defines the highest, thereby establishing the full spectrum of available ports for dynamic assignment.

## Email Settings

This section allows configuring the mail server in charge of sending notifications to the users of the IoT instance. A standard SMTP server can be used, but if the client has an AWS SES (Simple Email Service), which is more scalable and easier to use, it can be configured here to be used instead.

<figure><img src="/files/TmLT8huWcf0YTA0R0BMA" alt=""><figcaption></figcaption></figure>

In both cases, domain and sender parameters can be configured from the main section. Then, depending on the selected service, some specific parameters need to be specified:

### SMTP configuration

The **Simple Mail Transfer Protocol**, better known as SMTP, is a protocol used to transmit email messages over the Internet. Thinger.io server instances contain an SMTP server that allows sending notifications to the instance users, which has been configured by default to use the same web domain as the IoT server host and the standard parameters, however,  these parameters can be customized by changing the server:

<figure><img src="/files/dMpwYk89gPCaAorRTwAh" alt=""><figcaption></figcaption></figure>

* **Host:** Is the SMTP address or web domain.
* **Port:** Custom port to be used in order to send the notifications.
* **Username**: SMTP username credentials.&#x20;
* **Password:** SMTP username password.
* **SSL/TLS** **Connection:** should be enabled if the SMTP has been installed on a different host, but can be disabled if it is running on the same one.

### AWS SES configuration

The integration with Amazon SES provides a much simpler and scalable mailing tool. It can be selected instead of the common SMTP by selecting it on Email Type, and placing the credentials in its appropriate section. These credentials can be obtained on the AWS SES configuration section, as explained on[ **this link**](https://ongage.atlassian.net/wiki/spaces/HELP/pages/13795743/Amazon+SES+Setup+Tutorial)**.**

<figure><img src="/files/OLsJT358B7NaCOM5EUqa" alt=""><figcaption></figcaption></figure>

## Buckets Database Settings

The Thinger.io Data buckets system is very flexible, it can be configured to use the user's preferred system for the different storage and export processes supported by the platform&#x20;

### Storage Engine Settings

Thinger.io's data bucket storage engine can be configured to use different database systems such as MongoDB, DynamoDB, or InfluxDB (used by default in private instances). The "Buckets" section of "Host Settings" allows selecting the desired system via the "General" section and connect it to a database server of the same type, both for storage and export of the bucket data to files:

#### Using InfluxDB to store Buckets data

The default configuration of Thinger.io's storage engine uses InfluxDB system, as it provides some interesting features as data aggregation or using data tags to classify data over specific criteria. To set a different configuration of InfluxDB, the next four parameters need to be introduced:

<figure><img src="/files/dFa7H7JJFUahmc9WZT9F" alt=""><figcaption></figcaption></figure>

* **InfluxDB Host:** Place here the web domain or IP of the InfluxDB server
* **InfluxDB Port:** Place here the standard or custom InfluxDB port number
* **InfluxDB Username:** Is the username used to create the InfluxDB database
* **InfluxDB Password:** An authorization token obtained from the InfluxDB configuration console&#x20;

To obtain this information about an InfluxDB server, it is required to go to the InfluxDB configuration tool, as it is explained on: &#x20;

#### Using DynamoDB to store Buckets data

DynamoDB is a highly scalable and consistent storage system provided by AWS that performs really well on IoT projects. It is possible to configure a DynamoDB system to be used by the Thinger.io server to store data by selecting DynamoDB on the General section and introducing the following data into the system:

<figure><img src="/files/FeGUzMkGcAmvHRCBw3hx" alt=""><figcaption></figcaption></figure>

* **Table Name:** It is the identification of the DynamoDB table.
* **AWS Access Key ID:** This is the unique identifier for the AWS account, used to authenticate programmatic requests to AWS services. It acts as the public part of the AWS security credentials.
* **AWS Secret Access Key:** This is the confidential component of the AWS security credentials. It is used in conjunction with the AWS Access Key ID to cryptographically sign API requests to AWS, verifying the identity and protecting the account from unauthorized access. This key should be kept secure and never shared publicly.
* **Region:**  Enter here the AWS region in which the database is placed&#x20;

DynamoDB database configuration parameters can be obtained from the server as explained on the AWS documentation page.

#### Using MongoDB to store Buckets data

MongoDB is one of the most widespread database systems due to its robust operation and because it is an open-source project that offers free storage services for developers (companies that wish to make premium use of MongoDB can use the Atlas version). This database system can be used to store Thigner.io bucket data by entering a URI and some credentials:

<figure><img src="/files/2hOGW9y6SAPGuLiQSYdJ" alt=""><figcaption></figcaption></figure>

* **MongoDB URI:** Paste here the uniform resource identification obtained from the MongoDB configuration console
* **MongoDB Database:** Enter here the MongoDB database identifier
* **MongoDB Table:** Enter here the MongoDB table name in which the data will be stored

The server URI can be obtained from the "connect" context of the MongoDB or Atlas service as explained at this link.

### Bucket Export Settings

When a specific bucket is requested to be exported, the system creates a file to be stored in the instance's database. The export system allows selecting the database system where the resulting files will be stored, in the same MongoDB used to manage Thinger.io's user accounts, in the filesystem of the server instance or using Amazon S3 (a more scalable option and used by default in the public Thinger.io instances).

<figure><img src="/files/1A0pTZvzqNxo9jWuEbGj" alt=""><figcaption></figcaption></figure>

When **'Filesystem'** (as shown) is selected, specify an **'Export Path'**, which is the local directory where the bucket data will be saved:

<figure><img src="/files/EsujOEoeURKQF4rp604z" alt="" width="563"><figcaption></figcaption></figure>

To implement the **AWS S3** option, it must be selected on the General section and then configured to include the parameters:

<figure><img src="/files/n8ZLCzWmNnIyXVGfskTW" alt="" width="563"><figcaption></figcaption></figure>

* **Bucket ID:** It is the identification of the AWS S3 data bucket&#x20;
* **AWS Access Key ID:**&#x20;
* **AWS Secret Access Key:**
* **Region:**  Enter here the AWS region in which the database is placed&#x20;

DynamoDB database configuration parameters can be obtained from the server as explained on the AWS documentation page.

## SSL Settings

Communications between the devices and Thinger.io are secured using the TLS SSL protocol. The chain introduced by default is an ordered list of the security protocols to be used for the key exchange. Modifying that order, we can balance between a more secure configuration, better performance or compatibility.

<figure><img src="/files/xvXfAonooRkURV8Ig6Hr" alt=""><figcaption></figcaption></figure>

This section allows configuring the Secure Sockets Layer (SSL) settings for the Thinger.io server. This is essential for establishing secure, encrypted communication (HTTPS) between the server, connected devices, and web browsers, ensuring data confidentiality and integrity. Here, define **SSL Server Ciphers** (encryption algorithms), control the use of **Insecure Protocols**, and manage **Client CA Certs** for mutual authentication.

## Account Management Settings

Thinger.io private instances offer the ability to create user accounts, where each user profile can control their own devices and functionality according to a specific setting entered in the "accounts" section of the "settings" menu. Instructions on how to create and manage user accounts can be found at this link. Within this section, we will find two sets of properties to manage:

<figure><img src="/files/wyXsO78I3SkyX2OSsTua" alt=""><figcaption></figcaption></figure>

### User registration settings

This section manages all the parameters related to the registration of new users in an instance. By default, this configuration is set in private mode, that is, no public user will be able to register without the express authorization of the instance administrator, who will have to enter the email in the system manually. However, it is possible to enable the public signup and configure exclusion criteria through the "Registration" section, where a '**User Account Settings**' is shown as follows:

<figure><img src="/files/CPf3MrFQ4aTZv0BOryMl" alt=""><figcaption></figcaption></figure>

The following parameters can be configured

* **Admin Emails**: In this parameter, the instance administrator's email is entered by default; however, it is possible to add other addresses to perform user network administration functions, branding and or the operation of the IoT server.&#x20;
* **Invalid Email Domains**: Allows us to indicate the email providers that will be rejected, so that we can limit the access of certain users to a private IoT instance.&#x20;
* **Required Email Domains:** Allows to indicate one or several providers that will be authorized to create a user account in the private instance, rejecting all the others.&#x20;
* **Invalid Usernames**: Allows locking or reserving specific usernames on a private server instance.&#x20;
* **Min Password Length**: It is useful to force the user to keep safe passwords.
* **Max Password Length**: It is useful to force the user to keep safe passwords.
* **Public signup**: This button enables public user access to a private network, provided sufficient user licenses are available in the Thinger.io subscription.
* **Account Role:** Defines the default role that will be automatically assigned to new user accounts created on the server.
* **Require email notification**: Enables explicit confirmation of the email account.&#x20;
* **Recaptcha**: Activates the use of a security system against robot access to the system Recaptcha.
* **Recaptcha Secret:** Allows changing the security key of the Recaptcha system.

### User accounts feature limitations

Para permitir el control de las funcionalidades quedespliegan los usuarios de una instancia privada, el apartado "Limits" de "User Account Settings" ofrece una interfaz gráfica en la que cada privilegio puede ser configurado de forma independiente. Los valores introducidos en este menú se aplicarán a todos los usuarios por igual pero no restringirán las capacidades de la cuenta de administración de la instancia:

<figure><img src="/files/cCYun6e2Ioga9UoAHBm2" alt=""><figcaption></figcaption></figure>

<figure><img src="/files/zDHD95INI5GC2OlGtCPf" alt=""><figcaption></figcaption></figure>

The amount of the following features can be configured using this interface:

* Access Tokens
* Data Buckets
* Dashboards
* Devices
* Endpoints
* Plugins
* Projects
* Project members
* Storages
* Alarm Rules
* Alarm Instances
* Syncs
* Assets Types
* Assets Groups

  &#x20;

**Bucket Retention** defines how long data points are stored within a bucket before automatic deletion. It allows setting specific time limits or unlimited storage, crucial for managing data lifecycle and storage consumption.

## Deployment Settings

This section allows customizing the contact email to be used on the contact button of the platform's main menu:

<figure><img src="/files/hPyCSM5lyuOJs4I9wE7Y" alt=""><figcaption></figcaption></figure>

## Scripting Engine

This section allows managing the server's built-in scripting capabilities:

<figure><img src="/files/NUgv9BaUZWcJC7dhrXoT" alt="" width="563"><figcaption></figcaption></figure>

This section, specifically showing the **'NodeJS'** configuration, provides an **'Engine' toggle**. This toggle enables or disables the execution of NodeJS scripts on the server. When the engine is enabled, it allows for the implementation of custom logic, automation of tasks, and extension of the platform's functionality using JavaScript code.

## Restart Server&#x20;

The Thinger.io server needs to be reset after modifying any of these parameters in order to be configured in its files. The restart section allows executing the process easily:

<figure><img src="/files/siezd8NbiZyy6RNaEMqV" alt=""><figcaption></figcaption></figure>


# Cluster / Server Status

The 2.7.5 release of Thinger.io private instances introduced a dashboard to overview some host status variables. This is a very useful tool when working with multiple user accounts or extensive deployments because it allows the administrator to check the computational load of the server in order to evaluate if a more powerful subscription is required or if it is oversized.

{% hint style="info" %}
This feature is only available for the instance's manager account
{% endhint %}

The server monitoring terminal is accessible only to cluster/instance administrators by accessing the "**Cluster Hosts**" section of the Thinger.io main menu, which will display the Host List:

<figure><img src="/files/jimnPiQQryoJ7KJEaSsU" alt="" width="563"><figcaption></figcaption></figure>

The server list shows all the associated instances in the same cluster. If the IoT network consists of only one server, only one profile will be shown.

![](/files/-MCCfEwCtFHeUPlG_Hj7)

The values shown bring together the connection data of all devices and user accounts on the same server. The next parameters can be shown:&#x20;

* **HTTP Client Connections:** Connections made by devices that call the server's REST API.
* **HTTP Server Connections:** Made by running plugins.
* **Device Connections:** Is the number of Thinger.io software client devices connected.
* **HTTP Websockets:** Can be both thinger.io software client devices or web consoles opened.
* **HTTP SSE:** This is the number of server events that have been sent.
* **CPU Usage:** Is the load of the microprocessor, it increases with intensive data processing uses
* **RAM Usage:** Amount of RAM memory consumption, is actually the most critical variable, as it increases a lot with the number of deployed plugins.&#x20;
* **Disk Usage:** Amount of SSD consumed&#x20;

Thinger.io IoT server has been developed with a great effort to improve computational efficiency, allowing the creation of large device networks and ingesting thousands of data points per second with minimum overhead in the host. However, there are some factors that can increase the load on the server and cause malfunctions or data losses, such as:

1. The number of executing plugins, as each plugin deployed by each user account creates a Docker container, increases the RAM and CPU memory consumption.&#x20;
2. Intensive data computational processes over raw device data.
3. The number of user accounts and active interfaces: It will require thousands of users and requests at the same time to actually overload the system, so just a little instance can manage a huge network if no plugins are deployed.&#x20;


# Server Logs

Thigner.io server instances provide a logging console that allows visualizing the program status and events in real-time. These data can be used to evaluate the behavior of the server or any integration that is being developed.&#x20;

{% hint style="info" %}
This feature is only available for the instance's manager account&#x20;
{% endhint %}

## Start Logging

<figure><img src="/files/ROW8ZSBPLlcsw7U3W5Tu" alt=""><figcaption></figcaption></figure>

Follow the next steps to start logging the events of the server instance:

<figure><img src="/files/8GQbiwLcJFk8cQ4t8Xaf" alt=""><figcaption></figcaption></figure>

1. Go to the "Cluster Hosts" section of Thinger.io's main menu. The Host list displays all server instances connected within the same cluster, classified by their web domain.
2. Click the desired instance to access the server administration panel&#x20;
3. On the top right corner, choose the "Logs" tab to open the logging console
4. Press the "Connect" button to start the log sampling

<figure><img src="/files/7FBUxo8unjyqN2IrcS7q" alt=""><figcaption></figcaption></figure>

The structure of the log entries consists of six columns in which the following data is specified:

* **Date:** YYYY-MM-DD
* **Hour:** HH:MM:SS.SSS
* **PC**: Program Counter in seconds
* **Working Thread:** Thinger.io program has been created to optimize host architecture with multithread execution. This column identifies the thread that managed each event.
* **Program Module:** This column informs about the feature that is being used by each event.
* **Message:** Is the log content including a message type identification and a description

<br>

| Date | Hour | PC | Thread |   |   |
| ---- | ---- | -- | ------ | - | - |


# SERVER API

This section describes the basic messages that provide Thinger.io Server API to interact with its backend functionalities.

## Thinger.io API

{% hint style="success" %}
[New API documentation is **available on Swagger!** Can be checked out at *this link*](https://console.thinger.io/swagger)
{% endhint %}

All the examples described in this documentation define URL endpoints based on a relative path, assuming the host is just the server IP, domain, or the default Thinger.io server. For all calls issued over the default Thinger.io cloud, the host address will be:

```
https://api.thinger.io
```

*Notice* that if the Thinger.io server is being run on a private host or domain, a secure HTTPS request may fail without the configuration of an appropriate **SSL certificate**. While non-secure HTTP can be used for calls, it is not recommended in production environments.

## Authentication API

### REST API Authentication

All queries made to the API Rest interface must be signed in order to access the user resources. So, all requests must include an `Authorization` header that includes the access token to the account:

```
Bearer eyJhbGciOiJIUzI1NiIsInR5cCI6IkpXVCJ9.eyJleHAiOjE0ODYwNDkxNTcsImlhdCI6MTQ4NjA0MTk1NywidXNyIjoianQifQ.pkyG43xiEhDtUHLxuycYv156FGuvNh6nDKQ07kGcaGk
```

The access token is a JWT Token that needs to be obtained from the user credentials, from a refresh token, or just from a user-defined access token. So there are two different concepts:

#### Access Token

Is the token used for granting access to API requests? It should be included in the HTTP `Authorization` header along with the keyword `Bearer`. It can also be included as a URL parameter in the HTTP request, with the key `authorization` (case-sensitive), and the token as the value.

*Notice* that when this token is obtained from user credentials or a refresh token, it has a validity of **2 hours**. So it must be refreshed periodically in order to have a valid access token.

#### Refresh Token

The refresh token is a token that cannot provide access to the user resources, but can be used for getting a fresh access token in case it has expired.

This token, obtained with the user credentials or with a valid refresh token, has a validity of around **2 months** from the issue date and will be refreshed every time it is used to obtain a new pair of access and refresh tokens.

The idea behind the authentication is that user credentials are required to obtain both an access token and a refresh token. The refresh token can be kept in a secure place, and the access token can then be used to access user resources. Once the access token has expired. Then, use the refresh token to get a new access token and a new refresh token.

This way, if the account is used periodically, the user credentials are not required for the authentication process. If the access token is leaked in some way, then the attacker would have a short time span of access. If the refresh token is also leaked, it can be revoked manually to avoid its use for getting new tokens.

#### User Token

The tokens defined by the user in their account can be used just like any other access token to authenticate the request. However, contrary to the tokens obtained from the user credentials, this token does not expire by default, and the user can define the access level over the account resources. So, in this way, the user could define a token for accessing a single device or for writing to a data bucket without compromising other account resources.

This kind of token can be defined directly from the Thinger.io Console in the `Access Tokens` section.&#x20;

To add permissions to the token for writing to a single bucket, configuration can be performed to grant access to various resources and actions within the account:

<img src="/files/-LpXsmehVOGyeMUSYXQ-" alt="" width="563">

### Getting Tokens From User Credentials

This method allows getting both the access token and refresh token from the user credentials. It should be used the first time the user logs into the application.

* **URL**

  ```
    /oauth/token
  ```
* **Method:**

  ```
    POST
  ```
* **Content Type**

  ```
  Content-Type:application/x-www-form-urlencoded
  ```
* **Body**

  ```
    grant_type=password&username=username&password=password
  ```
* **Success Response:**
  * **Code:** 200
  * **Content:**

    ```javascript
    {  
       "access_token":"eyJhbGciOiJIUzI1NiIsInR5cCI6IkpXVCJ9.eyJleHAiOjE0ODYwNDgzNzcsImlhdCI6MTQ4NjA0MTE3NywidXNyIjoianQifQ.A-Vh715P6GjFDBkbh6TmNGxiHWl0KjbDq8tM4qsmTaI",
       "expires_in":7200,
       "refresh_token":"eyJhbGciOiJIUzI1NiIsInR5cCI6IkpXVCJ9.eyJleHAiOjE0OTEzMTE1NzcsImlhdCI6MTQ4NjA0MTE3NywianRpIjoiNTg5MzMwNTkzOWNiZWY0YWEzMDE1YWJiIn0.5Voenem4D90zPNqiS1oVBfguDzygwNzgmcmEi-4N-8Q",
       "scope":null,
       "token_type":"bearer"
    }
    ```
* **Error Response:**
  * **Code:** 401 Unauthorized
  * **Content:**&#x20;

    ```javascript
     {  
        "error":{  
           "message":"invalid username or password"
        }
     }
    ```

### Getting Tokens With Refresh Token

This method allows getting a fresh access token and refresh token from a valid refresh token. It should be called every time the access token has expired or the refresh token is likely to expire.

* **URL**

  ```
    /oauth/token
  ```
* **Method:**

  ```
    POST
  ```
* **Content Type**

  ```
  Content-Type:application/x-www-form-urlencoded
  ```
* **Body**

  ```
    grant_type=refresh_token&refresh_token=eyJhbGciOiJIUzI1NiIsInR5cCI6IkpXVCJ9.eyJleHAiOjE0OTEzMTIzNTcsImlhdCI6MTQ4NjA0MTk1NywianRpIjoiNTg5MzMzNjUzOWNiZWY0YWEzMDE1YWJjIn0.BYwRii9eL7jeQQQqMbuBEZAvwmmVRAU8kWYCNZEDn0s
  ```
* **Success Response:**
  * **Code:** 200
  * **Content:**&#x20;

    ```javascript
    {  
       "access_token":"eyJhbGciOiJIUzI1NiIsInR5cCI6IkpXVCJ9.eyJleHAiOjE0ODYwNTY0MjYsImlhdCI6MTQ4NjA0OTIyNiwidXNyIjoianQifQ.H7G4N3MMHxUO2gPHzG0a9N1lZ5--Gt56CC4HOiFMKLE",
       "expires_in":7200,
       "refresh_token":"eyJhbGciOiJIUzI1NiIsInR5cCI6IkpXVCJ9.eyJleHAiOjE0OTEzMTk2MjYsImlhdCI6MTQ4NjA0OTIyNiwianRpIjoiNTg5MzMzNjUzOWNiZWY0YWEzMDE1YWJjIn0.dqxbZegv4oemeDK6czDzQLRfA3da6NShBcseNLTn33Q",
       "scope":null,
       "token_type":"bearer"
    }
    ```
* **Error Response:**
  * **Code:** 401 Unauthorized
  * **Content:**&#x20;

    ```javascript
     {  
        "error":{  
           "message":"invalid refresh token"
        }
     }
    ```

### Detecting Access Token Expire

The access token expires in around 2 hours from its issue date. There are two ways to determine if the access token has expired in order to request a new one.

#### Checking the JWT contents

The first way of checking if an access token is expired is by parsing the JWT and decoding the payload data. An access token will have a payload:

```javascript
{
  "exp": 1486048377,
  "iat": 1486041177,
  "usr": "alvarolb"
}
```

The `exp` field is the Unix timestamp in seconds (UTC) when the token will expire. If the request is after this timestamp, then the request will fail.

#### Checking server response

It is possible to check the validity of an access token simply by trying to access any user resource. If the access token is expired, then the authentication will fail, and the API Request query will return a `401 Unautorized`.


# CHANGELOG

All notable changes on Thinger.io will be documented here.

## 7.0

**Community Release Date**: 04-02-2026

**Private Servers Release Date:**  \~18-02-2026

### Added

#### 🔐 Authentication & Security

* **Federated authentication via OpenID Connect (OIDC)**, allowing users to sign in using external identity providers (Google, Microsoft, Auth0, Okta, PingOne, and custom OIDC).
* **Multi-Factor Authentication (MFA)** support, including:
  * **TOTP** (RFC 6238) with QR code setup and backup codes.
  * **WebAuthn** security keys as a second factor.
  * **Passkeys** for passwordless authentication with cross-platform support.
* **OAuth2 Device Authorization Flow**, enabling secure device login via verification URLs.
* **Certificate-based authentication** for device auto-provisioning, with enhanced credential validation.
* **Login attempt limiting** for both password and MFA authentication, protecting accounts against repeated failed sign-in attempts.

***

#### 🚨 Alarms & Rules

* **Advanced alarm rule testing tools**, including:
  * Source data testing.
  * Dry-run mode for rule evaluation and notifications.
  * Copyable numeric variables from test results.
* New **`present` and `absent` comparators**, enabling alarms that detect missing or non-reporting devices.
* **GROUP BY support** for alarm data sources in MongoDB and InfluxDB.
* Variable-friendly naming for alarm data sources in time-series configurations.
* Alarm instance list now includes **Origin ID and Origin Name** fields.

***

#### 📁 File Explorer & File Management

* **New file explorer** for browsing and managing files on devices.
* Support for custom **terminal images** when accessing storage terminals.
* **Filesystem API for devices**, enabling upload, download and file management operations on compatible IOTMP devices (ThinRemote).
* **Filesystem API v2 for storages**, with streaming uploads for large files and improved path validation.

***

#### 🧩 Plugins & Marketplace

* **Modernized plugin marketplace UI**, with improved browsing and filtering.
* Improved plugin README rendering with:
  * GitHub-style markdown
  * Syntax highlighting
  * Alerts, tables of contents and proper image resolution
* Improved plugin image and asset resolution across the platform.

***

#### 📊 Monitoring & Metrics

* **Initial system and Docker monitoring components**, providing container-level metrics.
* New APIs for retrieving **container and runtime statistics**.

***

#### 🔌 Devices & Connectivity

* **Subdevice (virtual device) support**, allowing devices to be dynamically created from MQTT gateway flows.
* Improved device connectivity handling with **timeout-based lifecycle management** (sleep / wake / disconnect states).

***

#### 🧩 Products, APIs & Flows

* **Granular API endpoints** for product profile resources.
* Support for **handling endpoint call responses** in product profiles.
* Display of **full API endpoint URLs** when device identifier resolvers are configured.
* Support for **array field matching** in event filters.
* Product and device context is now fully included in resource stream events.

***

#### 🖥️ UI & Dashboards

* Migration of **text widgets**, **device console**, and **terminal components** from AngularJS to Angular.
* New **text widget** with color, icon, and value-based rules.

***

### Improved

* Updated **Node.js runtime to 24 LTS**, including an improved permission model.
* Improved **HTTP and streaming support**
* Improved **product configuration schema validation**, returning structured JSON error responses.
* Reduced unnecessary dashboard data refreshes and improved bucket data consistency.

***

### Fixed

* Fixed multiple **alarm rule evaluation edge cases**, including:
  * GROUP BY behavior without aggregation.
  * Missing data source handling.
  * Query limits affecting device status rules.
* Fixed authentication issues in mixed and federated flows.
* Correct handling of tag parameters in API requests and dashboards.
* Fixed CSV import issues related to timestamp parsing and normalization.
* Various UI fixes related to widgets, layouts and rendering.

***

### Internal

* Removal of legacy protocols and dependencies.
* Toolchain upgrade to **Ubuntu 24.04 and latest dependencies.**
* Performance improvements in scripting, sockets and request handling.
* Cleanup of deprecated code paths and noisy logs.

## 6.5

**Community Release Date:**  02-06-2025.

**Private Servers Release Date:**  09-06-2025.

#### Added

* Products now display a **graph view** of data sources and targets, helping visualize the flow configuration within the product profile.

<figure><img src="/files/AMHOGrrJwvxscvXaaYcI" alt=""><figcaption><p>Product Graph View</p></figcaption></figure>

* Added **property-level permissions** in products to control which device properties a project member can view or edit.

<figure><img src="/files/jzpORVZgDcijVFAaaPy9" alt=""><figcaption><p>Property-level permissions on products to control access on project members.</p></figcaption></figure>

* It is now possible to **edit dashboards on individual devices** (when inherited from a product). Editing can be restricted through new property permissions, allowing project owners to override the product dashboard while limiting access for end users.

<figure><img src="/files/MWS6wQSgPXizQbrBqc70" alt=""><figcaption><p>Dashboards editions at device level, to override a product dashboard.</p></figcaption></figure>

* Introduced **user properties**, available under *Profile > Properties*. These will be further integrated into other system areas such as alarms, custom forms, and automations.

<figure><img src="/files/VxM36tUz2ZcNBjEgqIa2" alt=""><figcaption><p>User Properties under Profile > Properties.</p></figcaption></figure>

* Added support for **MongoDB Transforms**, offering the same functionality previously available for InfluxDB. MongoDB now provides full parity in terms of data processing capabilities.

<figure><img src="/files/Edr7x44UYWBC4UXZ97ry" alt=""><figcaption><p>Data transform on MongoDB buckets backends.</p></figcaption></figure>

* Initial support for using **Device Buckets** as data sources in dashboards. Device Buckets are defined at the product level. This avoids the need to share a root bucket when sharing devices across projects.

<figure><img src="/files/UhuKzkaMnESZ2nSs6Dk5" alt=""><figcaption><p>Device Buckets are inherited from Product buckets definition.</p></figcaption></figure>

* Introduced **Group Hierarchies**: you can now create nested groups and subgroups, enabling more organized asset structures.

<figure><img src="/files/U5JtEBu4pRfz1Sjwo6nY" alt=""><figcaption><p>Group Hierarchies to enable subgroups.</p></figcaption></figure>

* Project members can now be **restricted to specific groups or subgroups** within a project.

<figure><img src="/files/FMnQ4u8EE29NAFqwtYeB" alt=""><figcaption><p>New member permissions to restrict access to specific asset groups.</p></figcaption></figure>

* New **Flow** feature in the Product Profile, enabling the definition of custom **sources** and **targets**.\
  You can now redirect data flows, for example, from a topic to an HTTP endpoint, or from a device property update to a topic. This feature deprecates the previous Endpoint, as it is much more versatile.

<figure><img src="/files/TSAfF4wgcp4xa3YKKnDa" alt=""><figcaption><p>New Flow feature in the Product Profile</p></figcaption></figure>

<figure><img src="/files/mEjBodAy0DVytRegwnPA" alt=""><figcaption><p>Flow configuration interface in the Product Profile, showing available target options such as Device Resource, Endpoint Call, and Product Function.</p></figcaption></figure>

* Initial support for **mTLS (mutual TLS)** on MQTT devices. This feature is currently under testing in selected deployments and is not yet intended for production use. Contact us for early access or details.
* Dashboards now implement lazy-loading to avoid fetching data from all tabs until they are accessed. This significantly improves loading times on large dashboards.

***

#### Enhancements

* Support for **JPG and WebP** formats when selecting plugin icons in the product plugin exporter.
* Added `build_date` and `license` to the `/v1/server/version` endpoint, preparing for Community On-Premise releases.
* Hide the billing link when using a Community license.
* Removed Twitter link from the menu and brand settings.
* Automatically **clean up Docker user networks** when the last plugin is uninstalled.
* Improved Docker logging by printing **command responses** to the plugin logs.
* Plugin installation dialog now **displays the resource ID** if the name is not available.
* Added support for **binary data** in HTTP requests with unknown content types.
* Dashboard placeholders can now **accept multiple values** from a single data source.
* Dashboard functions can now access placeholders via the **`shared` variable**.
* Product property forms now support **dates as keys** and **multi-field value inputs**.
* Multiple improvements to **MongoDB Bucket performance and data retrieval**.
* Plugin installer now correctly handles cases where only **development versions** of the plugin are available.
* User sessions are now preserved for 24 hours by default. Opening Thinger.io in a new browser tab within that period will no longer trigger permission prompts.

***

#### Fixed

* Fixed **public signup logic** for Community On-Premise instances.
* Fixed **console access over private IPs** in On-Premise deployments.
* Fixed **ApexCharts not displaying** inside Group Widgets.
* Fixed **incorrect data types** returned in the Server Statistics API.
* Resolved an issue where **global roles** were not applied in the Console.
* Fixed missing error **details in alert banners** from failed HTTP requests.
* Prevented database callback structures from being created on **virtual devices**.
* Fixed loading of HTML Widgets from **public storages**, regardless of access settings.
* Restored default **HTTP connection timeout** to 10 minutes.
* Fixed plugin configuration: **volumes and environment variables** were not applied properly.
* Fixed confirmation **message not updating** after changing the user password.
* Fixed the **multiple-resource-selector** making unnecessary API calls.
* Fixed **Control Widget** not working inside Group Widgets.
* Fixed **dashboard updates from buckets** not being reflected in real-time.
* Device status filters not working on alarm rules

***

#### Chore

* Updated Angular runtime to **Angular 19**, aligning with the latest development best practices.
* Upgraded **ng-zorro-antd** to version 19.3.1.
* Updated **OpenSSL** to version 3.4.1.
* Updated **CMake** to version 3.31.
* Updated **Boost** to version 1.87.
* Updated **mongoc** to version 1.30.1.
* Updated **mongocxx** to release r4.0.
* Updated **Crypto++** to version 2.36.0.

## 6.4

**Community Release Date:**  22-01-2025.

**Private Servers Release Date:**  29-01-2024.

#### Added

* **Plugin Installation Dialog**:

  * Support for custom volumes, enabling the mounting of custom file storage to plugins like Node-RED, FTP, etc.

  <figure><img src="/files/CLzR6VBeHH8It7Q7r0Pt" alt="" width="563"><figcaption><p>Custom Volumes to be attached to Plugins</p></figcaption></figure>

  * Support for configuring custom environment variables, e.g., for enabling Node-RED projects.

<figure><img src="/files/YhuKNgPmlvCvqzTt4Heq" alt="" width="563"><figcaption><p>Custom Environment Variables on Plugins</p></figcaption></figure>

* **Virtual Devices**: Initial support for devices that are always connected and can fetch data from external resources (e.g., endpoints via products). Example use case: creating a weather device that fetches weather data and forecasts.

<figure><img src="/files/xlvNFgyugzDDkCJITICC" alt="" width="563"><figcaption><p>Virtual Devices</p></figcaption></figure>

* **Product Plugin Exporter**: Export products to a file storage, with options to:
  * Set plugin image, name, description, and version.
  * Edit the markdown readme with images, changelogs, etc.

<figure><img src="/files/8DistZUhsnF4hqnAuzaF" alt=""><figcaption><p>New Product Plugin Exporter</p></figcaption></figure>

* **New Event**: `endpoint_call_response`, providing the result of endpoint calls.
* **Billing Menu for Admins**: Added a menu item linking to the customer portal.

<figure><img src="/files/lZAPrd7vEXAr0cdIFFow" alt="" width="208"><figcaption><p>New Billing </p></figcaption></figure>

* **Account Deletion**: Community users can now delete their accounts.

<figure><img src="/files/zm7rscOTqJlOyz8oQR0e" alt=""><figcaption><p>Community users can remove their accounts</p></figcaption></figure>

* **Enhanced Product Profile Resources**: Resources can now target endpoints, plugin paths, call other api resources, and enable operations based on their responses.
* **Experimental MongoDB Backend**:
  * Support for custom data retention policies for individual buckets.
  * Deprecates InfluxDB for new instances.

<figure><img src="/files/2fmRZkunaZ7XTfMu6ARa" alt="" width="563"><figcaption><p>MongoDB Backend as new </p></figcaption></figure>

***

#### Improved

* **Default Plugin Shell**: Updated to point to `/bin/sh` (used in minimal images). Configurable via the `task.shell` parameter.
* **Plugin Installation**: Plugins can now be installed directly from file storage, where Plugins are exported by default in the Plugin Exporter feature.
* **Plugin Management Page**: Migrated to Angular with new features:

  * Supports reading `readme.md` and images from file storage.

  <figure><img src="/files/UQo5ex3ASaBNe71TdhgW" alt=""><figcaption><p>New Plugin Management Page.</p></figcaption></figure>
* **Console Component**: Updated to Angular with text search functionality.
*

```
<figure><img src="/files/JiJCQFbHcTAP4jQYdp5j" alt=""><figcaption><p>New console component migrated to Angular</p></figcaption></figure>
```

* **Charts**: Migrated to Angular using `ng-apexcharts`, resolving several issues.
* **Location Updates**: Location properties now update with the current latitude and longitude values.
* **File Storage API**:
  * Added support for specifying storage paths using the `path` parameter.
  * Automatically creates parent directories when uploading a file via `PUT` if they do not exist.
* **Swagger API Schema**: Improved schema definitions for better clarity and usability.

***

#### Fixed

* **Bucket Operations**:
  * Resolved bucket writes with empty tag values.
  * Fixed bucket reads not using the `project` field.
* **Endpoint Calls**:
  * Fixed endpoint call tests are not displaying `application/json` body with UTF-8 encoding in response headers.
* **Plugin Environment Variables**:
  * Fixed creation of environment variables for plugins without default values.
  * Fixed issues when adding environment variables to such plugins.
* **Project Roles**: Fixed form creation for project roles.
* **Device Buckets**: Fixed an unauthorized message when a project member accesses `DeviceBucket`.
* **Resource Streams**: Fixed product resource streams not initializing for non-IoTMP/PROTO devices on connection.
* **Dashboard**:
  * Fixed window titles containing placeholders.
  * Fixed the removal of incorrect sub-widgets in group widgets.
  * Fixed missing sources in widgets within the group widgets.
  * Sharing a dashboard now automatically grants file storage read permissions if required (e.g., for HTML widgets).
* **Frontend API**: Fixed API resource permissions.
* **Mobile App**: Fixed issues with loading HTML widgets.
* **HTML Widgets**: Fixed reliance on public access to file storage.
* **Project Switching**:
  * Admin users within a project no longer see the info page.
  * Redirecting to the default state when switching projects now applies to all users.
* **Resource List**: Under some conditions, a resource list, i.e., devices, may display duplicated items.

## 6.3

**Community Release Date:**  17-06-2024.

**Private Servers Release Date:**  20-06-2024.

#### Added

**Products**

* 🗺️ Products now include a new functionality to configure how devices should be displayed on an Assets Maps widget, including icons, background colors, labels, and extended information when the icon is clicked. It supports conditional icons and background colors according to the latest bucket data, property values, or device status.

<figure><img src="/files/6TOJzyd9D8ZDR3HhDnlg" alt="" width="480"><figcaption><p>Assets Map with custom icons and fields.</p></figcaption></figure>

<figure><img src="/files/9Ja3jfr711aSaArpoj5r" alt=""><figcaption><p>Product Visualization configuration, with support for multiple icons, backgrounds, and fields.</p></figcaption></figure>

* 📡 Initial support for Device events as a source for Product resources (properties, buckets, endpoints), i.e., for reacting to device connection events.

<figure><img src="/files/A8pQeCECUD2vK6dbjm4H" alt="" width="435"><figcaption><p>Device Event as a new data source for properties, buckets, or endpoints.</p></figcaption></figure>

* 🧩 Initial support for multiple data sources on Product properties, i.e., listening for different events/resources to update a single property.

<figure><img src="/files/7cNwTZnulxxs0qMhsAwg" alt="" width="439"><figcaption><p>Multiple data sources on Product Properties</p></figcaption></figure>

* 🔄 Initial support for Product properties PATCH to allow partial updates.

<figure><img src="/files/fQG1UOAtFkxmAkwGT4bT" alt=""><figcaption><p>Product Property Patch feature for partial value updates.</p></figcaption></figure>

* 📥 Initial support for property data fetch on Product property, endpoints, and buckets template payloads. For example, it can be useful for modifying incoming bucket data based on device configuration.

  <figure><img src="/files/XU1biFFqhPR4WZizHDQZ" alt=""><figcaption><p>Property Data Fetch is now supported on properties, buckets, and endpoints template payloads.</p></figcaption></figure>

**Other**

* 📊 New Assets Table widget to display device information in a table, with the possibility to export data to a PDF report, CSV file, and filter and sort columns. The asset table can merge multiple pieces of information from each asset, i.e., from device state, buckets, or properties.

<figure><img src="/files/FaclSGp5YW4CQDY65SGJ" alt="" width="563"><figcaption><p>New Assets Table widget to display any asset information.</p></figcaption></figure>

* 🔔 New notification icon to stay updated on the latest news in the Thinger.io ecosystem, like server updates, new library releases, etc.

<figure><img src="/files/B0Cbgqk88ZeQuPZI5Ft6" alt="" width="377"><figcaption><p>New notification icon with the latest news in the Thinger.io ecosystem.</p></figcaption></figure>

* 🔒 Support for enabling legacy TLS protocols (TLS v1.0 and TLS v1.1) by reducing OpenSSL security level. This can be useful to support connectivity with old devices that don't support newer TLS versions. It can be configured under Cluster Host > Settings > SSL Certificates.

<figure><img src="/files/padyoOgFYKdjocvyl1Bl" alt=""><figcaption><p>TLS 1.0 and TLS 1.1. Support</p></figcaption></figure>

* 👥 Enable configuration for setting additional members and roles on project claims.

<figure><img src="/files/8UvjfHtvBPRU1rOUzn10" alt=""><figcaption><p>Automatically add new members/roles to the Claim Project, i.e., for supervision and management.</p></figcaption></figure>

* 🔌 Device services configured over Products will now use a configurable range of ports. This will simplify on-premise setup and speed up service access, as there will be no need to manage firewall rules dynamically.

<figure><img src="/files/aff9e3kS40YJVvviubps" alt="" width="525"><figcaption><p>New Host Configuration to set the dynamic ports range when using Product Services.</p></figcaption></figure>

#### Improved

* 🛠️ Product profile resources now simplify the payload configuration by allowing the selection of the source event, source payload, or a template payload. It also allows defining a custom payload processing function that is easier to configure than the current `{{payload:fn}}` definition.
* ✅ Schema validation error messages are both in the API and server logs.
* 📉 Reduce the required buffer size for each connected device.
* 📈 Increased maximum dynamic buffer size, supporting larger message sizes.
* 🔄 Product API Resource responses can now use template placeholders, including properties or other API resources.
* 📝 Improved claim resources landing with more informative messages.

#### Fixed

* 🛠️ Send `device_state_change` after product initialization.
* 🛠️ Installing development plugin versions.
* 🛠️ Bucket export download URL for buckets updated from a Project Member.
* 🛠️ Inside and outside expression comparators on alarms.
* 🛠️ Potential socket leak if the client did not try to perform the TLS handshake.
* 🛠️ Console permissions when a developer/admin closes an external project.
* 🛠️ Dashboard widget on community server not allowing the selection of a value.&#x20;
* 🛠️ Dashboard not showing configurable time selector.&#x20;

## 6.2.2

**Community Release Date:**  18-04-2024.

**Private Servers Release Date:**  30-04-2024.

#### Added

* Devices associated with a Product can now display bucket data directly from their pages, under the menu option called "Buckets". Each device can now list all the associated buckets and will filter out its data in the Data view. In future releases, we will add options for exporting, importing, and clearing data. This opens the possibility to avoid sharing raw bucket data with project members and effectively grant access only to their device data. With this feature, permissions are granted at the device level, with permissions like ViewDeviceBuckets, ReadDeviceBucket, ReadDeviceBucketTag, and ListDeviceBucketTags.

<figure><img src="/files/82nWDIk01tzkj3WuYwZv" alt=""><figcaption><p>New Buckets option for Product Devices</p></figcaption></figure>

* Introduced two new specific permissions for listing and reading bucket tags:`ListBucketTags`: Allows listing of bucket tags.`ReadBucketTag`: Allows reading of individual bucket tags. Previously, these operations required a more general `ReadBucketConfig` permission. This change provides more granular control over permissions.
* Claims now support including additional projects in the claim process. This way, claimed resources can be added automatically to parent "global" projects that can be used to manage the resources with different profiles.

<figure><img src="/files/d3twzNsopUZXao2lwfQ9" alt=""><figcaption><p>Additional projects where claimed resources will be included on the claim process.</p></figcaption></figure>

* Projects can be configured to limit bucket data access based on project devices. This functionality is useful for displaying aggregated data on the project dashboard or for restricting data access to project members. Additionally, this option can be set in the claim settings, ensuring that member projects are automatically created with this access limitation in place.

<figure><img src="/files/oqkPh6URNCuxVNSUPWxz" alt=""><figcaption><p>Limit Bucket data option on Project settings.</p></figcaption></figure>

* Device Tokens are now available for MQTT and HTTP devices, as they can have regular API resources over a product.

**Improved**

* The templating system (used on products or endpoints) can now process placeholders with spaces.&#x20;

  ```
  {{ payload : FunctionName = 22 }}
  ```
* Internal LRU cache with a modern and safer implementation.
* Removed unused 'curl' dependency on the base image, slightly reducing image size.

**Fixed**

* MQTT and HTTP devices can now also define Device tokens via the GUI, as they can define API resources over Products.
* Problem when removing nested resources, i.e., Bucket exports, Project Members.
* Bucket exports should not display set projects and clone context actions.
* Bucket exports are not loading by default.
* Apex Chart Widget preview is preventing the dashboard from being saved.
* Apex Chart Widget series colors are not being updated when the widget has titles.
* Problem when updating device locations.

## 6.1.0

**Community Release Date:**  08-04-2024.

**Private Servers Release Date:**  15-04-2024.

#### Added

* Brand PWA configuration includes support for uploading app icons directly from the filesystem. It also allows the configuration of both 'maskable' and 'any' icon purposes. Fixes <https://github.com/thinger-io/thinger-server/issues/84>

<figure><img src="/files/jyZbCJwwu0TkXIyh0zwA" alt="" width="375"><figcaption><p>PWA Images can be uploaded from filesystem</p></figcaption></figure>

* Brand Share Image includes support for uploading an image directly from the filesystem.

<figure><img src="/files/G1CiggDQsqr2k4u9nNJG" alt="" width="374"><figcaption><p>Share Image can be uploaded from filesystem</p></figcaption></figure>

* Brand Logos are now served from the web server instead of a JSON config, which should reduce load time.
* Brand PWA "start\_url" to make the console installable on Chrome.
* Products can now be configured to resend device data to a given endpoint. For example, fetch a given resource every n seconds, or take data from a topic, and resend it to another service.

<figure><img src="/files/gjDpyaTyIbwzz1iAQttU" alt="" width="375"><figcaption><p>Endpoint configuration on product profile.</p></figcaption></figure>

* Products can now configure bucket tags to be used on the automatic initialization. Fixes <https://github.com/thinger-io/thinger-server/issues/81>

<figure><img src="/files/e4gSQ8bi53I5tl1PElG2" alt="" width="375"><figcaption><p>Data tags configuration on the Product bucket.</p></figcaption></figure>

* Products can now handle Resource Streams, i.e., to create custom profiles for HTTP devices.

<figure><img src="/files/KTrD4C01vl5dahgRgPJz" alt="" width="375"><figcaption><p>New Device Stream target on Product API Resources.</p></figcaption></figure>

* The endpoint call event now provides context about the caller.

<figure><img src="/files/35f3isfSS5CD5QtswGVi" alt="" width="375"><figcaption><p>Endpoint call caller context</p></figcaption></figure>

#### Improved

* Add a resource cache for better performance on massive endpoint calls and bucket writes.
* HTTP devices have been migrated to a new connection schema where it is possible to log their statistics, like bytes sent, received, and connections, as any other MQTT or IOTMP device.
* HTTP devices can now be used inside dashboards with resources defined at the product level.
* Device property selector for HTML widgets allows selecting any parent node (with nested values), or all property values by not selecting any field. Fixes <https://github.com/thinger-io/thinger-server/issues/16>
* Property PATCH now supports regular JSON for partial property updates. Fixes <https://github.com/thinger-io/thinger-server/issues/16>
* Brand icons and logos are now served from the filesystem instead of a data URL, improving page load.
* Dashboard HTML widgets from external storage no longer require public storage access. In the case of members of a project, they will require read access to the storage.
* Product properties, topics, resources, and functions can be generated now by calling a product function.&#x20;
* Product bucket writes can now override tag values based on the write payload. Previously, tags like device were always being set by the product, discarding any "device" field present on the payload.
* Compatibility with OpenSSL 3.0 on SSL certificate provisioning.
* IP Geocoding automatic updates.

#### Fixed

* Apex Charts widget colors do not honor time series color configuration.
* Binary data on a product payload is not processed correctly.
* Visual Studio Code is not opening the file storage correctly.
* Products with just "run" resources were not displayed on the API explorer.
* Product profile list for buckets, endpoints, auto provision, and api resources were always displaying "Property" instead of the resource type.
* The info page displays on empty or restricted resources.
* Statistics on socket count.

## 6.0.0

**Release Date:** 11-03-2024

#### **Added**

* **Property Forms 📝** : Allow creating custom forms for improving the user experience when setting values inside a property, i.e., when configuring a device. The form can be defined at a Product level, and it is currently supported by [Formly](https://formly.dev/).&#x20;

<figure><img src="/files/KfOWoMneb80MEgveUEo7" alt="" width="457"><figcaption><p>Property Forms</p></figcaption></figure>

<figure><img src="/files/BjiYPvqFfFvKQaDSluRP" alt="" width="398"><figcaption><p>Device property editor using a form</p></figcaption></figure>

* **Property Location** 📍: Location properties now display a map for picking the address directly from the map or via a search bar for using an address. Once an address is selected, it automatically fills in the coordinates and timezone.

<figure><img src="/files/w5NmJWarh2hT45vHbuKy" alt="" width="398"><figcaption><p>Property location editor</p></figcaption></figure>

<figure><img src="/files/n4IiRESLQujC441ULQKl" alt="" width="396"><figcaption><p>Property raw fields generated by location editor.</p></figcaption></figure>

* **Dashboard Functions** ⚡: Dashboard now supports creating custom functions for processing any data used in the dashboard, i.e., for changing units, cropping decimals, or filtering values. Conversion functions can be selected in the data source configuration.

<figure><img src="/files/9VGOesB5fmbu1SGXA6ay" alt="" width="454"><figcaption><p>Dashboard Functions.</p></figcaption></figure>

<figure><img src="/files/n4KNujwcJqFKqw6OZdKT" alt="" width="456"><figcaption><p>Source processing using Dashboard Function.</p></figcaption></figure>

* **Dashboard Placeholders** 🏷: Dashboard now supports settings placeholders from a fixed value or a device property. Placeholders can be used in any string field on the dashboard, i.e., titles, units, or even inside functions to change the behaviour of the function depending on the current device configuration.

<figure><img src="/files/9wZNvmv8JIPXophycPph" alt="" width="455"><figcaption><p>Dashboard Placeholders.</p></figcaption></figure>

<figure><img src="/files/MXL4BMIKu53UyRPcIM15" alt="" width="455"><figcaption><p>Dashboard Placeholder used inside a Unit Field.</p></figcaption></figure>

<figure><img src="/files/3VLUUI0OdMBGJ3SlPs8F" alt="" width="454"><figcaption><p>Dashboard Placeholder used inside Dashboard Function.</p></figcaption></figure>

* **Dashboard Property Button** 🆕 : New "Property Button" widget for opening device properties for modification, even if they have a Property Form defined.

<figure><img src="/files/KxnfWRAatodmFRnVzux1" alt="" width="458"><figcaption><p>Property Button Configuration.</p></figcaption></figure>

<figure><img src="/files/jVB404Gf4cxBGrlPKrlU" alt="" width="177"><figcaption><p>Property Button on Dashboard.</p></figcaption></figure>

* **Dashboard Group Widget (BETA)** 🔠 : New Group Widget that brings the possibility to add any number of widgets inside a parent widget.&#x20;

<figure><img src="/files/YTnae17dipD7Hz6c6PM1" alt=""><figcaption><p>Group Widget</p></figcaption></figure>

* **Dashboard Property Table (BETA) 🔠** : Introducing a new widget that enables quick editing of properties for a device or a set of devices. This widget includes various built-in controls such as text display, input text, input number, slider, color selection, switch, a save button, and an edit button. These elements can be configured in each column to patch a single property value.

<figure><img src="/files/BlUh443evYfugh1ENw7j" alt=""><figcaption><p>Property Table</p></figcaption></figure>

<figure><img src="/files/mvRdnlV3H1gX9yz76a4b" alt="" width="462"><figcaption><p>Property Table Configuration</p></figcaption></figure>

* **Claiming Feature**☝️: The Claiming Feature is a versatile and user-friendly tool designed for administrators to configure and expose a selected number of resources, such as devices, for end-user claiming. This feature enables administrators to set up various resources that end-users can subsequently request effortlessly. Upon a successful request, these resources, like specific devices, are automatically integrated into the end-users' accounts. This streamlined process not only enhances user experience by simplifying resource acquisition but also provides administrators with efficient control over resource distribution and management.

<figure><img src="/files/fK3V0zT7I4H6u1jRp5x4" alt=""><figcaption><p>Claim Configuration</p></figcaption></figure>

One of the key strengths of this feature is its flexibility in claiming methods: users can initiate a claim through a directly generated URL, by scanning a QR Code, or by using a specific Claim Code:

<figure><img src="/files/cLUp4o4OzUkVYqnPYbST" alt=""><figcaption><p>Claim Details</p></figcaption></figure>

<figure><img src="/files/wVfHblOCYdavU7YWiwIH" alt="" width="563"><figcaption><p>Claim Process - Initial Step</p></figcaption></figure>

The second phase shows:

<figure><img src="/files/2g9rI9abT3ix9qyGNVoL" alt="" width="563"><figcaption><p>Claim Process - Review</p></figcaption></figure>

Once the claim is completed, the process may request the configuration of the devices, i.e., via the Property Forms defined on the product.&#x20;

<figure><img src="/files/SvgJuJBsl9jaOWyUrM6m" alt="" width="563"><figcaption><p>Claim Process - Complete &#x26; Configure</p></figcaption></figure>

* **Configurable Brand Accounts**👨‍💼: We've introduced a new "Accounts" section for each brand. This enhancement allows more control over brand-specific behaviors, including:

  * **Cross Sign-In Control:** Determine whether users registered with one brand can log in to another, thereby enhancing security and user management.
  * **Public Sign-Up Options:** Choose whether to allow public sign-up for each brand, providing flexibility in user onboarding.
  * **Automated Role Assignment:** Set specific account roles for users who register through public sign-up, such as automatically assigning 'member' status for device claiming purposes.

  This update offers more customization to better align with the brand's unique operational needs.

<figure><img src="/files/5jgTUDbKwVfOdjHQ2IjS" alt=""><figcaption><p>Brands Accounts Configuration</p></figcaption></figure>

* **Configurable Brand Scripts** 🖥️: An update has been released that allows for the configuration of custom scripts for a brand's `index.html`. This enhancement facilitates the integration of tools such as Google Tag Manager and the monitoring of customer traffic.

<figure><img src="/files/Mdtn7vhKFawlOlKZjX1A" alt=""><figcaption><p>Brand Scripts Configuration</p></figcaption></figure>

* **New Permissions** 🔒: Console is introducing an array of specific new permissions, enhancing the granularity with which administrators can control member access and actions within the console. This update distinctly separates permissions for actions performed through the API from those executed directly on the console interface. In the current version, all existing permissions will continue to function as before. However, future updates will require the explicit assignment of 'View' permissions to maintain the access level. This change lays the groundwork for more precise and customizable user role management, ensuring enhanced security and efficiency in operation. At this moment, they are partially released for Devices, but will be covering the whole console in future updates.

<figure><img src="/files/GLcAbVNcxvXK5U74bmv1" alt="" width="563"><figcaption><p>New View</p></figcaption></figure>

* **Updated Editors** :woman\_technologist:: Now, editors are based on Monaco (the editor from Visual Studio Code) with support to maximize the editor and copy the contents:

<figure><img src="/files/A6lG9JsLjvxQw7S8Rvz9" alt="" width="375"><figcaption><p>New Code/Value editor in the console.</p></figcaption></figure>

* **New Icon Picker** :unicorn: :  There is a new icon picker with a much greater variety of icons and improved search capabilities.

<figure><img src="/files/crBYSd1QOsKEXAIAzpOl" alt="" width="563"><figcaption><p>New Icon Picker</p></figcaption></figure>

#### **Improved**

* Double-click on Widget now opens the Widget editor!
* Create and update properties' performance.
* Time series data should not present data wraps anymore.
* Internal Google Maps loader to potentially avoid multiple loads.
* Buckets API query now supports the "group\_by" parameter.
* Move Swagger to an Angular component. New URL: <https://console.thinger.io/swagger>
* Initial deprecation of InfluxDB v1.
* Widget add time series automatically selects a different name and color for each series.
* Dashboard source switching now allows switching between bucket tags, with minimum and maximum selected tags.
* Dashboard internals.

#### **Fixed**

* Push button widget not working on mobile devices.
* Real-time dashboards now work properly with project members and shared dashboards.
* Fixed the issue where the dashboard widget with device resource data source was showing offline, despite the widget receiving data.
* Deletion event not triggered for nested resources, i.e., device property.
* Creation event not triggered for property resources.
* Data bucket storage from Products using device resources with a fixed interval randomly stops writing.
* Add Syncs to the tokens' actions.
* Dashboard editing is not being disabled on non-active tabs.
* Token configuration was missing the description field.
* Delete resource from the console, sending parameters like index, count...

#### Core

* Partial migration from AngularJS to Angular 17
* Update OpenSSL to versión 3
* Update Boost to 1.83.0
* Update Mongoc to 1.25.1
* Update Mongocxx to 3.9.0
* Update Crypto++ to 8.9.0

## 5.3.7

**Release Date: 30-11-2023**

**Fixed**

* Issue while displaying the default project on member accounts.
* Reset password not working for some email addresses.

## 5.3.6

**Release Date: 24-10-2023**

**Added**

* Support for HTTP\_HOST and HTTPS\_HOST environment variables for HTTP requests over a proxy.
* Support for disabling HOSTNAME resolutions on installed plugins, i.e., useful for plugins that require querying an external public IP (like FTP).

**Improved**

* Prevent large navigation breadcrumbs from overlapping the right menu button.

**Fixed**

* Device link to a Product web page not working on mobile devices (in the aside menu).
* Error while updating account limits.
* Support for 303 HTTP See Other status.

## 5.3.2

**Release Date: 04-07-2023**

**Added**

* Widgets now have a "Show Offline" parameter to "turn off" the widget if the data is not recent.

<figure><img src="/files/2fxmqsgxq5y3GTdOOcky" alt=""><figcaption><p>Show Offline Configuration based on Timespan.</p></figcaption></figure>

<figure><img src="/files/RODumpu6mjS2cKVR1xNX" alt=""><figcaption><p>Widget displayed as "Disconnected".</p></figcaption></figure>

* Product API Response can now be sourced directly from a function.
* Product API Response can now be sourced directly from an IOTMP resource.

**Improved**

* Internal HTTP client stability.

**Fixed**

* Problem while counting active alarm instances on the menu.
* Alarms that are not triggering notifications on creation when it has immediate activation.
* Alarms that do not allow for selecting hours as reminder intervals.
* IOTMP with multiple property stream subscriptions.
* Products that do not process the API Responses payload configuration, but return just the original payload.
* Input template params to Product API Request targeting functions are not being correctly processed.
* Plugins that require a MongoDB user to interact with the database fail to upgrade.
* Dashboard widget settings are closed when removing the widget background.

## 5.3.0

**Release Date: 19-06-2023**

**Discussion Topic:** [**Thinger.io Community**](https://community.thinger.io/t/thinger-io-iot-platform-version-5-3-0/4784)&#x20;

**Added**

* New Alarms feature ⏰ (BETA)! A completely new solution for managing IoT alarms, which includes rule definitions and alarm instance management. Some key features of the new solution:

  * Multiple data sources for configuring alarm triggering include data buckets, device properties, and device state.
  * Multiple severities: High, medium, low, none.
  * Independent activation and normalization conditions, including confirmations based on timespan or several consecutive events.

  <figure><img src="/files/EJ8x96EI2xCpb39z4G2u" alt=""><figcaption><p>Alarm Rule Configuration</p></figcaption></figure>

  * Multiple endpoint notifications on activation, normalization or reminder, i.e., for sending an email, a message to mobile, etc.
  * Alarm instance management via Acknowledge, Shelve, Latch, or Clear, including reactivation timeouts and operator annotations.

<div align="center" data-full-width="false"><figure><img src="/files/cRpnXLI7u1unui8WcoSk" alt="Alarm Instances"><figcaption><p>Alarm Instances</p></figcaption></figure></div>

* Support for cloning almost any thinger.io resource, from dashboards to data buckets, file storage, and projects.

<figure><img src="/files/bkfghNsqooxqZqpxaMDO" alt=""><figcaption><p>Clone Resource Functionality</p></figcaption></figure>

* HTTP endpoints now support embedded NodeJS 🧑‍💻 scripts for custom payload processing when calling third-party services.

<figure><img src="/files/HFeI3paTSLw3mvoUrqpC" alt=""><figcaption><p>HTTP Endpoints with custom NodeJS Payload processor</p></figcaption></figure>

**Improved**

* The bucket list automatically refreshes the bucket state, i.e., when it finishes exporting or importing, which happens on a clone operation.
* IOTMP proxies now work correctly with TLS endpoints.
* HTTP over IOTMP now correctly supports WebSockets.
* Resource list and navigation:
  * It is possible to change the maximum number of elements to display per page.
  * Page navigation/sorting is not reset after entering one element and going back to the list.
* The changelog is now available at <https://docs.thinger.io/server/changelog>.

**Fixed**

* Remove project properties and project roles from the database on project deletion.
* The bucket field selector now displays an input text for manually selecting the fields if the latest values cannot be queried, i.e., when they are older than one week.
* Double loading of HTML widgets when the dashboard is open.&#x20;
* Proxy configuration was not displayed correctly if the source was different than TCP.
* The bucket export list is not being displayed under some circumstances.
* Resource lists on the front-end are not showing the correct permissions for members.
* Prevent members from navigating to specific resources if no permissions are available.
* Update the Device permission on the front-end.

## 5.2.2

**Release Date: 12-04-2023**

#### Fixed

* Timestamp on HTTP device callbacks from HTTP plugin

## 5.2.1

**Release Date: 10-04-2023**

**Discussion Topic:** [**Thinger.io Community Forum**](https://community.thinger.io/t/platform-version-5-2-0/4709)

**Added**

* Included support for installing Products over plugins. Now, there are some Shelly devices added to the plugins Marketplace. We will grow it soon! Looking for contributors and partnerships!

  ![image|690x254](https://discoursefiles.s3.dualstack.eu-west-1.amazonaws.com/original/2X/a/a6b362ec39d695137800fa1239b5eba0932e9e7b.png)
* Initial support for devices auto-provisioning over products. It is currently based on the device id, but will include other features like white lists, manual approval, etc.

  ![image|690x97](https://discoursefiles.s3.dualstack.eu-west-1.amazonaws.com/original/2X/8/8b34fc5afab7db6575db3146caecd2f7a2addb36.png)
* New Plugins Marketplace based on a monorepo repository: [Thinger.io Plugins](https://github.com/thinger-io/plugins). It will allow better maintainability and simplify new contributions!
* Initial Plugin Exporter feature inside Products. This way, a Product can be easily converted to a Plugin. enhancing user contributions.

  ![image|672x500](https://discoursefiles.s3.dualstack.eu-west-1.amazonaws.com/original/2X/2/20c14412e568658f446c89acbdb123aa17de79b0.png)
* Device type to "device\_authentication\_failed" event.

#### Improved

* Avoid creating a Docker network if the plugin does not run a task (i.e., products).
* Plugins marketplace on the frontend, with better image alignment.
* Permissions assigned to user File Storage are 1000:1000, so they can be easily edited over plugins, i.e, in Node-Red, VSCode, Jupyter plugins, etc.
* Plugin files copied on installation now have 1000:1000 permissions, so they are modifiable over plugin shells.

#### Fixed

* Bucket exports showing duplicate columns
* Domain creation when setting a name

## 5.1.12

#### Release Date: 16-03-2023

#### Fixed

* Temporal restore of the default IOTMP buffer size until IOTMP-Websocket supports growing buffers

## 5.1.11

#### Release Date: 14-03-2023

#### Fixed

* DynamoDB (community buckets) bucket projections when using reserved keywords

## 5.1.10&#x20;

#### Release Date: 08-03-2023

#### Fixed

* Null/false on bulk bucket writes when using tags on topic placeholders
* DynamoDB (community buckets) bucket projections when using non-alpha characters

## 5.1.9

#### Release Date: 07-03-2023

#### Improved

* Bulk bucket writes are now also supported by products

## 5.1.8

**Release Date: 06-03-2023**

#### Fixed

* Center images on the dashboard image widget.
* Remove the undesired console.log used in development
* HTML widgets from file storage may fail to load
* The dashboard add widget modal closes when adding a new background color

#### Improved

* DynamoDB can now use field projections from dashboards to save bandwidth
* Reduced dashboards' max chunks fetch to support large datasets on DynamoDB

## 5.1.7

#### Release Date: 06-03-2023

#### Add

* Daily Data transmission on device Status (For MQTT and IOTMP)

#### Fixed

* Computed data transmission for current and past days

## 5.1.6

#### Release Date: 03-03-2023

#### Fixed

* Big logo shown on shared dashboards

## 5.1.5

#### Release Date: 03-03-2023

#### Fixed

* Problem when converting certain InfluxDB data back to JSON.

## 5.1.4&#x20;

#### Release Date: 02-03-2023

#### Improved

* Maximum message size for IOTMP/MQTT devices.

## 5.1.3

#### &#x20;Release Date: 01-03-2023

#### Fixed

* Fix SSL certificates provisioning on instance startup.

## 5.1.2

#### Release Date: 27-02-2023

#### Fixed

* Plugin Environment variables not initialized on upgrade.
* Dashboard error popups are hidden on the device dashboard.
* The menu on mobile is not responding to the first touch event.

#### Improved

* Disconnect the mechanism after server restart. It should correctly handle device disconnections and their events.

## 5.1.1

#### Release Date: 24-02-2023

**Discussion Topic:** [**Thinger.io Community Forum**](https://community.thinger.io/t/platform-version-5-1-1/4669)

#### Added

* Infinity scroll on mobile view.
* Support for bulk data bucket writes, i.e., `[{"ts": 1675360078000, "val1": 0, "val2": 1},{"ts": 1675360088000, "val1":1, "val2":3}]`. Only working on private instances at this time.
* The clock icon displays full time when the mouse is over

  ![image|182x135](https://discoursefiles.s3.dualstack.eu-west-1.amazonaws.com/original/2X/6/616158f54504d519396aa69cf69509bb1f98aa41.png)
* The protocol column now displays the connection security

  ![image|351x171](https://discoursefiles.s3.dualstack.eu-west-1.amazonaws.com/original/2X/d/d3932440a5d1fc78ea67869a049cce0fdfcdc2fa.png)
* Error/Info messages on mobile view

  ![image|399x191](https://discoursefiles.s3.dualstack.eu-west-1.amazonaws.com/original/2X/e/e1882d5dc641a1309e8f2013bc65b2e993039aad.png)

  ![image|402x196](https://discoursefiles.s3.dualstack.eu-west-1.amazonaws.com/original/2X/8/8e1ffe761c114daff45e6374ff016da0b1010ea3.png)

#### Fixed

* "Never" is shown again when the device has not been connected
* Resource inspector not opening
* Minor bugs
* Bucket import error reporting
* Plugin logs are not working with the latest Docker versions
* Locks are not deleted when Sync is removed

#### Improved

* Scrollbars on the left menu and content are now overlay scrollbars with auto-hide.
* Action buttons are now displayed on the left in desktop view.

![image|569x164](https://discoursefiles.s3.dualstack.eu-west-1.amazonaws.com/original/2X/6/6d81787a4dfdf9d786a304f902ffc56110ec7224.png)

* Resource ID is also displayed on mobile view
* Set Type, Set Group, and Set Projects do not require a list refresh.

## 5.0.1

#### Release Date: 2023-02-14

**Discussion Topic:** [**Thinger.io Community Forum**](https://community.thinger.io/t/platform-version-5-0-1/4664)

#### Added

* Support for **ARM64** (Raspberry Pi, Apple M1, Apple M2).
* New 'Syncs' feature inside the Toolbox section: Semaphores for distributed IoT devices that can be used for bandwidth limiters, access control, max number of devices doing OTA, etc. This feature can be used both from the API and IOTMP devices using the new `lock_sync` and `unlock_sync` methods. Each lock acquires a fixed number of slots if they are available.

![image|412x499](https://discoursefiles.s3.dualstack.eu-west-1.amazonaws.com/original/2X/8/87ace18f88f840aec4e43c27baac2343d28ea838.png)

* New Content-Security-Policy HTTP header configuration on Cluster Settings > Deployment.
* Products can now target a File Storage for their script (still under testing). It will automatically load the `index.js` script into the Storage.

![image|475x107](https://discoursefiles.s3.dualstack.eu-west-1.amazonaws.com/original/2X/7/7fdc94029e5bbdd3d4f8140feed4f5da88bab1e7.png)

* Product APIs can now target a script function for their destination and include additional placeholder data from properties or other device APIs.

![image|582x454](https://discoursefiles.s3.dualstack.eu-west-1.amazonaws.com/original/2X/e/ea631343ed2df33bf74b9491ea7293f4f099bc2e.png)

#### Fixed

* Product APIs with Property as its target (the property was not written).
* Exception when `TOKEN` is not provided.

#### Improved

* Installed plugins are now automatically updated on impersonation changes.
* UI with better support for mobile devices. Will be released as an APP. Still under development! :technologist:

<img src="https://discoursefiles.s3.dualstack.eu-west-1.amazonaws.com/original/2X/0/03e8a7ed74c46b4d097b2e1e7986b52a0b10958e.jpeg" alt="image|232x500" width="563">

#### Core

* Base Docker Ubuntu version from 20.04 to 22.04
* Updated OpenSSL version from 1.1.1m to 1.1.1t
* Updated Boost version from 1.78 to 1.81
* Updated mongoc version from 1.20.0 to 1.23.2
* Updated mongocxx version from 3.6.6 to 3.7.0
* Updated CryptoPP from 8.6.0 to 8.7
* Updated Jemalloc from 5.2.1 to 5.3.0
* Updated Maxmind from 1.5.2 to 1.7.1

#### \[4.6.7] 2022-12-20

#### Fixed

* SSL automatic updates.

#### Added

* Search any field on resource lists via API, i.e., email on user accounts.
* Internal configurable parameter "certificates.min\_certificate\_validity"

#### Improved

* Validate sort and order query parameters on resource listing.

#### \[4.6.6] 2022-11-22

#### Fixed

* Database initialization for users without an initial password.
* Device access without permissions, i.e., from a member.

#### \[4.6.5] 2022-11-22

#### Fixed

* Bucket clear error.
* Remove export, create log.

#### \[4.6.4] 2022-10-28

#### Fixed

* Bucket export with a custom date interval does nothing.
* The difference transformation without aggregation provoked an error.
* Representation issue on the dashboard when setting an absolute timeframe after a relative timeframe.

#### \[4.6.3] 2022-10-27

#### Added

* A new setting on the Dashboard control allows hiding hours from the absolute date range picker.

#### Improved

* Aggregated dashboard time series queries that include a transform (i.e., a difference or derivative) now automatically expand the query interval (lower bound) to display the expected range on the UI.

#### Fixed

* Date-time selector now relies on the datetime-local HTML5 component, removing some issues related to the previous date-time picker.
* Access tokens without a project should not limit access to project resources

#### \[4.6.1] 2022-10-13

**Discussion Topic:** [**Thinger.io Community Forum**](https://community.thinger.io/t/platform-version-4-6-0/4553)

#### Added

* Experimental **IOTMP Proxies** (TCP/HTTP) for connecting with device local network resources, i.e., devices/routers webpages, terminals, RDP, VNC, etc. These proxies require a new IOTMP client library for Linux.

  <img src="https://discoursefiles.s3.dualstack.eu-west-1.amazonaws.com/optimized/2X/5/5f75f79c013adb100f77cb875914de881ed23808_2_682x500.png" alt="" width="563">

  Example of the IOTMP Linux Client working on a [RevPi](https://revolutionpi.com/), providing access to device configuration over the local web page:

  ![](https://discoursefiles.s3.dualstack.eu-west-1.amazonaws.com/original/2X/e/e4fb3e49e52e3005b6fecf992a21c9d41b9a29e2.jpeg)
* Support for defining **Web Services** inside `Products` section. It allows defining web pages that can be accessed over an IOTMP linux client.

  <img src="https://discoursefiles.s3.dualstack.eu-west-1.amazonaws.com/original/2X/2/2ce86149f84152af3a0343c7f4a4ad0e61296ed8.png" alt="" width="563">
* Ability to **create project members** directly from the "Add Member" section, creating the user automatically by providing only the email address.
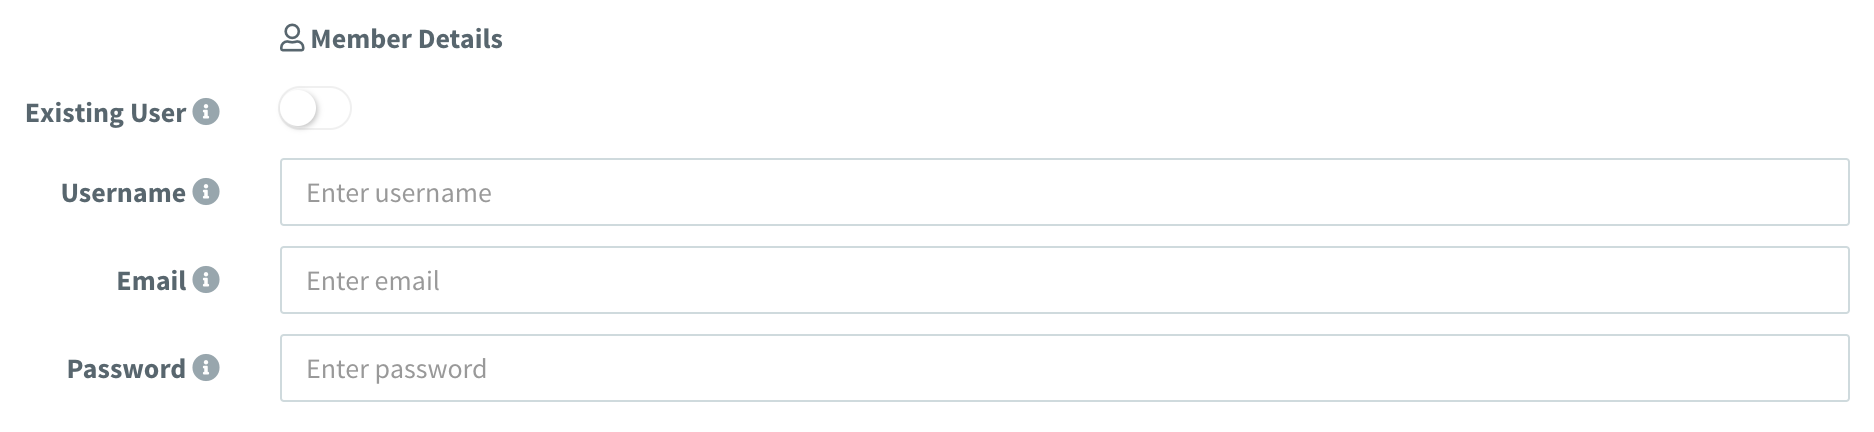
  ![](https://discoursefiles.s3.dualstack.eu-west-1.amazonaws.com/original/2X/1/1950978482fe7a4e2d55d6d79a78a5094b6fa360.png)
* Each project can now define a set of **Project Roles** that can be used by any member within a project.

  <img src="https://discoursefiles.s3.dualstack.eu-west-1.amazonaws.com/original/2X/c/c97d1016ff70708f110041ff0cbcd0fb26cb388b.png" alt="" width="375">
* Each developer/admin account can now define a set of **Global Roles** that can be used by any member within any project. For example, a general-purpose read role that can be shared in all projects.

  <img src="https://discoursefiles.s3.dualstack.eu-west-1.amazonaws.com/original/2X/8/8321e7caa769129c79afc43cb67b9727a8a17be5.png" alt="" width="375">
* **Project member permissions** can now be established by **roles** in addition to custom member permissions, simplifying permissions management. All global roles, project roles, and custom permissions can be established together (if required).
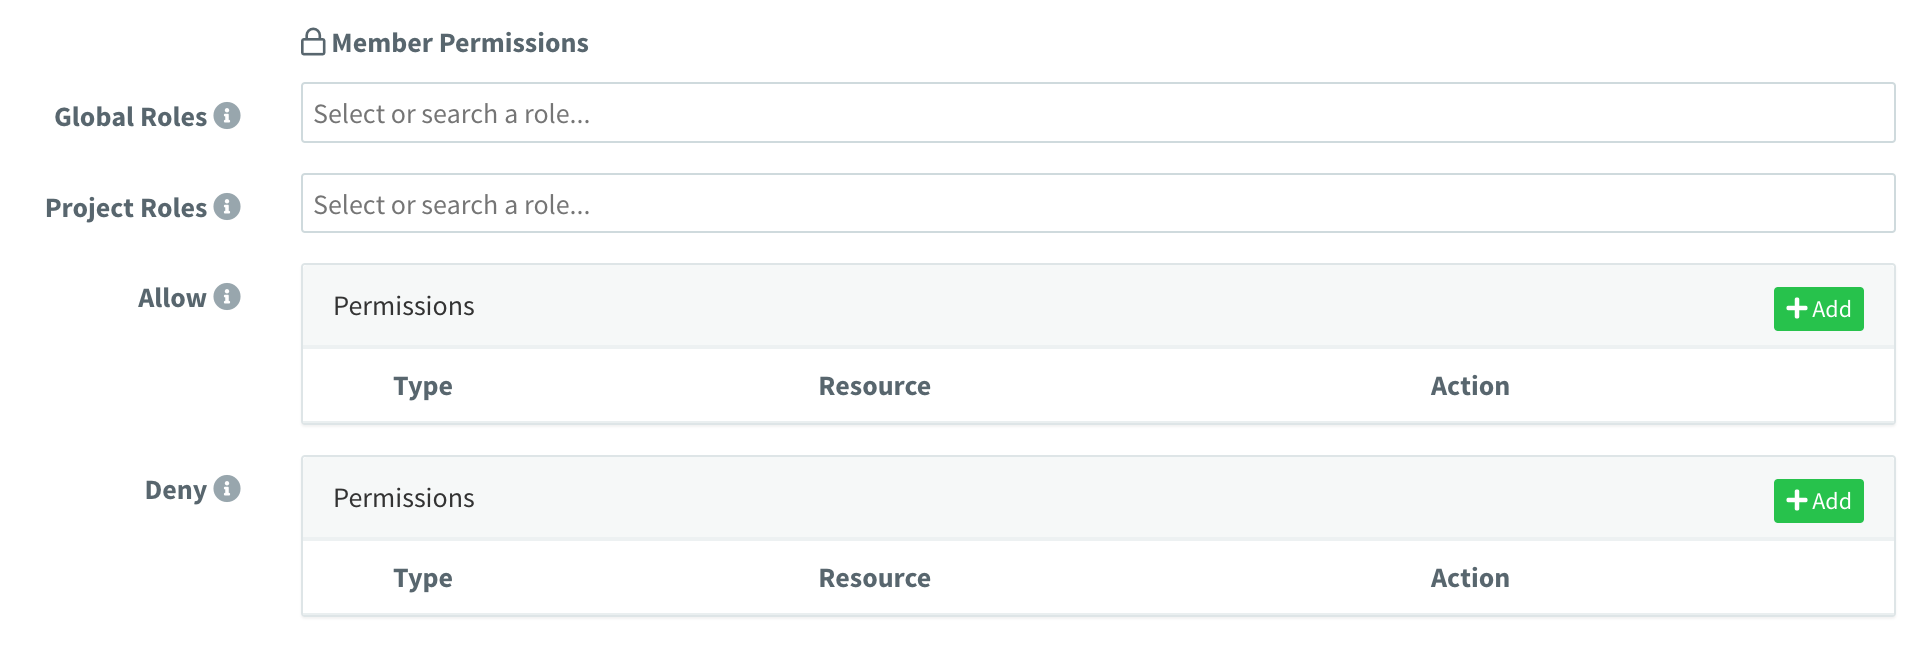
  ![](https://discoursefiles.s3.dualstack.eu-west-1.amazonaws.com/original/2X/7/7562321053f93999a22c98ee4f6f1bc04bf6a66c.png)

#### Improved

* Members will go to the first allowed section after login or refresh, instead of the default Project Dashboard, i.e., devices or dashboards, if they do not have access to read the project dashboard.
* Device resource streams now include different signals: start, stop, data, and error (on IOTMP devices), in order to keep track of streams.
* Device Terminal now supports multiple concurrent sessions (with the IOTMP linux client).

  ![](https://discoursefiles.s3.dualstack.eu-west-1.amazonaws.com/original/2X/b/b29b3be6647dc9efbb4721372f2edf2b53342d61.png)
* The server can now use wildcard certificates, stored as `*.mydomain.com` in the certificates folder. Provisioning wildcard certificates over the 'Domains' section is not possible.
* Internal socket server can now filter socket connections based on IP address. Used at this moment internally for proxies' security.

#### Fixed

* Very high loads over websockets could cause a crash under some circumstances.
* Automatic transition to newly created resources when they are nested more than 2 levels (i.e., while creating a new project member).
* Potential crash with multi-thread product initialization at startup.
* Switching between projects or opening/closing projects is forbidden under some circumstances.
* Set projects displayed on proxies (proxies do not support projects).
* Missing selectors when configuring specific token permissions, i.e., over a proxy.
* Access Tokens are now limited to the project scope where they are defined.
* Payload not being sent on IOTMP devices.

#### \[4.5.4] 2022-07-14

Discussion Topic: [Thinger.io Community Forum](https://community.thinger.io/t/platform-version-4-5-4/4483)

#### Improved

* File Storage Explorer does not download binary files automatically when clicked, it just displays a download button: ![](https://discoursefiles.s3.dualstack.eu-west-1.amazonaws.com/original/2X/a/a166b629602cc508587dce113f2d765d22067f34.png)
* Storage API now determines if a file without an extension is `text/plain` or `application/octect-stream` to set the correct `content-type` on the HTTP response.
* Add option `rewrite_base_path` to avoid base path rewrite in plugins' reverse proxy.
* File Storages can now be opened with VS Code when the plugin is installed.

<figure><img src="/files/ynPSkRfGDvYUqss15GfL" alt=""><figcaption></figcaption></figure>

#### \[4.5.3] 2022-07-13

Discussion Topic: [Thinger.io Community Forum](https://community.thinger.io/t/platform-version-4-5-0/4477)

#### Added

* Support for limiting range selector on dashboard (i.e., allow only relative and/or absolute range selection).

![image|609x305](https://discoursefiles.s3.dualstack.eu-west-1.amazonaws.com/original/2X/1/11881a346e70d3c79b0ebee50792c68fbed75317.png)

* Screen helpers for all resources on Thinger.io, with links to documentation, API, features, etc.

#### Improved

* Location set from a device property now overwrites geo-ip location, and:
  * Trigger `device_location_changed` event with a new location.
  * Execute the Geofence configuration to trigger any action based on location change.
  * Fixed location is now displayed correctly on Assets Maps.

#### Fixed

* Fix Bucket query when fields contain a path with dots, i.e., environment.temperature

#### \[4.5.0] 2022-06-28

Discussion Topic: [Thinger.io Community Forum](https://community.thinger.io/t/platform-version-4-5-0/4461)

#### Added

* New administration feature called 'Proxies' (starting on MEDIUM instances), which allows creating custom proxies to plugins or local services, i.e, redirect TCP or UDP traffic to Node-RED (for example, for COAP devices), or provide access to local InfluxDB2 install:

<img src="https://discoursefiles.s3.dualstack.eu-west-1.amazonaws.com/optimized/2X/f/f8b596ac16ee9fcd6c6021fc61a956ea9201078f_2_732x750.png" alt="image|615x500" width="563">

* New plugin InfluxDB2 (starting on MEDIUM instances, as it requires Proxies feature). It supports accessing the InfluxDB2 GUI and API for custom configurations, dashboards, alerts, ingestion, etc.

<figure><img src="/files/Vlk4Ba0NEgtHDNT10rPT" alt="" width="563"><figcaption></figcaption></figure>

* A plugin install can now initialize any resource in the console, i.e., InfluxDB2 plugin automatically initializes a proxy.
* Plugins can now be defined without a task, i.e., the InfluxDB2 plugin does not deploy any additional container.

#### Improved

* Swagger API Generation (tested on the proxies API).
* Plugin installs from File Storages.
* The left menu now correctly displays the current selected plugin.

#### Fixed

* Some fixes on dashboards using image widget and map widget with geofences.
* Devices API v2 not respecting the v2 specification (wrapping response inside 'out').
* Loading bucket data view without access to bucket config (required for loading tags information), i.e., when a member does not have permissions for ReadBucketConfig.
* Plugins API now supports "id" query parameter, required for Plugin selector.

#### \[4.4.0] 2022-06-20

Discussion Topic: [Thinger.io Community Forum](https://community.thinger.io/t/platform-version-4-4-0/4450)

#### Added

* Bucket view now displays tag values in the first column:

  ![image](https://discoursefiles.s3.dualstack.eu-west-1.amazonaws.com/original/2X/2/24817cae42a920023d367d11c3e8a31882767d76.png)
* Bucket's data query API now supports a new query param 'fields' for selecting specific fields from a bucket, i.e., ?fields=temperature, humidity.
* Bucket's data query API now includes a v2 endpoint, removing the unnecessary 'val', or aggregation/transformation name, on each measurement.

#### Improved

* Dashboards now select only required fields from a bucket, improving bandwidth/resources for buckets with several fields.
* Bucket view now auto-resizes columns according to the content size.
* Bucket view now displays a 'Loading' overlay while fetching data.
* InfluxDB2 performance relies on InfluxQL queries when possible.
* Grafana plugin is now able to automatically configure data sources (both InfluxDB1 (compatibility) and InfluxDB2).

#### \[4.3.2] 2022-06-15

#### Fixed

* Map widget initialization occurs when the map is placed on a dashboard tab.

#### \[4.3.1] 2022-06-14

#### Fixed

* Fix the problem while installing plugins on small instances.

#### \[4.3.0] 2022-06-12

Discussion Topic: [Thinger.io Community Forum](https://community.thinger.io/t/platform-version-4-3-0/4444)

#### Added

* Support for switching projects in the mobile view:

![image](https://discoursefiles.s3.dualstack.eu-west-1.amazonaws.com/original/2X/e/e44c561db24474b414567e02dffd76a97dd0ca00.png)

* Show dashboard name on the project dashboard instead of the default navigation bar:

![image|572x133](https://discoursefiles.s3.dualstack.eu-west-1.amazonaws.com/original/2X/8/897bed6625ab3fd946e743a67b8aee5f9882b898.png)

#### Fixed

* The project dashboard switches when the user is not a member.

#### \[4.2.0] 2022-06-08

Discussion Topic: [Thinger.io Community Forum](https://community.thinger.io/t/platform-version-4-2-0/4443)

#### Added

* Open Graph support for title, description and image, configurable for each brand, i.e., when sharing a link over a social network.

![image](https://discoursefiles.s3.dualstack.eu-west-1.amazonaws.com/original/2X/d/daab6585ebd0293b085c01462542ef384497eb77.png)

* The bucket data viewer now includes a filter by time:

![image](https://discoursefiles.s3.dualstack.eu-west-1.amazonaws.com/original/2X/4/4b8761926365715a40002ad6b9defd5bba04d0af.png)

* The Set Project dialog now keeps previously assigned projects on the resources:

![image](https://discoursefiles.s3.dualstack.eu-west-1.amazonaws.com/original/2X/a/a4f0a652eb9657eca3327bf098c767c87511f383.png)

* Full support for new time-series backend: InfluxDB2.
* Server API updates with support for querying branch information and statistics from localhost.
* Landing pages for each resource type, providing information and links to resources:

![image](https://discoursefiles.s3.dualstack.eu-west-1.amazonaws.com/optimized/2X/f/f0dac6aa0146b5b9d584f03532ecb9ed95f853eb_2_517x345.png)

* Support for launching processes inside plugins and getting the command response over HTTP/WebSocket.
* Shell over a plugin instance is now executed inside the plugin container (using exec).
* Shell over a plugin now adapts to the original terminal size.
* Show page title according to navigation state, i.e., 'Devices | esp32 | terminal':

![image](https://discoursefiles.s3.dualstack.eu-west-1.amazonaws.com/original/2X/1/1e2576e237b96420f5d638a12499bd012fd85db1.png)

* Console rebrand based on new image/logo, including emails:

![image](https://discoursefiles.s3.dualstack.eu-west-1.amazonaws.com/original/2X/7/7825f8e7d53761dddddd6c43a480396c2814ba48.png)

#### Improved

* InfluxDB2 queries perform poorly when using 'heavy' buckets with multiple tag values.
* Data bucket import now excludes empty or null values.
* Internal proxies to plugins, required for supporting the latest Grafana version and its security requirements.
* Plugins can now (and should) set the image version inside the task. Image field (i.e. grafana/grafana:8.5.4), so it can be decoupled from the plugin version.
* InfluxDB2 + Grafana integration, with automatic source configuration on install.
* Console terminals now use a custom user-friendly scrollbar.
* Dashboard view on mobile when controls are enabled (timespan selector and aggregation).
* Mobile navigation occurs when clicking on the menu or showing tables.
* Data bucket viewer now displays local time instead of ISO date on bucket entries.
* Better compatibility for showing last update timestamp on dashboard widgets (even time series charts).
* Using 'password' type on account management.
* Fix the tachometer widget scaling and value update.

#### Fixed

* Multiple dashboard queries on dashboards when using buckets with several tag values.
* Undesired timestamp plot on time series chart when no field mapping is present on the widget source.
* The slider widget malfunctions when setting the step width smaller than 1.0.
* Dashboard aggregation controls are shown on the community version (only supported on private instances).
* The console terminal is not releasing the window.
* The plugin markdown is not shown.
* Migration to the new dashboard sources is not working correctly on control widgets.
* Download bucket exports are not working on the community.
* Problems with device terminals after the 4.0.0 upgrade.
* Search by id or name problem after introducing 'domain' on resources.
* MQTT Fix potential crash with malformed inputs.
* Email fixes when using multiple brands and multiple email servers.

#### \[4.0.0] 2022-05-18

Discussion Topic: [Thinger.io Community Forum](https://community.thinger.io/t/platform-version-4-0-0/4442)

#### Added

* Support for multiple time series sources on time series widgets, i.e. charts, html time series, and maps:

![image](https://discoursefiles.s3.dualstack.eu-west-1.amazonaws.com/original/2X/1/1b374698e2152e21eb5158198e488b173c935c89.png)

* Add new "Product" section to allow defining device profiles, that will help when managing devices at scale:

![image](https://discoursefiles.s3.dualstack.eu-west-1.amazonaws.com/original/2X/4/4053724a51c50312897c4301c4f6bcf688eb0e05.png)

* It supports updating device properties from MQTT topics/device resources.
* It supports defining buckets from MQTT topics/device resources.
* It allows creating custom device APIs for MQTT/HTTP/IOTMP devices.
* Add support for processing data payloads with NodeJS runtime.
* Add support for defining per-product dashboard, which is inherited by each device. Devices now automatically open the product dashboard if it is available.
* It adds another property hierarchy for devices, with this order Product > Type > Group > Device.
* Data buckets now supports tags: multiple data from the same type can be stored in the same bucket:

![image](https://discoursefiles.s3.dualstack.eu-west-1.amazonaws.com/original/2X/9/95c65278062f5a9279f6c624066ff04dfa7d82af.png)

* Dashboard support for buckets with tags:

![image](https://discoursefiles.s3.dualstack.eu-west-1.amazonaws.com/original/2X/b/bbad3b3fa08665555c1d085a44dd3f8fc0639178.png)

* New role named "Domain Admin", with the ability to manage developer/members inside the specified domain(s):

![image](https://discoursefiles.s3.dualstack.eu-west-1.amazonaws.com/original/2X/f/fc92a1f7f5d1227a47893fd2583cc921141db5e4.png)

* Initial support for device shadow information, i.e., being able to display last stream data on a dashboard even if de device is disconnected.
* Add a new Inspector tool for any resource, so, it is possible to see live Events related to monitored resources, i.e., MQTT live data sent by a device.
* Disabling a device from its settings disconnects the ongoing connection.
* APIs now support additional content types: messagepack, cbor, ubjson, and form data.
* Support for InfluxDB transformations on dashboards:

![image](https://discoursefiles.s3.dualstack.eu-west-1.amazonaws.com/original/2X/1/1bd173177445f1f26fb2265244ccb2f00a41be70.png)

* Support for MQTT retained messages.

#### Improved

* Aggregated data in dashboards now uses the browser's timezone to display data correctly.
* Device API now lazy loads device resources when clicked, useful for devices with several resources.
* Device API now keeps track of opened resources when refreshing the API with the button.
* Tokens and Device Tokens can be easily copied with a button.
* Allow plugins to update current token permissions.
* Auto-hide track waypoints on the map widget depending on the map zoom level.
* The bucket data view now displays the real field case in the columns.

#### Fixed

* Brand email configuration is not working properly.
* Profile Settings link not working.
* Buckets source switch is not working when changing from a device resource to anything else.
* Disabling a bucket did not stop a device resource from streaming properly.
* Closing the host's dashboard throws an error on the console.
* Resource selector not taking the correct selected id when using similar ids.
* Device event 'device\_authentication\_failed' is not thrown.
* Device enable/disable setting is not working properly.
* Fix Device API curl example when the body request is 'false'.
* Endpoint HTTP request body editor does not show until the 'Test' section is opened.
* Fixed the butter-bar not showing while loading pages.
* Fixed Image/MJPEG widget not updating images or updating after modifications.
* MQTT client timeout is not being used.

#### Core

* Updated OpenSSL version from 1.1.1j to 1.1.1m.
* Updated Boost version from 1.75 to 1.78.
* Updated mongoc version from 1.20.0.
* Updated mongocxx version from 3.6.2 to 3.6.6.
* Updated CryptoPP from 8.4.0 to 8.6.0.

#### \[3.4.2] 2021-11-11

Discussion Topic: [Thinger.io Community Forum](https://community.thinger.io/t/platform-version-3-4-0/4134)

#### Added

* Initial version for OAuth2 Client authentication flow, i.e., connecting third-party apps like Alexa:

![image](https://discoursefiles.s3.dualstack.eu-west-1.amazonaws.com/original/2X/1/10162c1e1aa1d58c85022eb1ca69c40454afd52f.png)

* New plugin: HTTP Device, supporting scaling HTTP device deployments:

![image](https://discoursefiles.s3.dualstack.eu-west-1.amazonaws.com/original/2X/4/4cb41b2179b5db8a452e2ba8738c302d7a9d0e58.png)

* Hide the Menu option for members:

![image](https://discoursefiles.s3.dualstack.eu-west-1.amazonaws.com/original/2X/7/7266e6c8a0d366e0e85b1502dd0f6cd404b61b9f.png)

* Improved HTML Widgets with support for custom AngularJS directives!
* Opening a restricted link will redirect to the target URL after login.
* Support for disabling Swagger API pages. Available on Host Settings > Deployment:

![image](https://discoursefiles.s3.dualstack.eu-west-1.amazonaws.com/original/2X/2/27920332be1db283e1a581ebd1f216464a217959.png)

* Now it is possible to configure X-Frame-Options to allow adding iframes on known pages. Available on Host Settings > Deployment:

![image](https://discoursefiles.s3.dualstack.eu-west-1.amazonaws.com/original/2X/0/03ebb7e9ba9237e7269b39332f468383a204b494.png)

* Endpoints have an optional field name for displaying & search purposes.
* Dozens of new server events that can be used with Node-RED, i.e., any resource create/update/delete.
* API Endpoint '/v1/server/events' to query all available server events.
* API Endpoint '/v1/server/assets' to query server asset types.
* API Endpoint '/v2/users//events' with support for registering/unregistering server events, providing commands feedback.
* Brand configuration for web metadata, like keywords and description:

![image](https://discoursefiles.s3.dualstack.eu-west-1.amazonaws.com/original/2X/f/f57a96bf1a08d23e0988223b6807eb2acd87a004.png)

* Access tokens now provide a field with the hostname for easier cloud integration.
* Devices can now be enabled or disabled from settings.

#### Improved

* Dashboards refresh buckets and properties sources in real-time.
* Removed "#!" from URLs. Previous URLs are still valid.
* Platform security by preventing refresh token re-usage.
* Improve the refreshing token mechanism on the frontend (avoiding multiple queries).
* The internal event system is now much more flexible and fault-tolerant.

#### Fixed

* Show server version option in custom brand configuration.
* Set Project button is not showing sometimes while changing between projects.
* Add resource button with broken layout when switching to a project with some selected items.
* Server not registering above 50 MQTT listeners after restart.
* Password update from the users section is not triggering the internal event for database update.
* New instances are not showing the Hosts section after initial deployment.
* Time series chart with absolute dates not working.
* Set project dialog is not showing the Project selector under some circumstances.
* Access token link not working on shared dashboard settings.
* Device connection event trigger order on reconnection when 'reusing' credentials.
* Server Event 'device\_state\_listener' not triggering with MQTT devices on disconnect.

#### \[3.3.0] 2021-08-10

#### Added

* Support for branding on login form, signup, forgot password, etc. It is possible to set the background color, image, location of the forms, and hide the public signup:

![image|690x306](https://discoursefiles.s3.dualstack.eu-west-1.amazonaws.com/original/2X/0/0848b751e0a0b29a512e374d96aee92c9fc31e0c.gif) ![image|690x306](https://discoursefiles.s3.dualstack.eu-west-1.amazonaws.com/original/2X/0/0e38c2aa99e10c34eed5b5d877d781afb8f11d5b.png)

#### Fixed

* A problem with `PATCH` and `PUT` methods on properties, causing issues with the Project dashboards or the slider widget.
* Groups section in the console should be working now for members with allowed permissions
* Fix `Set Project` menu button for types and groups.
* Assets menu now behaves correctly according to member permissions

#### \[3.2.2] 2021-07-29

#### Added

* Configurable default project for members after login:

![image|690x83](https://discoursefiles.s3.dualstack.eu-west-1.amazonaws.com/original/2X/f/f3d8701f936e1d2b128bf6ce2f9f27851b2437fb.png)

* A configurable dashboard for each project, shown by default after the member logs in or project:

<figure><img src="/files/zcNhfP3Hq75jczrs5rTx" alt=""><figcaption></figcaption></figure>

* Console interface adapts to member permissions, hiding unavailable actions or sections.
* Account management now allows changing per-user account limits (dashboards, devices, etc.):

![image|690x390](https://discoursefiles.s3.dualstack.eu-west-1.amazonaws.com/original/2X/2/2d72071d6622ed2dffeaff2f8a82cb8a3829a22d.png)

* Configurable Bucket data retention policy per-user account and default setting:

![image|690x64](https://discoursefiles.s3.dualstack.eu-west-1.amazonaws.com/original/2X/3/31d281300b423e15d271964fb285a73a08f67e76.png)

* Impersonate functionality to check other accounts easily from the admin account:

![image|690x390, 100%](https://discoursefiles.s3.dualstack.eu-west-1.amazonaws.com/original/2X/f/f3eb76840142764dcf5ba40c8f143d89a57492fc.png)

* Support for linking dashboard widgets to another dashboard.
* Websocket support for IOTMP and MQTT devices.
* Support for selecting a timestamp as a field from bucket data.
* Dashboard background now supports HTML color, i.e., #aabbcc instead of a URL image.

**Improved**

* Keep menu and sub-menu items as "active" respecting the hierarchy.
* Refactored bucket layout section with different sections grouped by functionality.
* Hide the project column when there is a project selected in the console.
* Hide "ugly" resource names when navigating on resources inside a project, i.e., user.device.
* Increased keep-alive tolerance for better device connection stability.
* Disable close project button for members.

**Fixed**

* Apex Charts color contrast in title, subtitle, and axis labels.
* Device creation error when switching from Generic to HTTP after filling in some fields.
* Bucket download links for community buckets exported to S3.
* Disable internal database creations for members.
* Bucket export state when export fails.
* DB error while updating a device without stats.
* Invalid property update event when modified from dashboard slider (or PATCH REST API).
* Disable property creation when parent resource does not exist.

#### \[3.1.0] - 2021-05-05

**Added**

* New HTML widget for its use with time series data (i.e., display tables):

![image|690x267](https://discoursefiles.s3.dualstack.eu-west-1.amazonaws.com/original/2X/1/190105ba8ee1adb5842715a8cc14616bf9856c96.png)

* Current HTML widget now supports multiple values to be selected.

**Fixed**

* Install/upgrade custom plugin version.
* Geofences are not working for some polygons.
* Fix the LED colors editor (each color in a single row).
* Set X and Y axis limits on time series charts to prevent freezes with wrong values.
* Fix a problem with the min and max y-axis on the time series chart when set to zero.
* Fix legacy bug regarding buckets query & merging.
* Allow modification of an existing widget type.
* Fix template replacement when using {{}} as a pattern.

**Improved**

* Starting a plugin will show its log by default (some plugins require boot time, so this provides feedback to the user).
* Plugins with master or latest tags will force an update when installing or upgrading.
* Security when mounting volumes inside plugins.

#### \[3.0.0] - 2021-04-16

**Added**

* Apex Charts are now available (in BETA)!:

![image|660x479](https://discoursefiles.s3.dualstack.eu-west-1.amazonaws.com/optimized/2X/d/dbf03ebaff5b5e608b69e7910b9a8ecc93e98cb9_2_463x500.gif)

* Add aggregation based on the client browser's timezone.
* Allow MQTT 3.1 client connections (in addition to 3.1.1).
* Initial support for VSCode plugin (starting from Medium instances). Contact us for more details.
* Added openapi.json to support restish.
* Add support for displaying last known location of a device on the map.

**Improved**

* Show plugins in menu only if the plugin is running to avoid confusion.
* Assets Map widget options are now more legible with different backgrounds.
* Upgraded widget buttons.
* Dashboard error handling with a time series chart.
* Thinger.io Docker image is now smaller.
* Plugins engine now supporting installs from Storages, setting custom user, etc.

**Fixed**

* A problem with instances using the server "[www](http://www)." subdomain.
* Storage editor not opening due to Chrome security fix.

#### \[2.9.9] - 2021-02-28

**Added**

* New widget "Assets Maps" for viewing all assets by type/group in map, with search capabilities:

![image|660x479,50%](https://discoursefiles.s3.dualstack.eu-west-1.amazonaws.com/original/2X/a/a49c08bc984ac19d69af6de77ae0491e0141cad4.png)

* New widget "Source Switcher" acting as previous template feature: allow to change the device/bucket within a tab:

![VI0ZxIsiH6|492x387,75%](https://discoursefiles.s3.dualstack.eu-west-1.amazonaws.com/original/2X/a/aa4c95d244ad947f7037e1857295dcbfbb885028.gif)

* Add support for disabling fullscreen button on widgets (@rin67630):

![image|208x46](https://discoursefiles.s3.dualstack.eu-west-1.amazonaws.com/original/2X/b/baf6d4e0d0cc69c583d00321689a502744f240c5.png)

* Add an option in the shared dashboard settings to automatically update the permissions from the shared link:

![image|327x89](https://discoursefiles.s3.dualstack.eu-west-1.amazonaws.com/original/2X/9/993d72a82a0ccd93217a8ec6b92f9e09b0c671de.png)

* Add support to modify min row height in dasbhoards.
* Buckets can now support an asset type and group.
* Add an option for setting asset types and groups for devices/buckets creation and from its settings/lists.
* Devices can hold now a friendly name, i.e., a serial number, plate id, etc.
* Support for creating new accounts (members and developers) without a password. The user will be required to initialize the password via email.
* New page that allows the developers/members initialize their accounts passwords.
* Support for multi-brand email templates and servers. Brands can now define its own emails templates and custom mail servers for communicating with users:

![image|544x500,75%](https://discoursefiles.s3.dualstack.eu-west-1.amazonaws.com/original/2X/1/1626029a3575529e9881c8f1e8cfd667e8b3e71a.png)

* Added email template editor and mail server settings inside Brands section with options for template testing.
* Add STARTTLS support in SMTP for old servers not supporting direct SSL/TLS connections.

**Improved**

* Changed legacy email templates.
* SMTP interface will correctly send the From Name.
* Users without a verified email address can verify it automatically after initializing/resetting their password (which requires an email).
* All source selectors will display the friendly name of the resource, i.e, the friendly name of a project, device or bucket.
* Search supports now both searching by id and friendly name in all resources.
* Control Widgets (buttons/sliders) now support mapped values (i.e., a field inside a resource).

**Removed**

* Email communications when bucket export, clear, and delete succeed/fail.
* Google Vector Maps are used by default in dashboards, as they were not performant enough.

**Fixed**

* Swagger API rendering problems. Now it is completely usable again.
* Tachometer widget when setting major axis to 0 (@hjfosse).
* Fix case search root resources (domains, hosts, brands, etc.).
* Fixed an error while removing the panel title and subtitle (not updating).
* Cropped the aggregation menu from the charts widget when the chart was smaller than the menu.
* Fix the chart aggregation menu padding, hiding the right selector border.
* Fixed some problems when loading multiple maps on dashboards.

**Core**

* Propagate websocket proxy error to caller in clustered deployments.
* Asset types and groups are automatically created in the device/bucket creation (from API).
* Updated OpenSSL version from 1.1.1h to 1.1.1j.
* Updated Boost version from 1.74 to 1.75.
* Updated mongoc version from 1.17.1 to 1.17.4.
* Updated mongocxx version from 3.6.0 to 3.6.2.
* Updated CryptoPP from 8.2.0 to 8.4.0.
* Updated MaxMindDB from 1.4.3 to 1.5.2.

#### \[2.9.8] - 2021-02-03

**Added**

* Initial support for column sorting in all console lists (devices, buckets, dashboards, etc.):

![](https://discoursefiles.s3.dualstack.eu-west-1.amazonaws.com/original/2X/5/5475c0318cedc12ae4a8f3eaf721ad677a36d0d3.png)

* Add support for configuring axis on chart widget:

![](https://discoursefiles.s3.dualstack.eu-west-1.amazonaws.com/original/2X/2/24054f81487d97215d43018050ac85fa1de27d80.png)

* Add support for setting placeholders in widgets title and subtitles:

![](https://discoursefiles.s3.dualstack.eu-west-1.amazonaws.com/original/2X/f/fb73f973f0f3dae22d961a0f08e3c063a694ce92.png)

* Add support for showing last widget update:

![](https://discoursefiles.s3.dualstack.eu-west-1.amazonaws.com/original/2X/6/6a99ce53e110b55789715100843ea6f903f8233f.png)

**Improved**

* Forgot, login, change password and signup forms metadata for improved browser compatibility.

**Fixed**

* Device tokens are not opening under some circumstances.
* Email settings are not being updated.
* Properties listing on types and groups (removed Source column).
* Legacy PSON error while decoding uint64\_t values.

**Core**

* Upgrade nlohmann JSON to 3.9.1.
* Experimental support for IOTMP protocol on private instances that will allow:
  * Clients running on different languages (currently C++, Node.JS, web). Support needed for Python, Java, etc.
  * Resource Path Parameters.
  * Custom return code for HTTP methods.
  * Publish/Subscribe to MQTT topics.
  * Listen to server events.
  * Remote Shell on Linux.

#### \[2.9.7] - 2020-11-09

**Added**

* Add dashboard 'Developer' tab in settings showing source config, so users can share, copy, or edit dashboards from editor.
* Add dashboard tabs, so, one dashboard can contain multiple tabs with different names and icons.
* Add dashboard widget: push button (on only while it is pressed).
* Add support for nested values on endpoint templates, i.e., {{location.lat}} {{location.lng}}.
* Add role field in accounts list showing: Admin, Developer, and Project Member.
* Add icon color on progressbar widget.
* Add inner icon size for button widgets.
* Add full screen mode for properties editor.
* Add brand config for show/hide support links and server version.

**Improved**

* Dashboards settings are split on three different tabs.
* Map widgets loading & initialization, now using vector maps instead of raster.
* Disable popup exit when clicking outside, (i.e), when editing a property.
* Font Awesome icons can be defined now as 'fas fa-...' to allow other styles (i.e. regular icons 'far fa-...').
* Led indicator colors now works with boolean values (as 0, 1) (thanks rin67630).
* Property list does not wrap source or time. Improved mobile view.
* Tachometer widget now appears correctly centered inside widget.

**Fixed**

* Bottom shadow on button widget.

**Core**

* Updated the server Docker base image to Ubuntu 20.04.
* Updated SSL version to 1.1.1h.
* Updated C++ Boost library to 1.74.0.
* Updated MongoDB to mongoc 1.17.1 and mongocxx 3.6.0.
* Reduce Docker image size: \~6 MB.

#### \[2.9.6] - 2020-10-28

**Added**

* Add (BETA) support for "template" dashboards, which allows switching resources (devices/buckets) directly from the dashboard.
* Add template settings in dashboards.

**Improved**

* Improve UI by adding an icon according to its type to resource selectors.
* Improve messages in the dashboard when the device is not available.

**Fixed**

* Fix JSON validation problem when creating tokens under some circumstances (i.e., from Dashboard with device properties) (thanks rin67631).

#### \[2.9.5] - 2020-10-15

**Fixed**

* Change device credentials are not working properly (thanks rin67630).
* Map size on load.
* Remove the plugin problem.
* Removing the user account correctly cleans all user plugins.
* Bug with passwords being too long.

**Improved**

* Disable console being embedded into an iframe for security reasons (Clickjacking).

#### \[2.9.3] - 2020-10-01

**Added**

* Add support for users with role 'Project Member', especially useful for end users
  * Project Members are not limited by the regular max user license limit.
  * Project Members customize the menu, hiding features not available for end-users
* Add support for setting a custom profile picture, removing the Gravatar approach.
* Add support for changing roles to accounts between user, admin, and member.

**Improved**

* User deletes now correctly erases all buckets, running plugins, and other critical resources associated with the account.
* Token and members' permissions with the possibility to set wildcards on actions, i.e., List\*, Read\*, etc.
* Adding a member to a project now displays a selector with search capabilities (for admins).

**Fixed**

* Batch users removal.
* Fix removing properties from types and groups after their deletion.
* Fix and restart other hosts in the cluster from the Cluster Host Admin.
* Remove bucket exports after bucket deletion.
* Remove the contextual "Set projects" button on resources that do not support it.
* Avoid sending current project params on requests that do not support it.
* "Close" project after account logout.
* Other minor UI fixes.

#### \[2.9.2] - 2020-09-21

**Added**

* Add support for defining asset types and asset groups.
* Add support for defining geofences at device, type, and group levels.
* Add support for showing geofences in device overview.
* Add support for "inherited" properties in devices from their asset types and groups.
* Viewer for asset types, groups and all assets in the map.
* Generated device tokens point to the custom instance, so the Mobile APP can be used with private instances.
* Contextual menu on device list supports changing its type, group, and project.
* Contextual menu on any other resource supports changing its project.
* Resource lists now show the current project of each resource. Also, type/group for devices.

**Improved**

* The Map widget contains more features, like showing track route, default zoom level, map type, path color, show waypoints, default location, show geofences, or hide default Google Maps control.
* Dashboards now show the dashboard name in the page title to differentiate between several open dashboards.
* Now it is possible to do insensitive case searches in lists or other resource selectors.
* Property selectors now apply filtering at the DB level when searching.

**Fixed**

* Some problems with maps not loading properly or showing "ghost" markers.
* Printing nested values, i.e., location.lat, from buckets onto a dashboard.
* Fixed properties listing for devices with the same root identifier.
* Fixed bucket export listing for buckets with the same root identifier.
* Minor bug fixes and improvements.

#### \[2.8.2] - 2020-07-21

**Fixed**

* The brand limitation was not applied correctly.
* Updating a device property from a shared dashboard.

#### \[2.8.0] - 2020-07-14

**Added**

* Add plugin settings for enabling public access to them (useful for plugins managing their own authentication, like Grafana).
* Add support for writable filesystems on plugins (useful for installing plugins, i.e, inside Grafana).
* Add changelog viewer.

**Fixed**

* Fixed plugin management control states.
* Fixed Dashboard switch button when modifying a value from a property.
* Minor bug fixes and improvements.

**Security**

* Fixed plugin privileges when running a shell over a container. Now all containers run with UID and GUID 1000.

#### \[2.7.6] - 2020-07-10

**Added**

* Admin section "Cluster Hots", supporting viewing all Thinger.io nodes in the cluster, and:
  * View host resources in real time, like connections, CPU/RAM usage, etc.
  * Configure Thinger.io: HTTP Server, Thinger Server, MQTT Server, Email, Buckets, SSL Certificates, Accounts, Deployment and Restart Server.
  * View host logs in real-time.
* Brand support for PWA (Progressive Web Applications), setting theme color, icons, App name...
* Dashboard settings:
  * Now supports dashboard backgrounds.
  * Now supports setting round corners on widgets.
  * Allow alpha widgets, setting colors like "#000000aa".
  * Allow hiding the header with a shared dashboard.

**Fixed**

* Timezone update in settings.
* Date visualization on buckets according to timezone.
* Complex object visualization on buckets.
* Dashboard edition on mobile.


# OTHER SOFTWARE

This section serves as a dedicated area for managing and integrating various complementary software modules and client applications. This centralized location provides a straightforward way to access


# Server Monitoring Client

Track system metrics from Thinger.io Platform

The Linux Monitoring Client is a software module based on the Thinger.io Linux Client that tracks various system metrics and publishes them to the Thinger.io Platform, enabling the monitoring of individual servers, embedded Linux devices, or entire fleets.

## Resource Tracking

The client tracks different metrics for System Information as well as for six different types of resources: general system information, CPU, system memory, network interfaces, filesystem mount points, and I/O drives.

Apart from uploading the resource information to Thinger.io Platform, the resources can be queried directly to the client or from the local server running the client at <http://localhost:7890/monitor>.

### General System Information

There is some system information that can be relevant from a server administration standpoint.

Currently, the metrics the client is retrieving are:

* Hostname.
* Uptime.
* OS version.
* Quantity of normal and security updates (Ubuntu server).
* If a reboot is required to apply updates (Ubuntu server).

### CPU

To evaluate the performance of the CPU, these metrics are tracked:

* Number of cores.
* CPU usage.
* CPU load for 1m, 5m and 15m.

### System Memory (RAM)

As having reliable information about the system memory used is vital for capacity planning and maintaining the integrity of the servers, these metrics are collected:

* Total, used and available memory capacity.
* Memory usage.
* Total, used and available swap memory capacity.
* Swap memory usage.

### Network Interfaces

For each network interface, the following is tracked:

* Internal/Private IP.
* Incoming and Outgoing network speed.
* Incoming and Outgoing total network transfer.

It will also retrieve the public IP of the server.

### Filesystem Mount Points

Each filesystem corresponds to one partition of a drive, from which it will track:

* Capacity.
* Capacity free.
* Capacity used.
* Capacity usage (percentage).

### I/O Drives

To provide insight on how a server is performing, these I/O drive metrics are monitored:

* Input and Output operation speed.
* Disk usage.

## Configuration

The basic device configuration is tracked over a JSON file located on the server. Additional configurations are tracked through the device properties to allow live configuration changes through the Thinger.io Platform.

### Basic device configuration

The configuration will be auto-created on first launch when it is auto-provisioned.

The file structure is:

```javascript
{
  "device": {
    "credentials": "<device_credentials>",
    "id": "<device_id>",
    "name": "<device_name>"
  },
  "server": {
    "ssl": true,
    "url": "<server_to_connect_url",
    "user": "<thinger.io_account>"
  }
}
```

{% hint style="info" %}
If launched with root, the default path for the configuration file is: /etc/thinger\_io/monitor/app.json

If launched with non-root, the default path for the configuration file is: /home/\<user>/.config/thinger\_io
{% endhint %}

### Configuration properties

As mentioned before, the configuration for the resources will be in the device properties.

It contains five sections:

* defaults: a boolean value indicating whether the name of the first element of each resource will have a default name instead of the resource name. Useful when tracking different devices with one dashboard.
* interfaces: JSON array with the names of the network interfaces to track.
* filesystems: JSON array with the mount point of the partitions to track.
* drives: JSON array with the Linux devices to track.
* server: Object containing the host IP to listen on and the port to launch the local server.

Here is an example `resources` property value:

```json
{
  "defaults": true,
    "drives": [
      "xvda"
    ],
    "filesystems": [
      "/"
    ],
    "interfaces": [
      "eth0"
    ],
    "server": {
      "host": "0.0.0.0",
      "port": 7890
    }
}
```

## First Launch

This module has the feature to auto-provision the device in the Thinger.io Platform, but also allows for inputting a configuration if it's already provisioned.

It is also capable of creating a system service so the monitor is always running regarding if the server has been rebooted.

### With auto provision

Download the installation script from the [last software release](https://github.com/thinger-io/monitoring-client/releases/latest), and run the software as:

```
./install_thinger_monitor.sh -t '<create_device token>'
```

{% hint style="info" %}
For update and reboot abilities, it needs to be run with the root user
{% endhint %}

### Without auto-provision

If the device is already provisioned, we will need to set the user id, device id and credentials in the configuration file and launch the software as:

```
./thinger_monitor [-c <config file path>]
```

{% hint style="warning" %}
If the operating system is not Ubuntu or OpenSSL is installed in a different folder than the default, it is necessary to indicate the certificates directory by declaring the variable SSL\_CERT\_DIR before calling the installer or the binary:

Ex: `SSL_CERT_DIR=/etc/ssl/certs ./installer_thinger_monitor.sh`
{% endhint %}


# THINGER.IO HARDWARE

Although Thinger.io is a cloud platform, we have created few hardware devices to cover some market weaknesses. In this section it is possible to find device user manuals and open-source design files.


# Thinger M2IoT Modem

This is work in progress, stay tuned!&#x20;


# Thinger32 NB-IoT

The Thinger32NB-IoT is a compact dev board that combines Quectel BC660 with an Espressif ESP32-PICO-D4 to provide a simple-to-use development board for IoT projects.

<figure><img src="/files/EFtRlBdnvKnxFuR5UdIN" alt=""><figcaption></figcaption></figure>

Unlock the **next level of IoT development** with this **ESP32 + Quectel BC66 hybrid board**. Combining the **power and flexibility** of the **ESP32** with the **low-power, wide-area communication** of the **NB-IoT Quectel BC66**, this board is the **perfect solution for developing IoT projects that demand high efficiency, long-range connectivity, and seamless integration**.

* The BC660K-GL is a high-performance LTE Cat NB2 module which supports multiple frequency bands of B1/ 2/ 3/ 4/ 5/ 8/ 12/ 13/ 17/ 18/ 19/ 20/ 25/ 28/ 66/ 70/ 85 with extremely low power consumption, it provides a flexible and scalable platform for the migration from GSM/GPRS to NB-IoT networks.
* The ESP32-PICO-D4 is a powerful MCU module with WiFi, Bluetooth®, and BLE connectivity and comes integrated with 8MB SPI flash, 2MB SPI Pseudo static RAM (PSRAM), and a 40 MHz crystal oscillator. The ESP32 microcontroller itself features two CPU cores that can be individually controlled, with an adjustable clock frequency between 80 - 240MHz and a low-power co-processor for minor tasks, such as monitoring peripherals. It supports a range of peripherals, including an SD card interface, capacitive touch sensors, ADC, DAC, Two-Wire Automotive Interface (TWAI), Ethernet, high-speed SPI, UART, I2S, I2C, etc.

Designed by the Thinger.io team, this board has been made for **developers, makers, and industry professionals,** leveraging the best integration with the Thinger.io platform. This board enables **Wi-Fi, Bluetooth, and NB-IoT** connectivity, all in a compact form factor with **USB 3.0 support and up to 10 versatile GPIO options**.

## **Technical Specifications**

<table data-header-hidden><thead><tr><th width="336">Feature</th><th>Specification</th></tr></thead><tbody><tr><td><strong>Feature</strong></td><td><strong>Specification</strong></td></tr><tr><td>NB-IoT bands</td><td>B1/ 2/ 3/ 4/ 5/ 8/ 12/ 13/ 17/ 18/ 19/ 20/ 25/ 28/ 66/ 70/ 85</td></tr><tr><td><strong>WiFi Connectivity</strong></td><td><ul><li>WiFi 802.11 b/g/n</li><li>150Mbps</li><li>2412 - 2484MHz</li></ul></td></tr><tr><td><strong>Bluetooth Connectivity</strong></td><td><ul><li>Bluetooth v4.2 Specification</li><li>BR/EDR and BLE</li><li>Transmitter Class: 1, 2, and 3</li></ul></td></tr><tr><td></td><td></td></tr><tr><td><strong>ESP32 specs</strong></td><td><p></p><p>Xtensa® Dual-Core 32-bit LX6 Microprocessor (up to 240MHz)</p><ul><li>448KB of ROM and 520KB SRAM</li><li>8MB SPI Flash</li><li>2MB PSRAM</li><li>16KB SRAM in RTC</li></ul></td></tr><tr><td></td><td></td></tr><tr><td><strong>GPIO</strong></td><td>10 configurable (UART, I2C, SPI)</td></tr><tr><td><strong>SIM Support</strong></td><td>NanoSIM 4FF slot</td></tr><tr><td><strong>Programming</strong></td><td>Arduino Framework, MicroPython, ESP-IDF</td></tr><tr><td><strong>Buttons</strong></td><td>ESP32 Reset<br>ESP32 Boot</td></tr><tr><td><strong>Connections</strong></td><td>USB 3.0 with CP2102 interface<br>ITX1 Antenna connector WiFi Blutetooth<br>ITX1 Antenna connector NB-IoT<br>2X16P 2.54mm pins</td></tr><tr><td><strong>LEDS</strong></td><td>BC PWR Red<br>BC NET  Amber<br>ESP32 UART Tx Green</td></tr><tr><td><strong>Supported peripherals</strong></td><td>SD card, UART, SPI, SDIO, I2C, LED PWM, Motor PWM, I2S, IR, pulse counter, GPIO, capacitive touch sensor, ADC, DAC, TWAI® (compatible with ISO 11898-1, i.e. CAN Specification 2.0), Ethernet MAC</td></tr></tbody></table>

### **Electrical Characteristics**

| **Power Source**   | **Voltage** | **Current**                                      |
| ------------------ | ----------- | ------------------------------------------------ |
| USB 3.0            | 5V          | Full Rf operation 600mAh  Normal operation 80mAh |
| GPIO Power Output  | 3.3V        |                                                  |
| NB-IoT Active Mode | 3.3V        |                                                  |

## **Pinout**

<figure><img src="/files/VCUngYXAdWReHEDpwDhh" alt="" width="375"><figcaption><p>Thinger32 NB-IoT Pinout</p></figcaption></figure>

## **Getting Started**

**1. Install the Required Software**

* **Arduino IDE** (with ESP32 board manager) or **Visual Studio Code** with **Platformio** extension.&#x20;
* **USB Driver for CP2102** (if needed)
* Install the Thinger.io library on the project

**2. Connect the Board**

* Use a **USB 3.0 cable** for fast communication, then check the data transfer by opening the Serial Monitor.&#x20;
* Insert a **microSIM card** for NB-IoT connectivity.

**3. Upload the First Sketch**

* Use the **Arduino Framework** and Thinger.io libraries for easy programming.
* Configure **Wi-Fi or NB-IoT** connectivity in a few lines of code.

## **Example code**

This example code shows how to work with the NB-IoT connection by means of TinyGSM and Thinger.io libraries. To work with the WiFi or Bluetooth modems, developers just need to use the ESP32 common source code.&#x20;

````
```cpp

#define THINGER_SERVER "acme.thinger.io"
#define HEXACORE_DEVELOPMENT
#define THINGER_SERIAL_DEBUG
#define _DISABLE_TLS_
#include <Arduino.h>
#include <EEPROM.h>

// Set serial for debug console (to the Serial Monitor, default speed 115200)
#define SerialMon Serial
#define SerialAT Serial1

// Select the modem:
#define TINY_GSM_MODEM_BC660
#define TINY_GSM_DEBUG SerialMon
//#define DUMP_AT_COMMANDS
#ifndef TINY_GSM_RX_BUFFER
#define TINY_GSM_RX_BUFFER 1024
#endif

//set hibernation parameters
#define uS_TO_S_FACTOR 1000000ULL  /* Conversion factor for micro seconds to seconds */
#define TIME_TO_SLEEP  10        /* Time ESP32 will go to sleep (in seconds) */

// Can be installed from Library Manager or https://github.com/vshymanskyy/TinyGSM
#include <TinyGsmClient.h>
#include <ThingerTinyGSM.h>
#include <ThingerESP32OTA.h>
#include "arduino_secrets.h"

//Sensor libraries

#ifdef DUMP_AT_COMMANDS
#include <StreamDebugger.h>
StreamDebugger debugger(Serial1, Serial);
ThingerTinyGSM thing(USERNAME, DEVICE_ID, DEVICE_CREDENTIAL, debugger);
#else
ThingerTinyGSM thing(USERNAME, DEVICE_ID, DEVICE_CREDENTIAL, SerialAT);
#endif

ThingerESP32OTA ota(thing);
String iccid;

// module config version
#define MODULE_CONFIG_VERSION 3


   #define PIN_MODEM_RESET 13
   #define PIN_MODEM_WAKEUP 12
   #define PIN_MODEM_PWR_KEY 19
   #define PIN_MODULE_LED 21
   #define PIN_MODEM_RX 32
   #define PIN_MODEM_TX 33

   #define RELAY_PIN 27
   #define DOOR_STATE_PIN 14

String id2 = "My_device";


void setup() {
   pinMode(PIN_MODEM_RESET,   OUTPUT);
   pinMode(PIN_MODEM_WAKEUP,  OUTPUT);
   pinMode(PIN_MODEM_PWR_KEY, OUTPUT);

   Serial.begin(115200);
   Serial1.begin(115200, SERIAL_8N1, PIN_MODEM_RX, PIN_MODEM_TX);
   delay(400);

  sensors_begin();

   thing["my_data"] >> [](pson & out){
       out["millis"] = millis();
   };

   thing["modem"] >> [](pson & out){
      out["modem"] =    thing.getTinyGsm().getModemInfo().c_str();
      out["IMEI"] =     thing.getTinyGsm().getIMEI().c_str();
      out["CCID"] =     thing.getTinyGsm().getSimCCID().c_str();
      out["operator"] = thing.getTinyGsm().getOperator().c_str();
   };

   //  set APN
   thing.setAPN(APN_NAME, APN_USER, APN_PSWD);

   // configure hardware module reset
   thing.setModuleReset([]{
      // modem reset
      digitalWrite(PIN_MODEM_RESET, 1);
      delay(100);
      digitalWrite(PIN_MODEM_RESET, 0);
   });

   thing.initModem([](TinyGsm& modem){
      // read SIM ICCID
      iccid = modem.getSimCCID();
      THINGER_DEBUG_VALUE("NB-IOT", "SIM ICCID: ", iccid.c_str());

      // disable power save mode
      modem.sendAT("+CPSMS=0");
      modem.waitResponse();

      // disable eDRX
      modem.sendAT("+CEDRXS=0");
      modem.waitResponse();

      // edRX and PTW -> disabled
      modem.sendAT("+QEDRXCFG=0");
      modem.waitResponse();

      // initialize module configuration for the first time
      EEPROM.begin(1);
      auto state = EEPROM.readByte(0);
      if(state!=MODULE_CONFIG_VERSION){
         THINGER_DEBUG_VALUE("NB-IOT", "Configuring module with version: ", MODULE_CONFIG_VERSION);

         // stop modem functionality
         modem.sendAT("+CFUN=0");
         modem.waitResponse();

         // configure APN
         modem.sendAT("+QCGDEFCONT=\"IP\",\"" APN_NAME "\"");
         modem.waitResponse();

         // preferred search bands (for Spain)
         modem.sendAT("+QBAND=3,20,8,3");
         modem.waitResponse();

         // set preferred operators
         modem.sendAT("+COPS=4,2,\"21407\"");  // movistar
         //modem.sendAT("+COPS=4,2,\"21401\"");  // vodafone
         modem.waitResponse();

         // enable net led
         modem.sendAT("+QLEDMODE=1");
         modem.waitResponse();

         // full functionality
         modem.sendAT("+CFUN=1");
         modem.waitResponse();

         EEPROM.writeByte(0, MODULE_CONFIG_VERSION);
         EEPROM.commit();
      }else{
         THINGER_DEBUG_VALUE("NB-IOT", "Module already configured with version: ", MODULE_CONFIG_VERSION);
      }
      EEPROM.end();
   });

   // configure ota block size to 
   ota.set_block_size(512);
   id2+=iccid.c_str();
   thing.set_credentials(USERNAME, id2.c_str(), id2.c_str());

}

void loop() {
  // iotmp handle, modem pwr on
  thing.handle();
}

```
````

## Documentation

{% file src="/files/Y5BBnkzGZaYmxh8ERwMq" %}

{% file src="/files/A9zFkjrlayivOZrSBOM2" %}

{% file src="/files/iPiiNOHmau6j8K4r8V5E" %}

{% file src="/files/BWN8rRe4ircKoMaTDVim" %}

{% file src="/files/b2kSuAaiU6XiVS20rdTg" %}

## **Use Cases**

🔹 **Smart Cities & Remote Monitoring** – Low-power sensors with NB-IoT for real-time monitoring\
🔹 **Industrial IoT (IIoT)** – Secure cloud connectivity for machinery and logistics tracking\
🔹 **Wearables & Health Tech** – Battery-optimized applications with Wi-Fi + NB-IoT\
🔹 **Home Automation** – Wi-Fi and cellular connectivity for smart devices\
🔹 **Agriculture & Environment** – Remote sensing with ultra-low power requirements

<figure><img src="/files/uCzUExV1XDW5797P282u" alt=""><figcaption></figcaption></figure>


# ClimaStick

Environmental and inertial sensing device based on ESP8266 processors.

<figure><img src="/files/oOXR8mJnxbXxIL5WvfIi" alt="" width="188"><figcaption></figcaption></figure>

## ClimaStick Reference

This board is a complete Internet of Things development kit that integrates WiFi connectivity along with a set of powerful sensors to provide environmental and motion sensing. This way, it is possible to create several connected projects easily. It is fully compatible with the Thinger.io cloud infrastructure and provides easy-to-use libraries that can be used in the Arduino IDE.

### Board Layout

#### ClimaStick V1.1:

![](/files/-LpggxcUIIZRPX3125rV)

#### ClimaStick V2:

![](/files/-Lpgh6i_cjAmGTJezGbu)

### Board Features

* Environmental sensing for temperature, relative humidity, barometric pressure, and lux intensity. A micro weather station!
* Inertial Measurement Unit (IMU), integrating an accelerometer, a gyroscope, and a digital compass.
* Li-Po Charger. It can charge (and be powered by) batteries from a solar panel or the built-in USB.
* RGB Led (only in ClimaStick V1).
* User button.
* Fully compatible with the Arduino Environment. Can be programmed directly from the Arduino IDE. There are libraries for reading the sensors and connecting the board to the Thinger.io Cloud or other Internet services.

### Sample Use Cases

* Education: This board provides an easy-to-use environment for education. It is fully compatible with the Arduino IDE, ensuring continued use of this familiar environment. The board also integrates multiple sensors, allowing students to develop projects directly. This eliminates the need for extensive wiring of multiple sensors and controllers on large protoboards, thereby avoiding potential shorts and burns. Moreover, its integrated WiFi capabilities enable students to advance in building connected solutions, including creating dashboards, sending emails, and recording data.
* Remote Telemetry: It provides a full IMU with Wifi connectivity that can be used for remote telemetry. The low weight of the device (4gr) and the option for setting a different power supply than the USB make this board an excellent option for monitoring drones or UAVs in real-time.
* Industry 4.0: It can be used in industrial environments for predictive maintenance, as it is possible to measure vibrations, temperature, and humidity in real-time and determine if the sensed parameters are between normal operation thresholds.
* Weather Station: This device can be used as a micro weather station. It can be powered easily from a battery and a solar panel, and collaborate with weather platforms, or just store the information in the Thinger.io cloud.

{% hint style="info" %}
To obtain highly accurate weather variables, the PCB processor must be hibernated using the "ESP.deepsleep()" instruction. &#x20;
{% endhint %}

## Configure Environment

This section covers how to set up the computer to start working with the ClimaStick device.

### Install required components

* CP2102 drivers from Silicon Labs may need to be installed if the ClimaStick device is not recognized by the computer. This driver facilitates USB-to-serial communication with the board.

[Download page >](http://www.silabs.com/products/mcu/pages/usbtouartbridgevcpdrivers.aspx)

* Arduino IDE v1.6.13 or newer.&#x20;

[Download page >](https://www.arduino.cc/en/main/software)

### Configure Arduino IDE

1- Open File > Preferences > Additional\_Boards\_URL\_Manager to include the "ESP8266 boards manager link" that can be retrieved from the [Github community project](https://github.com/esp8266/Arduino). It is normally:

`http://arduino.esp8266.com/stable/package_esp8266com_index.json`

![](/files/-LpgiWM5bf_jOcJw1H_L)

2- Open Tools > Boards > Boards Manager... and search for ESP8266 package, then install the latest version.

![](/files/-Lpght83EB6tgrRIjIYu)

3- Almost any ESP82XX processor can now be programmed directly from the Arduino IDE. Under `Tools > Boards`, the newly installed ESP8266 community boards should be visible.

1. For program ClimaStick V1 select **NODE\_MCU V1.0 (ESP-12E Module)**.
2. For program ClimaStick V2 select **WeMos D1 Mini Lite**.

![](/files/-LpghK_ZVnjVs-T7RSh_)

4- Open Sketch > Include Library > Manage Libraries, and search for **Thinger.io** libraries. Then install the Thinger.io and ClimaStick libraries:

![](/files/-LpXt-h9Pn-8B7vnTrrm)

5- Connect the ClimaStick to the computer and select its serial communication port number on: Tools > Port. It normally will be a COM port, or named as /dev/cu.SLAB\_USBtoUART on Mac.

6- Now, start developing with Thinger.io ClimaStick! It is helpful to start with the examples provided in the library by opening File > Examples > ClimaStick.

### Uploading firmware

The ClimaStick board can be programmed directly by pressing the Upload button of the Arduino IDE, as it has been designed with an automatic synchronization circuitry.  However, if the synchronization fails or the program is not able to connect with the PCB, please follow the next checklist in order to identify the problem:&#x20;

#### Firmware upload Troubleshooting

* Be sure that the micro USB wire allows data transmission. Some cables are only for electrical power and may not work properly.
* Verify that the operating system properly recognizes the CP2102 serial port interface.
* Check the selected serial COM port on Arduino IDE: Tools > Port
* ⚠ **Flash boot mode:** If it is confirmed that everything is configured properly and the problem persists, a flash boot-up can be forced by pressing the USR button on the board, then pressing the RST button once, and finally releasing the USR button. Following this procedure, the PCB should be ready to receive the program.

{% hint style="info" %}
ClimaStick's processor status can be checked by opening the Serial Port inspector of Arduino IDE and selecting 74.880 baudrate. When booting up, the PCB will print the boot status between two possibilities:  &#x20;

1\) If the processor is in normal execution mode, a message ending with the command "mode(3,6)" will be printed.&#x20;

2\) If Flash mode, a message ending in  "mode(1,6)" means that the processor is ready to receive a new sketch.&#x20;
{% endhint %}

## QuickStart Examples

The system should now be ready to open and upload any example from the ClimaStick library to the ClimaStick device. In the Arduino IDE, navigate to `File > Examples > ClimaStick` to access examples illustrating the most useful functions of the board's features, including sensors, IMU access, battery level readings, weather conditions, and LED state changes.

### ClimaStick Auto

The ClimaStick\_Auto example code is a little sketch that integrates all ClimaStick functionality, defining all sensor resources that will be accessible from the Thinger.io Platform:

```cpp
#include <ClimaStick.h>

#define USERNAME "your_user_name"
#define DEVICE_ID "your_device_id"
#define DEVICE_CREDENTIAL "your_device_credential"

#define SSID "your_wifi_ssid"
#define SSID_PASSWORD "your_wifi_ssid_password"

ClimaStick thing(USERNAME, DEVICE_ID, DEVICE_CREDENTIAL);

void setup() {
  // configure board wifi
  thing.add_wifi(SSID, SSID_PASSWORD);
  // initialize board sensors
  thing.init_sensors();
  // define resources for all features
  thing.init_resources();
}

void loop() { 
  thing.handle();
}
```

### Data Recording using Sleep

The board can be easily configured to record environment values and then enter a sleep state. This functionality is quite useful when powering the device from a battery. This example will write the environment values to the specified `BucketId`, which must be created in the Thinger.io console.

```cpp
#include <ClimaStick.h>

#define USERNAME "your_user_name"
#define DEVICE_ID "your_device_id"
#define DEVICE_CREDENTIAL "your_device_credential"

#define SSID "your_wifi_ssid"
#define SSID_PASSWORD "your_wifi_ssid_password"

ClimaStick thing(USERNAME, DEVICE_ID, DEVICE_CREDENTIAL);

void setup() {
  // configure board wifi
  thing.add_wifi(SSID, SSID_PASSWORD);
  // initialize board sensors
  thing.init_sensors();
  // define the "environment" resource
  thing.init_environment_resource();
}

void loop() { 
  thing.handle();
  // write to bucket BucketId
  thing.write_bucket("BucketId", "environment");
  // sleep the device 60 seconds
  thing.sleep(60);
}
```

This example is particularly useful when accurate temperature values are required. Due to its low power dissipation capacity, the small ClimaStick board heats up quickly after a few seconds of operation, making accurate temperature readings challenging during constant work. To obtain more accurate temperature data, it is advisable to put the processor to sleep and wait a few minutes before taking a fresh sensor reading. The board supports the `thing.sleep(seconds)` function, that will sleep the processor and all WiFi transmissions. After the sleep, the device will start again like a normal reboot.

> **⚠ DEEPSLEEP CONSIDERATIONS:**
>
> * To allow the processor to automatically wake up it is mandatory to weld the WKUP connexion of the board bottom as shown in the section "other considerations".&#x20;
> * During the deepSleep mode, it is not possible to flash code. To change the program, make a forced flash mode boot up as described in the Uploading firmware section.
> * Note that, when the processor makes a hard reset, all dynamic variables will lost its values.

After some time, the bucket should look like:

![](/files/-LpXt-hDIiEsoZLG56dB)

That will allow creating historical dashboards like:

![](/files/-LpXt-hFPK-yoWkXdQfj)

## ClimaStick Functions

The ClimaStick functions can be executed to read any sensor value as required by the application. Here we describe some of the most important functions. Using these functions always requires initializing the sensors in the setup method:

```cpp
void setup() {
    thing.init_sensors();
}
```

### Reading Accelerometer

```cpp
Accelerometer accel = thing.get_acceleration();
Serial.println(accel.ax);
Serial.println(accel.ay);
Serial.println(accel.az);
```

### Reading Gyroscope

```cpp
Gyroscope gyro = thing.get_gyroscope();
Serial.println(gyro.gx);
Serial.println(gyro.gy);
Serial.println(gyro.gz);
```

### Reading Compass

```cpp
Compass compass = thing.get_compass();
Serial.println(compass.heading);
Serial.println(compass.headingDegrees);
```

### Reading Magnetometer

```cpp
// you can also call thing.get_raw_magnetometer() to read raw values and not normalized
Magnetometer magnet = thing.get_magnetometer();
Serial.println(magnet.x);
Serial.println(magnet.y);
Serial.println(magnet.z);
```

### Reading Temperature

```cpp
float temperature = thing.get_temperature();
Serial.println(temperature);
```

### Reading Humidity

```cpp
float humidity = thing.get_humidity();
Serial.println(humidity);
```

### Reading Pressure

```cpp
float pressure = thing.get_pressure();
Serial.println(pressure);
```

### Reading Lux

```cpp
uint16_t lux = thing.get_lux();
Serial.println(lux);
```

### Change RGB Led (Only in ClimaStick V1)

```cpp
 int r=255, g=0, b=0;
 thing.set_rgb(r, g, b);
 // or
 thing.set_rgb("blue");
```

## OTHER CONSIDERATIONS

This section covers different considerations while using the board.

### General Considerations

*
* The device should be powered by a 5V USB power supply capable of providing 250 to 1000mAh of current.
* This board has a low heat dissipation capacity, so it is normal for it to heat up during high transmission processes. The temperature sensor may read elevated values while performing full-duplex communication.
* This device is developed for prototyping and software development support; therefore, it is not designed to withstand harsh weather conditions without an appropriate protective enclosure.
* Avoid touching the component surfaces while using the device, as electrostatic discharge can cause short circuits and malfunctions. It is recommended to handle the board by its edges:

<figure><img src="/files/-Lpgmvwp9sSuT9edzw3k" alt=""><figcaption></figcaption></figure>

* If necessary, clean the circuit using a non-damaging contact cleaner like Isopropyl alcohol and a soft brush.&#x20;
* Store in a cool, dry place. Protected from dust.

### External Power Supply

* If the VIN power header is used, care must be taken to connect it in the correct position. Not following this directive could damage the protection diode.

&#x20;

<figure><img src="/files/-LpgmiRsb3jJfXGBNdk6" alt="" width="375"><figcaption></figcaption></figure>

* ⚠ Do not use the VIN power supply and USB power supply at the same time! It can damage the hardware.

### Battery Power Supply

* A battery can be powered and charged directly from the board. Use the BAT power header, and take care of the polarity:

<figure><img src="/files/-Lpgmp6lJjlXNrOyDEg5" alt="" width="375"><figcaption></figcaption></figure>

* BAT header is connected to a lithium battery charger that can manage 3.7Vdc, 500mAh Li-Po / Li-ion batteries' charge and discharge process.
* To charge a battery, connect it to the BAT header and power on the ClimaStick through USB / VIN connectors. The battery charger will manage the charging voltage to increase the battery life and stop the charging cycle when the voltage drops to 4.2Vdc.
* ⚠ If a different battery is being used, it should be plugged into the VIN connector.
* ⚠ If the cell voltage drops under 3.6V, an automatic battery protection circuit will power off the system.

### Wake-up selector

When using the Deep-sleep function, it is necessary to weld together the two connectors of the WKUP port in order to close the WKUP circuitry (GPIO16-RESET). This port is not originally soldered to avoid malfunctions in the programming process. It is normal that, by enabling this option, it is necessary to force the flash mode before each reprogramming.

![](/files/USMU4rh6EE1ZDZqjolvX)

## Device Files

### Arduino Library

Click below to download latest ClimaStick.h library:

{% file src="/files/-Lz7h52HvcX7bGgr1tSU" %}

### Datasheets

Download the device datasheet from:

[ClimaStick V1 Datasheet >](https://github.com/thinger-io/Docs/tree/9fc057586e6704dcf058d1a33a7f25ae648c002c/hardware/climaStick/assets/ClimaStick_Datasheet.pdf)

[ClimaStick V2 Datasheet >](https://github.com/thinger-io/Docs/tree/9fc057586e6704dcf058d1a33a7f25ae648c002c/hardware/climaStick/assets/ClimaStick_V2_Datasheet.pdf)

### Design files

Download and edit the device files using Eagle CAD:

[ClimaStick V1 design files (.sch & .brd)](https://acme.thinger.io/v1/users/jt/storages/ClimaStickFiles/files/)

[ClimaStick V2 design files (.sch & .brd)](https://acme.thinger.io/v1/users/jt/storages/ClimaStickFiles/files/)

### Disclaimer

* This device is commercialized by the Thinger.io platform (INTERNET OF THINGER S.L.) as a development kit, so it is not subject to commerce homologation rules. The device owner is liable for all injuries to third parties and damage to their properties.&#x20;


# WiFi Button

This section describes the main characteristics, user guide, and development guidelines for Thinger.io WiFi Button.

## Introduction

Thinger.io WiFi Button is a ready-to-go Internet of Things-based dash-button that integrates an ESP8266 processor with WiFi connectivity, along with a simple integration with Thinger.io platform events to provide flexible support for many different use cases.&#x20;

<figure><img src="/files/v5oibVueCVgMOKp744sf" alt="" width="563"><figcaption></figcaption></figure>

![](/files/-Lte6RzcR4rrqxbM8QM0)

These devices are aimed at creating simple interfaces, Huma-Internet, which can be used for any kind of project in education, connected industry, or home automation. Depending on the user requirements, the WiFi-Button can be used to execute functions through Thinger.io Platform, such as sending a notification via email, endpoints to IFTTT, messages to other devices or even, by means of a Thinger.io Server Event, trigger the execution of a flow in Node-RED.

![](/files/-LtxhHpCXPTdMsRW42wC)

Our buttons come with an example program that enables configuration of a WiFi network and Thinger.io credentials via an onboard web server. Once configured, the device instantly connects to the specified Thinger.io Server to perform programmed functions. Afterward, the WiFi Button's hardware enters a hibernation state to conserve battery, extending its life to over 3000 pulsations under optimal conditions.

The following sections explain how to work with this example program and how to configure the Thinger.io platform to leverage its full capabilities.

## **Quick start guide**

This section contains the deployment instructions that should be followed on the device’s first run:

1. Opening the bottom battery cap, Insert with two R03 (AAA) 1.5V alkaline batteries, then close the cap and insert the security screw if available.&#x20;
2. Put the bottom switch in the “ON” position
3. Press the main button to first start the device. One “bip” sound will be emitted.
4. The device will create a WiFi hotspot that can be used to configure connection credentials using a multimedia device.

### **Button Status graph**

This device has been provided with a basic program that allows creating useful functionalities using Thinger.io endpoints. The next execution diagram shows how this program works and how to use the single button to move between the different program menus, which allows introducing or deleting WiFi credentials, changing the device program by using Arduino OTA feature or just making a single connection to order any functionality.&#x20;

![](/files/-LtxoRoUoHSHC4lw-JRv)

### **Device Sound interface**

This device includes a buzzer that provides a simple way to monitor its working status. The following sound commands list specifies the interface protocol introduced in the device.

| **Process status**                | **Sound specification** |
| --------------------------------- | ----------------------- |
| Wake up                           | **·**                   |
| 5 seconds pressed button          | **·**                   |
| Confirmation                      | **· ·**                 |
| WiFi error                        | **\_ \_ \_**            |
| Cleaning credentials menu         | **· · ·**               |
| Cleaning credentials confirmation | **\_**                  |
| Timeout, going to sleep           | **\_     \_     \_**    |

| Sound specification | **Sound description**     |
| ------------------- | ------------------------- |
| **"·"**             | short sharp sound (“bip”) |
| **"\_"**            | long grave sound (“daaa”) |
| "  "                | Silent                    |

### **Initial configuration process**

A brand-new device is not ready for immediate use; it requires the introduction of Wi-Fi connection credentials and user information. During its initial setup, the device will create a temporary Wi-Fi hotspot. This hotspot enables users to access a graphical configuration interface via a standard web browser. Follow the next steps to access this interface and configure the Wi-Fi credentials.

{% hint style="info" %}
To conserve battery, the configuration hotspot remains active for 180 seconds (3 minutes). **After this period, the Wi-Fi button will automatically power off.** If the configuration process was not completed, it can be restarted by pressing the main button once.
{% endhint %}

1\)      With the bottom switch in the “ON” position, press the device and listen to the Wake-up signal (one “bip”).

2\)      Using a Smartphone or a Personal computer with WiFi connectivity, open the WiFi configuration and look for the button device WiFi hotspot. Then connect to this network by introducing the password, which will be the same as the WiFi SSID (wifi network name).

![](/files/-LteS84eZsVACf1W9N93)

3\)      When the device begins to connect to the access point, a Web Browser should automatically open the configuration interface:

![](/files/-LteTHfhWQeoDpA6TV-m)

{% hint style="danger" %}
WARNING! If the computer is connected to the Wi-Fi hotspot but the web browser doesn't show this interface, it is possible to manually access it by opening a web browser and entering the 192.168.4.1 address in the browser bar.
{% endhint %}

4\)      Select **“Configure WiFi”** option by pressing the button on the main menu. This option initiates a scan to identify higher-quality WiFi signals within the surrounding environment (home or office), displaying them in the subsequent menu.

![](/files/-LteTPDnTkzHDjbqLUxh)

{% hint style="info" %}
IMPORTANT: If the desired Wi-Fi Network SSID doesn't appear in this list, pressing 'Scan' will launch a new scanning process. If the problem persists, the SSID can be manually entered into the SSID text box.
{% endhint %}

5\)      Select the correct Wi-Fi network SSID by clicking it, then enter the Wi-Fi security password to establish full connectivity for the Wi-Fi button device.

6\)      Continue by filling out the form as explained in the next section (Device Credentials Configuration).

7\)      Finally, press the 'Save' button to store credentials and initiate the device's first run.

If the device successfully connects to the Wi-Fi network, a confirmation sound will be emitted. After sending its first message, the device switches to a low power mode; however, the bottom hardware switch can be turned off to prevent accidental executions without affecting the saved configuration.

{% hint style="danger" %}
**WARNING!** If the connection wasn’t possible, **the WiFi hotspot will be launched again** in order to provide the user another chance to make the configuration. If, after 3 minutes, the device is not receiving interaction from the user, an alert signal will be emitted and the device will power off the WiFi hotspot. &#x20;
{% endhint %}

### **Device Credentials Configuration**

In addition to the common configuration parameters, each connected device has to be configured to send data to a specific IoT server. The next table shows all the parameters that can be changed in these buttons in order to adapt them to different use cases:

| **Parameter**           | **Description**                                                                                  |
| ----------------------- | ------------------------------------------------------------------------------------------------ |
| IoT server address      | Thinger.io Hostname, for example "acme.do.thinger.io"                                            |
| Server account          | Each account can be managed to a project or user, place here the name of these account           |
| Auto-provisioning token | An authorization string that provide auto-provisioning permissions to create the device profile. |
| Device ID               | Button identifier                                                                                |

As soon as a valid WiFi configuration is made, the WiFi button will create a new device profile on this platform according to the auto-provisioning process, setting its device credentials with the data that was included during the button configuration. This profile can be checked at the Thinger.io platform workspace by clicking on the “devices” menu tab.

<figure><img src="/files/W9zzgkX3rOnkdgJeXex9" alt=""><figcaption></figcaption></figure>

Clicking on the device name, it is possible to access the device dashboard that contains information related to the device connection and status, and provides a simple way to show device parameters.

**Working with the device**

1. Make sure that the bottom switch is in the “ON” position.
2. Press the main device button for an instant. A wake-up signal will be emitted.
3. If the device is configured properly, after a few seconds the device shall emit the confirmation signal (double “beep”).

If the confirmation signal is not emitted, review the configuration or go to the troubleshooting section of this guide (sect. 6).

**Changing device configuration**

After the first configuration, it is possible to change WiFi credentials and program parameters by cleaning the memory and repeating the configuration process. To make this, the system has been provided with a “delete credentials” process, which can be launched using the main button as is explained in the next steps:

1. Make sure that the bottom switch is in the “ON” position.
2. Hold the device's main button pressed (Wake-up signal will be emitted at the beginning), then continue pressing the button for 5 to 8 seconds.
3. Once a second "bip" is emitted, the button can be released to enter "cleaning credentials" mode.
4. If this process is carried out properly, the cleaning credentials mode will run in the device for 10 seconds. And the “cleaning credentials” message will be emitted.
5. To confirm the deletion of the credentials, press the button momentarily one more time. Then the “delete” message will be emitted and the WiFi configuration hotspot will be launched in order to provide a way to configure new credentials.
6. If new credentials are not to be configured, the device's bottom switch can be turned off, or a 3-minute waiting period can be observed for automatic power-off.

{% hint style="warning" %}
Once a device's credentials are deleted, it is not possible to recover them.
{% endhint %}

### **General Troubleshooting Guidelines**

This section compiles all the possible operating problems and the recommendations to follow in order to solve them or to identify the factor that causes the system malfunction:

| Problem                                                                                             | Source                                                                                      | Solution                                                                                                           | Observations                                                                                                                                 |
| --------------------------------------------------------------------------------------------------- | ------------------------------------------------------------------------------------------- | ------------------------------------------------------------------------------------------------------------------ | -------------------------------------------------------------------------------------------------------------------------------------------- |
| After configure the device credentials, no confirmation signal was emitted and the hotspot stils up | WiFi credentials can’t be confirmed because the device wasn’t able to connect this network. | Check WiFi SSID and password to be sure that they are well gotten and the WiFi is accessible in 2.4 Ghz frequency. | It is possible that the SSID and password are correct but the device can't connect because of additional protection protocols in the network |
| The device is not emitting wake-up signal when main button is pressed.                              | <p>1.Device battery is discharged</p><p>2. Device bottom switch is in “OFF” position</p>    | <p> 1. Change device battery </p><p>2. Put the bottom switch in “ON” position </p><p></p>                          | Also, The device could be working with configuration hotspot opened                                                                          |

## Configuring Thinger.io Platform

{% tabs %}
{% tab title="Configure Access Token" %}
{% hint style="warning" %}
Sorry! This is a work in progress
{% endhint %}
{% endtab %}

{% tab title="Using an Endpoint" %}

{% endtab %}

{% tab title="Capture Connection Event" %}

{% endtab %}
{% endtabs %}

## Development&#x20;

These devices have been created as a platform to develop different IoT use cases; it is possible to change their standard programming to modify the behavior.

### Configure Environment

This section covers how to set up the computer to start working with the ClimaStick device.

#### Install required components

* CP2102 drivers from Silicon Labs may need to be installed if the ClimaStick device is not recognized by the computer. This driver facilitates USB-to-serial communication with the board.

[Download page >](http://www.silabs.com/products/mcu/pages/usbtouartbridgevcpdrivers.aspx)

* Arduino IDE v1.6.13 or newer.&#x20;

[Download page >](https://www.arduino.cc/en/main/software)

#### Configure Arduino IDE

1- Open File > Preferences > Additional\_Boards\_URL\_Manager to include the "ESP8266 boards manager link" that can be retrieved from the [Github community project](https://github.com/esp8266/Arduino). It is normally:

`http://arduino.esp8266.com/stable/package_esp8266com_index.json`

![](/files/-LpgiWM5bf_jOcJw1H_L)

2- Open Tools > Boards > Boards Manager... and search for ESP8266 package, then install the latest version.

![](/files/-Lpght83EB6tgrRIjIYu)

3- Almost any ESP82XX processor can now be programmed directly from the Arduino IDE. Under `Tools > Boards`, the newly installed ESP8266 community boards should be visible.

1. For program ClimaStick V1 select **NODE\_MCU V1.0 (ESP-12E Module)**.
2. For program ClimaStick V2 select **WeMos D1 Mini Lite**.

![](/files/-LpghK_ZVnjVs-T7RSh_)

4- Open Sketch > Include Library > Manage Libraries, and search for **Thinger.io** libraries. Then install the Thinger.io Platform and WiFi Button libraries:

![](/files/-LpXt-h9Pn-8B7vnTrrm)

Now the computer is ready to start programming these devices to easily adapt their behavior to multiple use cases.

### Firmware development guidelines

#### Hardware resources

| Resource       | Attached GPIO | Annotations                                                                                                                   |
| -------------- | ------------- | ----------------------------------------------------------------------------------------------------------------------------- |
| Button         | GPIO12        | This port can be read to know if the main button is pressed or not.                                                           |
| Hold Circuitry | GPIO13        | This port must be HIGH to hold the device power supply enabled (POWER ON). If the port is LOW, the device will be turned OFF. |
| Buzzer         | GPIO14        | This is an active buzzer so HIGH signal on this port results on a constant sound.                                             |
| LED            | GPIO5         | This feature is optional, not all the hardware devices has been provided with LEDs                                            |
| Battery Sensor | Internal      |                                                                                                                               |

#### Thinger.io Resources

#### WiFi Button Library

### Uploading firmware

When a new device firmware is ready, the uploading process requires using an external processor that needs to be wired to the PCB programming connector.

**OTA programming**

In order to provide an upgradeable system, these devices can be reprogrammed using Arduino IDE / Platformio IDE OTA (Over The Air) system. To launch this status and upgrade device firmware, follow the next steps:

1\) Make sure that the bottom switch is in the “ON” position.

2\)      Hold the device's main button pressed (Wake-up signal will be emitted at the beginning), then continue pressing the button for 10 to 15 seconds.

3\)      When a third "beep" is emitted, the button can be released to enter "OTA firmware update" mode. An alert signal will then be emitted.

4\)      If this process is carried out properly, an “OTA” hotspot will be opened. Using a computer, developers can connect Arduino IDE to this network and send new firmware to the button via the Wireless Port.

#### **USB-**&#x55;ART Programming

1\)Button enclosure disassembling.

\>>IMAGE<<

2\)Wiring a UART programmer

{% tabs %}
{% tab title="NodeMCU as programmer" %}
![](/files/-Lz7uvjoqQwrIGfmAJCO)
{% endtab %}

{% tab title="Using a UART programmer" %}

{% endtab %}
{% endtabs %}

Been able to connect the WiFi button to the computer requires a UART to USB device. A specific programmer or a Node-MCU PCB can be used:&#x20;
<figure><img src="/files/F1joj23rJk2o4qokWhog" alt="" width="563"><figcaption></figcaption></figure>

Once the device is wired, go to the Arduino IDE> Tools>Serial Port selector and choose the addressed serial communication port of the programmer. Commonly, it will be a COM\_# port, or named as /dev/cu.SLAB\_USBtoUART on Mac.

At this point, the WiFi Button PCB can be programmed directly by pressing the Upload button of the Arduino IDE. However, if the synchronization fails or the program is not able to connect with the PCB, please follow the next checklist to identify the problem:&#x20;

#### UART Programming Troubleshooting

* Be sure that the micro USB wire allows data transmission. Some cables are only for electrical power and may not work properly.
* Verify that the operating system properly recognizes the CP2102 serial port interface.
* Check the selected serial COM port on Arduino IDE: Tools > Port
* ⚠ **Flash boot mode:** If it is confirmed that everything is configured properly and the problem still persists, a flash boot-up can be forced by pressing the USR button on the board, then pressing the RST button once, and finally releasing the USR button. Following this procedure, the PCB should be ready to receive the program.

{% hint style="info" %}
ClimaStick's processor status can be checked by opening the Serial Port inspector of Arduino IDE and selecting 74.880 baudrate. When booting up, the PCB will print the boot status between two possibilities:  &#x20;

1\) If the processor is in normal execution mode, a message ending with the command "mode(3,6)" will be printed.&#x20;

2\) If Flash mode, a message ending in  "mode(1,6)" means that the processor is ready to receive a new sketch.&#x20;
{% endhint %}

## Device Files

### Datasheet

{% file src="/files/-LwIw6UKLQ8WgipXf\_nt" %}
Thinger.io WiFi Button Datasheet.pdf
{% endfile %}

### Design files

{% file src="/files/-LwIvnq6vNUGzXaJ9PRY" %}
Thinger.io WiFi Button Dessing Files.zip
{% endfile %}

### Firmware files

{% file src="/files/-Lz7uP3UebCDdp3RcBfH" %}
Thinger.io WiFi Button Original Firmware
{% endfile %}

## Additional considerations

* This device is designed for indoor use only; do not expose it to rain or snow. As it utilizes Wi-Fi communication, a stable network with sufficient signal quality is mandatory for proper operation.
* This device is compatible only with 2.4GHz Wi-Fi networks. WPA2 and DHCP protocols must be configured on the Wi-Fi router to ensure a secure IP address and connection for the device.
* Use only R03 (AAA) batteries. Using other battery types may lead to bursting, causing personal injury and damage. Do not mix different battery types (e.g., NiMH, NiCd, Alkaline, Li-ion, Li-po) in the device.
* Remove batteries from the device if it will not be used for an extended period.
* Do not incinerate, disassemble, or short-circuit batteries.
* Do not dispose of electrical appliances as unsorted municipal waste; use separate collection facilities. Contact the local government for information on available collection systems. Improper disposal in landfills can lead to hazardous substances leaking into groundwater and entering the food chain, potentially harming health and well-being.

#### Disclaimer

This device is commercialized by INTERNET OF THINGER S.L. (Thinger.io platform) as a self-certified development kit. Consequently, it is not subject to common commercial homologation rules. The device owner is liable for all injuries to third parties and damage to their properties.


# SMARTPHONE APP

## Introduction

![](/files/ebE8jX5UIfLzpq51bTj1)

This documentation provides information about the mobile app of the Thinger.io IoT platform. This way, you will learn how to manage different elements of the platform on your smartphone. The app is available on Google Play and the App Store and it is ready to download.

[![](/files/0GQbnC3rDRuoyCJxEtfD)  ](https://play.google.com/store/apps/details?id=io.thinger.mobile.app\&pli=1) [  ![](/files/BBEJmjzucznMrmwK06g2)](https://apps.apple.com/us/app/thinger-io/id6503300549)

## Features

The application offers almost the same features as the web application. Access the capabilities of Thinger.io in the palm of your hand, enabling you to manage and control IoT devices and workflows anytime, anywhere.

![](/files/vBZbjylCbEqgdUSZTqdR)  ![](/files/jykt8GpUMShPz4XiUMAD)

![](/files/OPf29UMKLaF8alJRRpaU) ![](/files/y3zjAXlZn8jxyNdOqOAz)

### Logging in&#x20;

This application can be used to log in with both the community console (set by default) or against your private server.

![](/files/J9HaLKA8wpflHCYapaDE)

To configure the connection against your private server, click on the Settings button and set up your hostname.

<figure><img src="/files/VGoFdRIzXuMjU2VFmpa1" alt=""><figcaption></figcaption></figure>

### App Rebranding for Business

Are you a business interested in application rebranding? [Let us know](https://thinger.io/contact-us)! We offer customization options to align the app with your brand’s identity, providing a seamless experience for your users.

#### Customization Options

* **Brand Colors**: Customize the app’s color scheme to match your brand.
* **Logo and Icons**: Replace default icons and logos with your own.
* **Feature Adjustments**: Tailor the app’s features to better suit your business needs.


# ABOUT

Thinger.io is an Open-source cloud-based IoT Platform developed by INTERNET OF THINGER SL, a Spanish company whose objective is to provide an efficient, consistent and easy-to-use technology for IoT.

## History

The Thinger.io Platform project began in early 2015, with its initial source code lines written in 2014. It originated as a side-project by Dr. Álvaro Luis Bustamante while he was a researcher at the University Carlos III of Madrid (Spain). After studying various solutions for online interaction with affordable electronic devices, he found existing platforms to be either difficult to use, inefficient, or lacking sufficient capabilities to simply create professional IoT projects.

> *"Why I have to select a compatible vendor hardware? Why I need to use an Operating System just for my toaster? Why my device must run a scripting language that burn the batteries? Why I have to rely on a specific vendor and its closed platform? These are some questions I made myself before starting to work in the thinger.io platform."*

What began as a backend project to retrieve data and control devices in real-time quickly became a much more general tool that could be easily extended in any direction. In 2018, the project was turned into a loyalty-founded company and released an enterprise version of the Thinger.io platform technology to provide professional support for IoT projects with the original vision of a perfect balance between simple but powerful technology.  &#x20;

For some more of the history and highlights, check outthe  blog: <https://thinger.io/blog/>

## Development & Roadmap

Thinger.io is a constantly evolving IoT platform designed to meet the dynamic needs of the IoT community. Our development efforts focus on enhancing core features, integrations, and overall usability to ensure the platform remains powerful, flexible, and easy to use.

Instead of maintaining a fixed roadmap here, we encourage you to stay up to date and actively participate in shaping the future of Thinger.io through the following channels:

* **Community Forums**: Share your ideas, feature requests, and feedback at [community.thinger.io](https://community.thinger.io). This is the best place to interact with our team and fellow Thinger.io users.
* **Discord Server**: Join our vibrant community on [Discord](https://discord.com/invite/xAc24hdWZE), where you can ask questions, discuss projects, and connect directly with other IoT enthusiasts and our developers.

If your company has specific feature requirements or needs to expedite certain capabilities, feel free to reach out directly at <info@thinger.io>. We’re always open to collaboration that benefits the whole community.

Thank you for helping us improve Thinger.io!


# Community & Social Links

## Developers Network

The two main places to discuss Thinger.io are:

* [Thinger.io **community discussion forum**](https://community.thinger.io)
* [GitHub repository forum](https://github.com/thinger-io) and more concrete on the [server repository](https://github.com/thinger-io/thinger-server) and [plugins repository](https://github.com/thinger-io/plugins)

These are the best places to get started if you’re stuck on something, think you may have hit a bug, have a suggestion for the greatest feature ever or if you just want to say hello.

If you can't find help there or need professional support, please consider contracting our extended support when purchasing your license, and if you need commercial information, do not hesitate to write to <info@thinger.io>.&#x20;

## Partners Network

Although we haven't released it yet, still working on creating a large partners community directory to provide our users a way to get in touch with the best related technologies, simplifying even more the development of their projects obtaining some privileges. of Parents in which there are already some important actors of the IoT behavior, that's why with so we continue working on creating a nice partners community.

### Thinger.io **p**artners

#### IoT service providers

* [**Sigfox:** ](https://sigfox.com)global communication service provider for IoT
* [**Node-RED**](https://nodered.org/)**:** Open Source-Rule Engine for IoT projects
* [**Talent Swarm**](https://talentswarm.com/)**:** Industrial Digital Tweens experts
* [**UC3M GIAA**](http://portal.uc3m.es/portal/page/portal/grupos_investigacion/giaa)**:** Advanced Artificial Intelligence and Data Analytics experts
* [**Fundación UNED:** ](https://www.fundacion.uned.es/actividad/idactividad/20219)complementary education for engineers

**Hardware providers and manufacturers**

* [**Espressif Systems:**](https://www.espressif.com/) designs a range of high-performance Wi-Fi+Bluetooth/BLE chipsets and modules.
* [**Theobroma Systems**](https://www.theobroma-systems.com/)**:** High-performance Hardware developers for devices, gateways and servers.&#x20;
* [**SeeedStudio**](https://www.seeedstudio.com/fusion_pcb.html)**:** Whether you are a developer, technical supplier, or industry player, we provide products and services for your IoT needs.

### How to become a partner

There are multiple ways in which we can collaborate depending on your business model and services, so do not hesitate on writing us your proposal at <info@thinger.io> or fill [**this form**](https://thinger.io/become-a-partner) to benefit of better contracting conditions, access to our developers community or being an active part of Thinger.io Platform contributors, that are helping us to continue growing this technology in the best direction.&#x20;

## Other Networks

### Social network profiles

* Twitter:[ @thinger\_io](https://twitter.com/thinger_io)
* Instagram: [@thinger.io](https://www.instagram.com/thinger.io/)
* Facebook: [@thinger.io](https://www.facebook.com/thinger.io/)
* LinkedIn[: Thinger.io](https://www.linkedin.com/company/10001218)
* YouTube: [thinger.io](https://www.youtube.com/channel/UCnnGBSXMZ06CC0aun5RD41g)
* Hackster.io: [thinger-io](https://www.hackster.io/thinger-io)

### Professional network profiles

* [**Crunchbase** is a platform for finding business information about private and public companies](https://www.crunchbase.com/organization/thinger-io#section-overview)
* [**Iotone** is an advisory firm focused on industrial digitalization.](https://www.iotone.com/supplier/thinger.io/v2348)
* [**Angellist** Search tech & startup jobs, find new tech products, and invest in startups](https://angel.co/company/thinger-io)


# Branding

in this section we have uploaded the logos and icons of the platform to be used for drawing purposes

<figure><img src="/files/Jl0apxzBwM2f95Unq2Je" alt="thinger.io logo"><figcaption></figcaption></figure>

<figure><img src="/files/ExjRHlC3OlDp32nm2MaZ" alt="thinger.io logo dark"><figcaption></figcaption></figure>

{% file src="/files/JEIHJcOCcVWS6ntaHW8b" %}

{% file src="/files/Zibn2ulREovsVK7rJwBV" %}


# Terms & Conditions

These Terms of Service, including its appendixes specific to the country ( **"TCP Service Agreement"**, **"TCP Agreement"**, **"Agreement"** ) represent the terms and conditions applied to the access and use of the Thinger.io Cloud Platform, currently reachable at URL: [https://console.thinger.io](https://console.thinger.io/) by default or other configured custom domain that might be in use from time to time. This document is a legally binding agreement between the entity or person accepting these terms ( **"Customer"** or **"You"** ) that governs the application to services provided by Thinger.io entity listed in Paragraph 2 below (referred to as **"We"**, **"Our"** or **"Thinger.io Cloud Platform"** ). By using the Thinger.io Cloud Platform, the Customer acknowledges and agrees that they have read, understood, and consent to be bound by the Terms and all Your affiliate users or users approached by You ( **"End User"** ) to use the Service are bound to these Terms of Service.

**1. Submission and Acceptance of the Terms**

1.1 Customer use of the Thinger.io Cloud Platform is subject to the terms and conditions contained in this document as well as Thinger.io Cloud Platform Privacy Policy, Stripe Terms of Service and any other website or service policies or conditions as adopted and integrated with the Thinger.io Cloud Platform from time to time (collectively referred to as the " **Terms**").

1.2 This TCP Service Agreement is effective (the **"Effective Date"** ) when a Customer accesses the Thinger.io Cloud Platform for the first time. If you are accepting Terms or accessing the platform on behalf of Customer, you represent and warrant that (i) you have full legal authority to bind Customer to this TCP Service Agreement; (ii) you have read and understand this TCP Service Agreement; and (iii) you agree, on behalf of Customer, to this TCP Service Agreement. Vice versa, the Customer is deemed liable, represents and warrants that all users accept and comply with these Terms.

**Please do not use the Service if you do not agree to and accept all of the Terms. You acknowledge and agree that Thinger.io may amend any Terms at any time by posting the relevant amended and restated Terms on the Thinger.io Cloud Platform. Unless otherwise explicitly announced by Thinger.io, any changes to the Terms become effective right after they are posted. By continuing to use the Services, you agree to be bound by the latest released Terms.**

1.3 You may request to enter into other terms and conditions and agreements ( **"Additional Agreement"** ), whether online or offline, with Thinger.io. If there is any conflict or inconsistency between the Terms and such agreements, the Additional Agreement shall not take precedence over the Terms, unless it specifically pertains to the services governed by that conflicting Additional Agreement.

1.4 Assignment of the Terms to any person or entity is denied.

1.5 Thinger.io may change the Terms from time to time where such change is required to comply with applicable law, applicable regulation, court order, or guidance issued by a governmental regulator or agency, where such change is expressly permitted by the data processing and security policies, or where such change (i) is commercially reasonable; (ii) does not result in a degradation of the overall security of the Service; (iii) does not expand the scope of or remove any restrictions on processing of Customer personal data, as described in the Privacy Policy; and (iv) does not otherwise have a material adverse impact on Customer's rights.

**2. Provision of Service**

2.1 The Thinger.io legal entity that you are contracting with is Internet Of Thinger S.L. (referred as to **"Thinger.io"** )

2.2 You must register as a customer on the Thinger.io Cloud Platform in order to access and use the Service.

2.3 Thinger.io has the right to restrict, suspend or terminate your access to or use of the Thinger.io Cloud Platform or any features of the Service due to breach of the Terms or the Additional agreement.

2.4 The features within the Service may vary for different regions and countries. Thinger.io gives no warranty or representation that the Service or feature or function thereof will be available in all countries and regions or for all users, especially for the Customers under then-current [sanctions list](https://home.treasury.gov/policy-issues/financial-sanctions/specially-designated-nationals-list-data-formats-data-schemas). Thinger.io may in its sole discretion limit, deny or create different levels of access to and use of Service with respect to different users.

2.5 Thinger.io may discontinue or modify the TCP Service or certain functionality of the same. We will notify Customer at least 12 (twelve) months before discontinuing Service or associated feature unless replaced with the same functionality Service or component.

**3. Use of the Thinger.io Cloud Platform**

3.1 Your compliance with any and all applicable laws and regulations is a condition of your access to and use of the Service. You agree that you will not engage in fraudulent or deceptive practices and will not provide products and services to SDNs from the above mentioned sanctions list, terrorists, extremists and all other illegal or semi-legal entities, when using the Service.

3.2 With respect to content made available via the Service, the Customer and its End users agree that they will not: (a) copy, modify, or create a derivative work of the Service; (b) reverse engineer, decompile, translate, disassemble, or otherwise attempt to extract any or all of the source code of the Service (except to the extent such restriction is expressly prohibited by applicable law); (c) sell, resell, sublicense, transfer, or distribute any or all of the Service; (d) access or use the Service (i) for High Risk Activities, the Customer bears sole responsibility for any and all consequences; (ii) violating the Terms; (iii) intending to avoid incurring Fees or in a manner to omit Service-specific limits; (iv) to engage in cryptocurrency mining; (v) contravening the general purpose of the Service and its official documentation; (vi) for materials or activities that are subject to the International Traffic in Arms Regulations (ITAR) maintained by the United States Department of State; (vii) in a manner that breaches, or causes the breach of, Export Control Laws; or (viii) to transmit, store, or process personal information subject to GDPR and United States HIPAA regulations except as permitted by law. (e) without limiting the generality of the foregoing, copy, reproduce, download, compile or otherwise use the Service for the purposes of operating a business that competes with Thinger.io Cloud; (f) access or use the Service to produce, promote, provide to end users materials (i) that are defamatory, obscene, abusive, invasive of privacy, or offensive, including but not limited to content related to child pornography, bestiality, other types of illegal sexual content, and etc.; (ii) obtained from or via the Service for any purpose not expressly permitted in the Terms or the Additional Agreement; or (iii) that infringe or misappropriate the Intellectual Property Rights or proprietary rights of Thinger.io or others in connection with your use of the Service.

3.3 You agree that you will not: (a) undertake any action to gain unauthorized access to any computer, network, database, device of any Customer or End User; (b) intend to breach any security or authentication measures used in connection thereto; (c) forge your domicile and the origin of requests, including the faking of TCP/IP packet headers, email headers, or any part of any message describing its origin or route, operate any network services, such as open proxies, open mail relays, open recursive domain name servers, and etc.; (d) do any act which, in the sole opinion of Thinger.io or by protection mechanisms of Thinger.io Cloud, may undermine the security of the Service and Customers; (e) engage in any denial of service (DoS) attacks, distributed denial of service (DDoS) attacks, or any other forms of network attacks potentially affecting the Service performance or availability to particular Customers.

3.5 You agree that you will not distribute, send, or facilitate the sending or any unsolicited electronic commercial messages, or engage in any form of spamming activities that are in breach of the laws and regulations of any relevant jurisdiction or otherwise do any act or thing which constitutes promotion and marketing message abuse.

3.6 You acknowledge and agree that by disclosing any information to us, you warrant that you have the full power, title and authority to disclose and submit such information and that the use of such information in accordance with these Terms of Use shall not expose us to any claim, liability, or prosecution.

3.7 In addition to the Privacy Policy clauses in relation to personal data, you agree that any data and information, including personal data, provided to us for processing, storage, hosting or any other purposes in connection with your purchase and use of our Service ( **"Information"** ) will be transferred to, stored and processed in the country in which we maintain facilities for the Service. This may be in a different jurisdiction from where you are located, so such Information may need to be transferred to an overseas jurisdiction. 3.8 You acknowledge and agree that any such overseas transfer or processing of such Information is necessary to process and administer your customer account and to provide the Service.

3.9 You acknowledge and agree that Information related to your payment cards, including Information about your payment method organisation, the your card number, last four digits of the card number, the security code, and the expiration date of your payment instrument will be transferred to, stored and processed by our third party payment service provider (Stripe) directly in order for them to process your payment transactions and we will generally not store, have access to any such Information.

3.10 With respect to any other Information that you provide to us or collected by us, including Information provided at registration, Information we record pertaining to your activities, and Information provided voluntarily by you, we will not disclose such Information outside of us, our affiliates or our third party service providers unless: i) you request us to do so; ii) your end user has provided consent for us to do so; iii) as provided in these Terms of Use or in accordance with your agreement(s) with us, or iv) to comply with applicable law, legal process or lawful government requests, or in respect of any claims or potential claims brought against us.

**4. Withdrawal and suspension of the Service**

4.1 Thinger.io shall have the right at its sole and absolute discretion to remove, modify or reject any content that you submit to, post or display on the Thinger.io Cloud Platform which in our sole opinion is unlawful, violates the Terms, or could subject Thinger.io to liability without any refund claims.

4.2 If we become aware that Customer's or any Customer End User's use of the Service violates the Terms, we will give you notice of the violation requesting to cure the violation. If Customer fails to correct the violation within 24 hours of our request, then we may suspend all or part of Customer's use of the Service until the violation is corrected, or delete the customer account completely.

4.3 Notwithstanding c 4.1, Thinger.io may immediately suspend all or part of Customer's use of the Service if (i) we consider the breach of Paragraph 3 clauses; (ii) there is suspected unauthorized third-party access to the Service; (iii) it is necessary to withdraw immediately to comply with applicable law. At Customer's request, we will notify the Customer of the basis for the suspension as soon as reasonably possible. The lift of any such suspension is possible if the suspending event will have resolved within 15 (fifteen) days after the suspension.

**5. Limitation of Liability**

5.1 To the maximum extent permitted under applicable law, the Service is provided "as is", "as available" and "with all faults", and Thinger.io hereby expressly disclaims any and all warranties, express or implied, including but not limited to, any warranties of condition, quality, durability, performance, availability, accuracy, reliability, merchantability or fitness for a particular purpose, and non-infringement, or as to the Service being uninterrupted, error free, free of harmful components, secure, or not otherwise causing damage or loss of functionality or data.

5.2 Thinger.io does not warrant the validity, accuracy, correctness, reliability, quality, stability, completeness or currency of any information provided on or through the Service.

5.3 Thinger.io does not represent or warrant that use of products or services offered or displayed via the Service to End User does not violate any third party rights. Any material downloaded or otherwise obtained through the Services is done at your sole discretion and risk and you are solely responsible for any damage or loss of data that may result from the download of any such material.

5.4 You hereby agree to indemnify and hold Thinger.io Cloud, its respective affiliates, directors, officers and employees harmless from and against any and all losses, claims, liabilities which may arise from your use of the Service or from your breach of any of the Terms. You hereby further agree to indemnify and hold Thinger.io, its affiliates, directors, officers and employees harmless, from and against any and all losses, damages, claims, liabilities (including legal costs on a full indemnity basis) which may arise, directly or indirectly, as a result of any claims asserted by any third party claimants or other third parties relating to use of Thinger.io Cloud Platform by you. You hereby further agree that Thinger.io is not responsible and shall have no liability to you, for any material posted or submitted by others, including defamatory, offensive or illicit material and that the risk of damages from such material rests entirely with you.

5.5 Thinger.io shall not be liable for any special, direct, indirect, punitive, incidental or consequential damages or any damages whatsoever (including but not limited to damages for loss of profits or savings, business interruption, loss of information), whether in contract, negligence, tort, equity or otherwise or any other damages resulting from any of the following: (a) your use or inability to use the Service; (b) your violation of any third party rights, or claims against you by any party that they are entitled to defense or indemnification in relation to assertions of rights, demands or claims by any third party claimants; (c) unauthorized access by third parties to your data or private information; (d) your statements or conducts.

5.6 Notwithstanding any of the foregoing provisions, unless otherwise provided in the Additional agreement, the aggregate liability of Thinger.io Cloud, and their respective employees, agents, affiliates, representatives or anyone acting on their behalf with respect to you for any and all claims arising from or in connection with the Service or any use or inability to use the same during any calendar year shall be limited to the greater of (i) the balance you have paid to Thinger.io for the last month; or (ii) USD100. The preceding sentence shall not preclude the requirement by you to prove actual damages. All claims against Thinger.io in respect of any of the matters referenced in this c. 5.2 hereabove must be filed within 3 (three) months from the date the cause of action arose.

**6. Payment terms**

6.1 By accessing the Service you agree to pay the recurring monthly fee for the use ( **"Service fee"** ). While using the Service you consent to pay by card. Pursuant to your use, an automatic charging provided by Stripe for the subsequent billing period is done. Prior to charging, you will receive a few email notifications stating the upcoming Service fee invoice. On a due date you will receive the corresponding electronic invoice and Thinger.io will automatically charge the Service fee.

6.2 Customer's obligation to pay all fees is non-cancellable while and for use of Service. Thinger.io's measurement of Customer's use of the Service is final.

6.3 Customer is responsible for any taxes, and Customer will pay for the Services without any reduction for taxes. If required Thinger.io may provide the Certificate of Tax Residency to avoid the double taxation.

6.4 Any invoice disputes must be submitted before the payment due date. If the disputed invoice has not yet been paid, Thinger.io may apply the credit memo amount to the disputed invoice and Customer will be responsible for paying the resulting net balance due on that invoice. To the fullest extent permitted by law, Customer waives all claims relating to Service fee unless claimed within 60 (sixty) days after the invoice date. Thinger.io does not refund the Service fee. Refunds (if any) are at our discretion and will only be in the form of credit for the Service. Nothing in this Agreement obligates Thinger.io to extend credit to any party.

6.5 Late payments will cause the customer account suspension and further termination for breach of this TCP Agreement.

6.6 Unless otherwise agreed with the Customer, all applicable Service fees should be paid without any requirement to provide a purchase order number on Thinger.io's invoice (or otherwise).

**7. Force Majeure**

7.1 Under no circumstances shall Thinger.io be liable for any delay or failure or disruption of the content or the Service resulting directly or indirectly from acts of nature, forces or causes beyond our reasonable control, including without limitation, Internet failures, computer viruses, cyber-attacks, telecommunications or any other equipment failures, electrical power failures, strikes, labor disputes, riots, insurrections, quarantine lockdowns, civil disturbances, shortages of labor or materials, fires, flood, storms, explosions, acts of God, war, governmental actions, orders of domestic or foreign courts or tribunals or non-performance of third parties.

**8. Notice and Procedure for Making Claims of Copyright Infringement**

8.1 If you believe that your work has been copied in a way that constitutes copyright infringement, you may provide written notice to Thinger.io (in English only) to the address, as follows:

*Internet of Thinger S.L.*

C/ Matorral , 14, 28411, Moralzarzal, Madrid. The company is registered with the Commercial Registry of Madrid in volume 61, book 38329, page M-681979.

**9. Data Ownership**

9.1 Ownership of Data: All data stored or transmitted through the private instance of Thinger.io Cloud Platform belongs to the customer. Thinger.io shall not claim any ownership rights over the data uploaded or generated by the customer during the use of the platform.

9.2 Data Processing: Thinger.io will process the customer's data solely to the extent necessary for providing the services as per the user's programmed behavior of the platform. Thinger.io will not use the customer's data for any other purposes without explicit consent from the customer or as required by applicable law.

9.3 Customer Control: As the owner of their data, the customer has full control over it. The customer can freely download, export, or delete their data from the platform at any time. Thinger.io shall not retain the customer's data after termination of the agreement, except as required by applicable law or for backup and recovery purposes.

9.4 Data Security: Thinger.io shall implement reasonable technical and organizational measures to ensure the security and confidentiality of the customer's data. However, the customer acknowledges that no data transmission or storage can be guaranteed to be 100% secure, and Thinger.io shall not be liable for any unauthorized access, loss, or disclosure of customer data beyond its reasonable control.

9.5 Data Sharing: Thinger.io will not share, sell, or disclose the customer's data to any third party, except as required by law or to provide the services to the customer as per their instructions.

9.6 Compliance with Privacy Laws: Thinger.io will comply with all applicable privacy and data protection laws concerning the processing of customer data.

9.7 Data Anonymization: Thinger.io may use aggregated and anonymized data, which does not identify any individual or customer, for statistical and analytical purposes to improve the platform's performance and functionality.

9.8 Data Access Requests: If the customer receives any requests from individuals to access, correct, or delete their personal data stored on the platform, Thinger.io will cooperate with the customer to the extent required by law to fulfill such requests.

9.9 Third-Party Data: If the customer uses third-party data in connection with the platform, the customer shall ensure compliance with all applicable terms and conditions and obtain necessary rights and permissions to use such data.

**10. Intellectual Property Rights**

10.1 Ownership of Platform: Thinger.io is the sole owner of all rights and interests in the Thinger.io Cloud Platform, including its software, trademarks, logos, and other proprietary aspects. All title, ownership, and intellectual property rights in the Thinger.io Cloud Platform shall remain with Thinger.io, its affiliates, or licensors, as the case may be.

10.2 Use of Platform: Subject to compliance with these Terms of Use, Thinger.io grants the customer a limited, non-exclusive, non-transferable, and revocable license to access and use the Thinger.io Cloud Platform for the duration of the agreement.

10.3 Trademarks: "Thinger.io" is a registered trademark in multiple regions. The customer is permitted to state publicly that it is a customer of the Service, consistent with the trademark guidelines provided by Thinger.io. Thinger.io may include the customer's name in a list of Thinger.io customers, online or in promotional materials. Thinger.io may also verbally reference the customer as a customer of the Service.

10.4 Feedback and Suggestions: Thinger.io welcomes feedback, suggestions, or ideas regarding the platform. However, any feedback, suggestions, or ideas provided by the customer to Thinger.io shall become the property of Thinger.io, and the customer hereby assigns all rights to such feedback, suggestions, or ideas to Thinger.io without any obligation of confidentiality or attribution.

10.5 Third-Party Content: The platform may include content provided by third parties. All third-party content remains the intellectual property of its respective owners and is subject to their rights and terms.

10.6 Prohibited Use: The customer shall not, directly or indirectly, reverse engineer, decompile, modify, or create derivative works based on the Thinger.io Cloud Platform or any part thereof.

**11. Termination**

11.1 This TCP Agreement will begin on the date of first access to the Service and continue until the Agreement is terminated as stated in this Paragraph 10.

11.2 The cancelation of the Service utilization by you causes the termination of this agreement for convenience. The Customer may stop using the Services at any time. Thinger.io may terminate this TCP Agreement for its convenience at any time with 30 days' prior written notice to the Customer.

11.3 Thinger.io Cloud Platform policies allow the termination of the provision of the Service to you, if you have not incurred corresponding Service fee for such Services.

11.4 Either party may terminate this TCP Agreement if (i) the other party is in material breach of the Agreement and fails to cure that breach within 30 (thirty) days after receipt of written notice or (ii) the other party ceases its business operations or becomes subject to insolvency proceedings and the proceedings are not dismissed within 90 (ninety) days.

11.5 Termination event means that all rights and access to the Service are terminated for Customer (including access to Customer Data, if applicable), and all Service fees owed by Customer to Thinger.io are immediately due upon receipt of the final electronic bill or as set forth in the final invoice.

**12. General**

12.1 The Terms constitute the entire agreement between you and Thinger.io with respect to and governs the use of the Service, superseding any prior written or oral agreements in relation to the same subject matter herein.

12.2 You and Thinger.io are independent contractors, and no joint venture, partnership or other entity, employee-employer or franchisor-franchisee relationship is intended or created by this Agreement.

12.3 If any term herein is adjudicated by a court or tribunal of competent jurisdiction to be void or unenforceable, the validity or enforceability of the remainder of the terms herein shall remain in full force and effect.

12.4 You shall not delegate, assign, sub-license or transfer any of the rights and/or obligations under this Agreement to any third party without our prior written consent.

**13. Governing Law and Dispute Resolution**

13.1 The Terms shall be governed by the laws of the Spain Kingdom without regard to its conflict of law provisions. The parties to the Terms hereby submit to the exclusive jurisdiction of the courts of Spain.


# Privacy Policy

Privacy Policy Statement on the Use of this Service (Website)

## Privacy Policy

**Last updated:** 03/03/2026

This Privacy Policy explains how **INTERNET OF THINGER S.L.** (“Thinger.io”, “we”, “us”, “our”) collects and processes personal data when you visit or use **<https://thinger.io>** and related websites, products, services, and documentation (collectively, the “Services”).

This Policy is intended to provide the information required by the EU General Data Protection Regulation (“GDPR”) and applicable Spanish data protection laws.

***

### 1) Data Controller

**Controller:** INTERNET OF THINGER S.L.\
**VAT/Tax ID:** ESB88230602\
**Registered office:** C/Jacinto Benavente, 2A. Planta 1ª. Edificio Tripark. 28232 – Las Rozas de Madrid. Spain\
**Contact email:** <info@thinger.io>

If you contact us, please include enough information for us to verify your identity.

***

### 2) Data Protection Officer (DPO)

**Data Protection Officer (DPO):** We have not appointed a DPO, as we are not legally required to do so. For privacy-related questions, please contact us at **<info@thinger.io>**

***

### 3) Personal Data We Process

Depending on how you interact with the Services, we may process:

* **Identification and contact data:** name, surname, email address, phone number (if provided).
* **Professional data:** company name, role/department, country (if provided).
* **Content you provide:** messages, inquiries, support requests, and attachments you submit.
* **Account and service data (if you create/use an account):** username, authentication data, API keys/tokens, settings, subscription details, billing contact details.
* **Technical and usage data:** IP address, device identifiers, browser type, operating system, pages viewed, timestamps, and similar usage logs.
* **Cookie and tracker data:** as described in our [**Cookie Policy**](/about/cookie-policy).

We do **not** intentionally collect special categories of data (e.g., health data, political opinions). Please avoid including such data in free-text fields unless strictly necessary.

***

### 4) Where Personal Data Comes From

We collect personal data:

* **Directly from you** (forms, emails, account creation, support tickets).
* **Automatically** (cookies, logs, analytics when you browse).
* **From service providers** acting on our behalf (e.g., hosting, email delivery, analytics), only as needed to provide the Services.

***

### 5) Purposes and Legal Bases

We process personal data for the following purposes and under the following legal bases:

#### A) Responding to inquiries (Contact forms / email)

* **Purpose:** handle your request and communicate with you.
* **Data:** identification/contact data; message content; company/department (if provided).
* **Legal basis:** **consent** (Art. 6(1)(a) GDPR) and/or **pre-contractual measures** (Art. 6(1)(b)) when your request relates to a potential contract.
* **Retention:** see Section 7.

#### B) Providing and operating the Services (accounts, authentication, platform features)

* **Purpose:** create and manage accounts, provide functionality, deliver the service, customer support.
* **Data:** account and service data; technical data; support communications.
* **Legal basis:** **performance of a contract** (Art. 6(1)(b)).
* **Retention:** see Section 7.

#### C) Security, fraud prevention, and abuse detection

* **Purpose:** protect the Services, prevent abuse, investigate incidents, ensure integrity and availability.
* **Data:** technical and usage data; logs; account identifiers.
* **Legal basis:** **legitimate interests** (Art. 6(1)(f)) in keeping our systems secure.
* **Retention:** see Section 7.

#### D) Analytics and service improvement

* **Purpose:** understand how users interact with the website to improve content and performance.
* **Data:** technical/usage data; cookie identifiers.
* **Legal basis:** **consent** (Art. 6(1)(a)) for non-essential cookies/trackers, as applicable.
* **Retention:** see Section 7 and Cookie Policy.

#### E) Marketing communications (optional)

* **Purpose:** send newsletters, product updates, and marketing communications.
* **Data:** contact data; preferences (subscription status).
* **Legal basis:** **consent** (Art. 6(1)(a)). You can withdraw at any time (see Section 9).
* **Retention:** until you withdraw consent or unsubscribe, plus limited time to record suppression (see Section 7).

#### F) Billing and payments (if you purchase Services)

* **Purpose:** manage subscriptions, invoicing, payments, accounting.
* **Data:** billing contact details; transaction and invoice data.
* **Legal basis:** **performance of a contract** (Art. 6(1)(b)) and **legal obligation** (Art. 6(1)(c)) for accounting/tax.
* **Retention:** see Section 7.

#### G) Legal compliance and claims

* **Purpose:** comply with legal obligations, respond to lawful requests, defend legal claims.
* **Data:** as required for the specific obligation/claim.
* **Legal basis:** **legal obligation** (Art. 6(1)(c)) and/or **legitimate interests** (Art. 6(1)(f)).
* **Retention:** for the legally required periods.

***

### 6) Recipients and Data Sharing (Disclosures)

We do not sell your personal data.

We may share personal data with:

* **Service providers (processors)** that help us operate the Services (e.g., hosting, email delivery, analytics, customer support tools). They process data under our instructions and subject to appropriate contractual safeguards.
* **Professional advisors** (legal, accounting) when necessary.
* **Public authorities** when required by law or to protect rights and safety.

***

### 7) Data Retention

We keep personal data only for as long as necessary for the purposes described above:

* **Contact requests:** for the time needed to handle your request and follow-up; then stored for a limited period for record-keeping and legal defense (typically up to **2 years** depending on limitation periods).
* **Accounts and service data:** for as long as your account is active; after deletion, data may be retained for a limited period for security, backups, and legal obligations.
* **Marketing subscriptions:** until you unsubscribe/withdraw consent; we may retain minimal data in a suppression list to ensure we respect your choice.
* **Billing and invoices:** retained for the legally required tax/accounting periods (typically **5 years**).
* **Security logs:** retained for a limited period necessary for security monitoring and incident investigation (typically **1 month**).
* **Cookies/trackers:** see our [**Cookie Policy**](/about/cookie-policy) for cookie-specific durations.

***

### 8) International Data Transfers

We may use service providers located in, or that store/process data in, countries outside the European Economic Area (EEA).

Where international transfers occur, we rely on appropriate safeguards, such as:

* **European Commission adequacy decisions**, and/or
* **Standard Contractual Clauses (SCCs)**, and additional measures where necessary.

Details can be requested via **<info@thinger.io>**.

***

### 9) Your Rights (GDPR)

Subject to applicable law, you have the right to:

* **Access** your personal data
* **Rectification** of inaccurate data
* **Erasure** (“right to be forgotten”)
* **Restriction** of processing
* **Data portability**
* **Objection** to processing based on legitimate interests
* **Withdraw consent** at any time (this does not affect processing already carried out)

To exercise your rights, contact us at **<info@thinger.io>**. We may request information to verify your identity.

***

### 10) Right to Lodge a Complaint (Supervisory Authority)

If you believe our processing of your personal data infringes data protection law, you have the right to lodge a complaint with your supervisory authority.

For Spain, the supervisory authority is the **Agencia Española de Protección de Datos (AEPD)**.

***

### 11) Security Measures

We implement appropriate technical and organizational measures to protect personal data against accidental or unlawful destruction, loss, alteration, unauthorized disclosure, or access.

No method of transmission or storage is 100% secure, but we work to protect your data using industry-standard practices.

***

### 12) Children

Our Services are not directed to children under 16. We do not knowingly collect personal data from children. If you believe a child has provided personal data, contact us at **<info@thinger.io>**.

***

### 13) Changes to this Privacy Policy

We may update this Privacy Policy from time to time. We will post the updated version on this page and update the “Last updated” date.

***

### 14) Contact

For any privacy-related questions, contact: **<info@thinger.io>**

***


# Cookie Policy

## Cookie Policy

**Last updated:** 03/03/2026

This Cookie Policy explains how **INTERNET OF THINGER S.L.** (“we”, “us”, “our”) uses cookies and similar technologies on **<https://thinger.io>** (the “Website”).

### 1) Controller

**Controller:** INTERNET OF THINGER S.L.\
**Tax ID/VAT:** ESB88230602\
**Contact:** <info@thinger.io>

For more information about how we process personal data and how to exercise your rights, please see our [**Privacy Policy**](/about/privacy-policy).

### 2) What are cookies?

Cookies are small text files stored on your device when you visit a website. They help the website function, remember preferences, and provide usage analytics. Cookies can be:

* **Session cookies** (deleted when you close your browser), or
* **Persistent cookies** (remain on your device for a defined period or until you delete them).

### 3) How we use cookies (categories)

We use the following categories of cookies:

* **Necessary cookies** (always active): required for the Website to function and for security-related features.
* **Functional cookies** (optional): enable additional features and improve functionality.
* **Analytics cookies** (optional): help us understand how visitors interact with the Website so we can improve it.

> We do not set non-essential cookies unless you give your consent. You can change your preferences at any time using the cookie settings available on the Website.

### 4) Legal basis

* **Necessary cookies:** legitimate interest in providing a secure, functional Website.
* **Functional and Analytics cookies:** your **consent**, which you can withdraw at any time.

### 5) Managing your choices

You can accept, reject, or customize cookies through our cookie banner / preference centre. You can also delete or block cookies using your browser settings. Please note that blocking some cookies may affect the Website’s functionality.

### 6) Third parties

Some cookies may be set by third-party providers (e.g., Google Analytics and Cloudflare). These providers may process data on our behalf. Where data is transferred outside the EEA, the safeguards described in our **Privacy Policy** apply.

### 7) Cookie list (name, purpose, provider, duration)

#### A) Necessary cookies

| Cookie              | Provider                         | Purpose                                                                                                                        | Duration       |
| ------------------- | -------------------------------- | ------------------------------------------------------------------------------------------------------------------------------ | -------------- |
| `cookieyes-consent` | CookieYes                        | Stores your consent preferences so they are respected on subsequent visits. It does not collect or store personal information. | **1 year**     |
| `elementor`         | thinger.io (WordPress/Elementor) | Enables real-time content editing and site functionality via the WordPress theme/builder.                                      | **Never**      |
| `__cf_bm`           | Cloudflare                       | Supports Cloudflare Bot Management and helps protect the Website from malicious traffic.                                       | **30 minutes** |

#### B) Functional cookies (optional)

| Cookie             | Provider | Purpose | Duration |
| ------------------ | -------- | ------- | -------- |
| *(Currently none)* |          |         |          |

#### C) Analytics cookies (optional)

| Cookie               | Provider                              | Purpose                                                                                 | Duration     |
| -------------------- | ------------------------------------- | --------------------------------------------------------------------------------------- | ------------ |
| `_ga`                | Google Analytics                      | Distinguishes users and generates statistical data about Website usage (anonymous).     | **2 years**  |
| `_gid`               | Google Analytics                      | Stores information on how visitors use the Website and generates analytics (anonymous). | **1 day**    |
| `_gat_UA-59416166-1` | Google Analytics / Google Tag Manager | Limits the rate of requests to Google Analytics.                                        | **1 minute** |

### 8) Changes to this policy

We may update this Cookie Policy from time to time. Any changes will be posted on this page and the “Last updated” date will be updated.

### 9) Contact

If you have questions about this Cookie Policy, contact us at **<info@thinger.io>**.


# Service Level Agreement

This document contains the supplementary provisions on availability, maintenance, and response and recovery times for the platform as a service (PaaS) provided by THINGER.IO.

### Service Availability <a href="#sla" id="sla"></a>

The Service will be considered available so long as Customer is able to log in to its interface and view Customer Data ("Service Availability"). The applicable Service Availability will be calculated as a percentage of: (1) the total number of minutes in a month, after (2) subtracting any periods of unavailability during such month from the total number of minutes in a month.&#x20;

* Single Server Availability: 95-99%
* Cluster Server Availability: 99,999%

Note that Thinger.io offers multiple subscriptions to suit the needs of each client and project. The terms of this agreement are the same for each of them; however, the applicable KPIs vary. The following list provides an overview of these metrics:

### Recovery

System recovery time depends on the criticality of the issue and the service level. Thinger.io provides the following recovery attributes:&#x20;

| Fail type      | Basic | Professional |
| -------------- | ----- | ------------ |
| Instance event | 3-8 h | 1-3h         |
| Host event     | 6-12h | 2-6h         |

### Remedy and Procedure&#x20;

The customer’s remedy and the procedure shall be applied when the customer faces a downtime situation.

1. There must be a support ticket documenting the reported unavailability within five (5) Business Days of the end of the service interruption.
2. There are no invoice amounts on the customer’s account on which the customer is in default.
3. The customer must notify Thinger.io at least by email within five (5) Business Days by opening a support ticket and providing the following details together:
   1. List the individual functional areas of the service that were affected.
   2. List the server web domains that were affected.
   3. List the date and time the Downtime occurred.
   4. List usernames and email addresses affected by the Downtime.
   5. List and estimate the amount of actual Downtime in minutes.
   6. Include a description of the problem.

### Service terminacion request

Any customer who faces a Service Availability below that indicated in the table may request termination of the service. Such termination will be effective as of the end of the then-current billing period and no additional fees will be charged.

| Timing                          | Single Server | Cluster Server |
| ------------------------------- | ------------- | -------------- |
| Single calendar month           | 90.0 %        | 95%            |
| Two consecutive calendar months | 95.0 %        | 99%            |

Downtime hours can also be redeemed for credits at a 1:1 ratio.

### Additional terms and definitions

Additional terms in bold below for the purpose of this SLA are defined as follows:

* “Business Days” means Monday to Friday, excluding January 1 and December 25.
* “Business Hours” at Thinger.io means from 8 a.m. – 6 p.m. CET/CEST on Business Days.
* “Downtime” means the total number of minutes, outside Scheduled and Regular Maintenance periods, during which the customer cannot access the SaaS Service. The calculation of Downtime excludes time that the customer is unable to access the SaaS Service due to any of the following situations:
  * Scheduled Downtime.
  * The customer’s own internet service provider.
  * Force majeure event.
  * Any systemic internet failures.
  * Any failure in the customer’s own hardware, software or network connection.
  * Customer’s bandwidth restrictions.
  * Customer’s acts or omissions.
  * Anything outside of the reasonable control of Thinger.io.
  * Customer negligence and unscalable infrastructure use, including server CPU or RAM overloads.  &#x20;

## Support Helpdesk

### Service Scope

Thinger.io Support Helpdesk provides technical support and help on all Thinger.io products and services. It can be reached via email or a web portal. and under the following conditions.

The following aspects are covered by the Support Helpdesk:&#x20;

* System service interruption/outage
* System service updates/maintenance
* System service behavior that is not in line with what the customer’s users expect
* Support regarding functionality.&#x20;

The following aspects are NOT covered by the Support Helpdesk:&#x20;

* Requests from third-party provider(s) of the customer
* Networks, devices, servers and workstations managed by the customer
* Requests regarding the configuration and customization of Thinger.io products and services.&#x20;

### Support helpdesk availability

Theinger.io Support Helpdesk is available on Business Days via E-mail at <support@thinger.io> on Business Days from 8.00 a.m. - 22.00 p.m. CET/CEST this service will be provided indifferently from Spain and Mexico in English or Spanish.

### Support Helpdesk Response Time&#x20;

The Support Helpdesk Response Time is defined as the time from when the customer enters the request into the Thinger.io ticketing system or from when Thinger.io receives an email from the customer to the time when Thinger.io replies and starts working on the request. The Response Time is calculated based on the Service Times defined in the table below. The maximum Response Times vary depending on the severity of the incident and the SLA level; the priority for resolution is determined by Thinger.io when evaluating the customer’s request.

| Priority | Description fault                                                                    | Response Time               |
| -------- | ------------------------------------------------------------------------------------ | --------------------------- |
| High     | Use of the Software or substantial parts thereof or complete processes is impossible | 1 hour                      |
| Medium   | Use of the Software is substantially impaired, but basic use is possible             | 8 hours                     |
| Low      | The SaaS Service is available but exhibits minor problems not affecting the result   | Under Thinger.io discretion |

### For more help <a href="#for-more-help" id="for-more-help"></a>

If you need more help, check out these support and learning resources:

* Review Thinger.io's [data security ](https://docs.thiner.io)and [license documentation](https://docs.thinger.io/server/deployment).



